


 在当今快节奏的数字环境中,提供高性能的软件应用程序对于企业保持竞争力并提供无缝的用户体验至关重要。用户对应用程序速度、响应能力和可扩展性抱有很高的期望。这就是性能测试发挥关键作用的地方。
在本文中,我们将探讨什么是性能测试,深入探讨几种不同类型的性能测试方法,这些方法可用于更好地了解应用程序在不同负载级别下的行为方式。我们还将介绍K6,这是一款专为现代开发工作流程设计的强大性能测试工具,并通过示例场景展示其用法。该工具提供了极其用户友好的体验,对于那些具有Javascript或Typescript基本使用经验的人来说,它确实简化了性能测试!
你可以在: Github https://github.com/Jahmilli/k6-example上找到该示例。
什么是性能测试?
性能测试是软件开发生命周期的一个重要方面,重点是评估应用程序在各种工作负载条件下的性能特征。它涉及评估应用程序在速度、稳定性、可扩展性和资源使用方面的性能。通过模拟实际的用户场景,性能测试有助于识别潜在的瓶颈、发现性能问题并优化应用程序以获得最佳的用户体验。
有多种不同类型的性能测试方法,其中一些包括:
1. 冒烟测试
进行初步且快速的测试,以验证应用程序的关键功能是否按预期工作。它旨在在开发或部署过程的早期识别关键问题。

冒烟测试图
2.负载测试
涉及测试应用程序在预期负载下的性能,其目标是评估系统在典型使用模式和工作负载条件下的行为。负载测试模拟并发用户活动,例如多个用户同时访问应用程序,以确定系统如何处理预期负载。它有助于识别性能瓶颈、评估响应时间并确保应用程序能够有效地处理预期的用户流量。
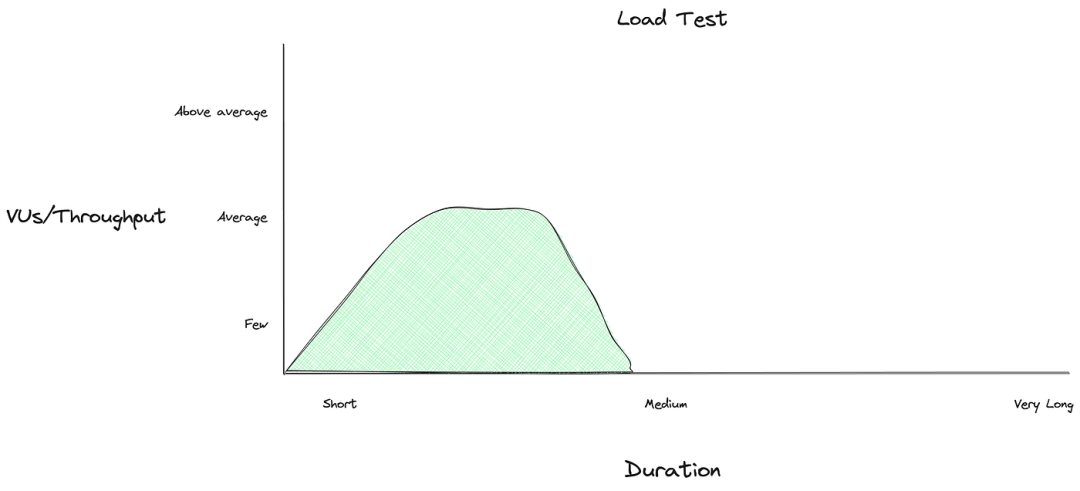
负载测试图
3. 压力测试
压测是为了评估应用程序在超出正常负载的极端条件下的行为。它涉及通过使应用程序承受繁重的工作负载、高数据量或资源限制来测试应用程序的性能。压力测试的目的是确定应用程序如何处理压力情况并从中恢复,例如突然的流量峰值、内存泄漏或服务器故障。执行压测有助于发现性能限制、评估系统稳定性并确定应用程序在具有挑战性的场景中的行为。
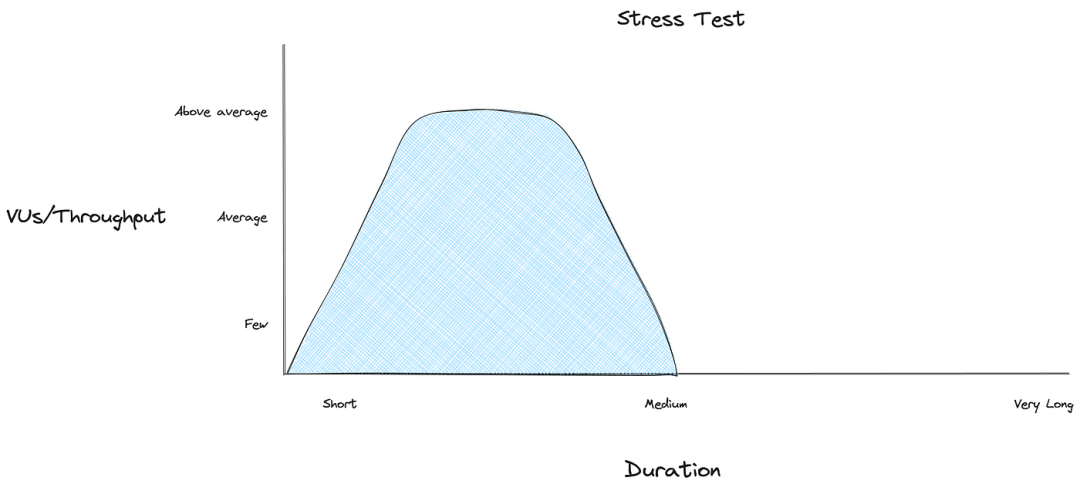
压力测试图
下文中我不会讨论场景中的每个单独测试,但要查看一些很好的配置示例,可以在此处找到:https://k6.io/docs/test-types/load-test-types/。
现在我们大体了解了性能测试的样子,让我们看看如何测试应用程序😎
先来了解一下K6
K6(https://k6.io/docs/)是 Grafana 实验室开发的开源负载测试工具,旨在简化性能测试。
K6 附带了一个 CLI 工具,用于执行测试并支持用 Javascript (ES2015/ES6) 完成的脚本编写,显然可以用 Typescript 编写并转换为可执行的 Javascript!
等等,Javascript不是应该超级慢吗?我们到底为什么要用它来执行性能测试?
好吧,在底层,K6 使用 Go 并嵌入了Javascript 运行时(https://github.com/dop251/goja),这意味着脚本全部在 Javascript/Typescript 中完成,但执行是在 Go 中进行的,使其具有高性能,同时仍然通过常用语言提供轻松的脚本编写。
本文的其余部分将讨论使用将使用Vite(https://vitejs.dev/)构建的 Typescript 编写 K6 脚本,但是,针对 Javascript 执行 K6 仍然很容易,可以在此处(https://k6.io/docs/get-started/running-k6/)找到示例。
测试示例
出于本文的目的,我将使用 reqres,而不是必须创建示例 API。它是一个公开托管的 REST API,提供各种不同的端点。可以在这里(https://reqres.in/api-docs/)找到他们的Swagger 规范https://reqres.in/api-docs/以了解不同的端点。
假设我们希望能够测试以下功能:
1.GET /users/{id}
2.PATCH /users/{id}
3.DELETE /users/{id}
// src/tests/reqres.ts

import { SharedArray } from "k6/data";
import { vu } from "k6/execution";
import { Options } from "k6/options";
import { deleteUser, getUser, updateUser } from "../apis/reqres";
import { users } from "../data/users";
import { logger } from "../utils/logger";

const data = new SharedArray("users", function () {
  return users;
});

export const options: Options = {
  scenarios: {
    login: {
      executor: 'per-vu-iterations',
      vus: users.length,
      iterations: 20,
      maxDuration: '1h30m',
    },
  },
};

export default function test () {
  // Get a random user from data that isn't currently being tested
  const user = data[vu.idInTest - 1];

  logger.info(
    `Running iteration ${vu.iterationInInstance} for user id ${user.id} with name ${user.first_name} ${user.last_name}`
  );

  getUser(user);
  updateUser(user);
  deleteUser(user.id);
}
在此示例代码中,我们将获取一个用户,进行更新,然后删除该用户。让我们进一步深入研究一下:
Options定义用于测试的配置:
(https://k6.io/docs/using-k6/k6-options/reference/)
-
vus定义同时运行的虚拟用户数量。K6 中的虚拟用户 (VU) 表示在性能测试期间与你的应用程序交互的模拟用户。正如我们所设置的1,这意味着在整个测试过程中,我们一次只会有1个用户(或执行下面的默认函数)。 -
iterationstest()指定执行函数的迭代总数。在这种情况下,这1意味着它将执行该函数中的逻辑一次。请注意,替代方案是持续时间,它不是执行测试一定次数,而是在指定的持续时间(即3分钟)内循环执行测试。 -
executor: “per-vu-iterations”意味着每个用户将根据指定的迭代次数执行(即在该场景中,将有两次执行,每个用户一次!)。另一种选择是,我们使用的执行器将在我们指定的 VU 数量之间共享迭代。这意味着如果我们有1次迭代和2个 vus,则只会发生一次执行。“shared-iterations” -
maxDuration指定如果迭代尚未完成则测试停止之前的时间。这只是作为一个超时,以确保它不会永远持续下去!
export default function () {}是用于执行测试的生命周期阶段,你可以在此处(https://k6.io/docs/using-k6/test-lifecycle/)找到有关生命周期阶段的更多信息。
getUser、updateUser、 和deleteUser是我们自己定义的函数,用于src/apis/reqres进行 API 调用并验证响应。
仅供参考,users数据如下所示:
// src/data/users.ts

export const users = [
  {
    id: 1,
    email: "george.bluth@reqres.in",
    first_name: "George",
    last_name: "Bluth",
    avatar: "https://reqres.in/img/faces/1-image.jpg",
  },
...
]
现在我们知道示例执行是什么样子,让我们看一下我们为测试端点而构建的 API 函数之一。我们可以看看它是如何getUser工作的
// src/apis/reqres.ts
import { check } from "k6";
import http, { StructuredRequestBody } from "k6/http";
import { Trend } from "k6/metrics";
import { logWaitingTime } from "../utils/logger";

/* Other stuff goes here but has been purposefully left out! */

/**
 * getUser makes a GET request to the /users/:id endpoint and asserts
 * that the response is 200 and that the user id and email match the
 * user object that was passed in.
 * @param user
 * @returns Response<User>
 */
export const getUser = (user: User): Response<User> => {
  const url = reqResUrl;
  const params = {
    headers: {},
  };

  const res = http.get(`${url}/users/${user.id}`, params);
  const jsonRes = res.json() as { data: User };
  logWaitingTime({
    metric: metrics.getUserResponseTime,
    response: res,
    messageType: `Get User`,
  });

  check(res, {
    "Get User By Id: is 200": (r) => r.status === 200,
    "Get User By Id: has correct id": (_) => jsonRes.data.id === user.id,
    "Get User By Id: has correct email": (_) =>
      jsonRes.data.email === user.email,
  });

  return {
    data: jsonRes.data,
    statusCode: res.status,
  };
};

/* Other stuff goes here but has been purposefully left out! */该getUser函数使用httpfrom 模块k6/http向端点发出 GET 请求https://reqres.in/api/users/${user.id}。{data: User}然后,我们将其反序列化为via类型的对象res.json(),然后调用logWaitingTime这是一个自定义函数来记录响应时间并更新指标getUserResponseTime。
然后我们使用 check来验证 API 请求的响应,然后返回结果。
该文件的其余部分具有与updateUser和类似的功能deleteUser,可以在 Github (https://github.com/Jahmilli/k6-example)上查看!
执行测试并查看结果
要执行代码,我们可以运行 json 包中的脚本来构建代码(使用 Vite 从 ts -> js 转换),然后执行 k6。
yarn test:demo
输出如下所示
➜  k6-example git:(main) ✗ yarn test:demo
yarn run v1.22.19
$ npm run build && k6 run dist/tests/reqres.cjs -a localhost:6566

> k6-example@1.0.0 build
> vite build

vite v4.3.8 building for production...
✓ 5 modules transformed.
Entry module "src/tests/reqres.ts" is using named and default exports together. Consumers of your bundle will have to use `chunk.default` to access the default export, which may not be what you want. Use `output.exports: "named"` to disable this warning.
dist/tests/config.cjs  0.19 kB │ gzip: 0.15 kB
dist/tests/reqres.cjs  4.94 kB │ gzip: 1.49 kB
✓ built in 84ms

          /\      |‾‾| /‾‾/   /‾‾/
     /\  /  \     |  |/  /   /  /
    /  \/    \    |     (   /   ‾‾\
   /          \   |  |\  \ |  (‾)  |
  / __________ \  |__| \__\ \_____/ .io

  execution: local
     script: dist/tests/reqres.cjs
     output: -

  scenarios: (100.00%) 1 scenario, 1 max VUs, 1h0m30s max duration (incl. graceful stop):
           * use-all-the-data: 1 iterations shared among 1 VUs (maxDuration: 1h0m0s, gracefulStop: 30s)

INFO[0000] 17:38:23.982 Running iteration 0 for user id 1 with name George Bluth  source=console

running (0h00m01.3s), 0/1 VUs, 1 complete and 0 interrupted iterations
use-all-the-data ✓ [======================================] 1 VUs  0h00m01.3s/1h0m0s  1/1 shared iters

     ✓ Get User By Id: is 200
     ✓ Get User By Id: has correct id
     ✓ Get User By Id: has correct email
     ✓ Update User By Id: is 200
     ✓ Update User By Id: has correct updatedAt
     ✓ Update User By Id: has correct job title
     ✓ Delete User By Id: is 204

     checks.........................: 100.00% ✓ 7        ✗ 0
     data_received..................: 4.5 kB  3.4 kB/s
     data_sent......................: 692 B   525 B/s
     delete_user_response_time......: avg=601.69ms min=601.69ms med=601.69ms max=601.69ms p(90)=601.69ms p(95)=601.69ms
     get_user_response_time.........: avg=22.93ms  min=22.93ms  med=22.93ms  max=22.93ms  p(90)=22.93ms  p(95)=22.93ms
     http_req_blocked...............: avg=28.05ms  min=0s       med=1µs      max=84.17ms  p(90)=67.33ms  p(95)=75.75ms
     http_req_connecting............: avg=5.43ms   min=0s       med=0s       max=16.31ms  p(90)=13.05ms  p(95)=14.68ms
     http_req_duration..............: avg=410.2ms  min=23.68ms  med=601.86ms max=605.04ms p(90)=604.4ms  p(95)=604.72ms
       { expected_response:true }...: avg=410.2ms  min=23.68ms  med=601.86ms max=605.04ms p(90)=604.4ms  p(95)=604.72ms
     http_req_failed................: 0.00%   ✓ 0        ✗ 3
     http_req_receiving.............: avg=77.33µs  min=64µs     med=71µs     max=97µs     p(90)=91.8µs   p(95)=94.4µs
     http_req_sending...............: avg=295.66µs min=81µs     med=118µs    max=688µs    p(90)=574µs    p(95)=630.99µs
     http_req_tls_handshaking.......: avg=9.08ms   min=0s       med=0s       max=27.25ms  p(90)=21.8ms   p(95)=24.52ms
     http_req_waiting...............: avg=409.82ms min=22.93ms  med=601.69ms max=604.86ms p(90)=604.22ms p(95)=604.54ms
     http_reqs......................: 3       2.277847/s
     iteration_duration.............: avg=1.31s    min=1.31s    med=1.31s    max=1.31s    p(90)=1.31s    p(95)=1.31s
     iterations.....................: 1       0.759282/s
     update_user_response_time......: avg=604.86ms min=604.86ms med=604.86ms max=604.86ms p(90)=604.86ms p(95)=604.86ms
     vus............................: 1       min=1      max=1
     vus_max........................: 1       min=1      max=1

✨  Done in 3.48s.
正如看到的,使用数据中的第一个用户进行测试函数的迭代显示了 1 个控制台日志INFO[0000] 17:38:23.982 Running iteration 0 for user id 1 with name George Bluth source=console。
们可以看到,所有的检查都很成功。
✓ Get User By Id: is 200
✓ Get User By Id: has correct id
✓ Get User By Id: has correct email
✓ Update User By Id: is 200
✓ Update User By Id: has correct updatedAt
✓ Update User By Id: has correct job title
✓ Delete User By Id: is 204

checks.........................: 100.00% ✓ 7        ✗ 0
这里有很多内容,我就不详细介绍了,因为这会大大增加本文的篇幅,但你可以在这里(https://k6.io/docs/using-k6/metrics/reference/)找到所有默认指标的相关说明。
我们还可以将 API 响应时间的结果细分为:
Get User:
- Avg: 22.93ms
- Min: 22.93ms
- Max: 22.93ms

Update User:
- Avg: 604.86ms
- Min: 604.86ms
- Max: 604.86ms

Delete User:
- Avg: 601.69ms
- Min: 601.69ms
- Max: 601.69ms
请注意,对于上述内容,我们可以看到每个API的平均/最小/最大响应时间都是相同的,你可能已经猜到了,但这是因为我们只为1个用户进行了1次迭代,所以我们只为每个 API 发出了1个请求!这对于健全性测试来说绝对没问题,但是,它并没有给我们任何真正的性能指标。
如果我们想要增加并发用户数和每个用户的迭代次数,我们可以更新options测试中的对象,使其总体具有5个 vus 和 10次迭代。这意味着我们将为5个并发用户执行列出的场景10次。
export const options: Options = {
  scenarios: {
    "use-all-the-data": {
      executor: "per-vu-iterations",
      vus: 5,
      iterations: 10,
      maxDuration: "1h",
    },
  },
};
running (0h00m13.3s), 0/5 VUs, 50 complete and 0 interrupted iterations
use-all-the-data ✓ [======================================] 5 VUs 0h00m13.3s/1h0m0s 50/50 iters, 10 per VU
✓ Get User By Id: is 200
✓ Get User By Id: has correct id
✓ Get User By Id: has correct email
✓ Update User By Id: is 200
✓ Update User By Id: has correct updatedAt
✓ Update User By Id: has correct job title
✓ Delete User By Id: is 204
checks.........................: 100.00% ✓ 350 ✗ 0
data_received..................: 84 kB 6.3 kB/s
data_sent......................: 11 kB 788 B/s
delete_user_response_time......: avg=606.32ms min=594.72ms med=601.36ms max=708.31ms p(90)=611.38ms p(95)=620.81ms
get_user_response_time.........: avg=38.29ms min=20.83ms med=23.44ms max=713.41ms p(90)=27.34ms p(95)=30.57ms
http_req_blocked...............: avg=3.03ms min=0s med=0s max=93.28ms p(90)=1µs p(95)=1µs
http_req_connecting............: avg=560.78µs min=0s med=0s max=17.22ms p(90)=0s p(95)=0s
http_req_duration..............: avg=420.87ms min=20.95ms med=600.01ms max=713.48ms p(90)=611.85ms p(95)=687.26ms
{ expected_response:true }...: avg=420.87ms min=20.95ms med=600.01ms max=713.48ms p(90)=611.85ms p(95)=687.26ms
http_req_failed................: 0.00% ✓ 0 ✗ 150
http_req_receiving.............: avg=42.53µs min=10µs med=31.5µs max=578µs p(90)=67.1µs p(95)=74.64µs
http_req_sending...............: avg=64.4µs min=22µs med=59µs max=374µs p(90)=96µs p(95)=117.94µs
http_req_tls_handshaking.......: avg=1.12ms min=0s med=0s max=35.67ms p(90)=0s p(95)=0s
http_req_waiting...............: avg=420.77ms min=20.83ms med=599.83ms max=713.41ms p(90)=611.76ms p(95)=687.13ms
http_reqs......................: 150 11.278302/s
iteration_duration.............: avg=1.27s min=1.22s med=1.23s max=2.03s p(90)=1.34s p(95)=1.4s
iterations.....................: 50 3.759434/s
update_user_response_time......: avg=617.69ms min=596.34ms med=604.34ms max=708.41ms p(90)=687.09ms p(95)=690.07ms
vus............................: 1 min=1 max=5
vus_max........................: 5 min=5 max=5通过运行我们可以看到,我们在 13.3 秒内进行了 350 次检查,成功率 100%。我们还可以看到每个 API 的以下详细信息:
Get User:
- Avg: 38.29ms
- Min: 20.83ms
- Max: 713.41ms

Update User:
- Avg: 617.68ms
- Min: 596.34ms
- Max: 708.41ms

Delete User:
- Avg: 606.32ms
- Min: 594.62ms
- Max: 708.31ms
还值得注意的是,所有这些指标在幕后都是Prometheus(https://prometheus.io/docs/introduction/overview/)指标,可以暴露给各种监控工具。使用监控工具将简化在整个测试期间查看和理解响应时间、错误率等结果的过程。
在当今竞争激烈的数字环境中,性能测试对于交付高性能软件应用程序至关重要。它有助于评估应用程序的速度、稳定性、可扩展性和资源使用情况。K6 是一个超级简单的工具,可以开始编写性能测试。
最后:下方这份完整的软件测试视频教程已经整理上传完成,需要的朋友们可以自行领取【保证100%免费】

软件测试面试文档
我们学习必然是为了找到高薪的工作,下面这些面试题是来自阿里、腾讯、字节等一线互联网大厂最新的面试资料,并且有字节大佬给出了权威的解答,刷完这一套面试资料相信大家都能找到满意的工作。


 1875
1875


 被折叠的 条评论
为什么被折叠?
被折叠的 条评论
为什么被折叠?
 到【灌水乐园】发言


