


此文章仅用作分享,不用于盈利
AndroidStudio相机拍照或从相册中选取照片并显示
本文最大优点在于适配Android8系统,项目给的平板版本很低,系统适配折磨了我很久
找了很多方法,这个版本是最简单并且可以成功运行的
0.AndroidMainfest.xml以及build.gradle配置文件
主要是添加权限uses-permission和provider,这些是必须添加的
provider根据自己的项目结构自行改,可以在后面写完file_paths.xml之后再写进来
<?xml version="1.0" encoding="utf-8"?>
<manifest xmlns:android="http://schemas.android.com/apk/res/android"
    xmlns:tools="http://schemas.android.com/tools"
    package="com.buildmaterialapplication">
    <uses-permission android:name="android.permission.MOUNT_UNMOUNT_FILESYSTEMS"
        tools:ignore="ProtectedPermissions"/>
    <uses-permission android:name="android.permission.READ_EXTERNAL_STORAGE"/>
    <uses-permission android:name="android.permission.WRITE_EXTERNAL_STORAGE"/>
    <uses-permission android:name="android.permission.CAMERA"/>

    <application
        android:allowBackup="true"
        android:icon="@mipmap/ic_launcher"
        android:label="@string/app_name"
        android:roundIcon="@mipmap/ic_launcher_round"
        android:supportsRtl="true"
        android:theme="@style/Theme.MyApplication">
        <activity
            android:name=".MainActivity"
            android:exported="true"
            tools:ignore="DuplicateActivity">
            <intent-filter>
                <action android:name="android.intent.action.MAIN" />

                <category android:name="android.intent.category.LAUNCHER" />
            </intent-filter>
        </activity>
        <provider
            android:authorities="com.buildmaterialapplication.fileprovider"
            android:name="androidx.core.content.FileProvider"
            android:exported="false"
            android:grantUriPermissions="true">
            <meta-data
                android:name="android.support.FILE_PROVIDER_PATHS"
                android:resource="@xml/file_paths"/>
        </provider>
    </application>
    <supports-screens android:resizeable="true" />
</manifest>
build.gradle我不确定我有没有改过。。以防万一还是放上来
plugins {
    id 'com.android.application'
}

android {
    compileSdk 31

    defaultConfig {
        applicationId "com.buildmaterialapplication"
        minSdk 19
        targetSdk 31
        versionCode 1
        versionName "1.0"

        testInstrumentationRunner "androidx.test.runner.AndroidJUnitRunner"
    }

    buildTypes {
        release {
            minifyEnabled false
            proguardFiles getDefaultProguardFile('proguard-android-optimize.txt'), 'proguard-rules.pro'
        }
    }
    compileOptions {
        sourceCompatibility JavaVersion.VERSION_1_8
        targetCompatibility JavaVersion.VERSION_1_8
    }
}

dependencies {

    implementation 'androidx.appcompat:appcompat:1.2.0'
    implementation 'com.google.android.material:material:1.3.0'
    implementation 'androidx.constraintlayout:constraintlayout:2.0.4'
    implementation 'androidx.navigation:navigation-fragment:2.3.5'
    implementation 'androidx.navigation:navigation-ui:2.3.5'
    testImplementation 'junit:junit:4.+'
    androidTestImplementation 'androidx.test.ext:junit:1.1.2'
    androidTestImplementation 'androidx.test.espresso:espresso-core:3.3.0'

}
1.activity_main.xml页面
<?xml version="1.0" encoding="utf-8"?>

<LinearLayout xmlns:android="http://schemas.android.com/apk/res/android"
    xmlns:app="http://schemas.android.com/apk/res-auto"
    xmlns:tools="http://schemas.android.com/tools"
    android:layout_width="match_parent"
    android:layout_height="match_parent"
    android:orientation="vertical"
    tools:context=".MainActivity">

    <ImageView
        android:id="@+id/pic"
        android:layout_width="300dp"
        android:layout_height="500dp"
        android:layout_gravity="center"></ImageView>
</LinearLayout>
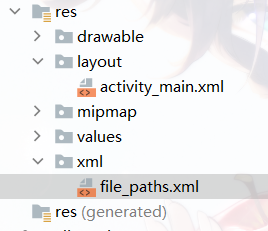
2.file_paths.xml相机拍摄照片存放位置
在res下建新文件夹xml在该文件夹下创建file_paths.xml,记得在Mainfest中写provider
本文使用了cache存储,若要使用其他存储需要对应修改xml文件中的路径
<?xml version="1.0" encoding="utf-8"?>
<resources>
    <external-cache-path path="." name="take_photo"/>
</resources>
3.MainActivity.java
Android版本不同拍照获取图片的方式也不同
注意APP安装到手机上后设置权限,否则应用会闪退。本文中的askPermission函数会在打开应用时询问权限,一般不需要手动设置。
package com.buildmaterialapplication;

import androidx.annotation.Nullable;
import androidx.annotation.RequiresApi;
import androidx.appcompat.app.AlertDialog;
import androidx.appcompat.app.AppCompatActivity;
import androidx.core.app.ActivityCompat;
import androidx.core.content.FileProvider;

import android.Manifest;
import android.annotation.SuppressLint;
import android.content.DialogInterface;
import android.content.Intent;
import android.database.Cursor;
import android.graphics.Bitmap;
import android.graphics.BitmapFactory;
import android.graphics.Canvas;
import android.net.Uri;
import android.os.Build;
import android.os.Bundle;
import android.provider.MediaStore;
import android.util.Log;
import android.view.View;
import android.widget.Button;
import android.widget.ImageView;
import android.widget.SimpleAdapter;
import android.widget.TextView;
import android.widget.Toast;

import java.io.File;
import java.io.FileNotFoundException;
import java.io.IOException;
import java.text.SimpleDateFormat;
import java.util.ArrayList;
import java.util.Date;
import java.util.HashMap;
import java.util.List;
import java.util.Locale;
import java.util.Map;
import java.util.Objects;

public class MainActivity extends AppCompatActivity {
    private static String[] items = new String[]{
            "拍照",
            "从相册中选择",
    };
    public static final int TAKE_PHOTO=1;//声明一个请求码,用于识别返回的结果
    private static final int SCAN_OPEN_PHONE = 2;// 相册
    private Uri imageUri;
    public String path=null;
    Bitmap bitmap;
    public String picpath=null;

    @Override
    protected void onCreate(Bundle savedInstanceState) {
        super.onCreate(savedInstanceState);
        setContentView(R.layout.activity_main);
        askPermission();
        choosePic();
        //aiAlgorithm

    }

    private void askPermission(){

        ActivityCompat.requestPermissions(this,new String[]{Manifest.permission.WRITE_EXTERNAL_STORAGE,
                    Manifest.permission.READ_EXTERNAL_STORAGE,
                    Manifest.permission.CAMERA
            },0);

    }
    private void choosePic(){
        AlertDialog.Builder builder = new AlertDialog.Builder(MainActivity.this)
                .setTitle("请选择图片")//设置对话框 标题
                .setItems(items, new DialogInterface.OnClickListener() {
                    @RequiresApi(api = Build.VERSION_CODES.N)
                    @Override
                    public void onClick(DialogInterface dialog, int which) {
                        if(which==0){
                            openCamera();
                        }
                        else{
                            openGallery();
                        }
                        return;
                    }
                });
        builder.create()
                .show();
    }
    private void openGallery() {
        Intent intent = new Intent(Intent.ACTION_PICK, MediaStore.Images.Media.EXTERNAL_CONTENT_URI);
        //intent.setType("image/*");
        startActivityForResult(intent, SCAN_OPEN_PHONE);

    }
    @RequiresApi(api = Build.VERSION_CODES.N)
    private void openCamera(){
        String imageName = new SimpleDateFormat("yyyyMMddHHmmss", Locale.getDefault()).format(new Date());
//        File outputImage=new File(Environment.getExternalStorageDirectory().getAbsolutePath()+"/data/com.example.woundapplication/"+imageName+".jpg");

        File outputImage = new File(getExternalCacheDir(), imageName+".jpg");

        Objects.requireNonNull(outputImage.getParentFile()).mkdirs();
//        Log.e("", outputImage.getAbsolutePath());
                /*
                创建一个File文件对象,用于存放摄像头拍下的图片,
                把它存放在应用关联缓存目录下,调用getExternalCacheDir()可以得到这个目录,为什么要
                用关联缓存目录呢?由于android6.0开始,读写sd卡列为了危险权限,使用的时候必须要有权限,
                应用关联目录则可以跳过这一步
                 */
        try//判断图片是否存在,存在则删除在创建,不存在则直接创建
        {
            if(outputImage.exists())
            {
                outputImage.delete();
            }
            boolean a = outputImage.createNewFile();
            Log.e("createNewFile", String.valueOf(a));
        }
        catch (IOException e)
        {
            e.printStackTrace();
        }
        if(Build.VERSION.SDK_INT>=24)
            //判断安卓的版本是否高于7.0,高于则调用高于的方法,低于则调用低于的方法
            //把文件转换成Uri对象
                    /*
                    因为android7.0以后直接使用本地真实路径是不安全的,会抛出异常。
                    FileProvider是一种特殊的内容提供器,可以对数据进行保护
                     */
        {
            imageUri= FileProvider.getUriForFile(MainActivity.this,
                    "com.buildmaterialapplication.fileprovider",outputImage);
                    //对应Mainfest中的provider
//            imageUri=Uri.fromFile(outputImage);
            path=imageUri.getPath();
            Log.e(">7:",path);
        }
        else {
            imageUri= Uri.fromFile(outputImage);
            path=imageUri.getPath();

            Log.e("<7:",imageUri.getPath());

        }

        //使用隐示的Intent,系统会找到与它对应的活动,即调用摄像头,并把它存储
        Intent intent0=new Intent("android.media.action.IMAGE_CAPTURE");
        intent0.putExtra(MediaStore.EXTRA_OUTPUT,imageUri);
        startActivityForResult(intent0,TAKE_PHOTO);
    }
    @SuppressLint("SetTextI18n")
    protected void onActivityResult(int requestCode, int resultCode, @Nullable Intent data) {
        super.onActivityResult(requestCode, resultCode, data);
        ImageView img_result=(ImageView) findViewById(R.id.pic);

        switch (requestCode) {
            case TAKE_PHOTO:
                if (resultCode == RESULT_OK) {
                    //将图片解析成Bitmap对象,并把它显现出来
//                    String filePath = getFilesDir().getAbsolutePath()+"/image.jpeg";
//                    bitmap = BitmapFactory.decodeFile(filePath);
					//注意bitmap,后面再decode就会为空
                    try {
                        bitmap = BitmapFactory.decodeStream(getContentResolver().openInputStream(imageUri));
                    } catch (FileNotFoundException e) {
                        e.printStackTrace();
                    }
//                        bitmap = BitmapFactory.decodeFile(picpath);
                    picpath=imageUri.getPath().toString();
                    Log.e("", imageUri.getAuthority());

                    Log.e("picpath",picpath);
                    @SuppressLint("SdCardPath") String fileName = picpath;
                        img_result.setImageBitmap(bitmap);
                        img_result.invalidate();
                }

                break;
            case SCAN_OPEN_PHONE:
                if (resultCode == RESULT_OK){

                    Uri selectImage=data.getData();
                    String[] FilePathColumn={MediaStore.Images.Media.DATA};
                    Cursor cursor = getContentResolver().query(selectImage,
                            FilePathColumn, null, null, null);
                    cursor.moveToFirst();
                    //从数据视图中获取已选择图片的路径
                    int columnIndex = cursor.getColumnIndex(FilePathColumn[0]);
                    picpath = cursor.getString(columnIndex);
                    Log.e("picpath",picpath);
                    cursor.close();
                    bitmap = BitmapFactory.decodeFile(picpath);
                    img_result.setImageBitmap(bitmap);
					img_result.invalidate();
                }
                break;
            default:
                break;
                }
        }

    }
4.手机调试方法
AS的虚拟机性能很差,个人都是用usb直接连手机调试的
步骤:
- 手机打开开发者模式中的usb调试
- usb连接电脑,选择传输文件/Android Auto
- 然后会提示什么usb调试授权之类的,给授权就可以了
- 运行这里出现手机型号就可以了
- 可能会出现testonly的bug,可以按我另一篇文章修改
Error: INSTALL_FAILED_TEST_ONLY


 2万+
2万+

 被折叠的 条评论
为什么被折叠?
被折叠的 条评论
为什么被折叠?
 到【灌水乐园】发言


