#结构体、结构体指针和函数指针(韦东山C语言加强07)
1 结构体
//结构体及结构体指针
typedef struct student {
	char *name;
	int age;
	struct student *   classmate;
}student, * pstudent;


int main( void )
{
	student zhangsan = {"zhangshan", 10, NULL};
	student lili = {"lili", 10, NULL};

	zhangsan.classmate = &lili;
	lili.classmate = &zhangsan;

	prvSetupHardware();

	printf("zhangsan's classmate is :%s\r\n", zhangsan.classmate->name);

	while (1);

	return 0;
}
2 函数指针在结构体中的妙用
typedef struct student {
	char *name;
	int age;
	void (*good_work)(void); //函数指针
	struct student *   classmate;
}student, * pstudent;


static void play_ball(void)
{
	printf("playing ball\r\n");
}

static void sing_song(void)
{
	printf("singing\r\n");
}
int main( void )
{
	int i;
	student ss[2] = {{"zhangshan", 10, play_ball, NULL}, {"lili", 10, sing_song, NULL}};

	prvSetupHardware();

	for (i = 0; i < 2; i++)
	{
		ss[i].good_work();
	}

	while (1);

	return 0;
}

//---------------------------------------------------初级版-----------------------------------
#if 0
int main( void )
{
	int i;
	student ss[5] = {{"zhangshan", 10, NULL}, {"lili", 10, NULL}};

	prvSetupHardware();

	for (i = 0; i < 2; i++)
	{
		if (strcmp(ss[i].name, "zhangshan") == 0)
			play_ball();
		else if (strcmp(ss[i].name, "lili") == 0)
			sing_song();
	}

	while (1);

	return 0;
}
#endif
3 EEPROM 与结构体指针的妙用

//通过eeprom读取lcd类型,执行相应操作
int read_eeprom()
{
	/* 0: lcd a
	 * 1: lcd b
	 */
	return 0;
}

int get_lcd_type(void)
{
	return read_eeprom();
}

void draw_logo_lcda(void)
{
	printf("display logo on lcd a\r\n");
}

void draw_logo_lcdb(void)
{
	printf("display logo on lcd b\r\n");
}


struct lcd_ops {
	int type;
	void (*draw_logo)(void);
	void (*draw_text)(char *str);
};

struct lcd_ops ask100_lcds[] ={
	{0, draw_logo_lcda, NULL},
	{1, draw_logo_lcdb, NULL},
	{2, draw_logo_lcdc, NULL},
	{3, draw_logo_lcdd, NULL},
};


int main( void )
{
	int type = get_lcd_type();
	ask100_lcds[type ].draw_logo();
	prvSetupHardware();
	while (1);
	return 0;
}
//--------------------进阶——----减少全局变量的使用,如果使用,用函数封装起来-------------------

int read_eeprom()
{
	/* 0: lcd a
	 * 1: lcd b
	 */
	return 0;
}

int get_lcd_type(void)
{
	return read_eeprom();
}

void draw_logo_lcda(void)
{
	printf("display logo on lcd a\r\n");
}

void draw_logo_lcdb(void)
{
	printf("display logo on lcd b\r\n");
}

typedef struct lcd_operation {
	int type;
	void (*draw_logo)(void)
}lcd_operation, *p_lcd_operation;


lcd_operation xxx_com_lcds[] = {
	{0, draw_logo_lcda},
	{1, draw_logo_lcdb},
	{2, draw_logo_lcdc},
	{3, draw_logo_lcdd},
};
//结构体指针
p_lcd_operation get_lcd(void)
{
	int type = get_lcd_type();
	return &xxx_com_lcds[type];
}

int main( void )
{
	p_lcd_operation lcd;

	lcd = get_lcd();//获取lcd
	lcd->draw_logo();
	prvSetupHardware();


	while (1);

	return 0;
}
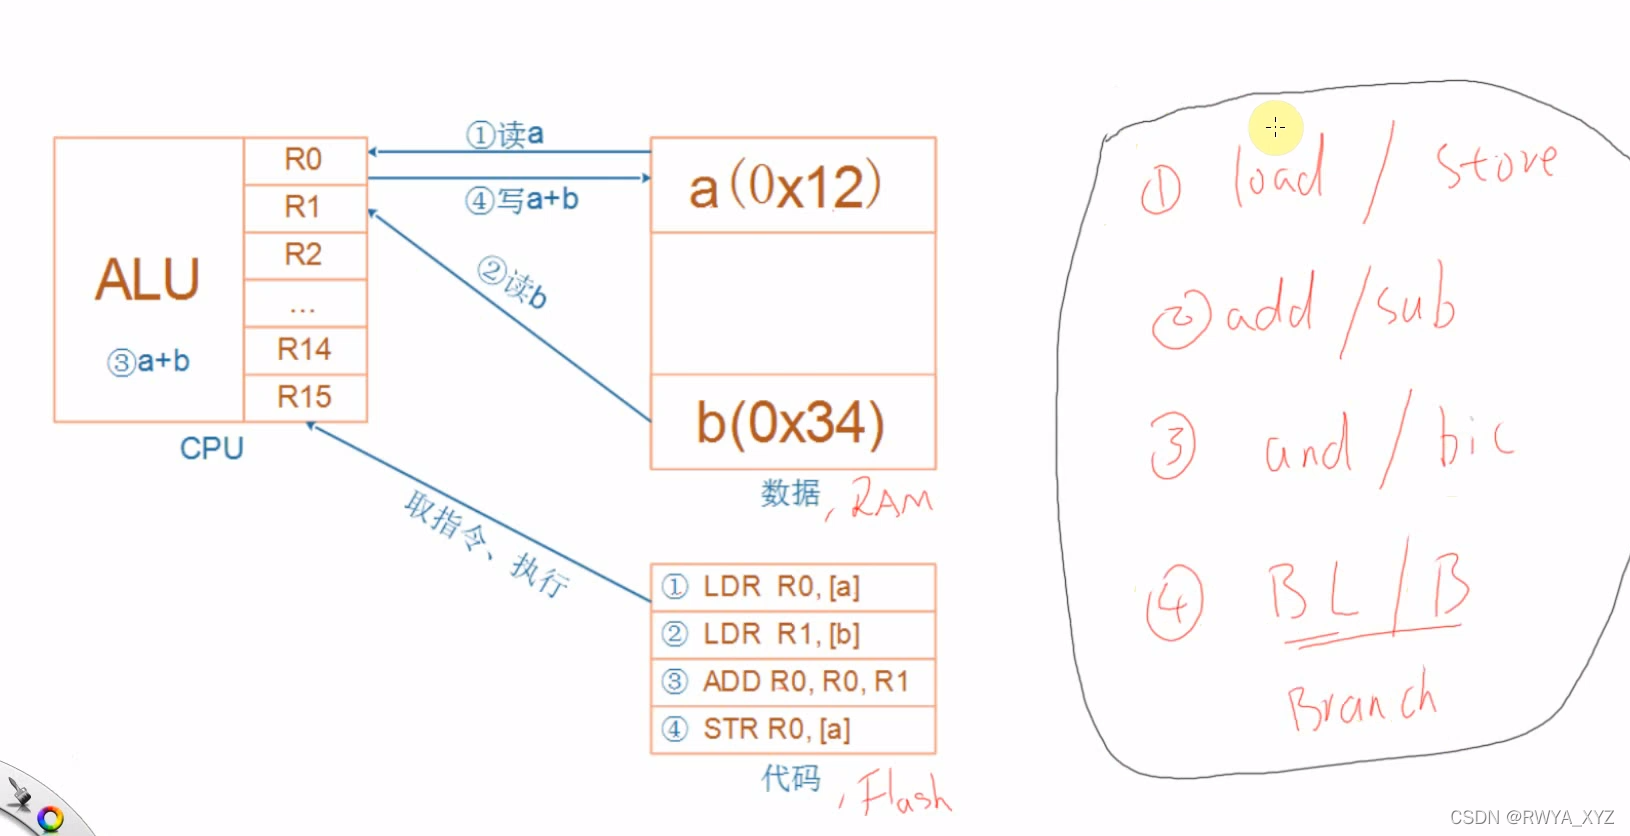
4 ARM架构(韦东山)
int main( void )
{
	volatile int a = 1;
	volatile int b = 2;

	a = a + b;

	prvSetupHardware();

	printf("a = %d\r\n", a);

	while (1);

	return 0;
}

一些汇编指令


5 链表
链表基础
typedef struct spy {
	char *name;
	struct spy *next;
}spy, *p_spy;

spy A = {"A", NULL};
spy B = {"B", NULL};
spy C = {"C", NULL};


int main( void )
{
	p_spy head = NULL;

	A.next = &B;
	B.next = &C;
	C.next = NULL;

	prvSetupHardware();

	head = &A;

	while (head)
	{
		printf("%s\r\n", head->name);
		head = head->next;
	}

	while (1);

	return 0;
}

插入
void insert_spy(p_spy newspy)
{
	p_spy last;

	if (head == NULL)
	{
		head = newspy;
		newspy->next = NULL;
	}
	else
	{
		/* 先找到链表的最后一项 last */
		last = head;
		while (last)
		{
			if (last->next == NULL) /* 找到了 */
				break;
			else
				last = last->next;
		}

		/*  */
		last->next = newspy;
		newspy->next = NULL;
	}
}

int main( void )
{
/*
	A.next = &B;
	B.next = &C;
	C.next = NULL;
*/
	insert_spy(&A);
	insert_spy(&B);
	insert_spy(&C);
	insert_spy(&D);

	prvSetupHardware();

	head = &A;

	while (head)
	{
		printf("%s\r\n", head->name);
		head = head->next;
	}

	while (1);

	return 0;
}
删除
void remove_spy(p_spy oldspy)
{
	p_spy left;

	if (head == oldspy)
	{
		head = oldspy->next;
	}
	else
	{
		/* 找出oldspy的上线 */
		left = head;
		while (left)
		{
			if (left->next == oldspy)
				break;
			else
				left = left->next;
		}

		if (left)
		{
			left->next = oldspy->next;
		}
	}
}


 314
314

 被折叠的 条评论
为什么被折叠?


