


PHP选课系统第四集——注册页面(registration.php)
这是PHP选课系统系列的第四篇,此系列会带领新学习PHP的萌新们一点一点的自己完成一个选课系统。我也是新学的菜鸟,所以大家一起努力吧!
如果不想看过程,最后有最终代码。
在这里用的环境是NetBeans IDE 8.0.2和XAMPP。
一、注册页面的制作
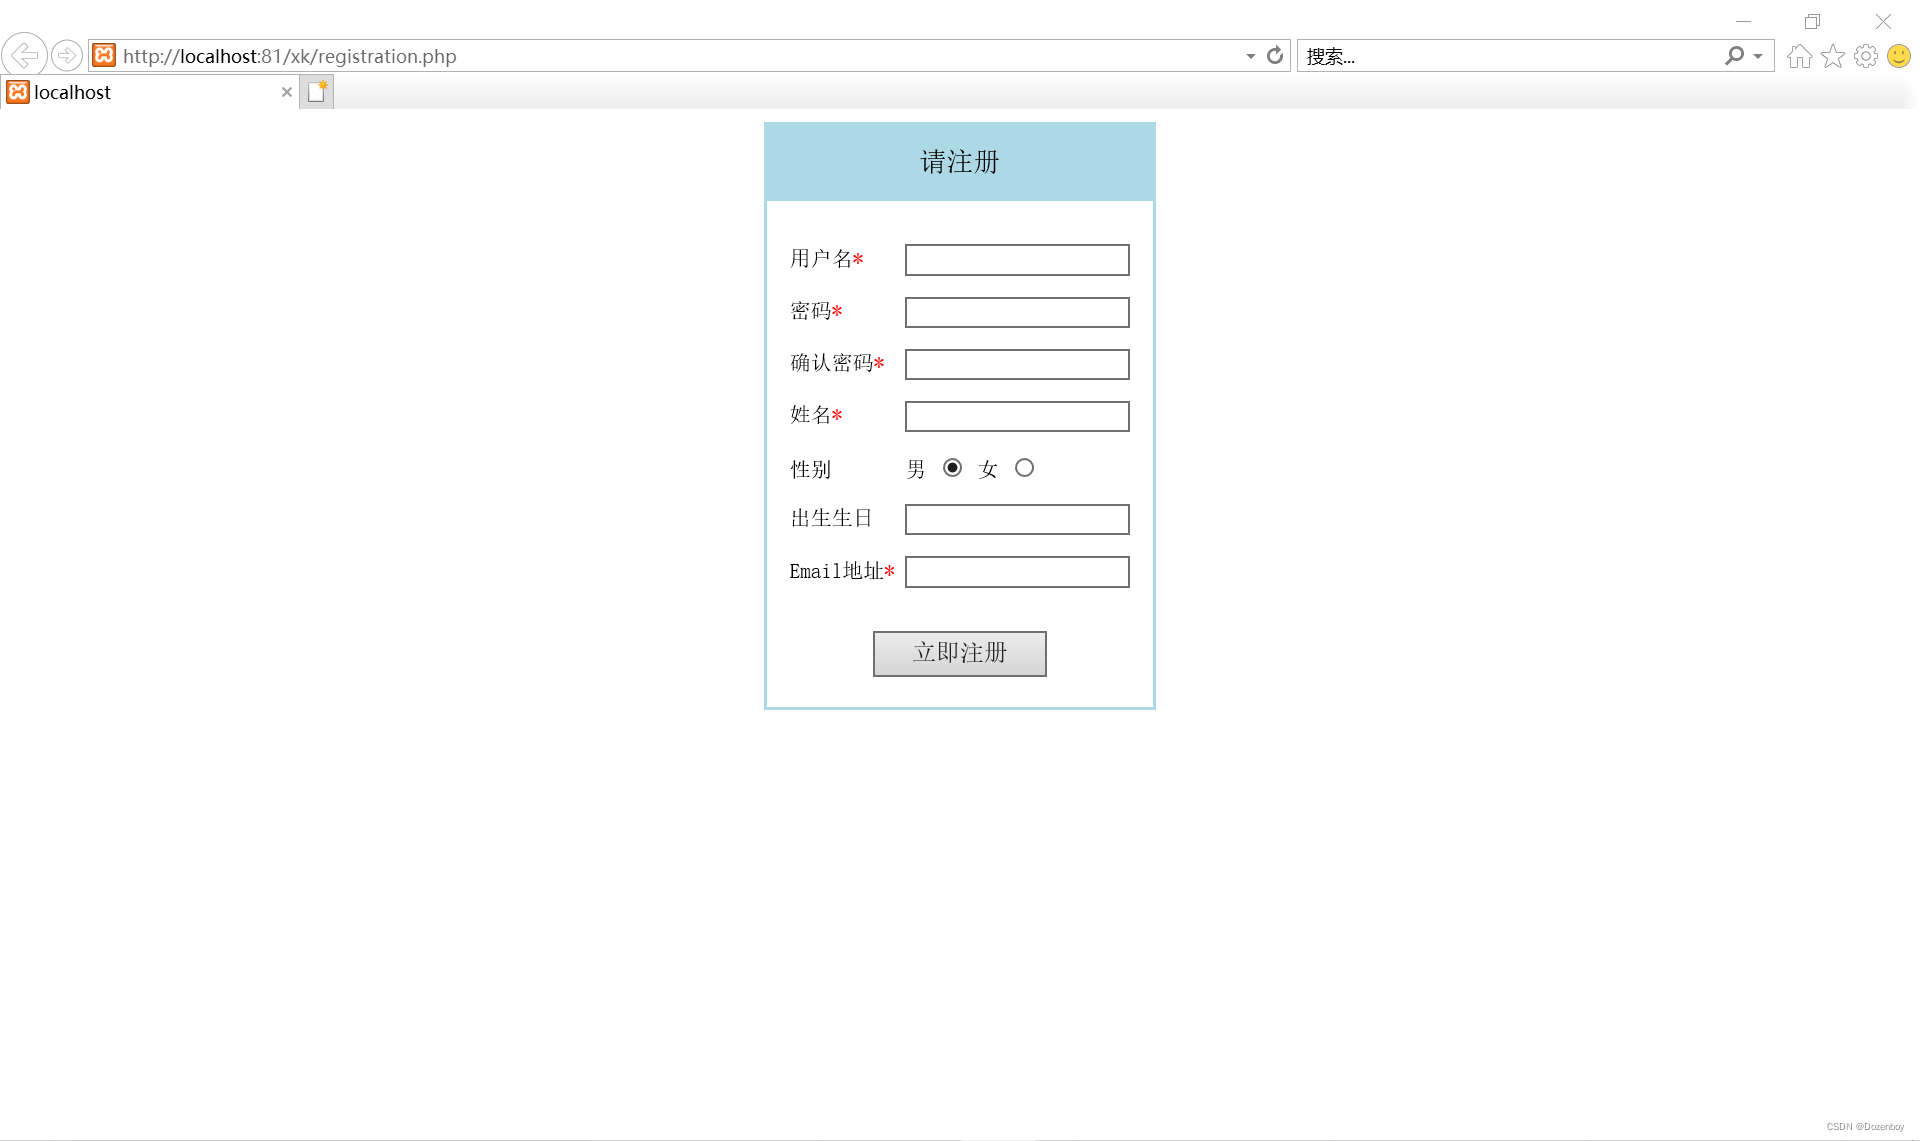
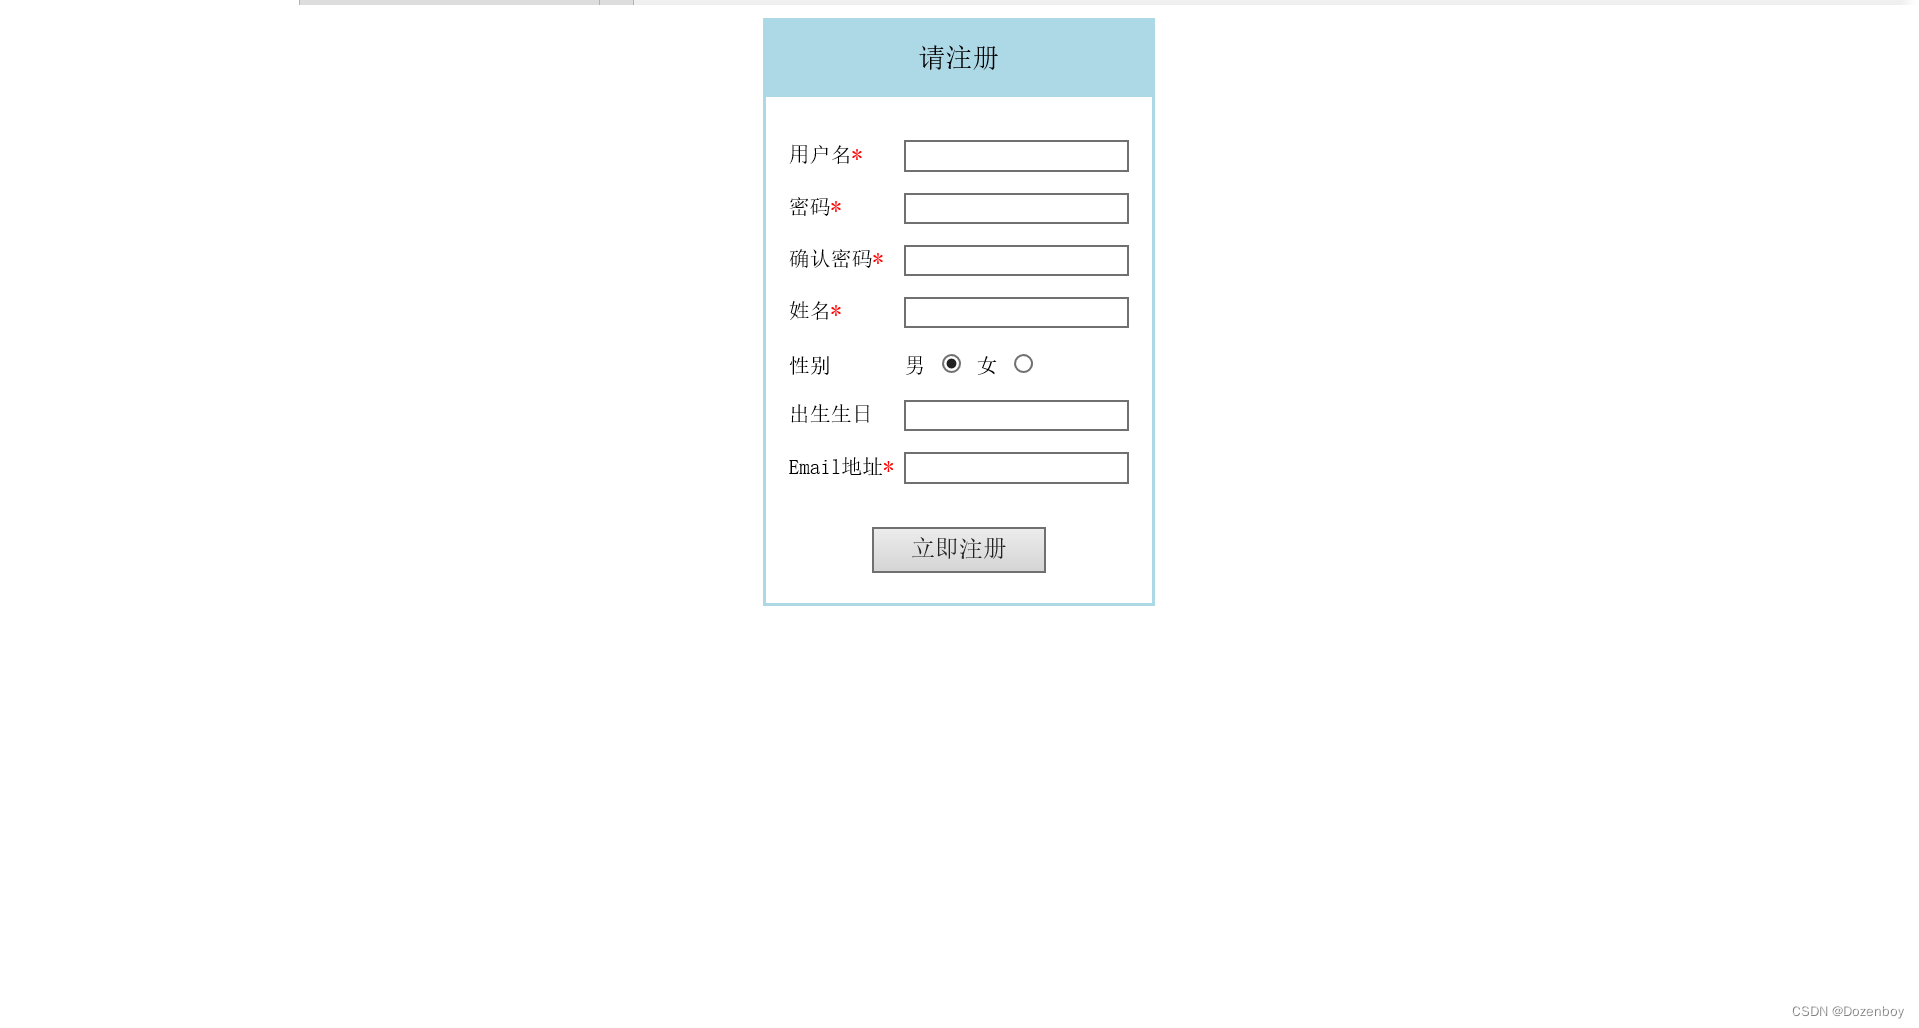
1.构思
大家还是构思一下注册页面需要有什么
和登录页面非常的相似,只是多了几个内容,所以这里会经常拿上一次的页面做比较,大家有不明白的可以到登录页面看看有没有需要的答案。
登录页面的讲解,用来对比
2.分解
用我们经典配色将它分解。首先,大家应该已经熟悉了,它应该在一个<div>里的。在这个div中,分成三块内容,分别是请注册这个标题,其他各种需要填写的信息,还有一个提交按钮。(这里的后两块按照功能划分了一下)
这里我们需要注意,在外层的<div>的外面,我们还要套一层表单<form>。表单用于向服务器传输数据。然后在表单里有一个大<div>,在其中又分别有三个<div>
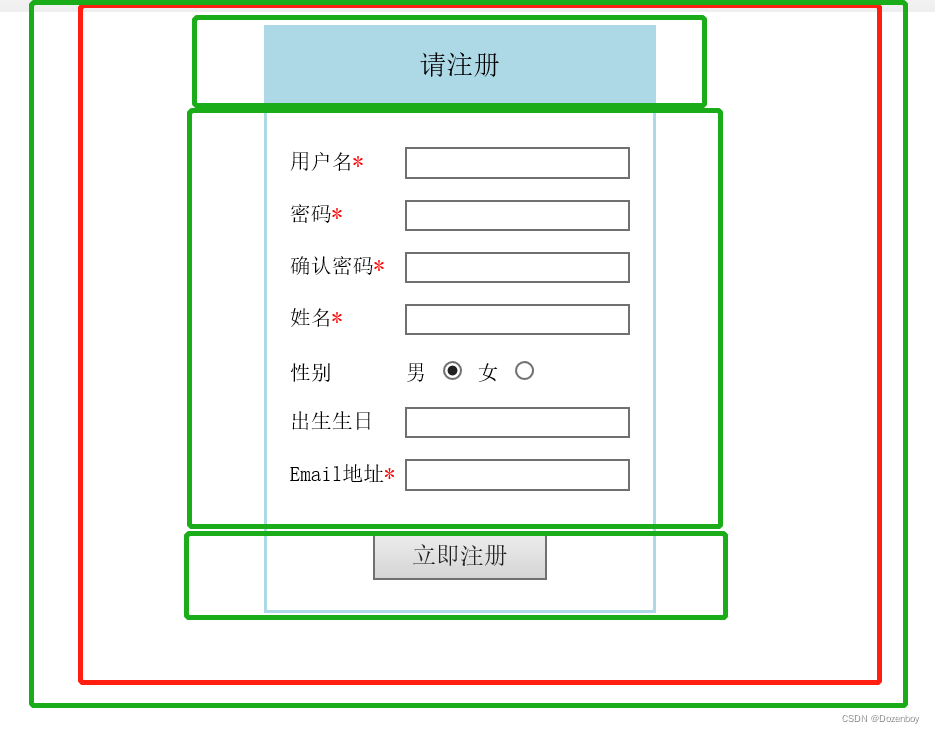
第一个小<div>只有标题,很简单;
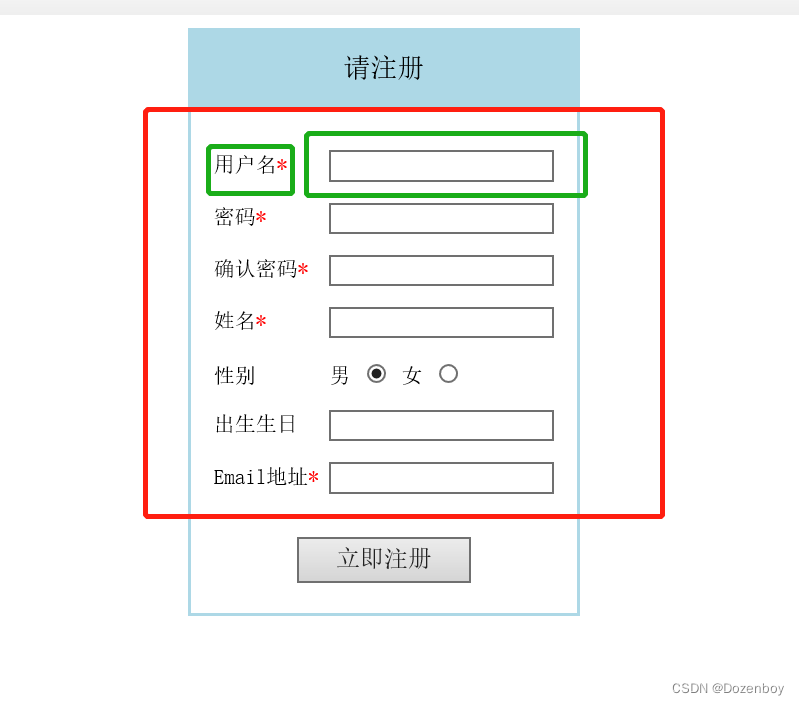
第二个小<div>中则要复杂许多。这里以第一行用户名为例,我们需要<label>一个“用户名”,并用<input>写用户名。
第三个小<div>中也只有一个提交按钮<input>。
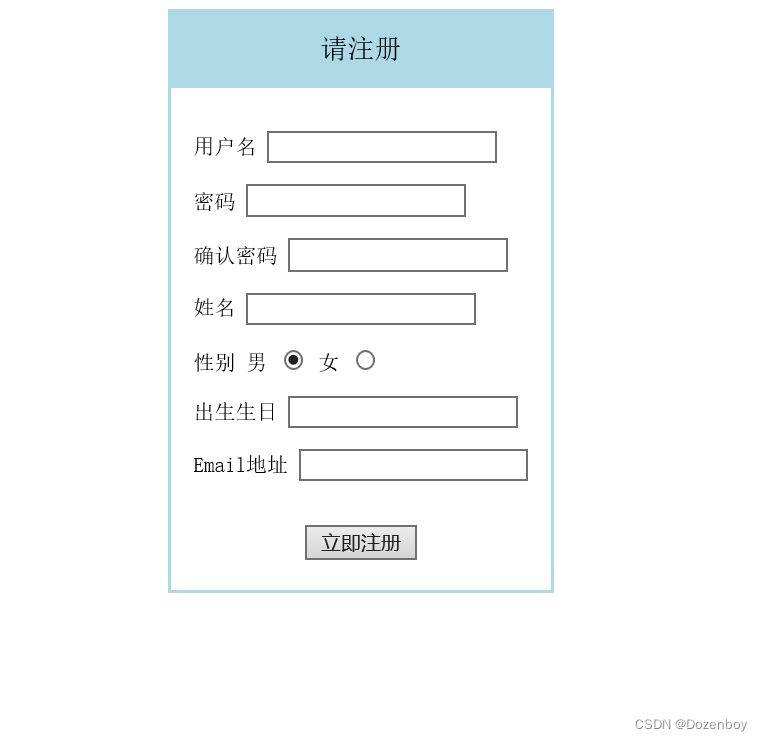
3.写框架
先写出刚才分解后的框架,并做一些外层的简单的css设置,再加上如同登录页面的设置(如:class,id,for等)
		<form method="post" action="" style="text-align:center;font-family: 宋体;font-size: 14px;" >
            <div style="border: 2px solid lightblue;display: inline-block;">
                <div style="background-color: lightblue;font-family: 宋体;font-size: 18px;padding: 15px 0;">
                    请注册
                </div>
                <div style="text-align: left;padding: 15px 15px;">
                    <p>
                        <label class="c1">用户名</label>
                        <input type="text" value="" name="sn" id="sn" class="ci1">
                        <span class="ce"></span>
                    </p>
                    <p>
                        <label class="c1">密码</label>
                        <input type="password" value="" name="password" id="password" class="ci1">
                    </p>
                    <p>
                        <label class="c1">确认密码</label>
                        <input type="password" value="" name="password1" id="password1" class="ci1">
                    </p>
                    <p>
                        <label class="c1">姓名</label>
                        <input type="text" value="" name="name" id="name" class="ci1">
                    </p>
                    <p>
                        <label class="c2">性别</label>
                        <label for="gender">男</label>
                        <input type="radio" name="gender" id="gender" checked="checked">
                        <label for="gender1">女</label>
                        <input type="radio" name="gender" id="gender1">
                    </p>
                    <p>
                        <label class="c2">出生生日</label>
                        <input type="date" value="" name="birthday" id="birthday" class="ci1">
                    </p>
                    <p>
                        <label class="c1">Email地址</label>
                        <input type="email" value="" name="email" id="email" class="ci1">
                    </p>
                </div>
                <div style="padding-bottom: 20px;">
                    <input type="submit" name="reg" value="立即注册" class="ci2">
                </div>
            </div>

        </form>
4.css调格式
接着调整细节,具体操作可看登录页面的讲解
这里比登录页面多加了红色*的功能.c1:after{content: '*';color: red;}
 <style type="text/css">
            .ci1{
                font-family: 宋体;
                font-size: 13px;
                width: 150px;
            }
            .ci2{
                font-family: 宋体;
                font-size: 16px;
                padding: 5px 25px;
                cursor: pointer;
            }
            .c1{
                display: inline-block;
                width: 70px;
            }
            .c1:after{
                content: '*';
                color: red;
            }
            .c2{
                display: inline-block;
                width: 70px;
            }
        </style>
二、为了方便,这里又放上了代码
<html>
    <head>
        <meta charset="UTF-8">
        <title></title>
    </head>
    <body>
        <?php
        // put your code here
        ?>
        <style type="text/css">
            .ci1{
                font-family: 宋体;
                font-size: 13px;
                width: 150px;
            }
            .ci2{
                font-family: 宋体;
                font-size: 16px;
                padding: 5px 25px;
                cursor: pointer;
            }
            .c1{
                display: inline-block;
                width: 70px;
            }
            .c1:after{
                content: '*';
                color: red;
            }
            .c2{
                display: inline-block;
                width: 70px;
            }
        </style>

        <form method="post" action="" style="text-align:center;font-family: 宋体;font-size: 14px;" >
            <div style="border: 2px solid lightblue;display: inline-block;">
                <div style="background-color: lightblue;font-family: 宋体;font-size: 18px;padding: 15px 0;">
                    请注册
                </div>
                <div style="text-align: left;padding: 15px 15px;">
                    <p>
                        <label class="c1">用户名</label>
                        <input type="text" value="" name="sn" id="sn" class="ci1">
                        <span class="ce"></span>
                    </p>
                    <p>
                        <label class="c1">密码</label>
                        <input type="password" value="" name="password" id="password" class="ci1">
                    </p>
                    <p>
                        <label class="c1">确认密码</label>
                        <input type="password" value="" name="password1" id="password1" class="ci1">
                    </p>
                    <p>
                        <label class="c1">姓名</label>
                        <input type="text" value="" name="name" id="name" class="ci1">
                    </p>
                    <p>
                        <label class="c2">性别</label>
                        <label for="gender">男</label>
                        <input type="radio" name="gender" id="gender" checked="checked">
                        <label for="gender1">女</label>
                        <input type="radio" name="gender" id="gender1">
                    </p>
                    <p>
                        <label class="c2">出生生日</label>
                        <input type="date" value="" name="birthday" id="birthday" class="ci1">
                    </p>
                    <p>
                        <label class="c1">Email地址</label>
                        <input type="email" value="" name="email" id="email" class="ci1">
                    </p>
                </div>
                <div style="padding-bottom: 20px;">
                    <input type="submit" name="reg" value="立即注册" class="ci2">
                </div>
            </div>

        </form>
    </body>
</html>


 3058
3058


 被折叠的 条评论
为什么被折叠?
被折叠的 条评论
为什么被折叠?
 到【灌水乐园】发言


