oled_sh1106+ds1307 实现
前言
Arduino 有个很强大的开源的库 u8g2 ,它支持了现在绝大多数的OLED屏幕,至于它的基本用法可以参考我的另一篇笔记,当然这只是我自己的学习笔记写的不是太好,我在文章里贴了官方参考链接可以感兴趣可以去看看。当然,你也可以参考这个博主的单片机菜鸟哥
OLED_SH1106
sh1106是一款1.3寸大小的OLED屏幕,一般有I2C接口和SPI接口,可以将其连接到Arduino Board 的硬件I2C或SPI接口,也可以用软件模拟的方式接到数字I/O口
DS1307时钟模块
硬件介绍我这里就略过了
引脚连接:
SDA------>Arduino SDA
SCL------>Arduino SCL
VCC------>Arduino 5V
GND----->Arduino GND
我使用的是,Arduino的 RTClib 库,可以自己下载,首先我们来看看它的示例程序
// Date and time functions using a DS1307 RTC connected via I2C and Wire lib
#include "RTClib.h"

RTC_DS1307 rtc;

char daysOfTheWeek[7][12] = {"Sunday", "Monday", "Tuesday", "Wednesday", "Thursday", "Friday", "Saturday"};

void setup () {
  Serial.begin(57600);

#ifndef ESP8266
  while (!Serial); // wait for serial port to connect. Needed for native USB
#endif

  if (! rtc.begin()) {
    Serial.println("Couldn't find RTC");
    Serial.flush();
    abort();
  }

  if (! rtc.isrunning()) {
    Serial.println("RTC is NOT running, let's set the time!");
    // When time needs to be set on a new device, or after a power loss, the
    // following line sets the RTC to the date & time this sketch was compiled
    rtc.adjust(DateTime(F(__DATE__), F(__TIME__)));
    // This line sets the RTC with an explicit date & time, for example to set
    // January 21, 2014 at 3am you would call:
    // rtc.adjust(DateTime(2014, 1, 21, 3, 0, 0));
  }

  // When time needs to be re-set on a previously configured device, the
  // following line sets the RTC to the date & time this sketch was compiled
  // rtc.adjust(DateTime(F(__DATE__), F(__TIME__)));
  // This line sets the RTC with an explicit date & time, for example to set
  // January 21, 2014 at 3am you would call:
  // rtc.adjust(DateTime(2014, 1, 21, 3, 0, 0));
}

void loop () {
    DateTime now = rtc.now();

    Serial.print(now.year(), DEC);
    Serial.print('/');
    Serial.print(now.month(), DEC);
    Serial.print('/');
    Serial.print(now.day(), DEC);
    Serial.print(" (");
    Serial.print(daysOfTheWeek[now.dayOfTheWeek()]);
    Serial.print(") ");
    Serial.print(now.hour(), DEC);
    Serial.print(':');
    Serial.print(now.minute(), DEC);
    Serial.print(':');
    Serial.print(now.second(), DEC);
    Serial.println();

    Serial.print(" since midnight 1/1/1970 = ");
    Serial.print(now.unixtime());
    Serial.print("s = ");
    Serial.print(now.unixtime() / 86400L);
    Serial.println("d");

    // calculate a date which is 7 days, 12 hours, 30 minutes, and 6 seconds into the future
    DateTime future (now + TimeSpan(7,12,30,6));

    Serial.print(" now + 7d + 12h + 30m + 6s: ");
    Serial.print(future.year(), DEC);
    Serial.print('/');
    Serial.print(future.month(), DEC);
    Serial.print('/');
    Serial.print(future.day(), DEC);
    Serial.print(' ');
    Serial.print(future.hour(), DEC);
    Serial.print(':');
    Serial.print(future.minute(), DEC);
    Serial.print(':');
    Serial.print(future.second(), DEC);
    Serial.println();

    Serial.println();
    delay(3000);
}
语句解释:
<1> RTC_DS1307 rtc---->定义一个trc模块
<2> DateTime now = rtc.now()------> 调用时间日期函数存入 now 中
<3> now.year() now.month() now.day() now.hour() now.minute() now.second()------> 获取当前具体时间或日期
<4> noww.unixtime()------>时间求和
时间显示
最后只需要将两个模块的代码缝合整理到一起便可以实现实时时间显示了
#include "RTClib.h"
#include <Arduino.h>
#include <U8g2lib.h>
#include <SPI.h>
U8G2_SH1106_128X64_NONAME_1_4W_HW_SPI u8g2(U8G2_R0, /* cs=*/ 10, /* dc=*/ 9, /* reset=*/ 8);
RTC_DS1307 rtc;    //Setup the ds1307
//char daysOfTheWeek[7][12] = {"Sunday", "Monday", "Tuesday", "Wednesday", "Thursday", "Friday", "Saturday"};
// TO made the WEEK
void setup() {
  // put your setup code here, to run once:
  Serial.begin(115200);
  u8g2.begin();
  u8g2.enableUTF8Print();

  if(! rtc.begin()){
    Serial.println("Could't fine RTC");
    Serial.flush();
    abort();
  }

  if (! rtc.isrunning()){
    Serial.println("RTC is not running, let's set the time!");
    rtc.adjust(DateTime(F(__DATE__), F(__TIME__)));
  }
}

void loop() {
  // put your main code here, to run repeatedly:
  DateTime now = rtc.now();
  u8g2.setFontDirection(0);
  u8g2.firstPage();
  do{
    u8g2.setFont(u8g2_font_ncenB10_tr);
    u8g2.setCursor(20,10);
    u8g2.print("Welcome!");
    u8g2.setCursor(0,30);
    u8g2.print("Date:");
    u8g2.setCursor(50,30);
    u8g2.print(now.year());
    u8g2.print('/');
    u8g2.print(now.month());
    u8g2.print('/');
    u8g2.println(now.day());
    u8g2.setCursor(0,50);
    u8g2.print("Time:");
    u8g2.setCursor(50,50);
    u8g2.print(now.hour());
    u8g2.print(':');
    u8g2.print(now.minute());
    u8g2.print(':');
    u8g2.println(now.second()+10);

  }while (u8g2.nextPage());
  delay(1000);

}
ps:如果没有判断if (! trc.begin()),要记得使用rtc.begin()语句初始化rtc模块
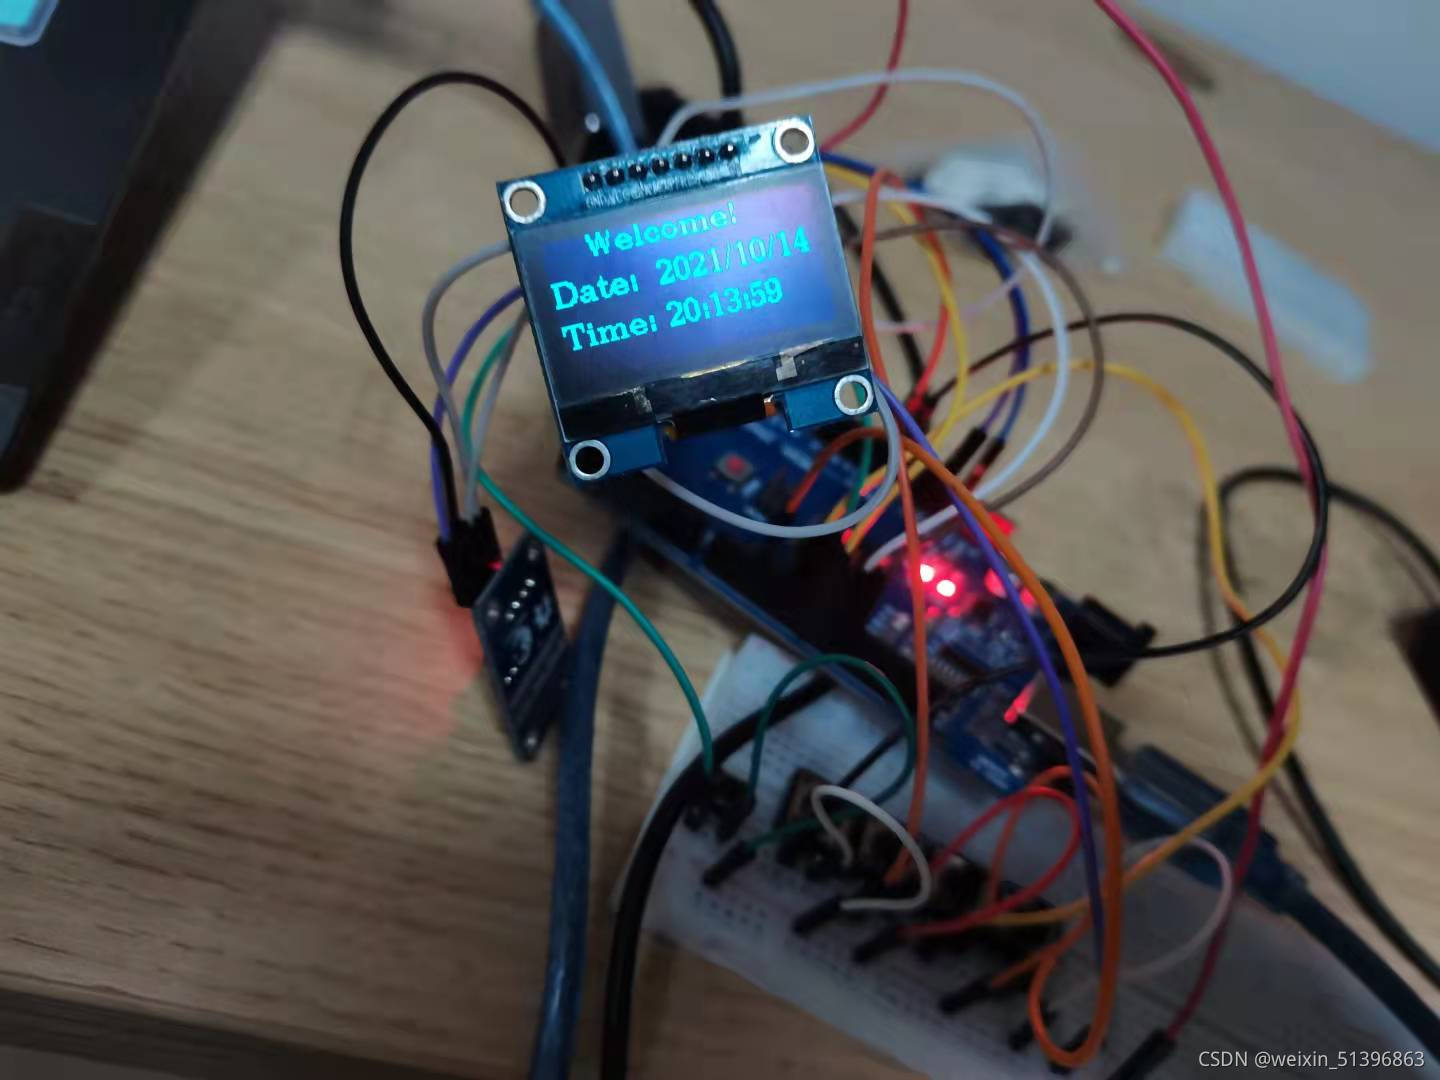
最后:实验效果图

附
在昨晚时间显示这个实验之后一天,当我打算再次重复这个实验时,我打开了1307的示例程序连接硬件,上传后却发现用不了,打开串口,串口输出的是“Cound’t find RTC”,我去Arduino的各种英文论坛找了很久,试着把下面这一段放到 loop 里面
if (! rtc.begin()) {
    Serial.println("Couldn't find RTC");
    Serial.flush();
    abort();
  }

  if (! rtc.isrunning()) {
    Serial.println("RTC is NOT running, let's set the time!");

    rtc.adjust(DateTime(F(__DATE__), F(__TIME__)));

  }
为了使循环可以进行,我删除了
    Serial.flush();
    abort();
这两句代码,结果就是时钟模块输出一直卡在一个不正常的值,类似于这种:

经过几个小时的不屑努力查找,终于我明白了:在上传代码的时候记得拔掉硬件 I2C 通信先!!!,因为它也属于串口通信,这就跟你在上传程序时不能占用 TX RX 两个引脚的硬件串口通信是一样的道理。
2021/10/19 更新
关于我前面说的时钟模块的问题,经过我几天的摸索发现,在使用前你只需要对时钟模块的时间校准(设置)一次就够了,之后将电池装上后模块会自己运行,每次你要使用时调用RTClib库的**begin()**就行了。


 774
774


 被折叠的 条评论
为什么被折叠?


