


Spring Cache
官方文档 https://docs.spring.io/spring-framework/docs/current/reference/html/integration.html#cache
- Spring 从3.1开始定义了
org.springframework.cache.Cache和org.springframework.cache.CacheManager接口来统一不同的缓存技术并支持使用 JCache(JSR-107)注解简化我们开发。 - Cache 接口为缓存的组件规范定义,包含缓存的各种操作集合。Cache 接口下 Spring 提供了各种 xxxCache 的实现,如
RedisCache,EhCacheCache,ConcurrentMapCache等。 - 每次调用需要缓存功能的方法时,Spring 会检查指定参数的指定目标方法是否已经被调用过,如果有就直接从缓存中获取方法调用后的结果,如果没有就调用方法并缓存结果后返回给用户,下次调用直接从缓存中获取。
- 使用 Spring 缓存抽象时我们需要关注以下两点
- 确定方法需要被缓存以及他们的缓存策略。
- 从缓存中读取之前缓存存储的数据
SpringBoot 整合 SpringCache
引入 SpringCache 依赖
<dependency>
  <groupId>org.springframework.boot</groupId>
  <artifactId>spring-boot-starter-cache</artifactId>
</dependency>
引入你缓存的开发场景,例如 Redis
<dependency>
  <groupId>org.springframework.boot</groupId>
  <artifactId>spring-boot-starter-data-redis</artifactId>
</dependency>
配置
引入 SpringCache 后,他自动配置了哪些内容?
CacheAutoConfiguration 会导入 RedisCacheConfiguration 。在RedisCacheConfiguration 中,自动配置了一个 Redis 缓存管理器
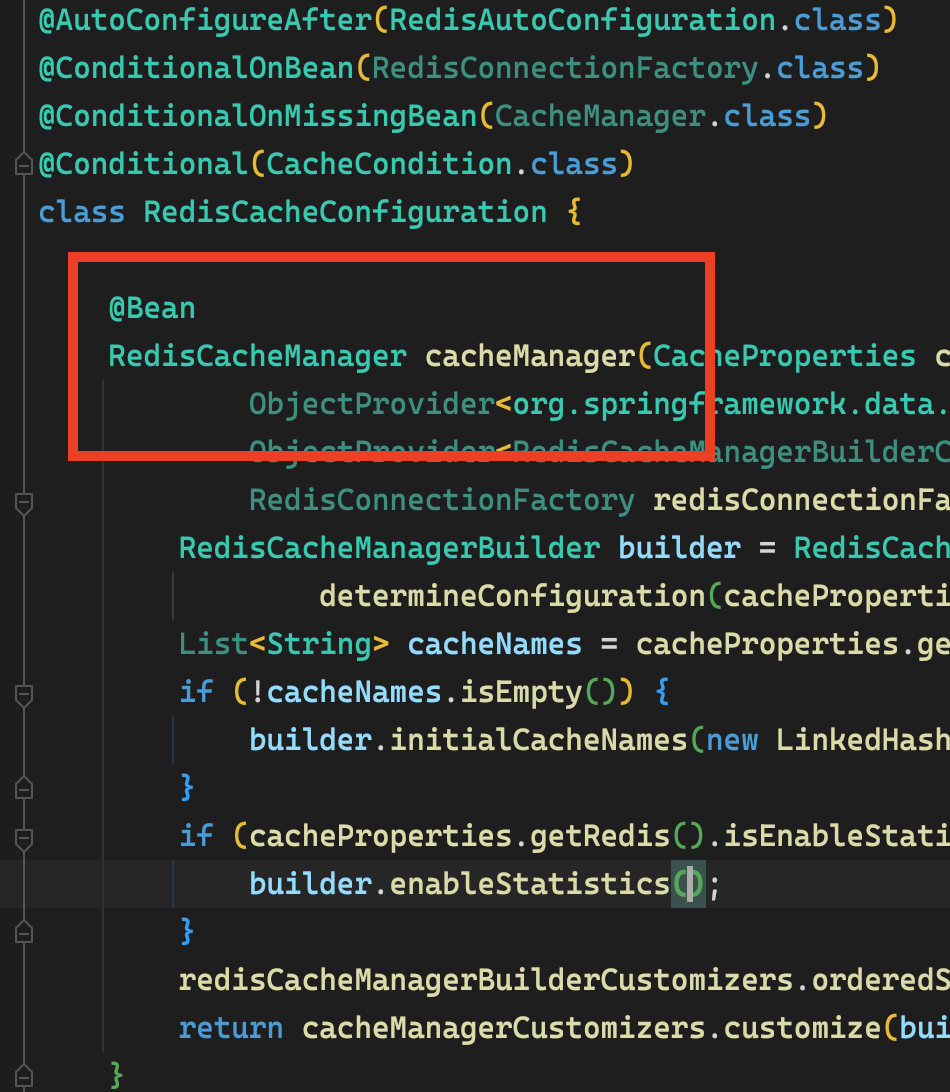
益于SpringBoot自动配置,我们需要配置的东西非常少
spring:
  # 配置 redis
  redis:
    host: 192.168.226.128
  # SpringCache配置
  cache:
  # 指定缓存类型
    type: redis
最后需要手动开启缓存功能
@EnableCaching
...
@SpringBootApplication
public class GulimallProductApplication { ... }
最后使用指定注解就能完成指定操作
注解
SpringCache 如下注解为我们提供缓存的操作
@Cacheable触发将数据保存到缓存的操作。- 如果缓存中有数据,被标注的方法不调用。
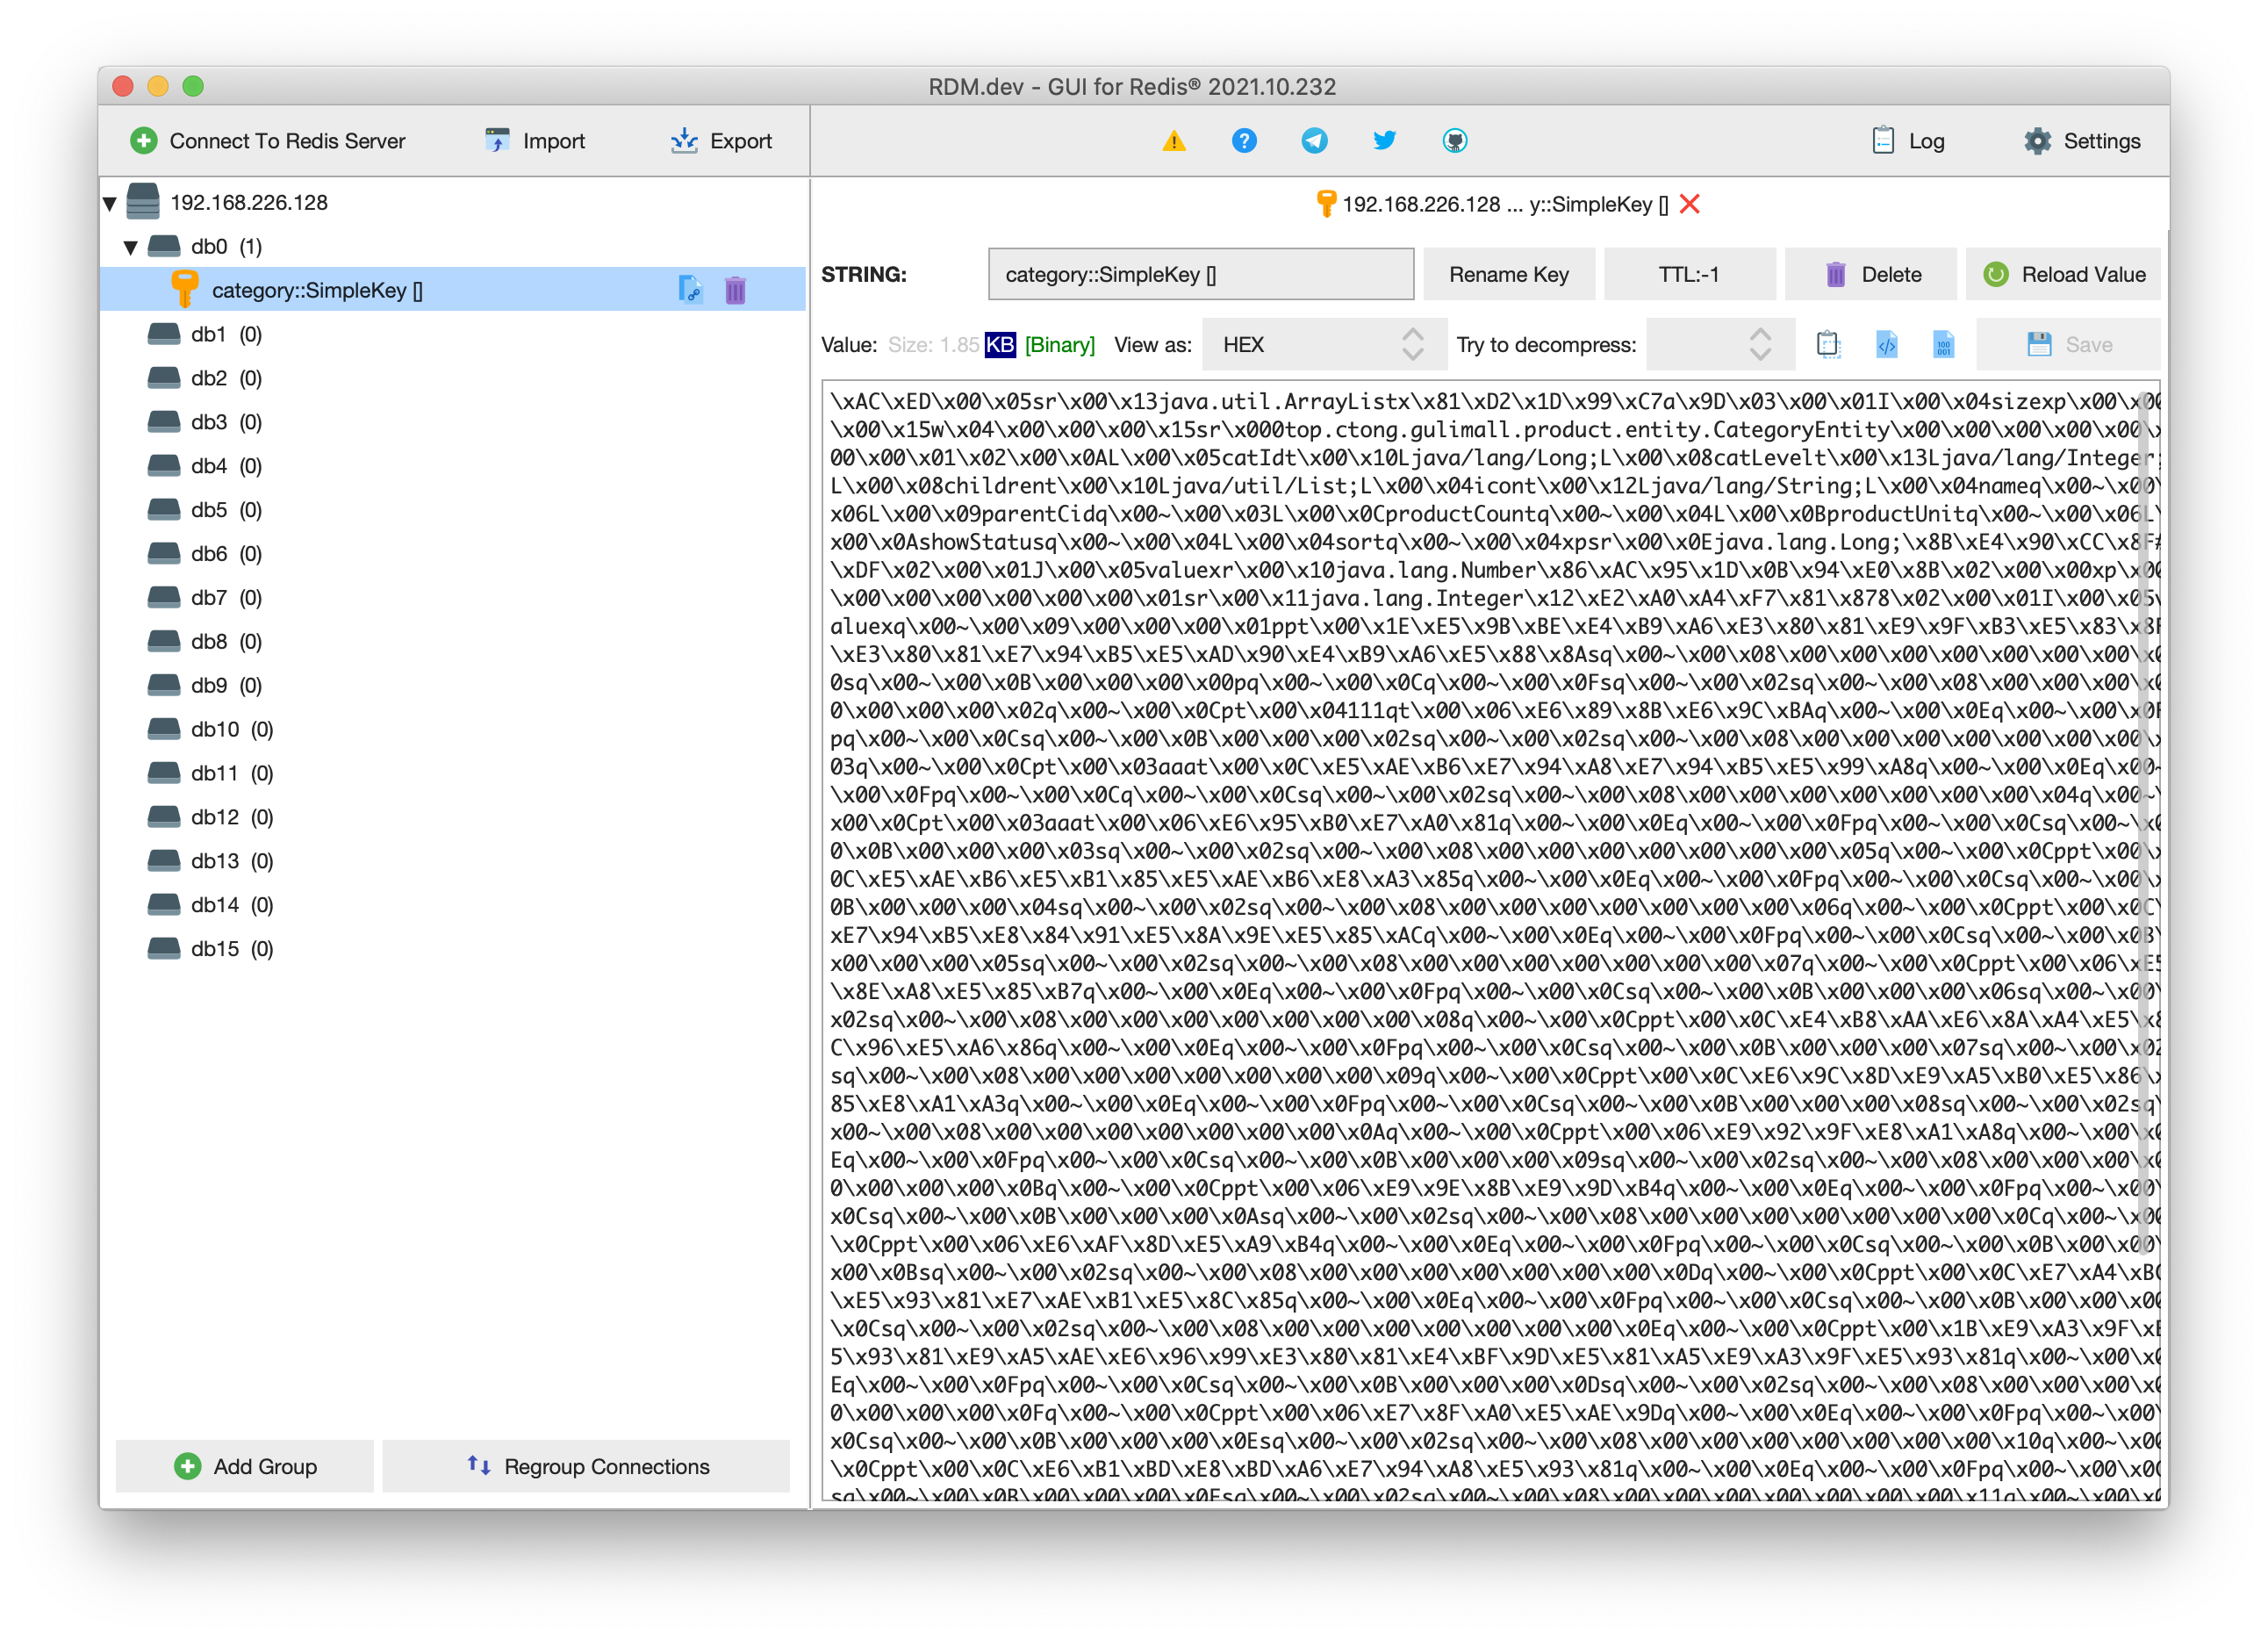
- key 默认自动生成:
缓存名字::SimpleKey [],如category::SimpleKey []。 - 缓存值默认使用 jdk 序列化机制将序列化后的数据存到缓存。
- 默认过期时间是
-1。
@CacheEvict将数据从缓存删除。@CachePut沉浸式更新缓存。@Caching组合多个缓存操作。
测试
@Cacheable
代表当前方法的结果需要缓存,如果缓存中有,那么被标注的方法不进行调用。如果缓存中没有,那么会调用被标注的方法得到放回结果,最后将结果放到缓存中。
/**
 * 查询一级分类
 *
 * @return List<CategoryEntity>
 * @author Clover You
 * @date 2021/12/26 10:41
 */
@Cacheable(cacheNames = {"category"})
@Override
public List<CategoryEntity> getLeve1Category() {
  log.info("getLeve1Category调用....");
  return baseMapper.selectList(new QueryWrapper<CategoryEntity>().eq("cat_level", 1));
}
第一次调用,此时缓存中无数据
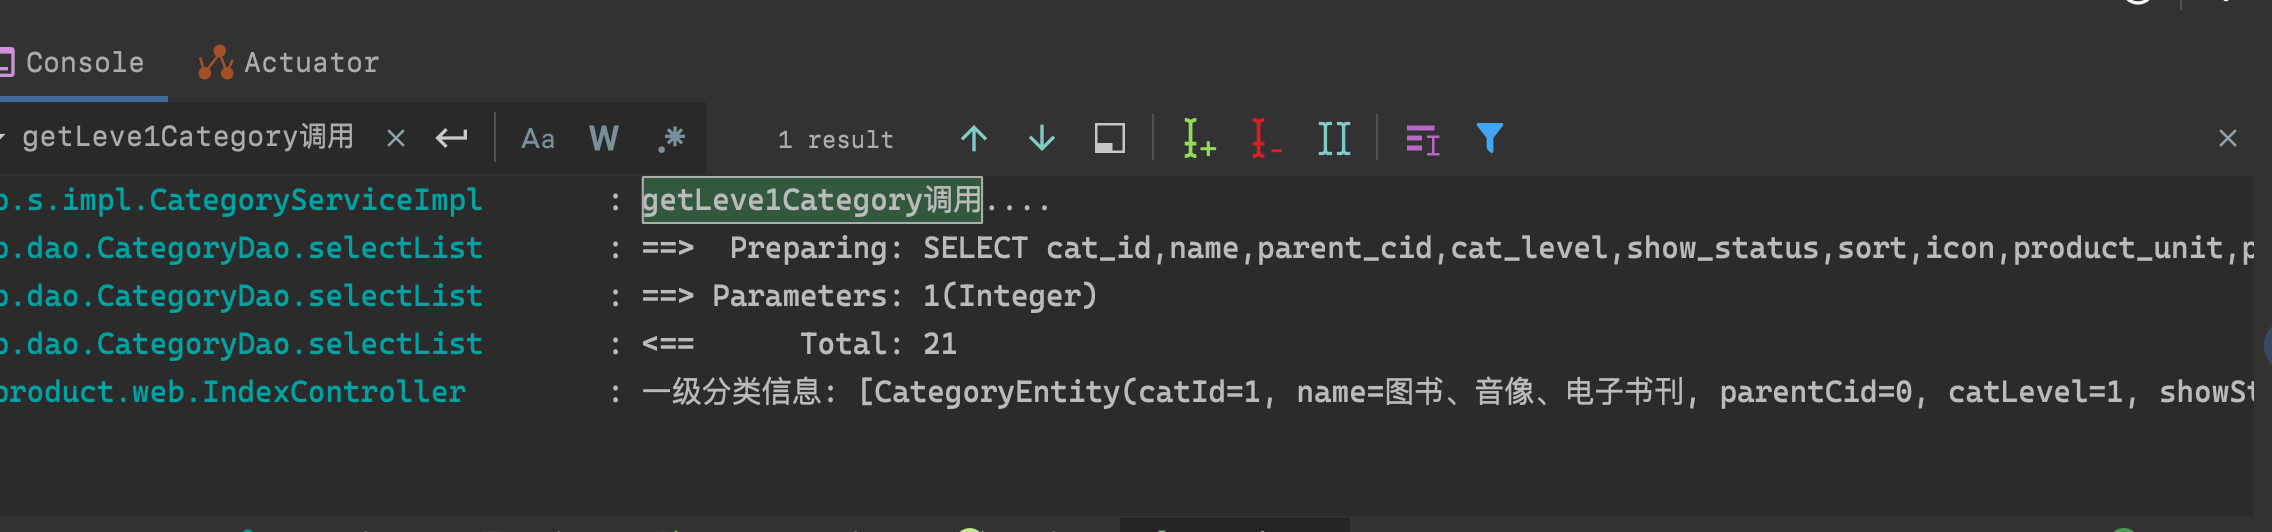
检查缓存
第二次调用这个接口,我们这个方法并没有调用,而是直接去缓存中将数据获取出来

自定义
指定生成的缓存使用自定义的 key。如果需要自定义key,可以使用 key 属性,他使用 SpEL 表达式。
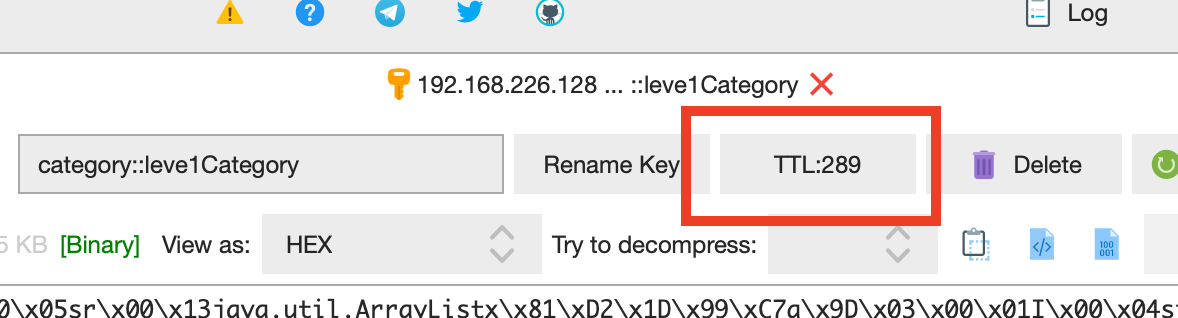
@Cacheable(cacheNames = {"category"}, key = "'leve1Category'")
 指定缓存数据的过期时间,
@Cacheable 注解并没有提供什么属性让我们自定义过期时间,但是可以在配置文件中指定 Redis 的 ttl
spring:
  cache:
    type: redis
    redis:
      # 单位是毫秒
      time-to-live: 300000
将数据保存为 JSON 格式,需要搞清楚原理,CacheAutoConfiguration 通过org.springframework.boot.autoconfigure.cache.CacheAutoConfiguration.CacheConfigurationImportSelector 导入了 RedisCacheConfiguration ,在 RedisCacheConfiguration 中自动配置了 RedisCacheManager ,RedisCacheManager初始化了所有缓存,初始化是按照配置文件中 cache.cache-names 配置的名字进行初始化。在初始化时最重要的是
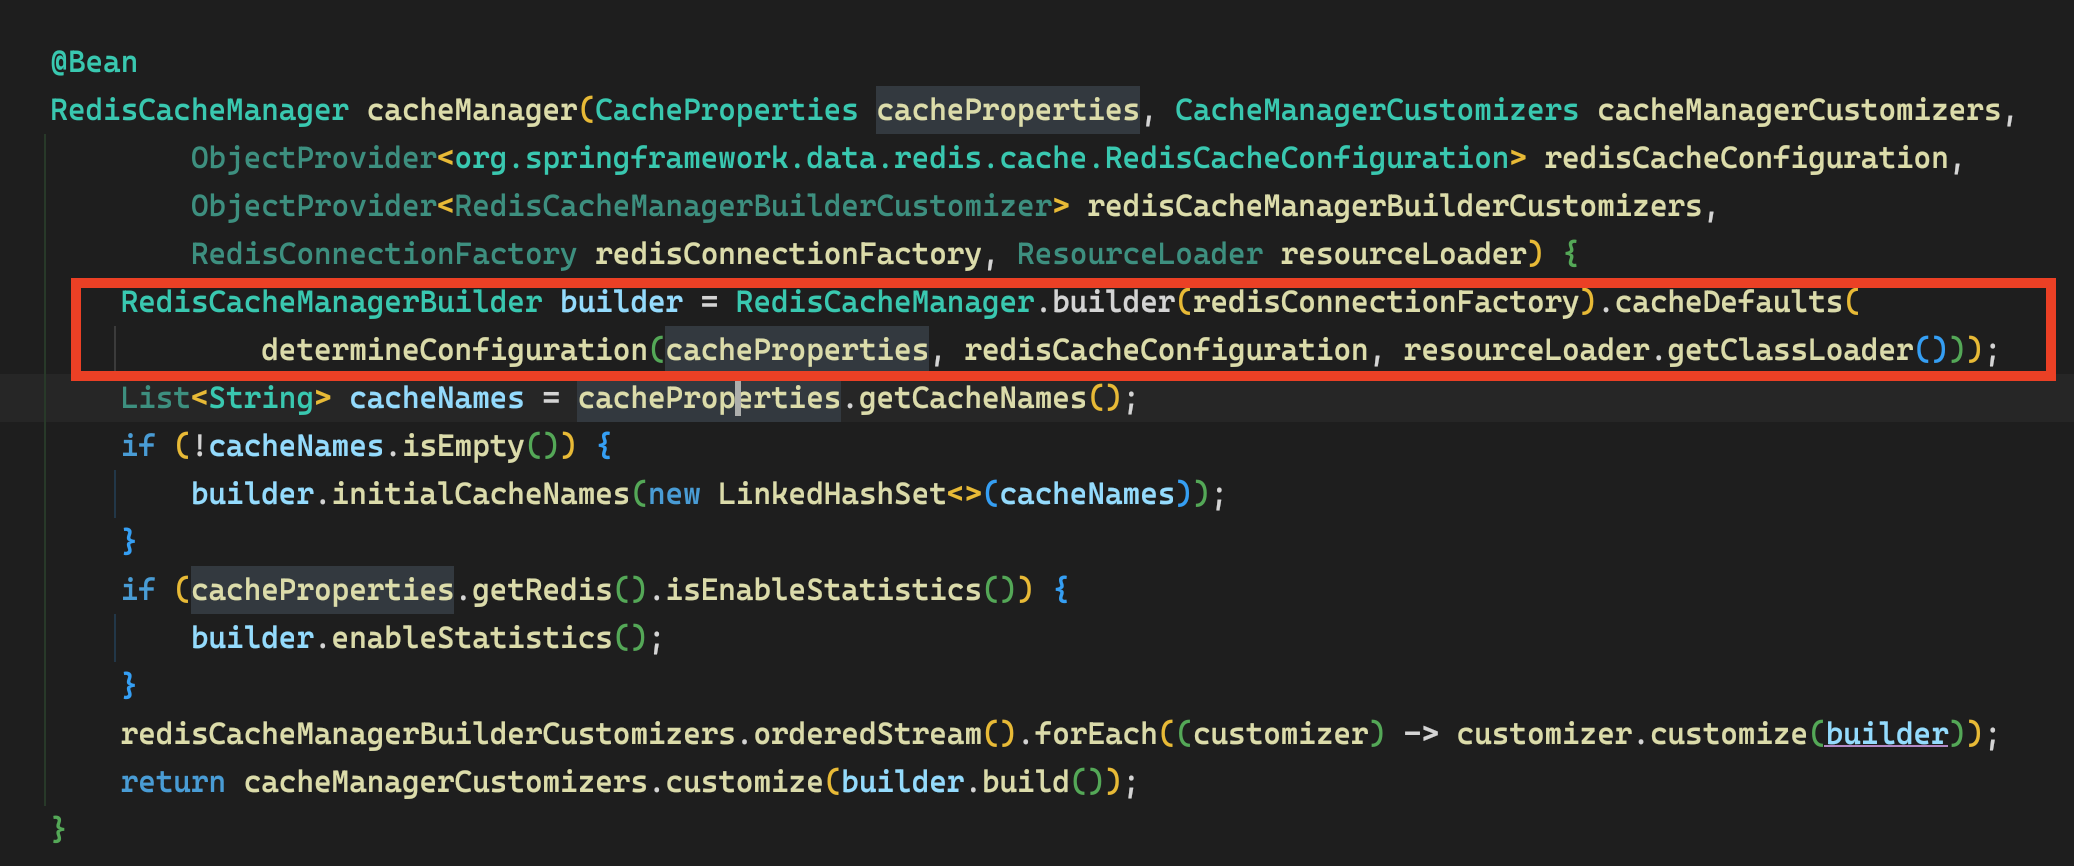
他决定用来使用那个缓存配置。如果需要改缓存配置只需要在容器中放一个 org.springframework.data.redis.cache.RedisCacheConfiguration 即可。
package top.ctong.gulimall.product.config;

import com.alibaba.fastjson.JSONObject;
import org.springframework.boot.autoconfigure.cache.CacheProperties;
import org.springframework.boot.context.properties.EnableConfigurationProperties;
import org.springframework.cache.annotation.EnableCaching;
import org.springframework.context.annotation.Bean;
import org.springframework.context.annotation.Configuration;
import org.springframework.data.redis.cache.RedisCacheConfiguration;
import org.springframework.data.redis.serializer.*;

/**
 * █████▒█      ██  ▄████▄   ██ ▄█▀     ██████╗ ██╗   ██╗ ██████╗
 * ▓██   ▒ ██  ▓██▒▒██▀ ▀█   ██▄█▒      ██╔══██╗██║   ██║██╔════╝
 * ▒████ ░▓██  ▒██░▒▓█    ▄ ▓███▄░      ██████╔╝██║   ██║██║  ███╗
 * ░▓█▒  ░▓▓█  ░██░▒▓▓▄ ▄██▒▓██ █▄      ██╔══██╗██║   ██║██║   ██║
 * ░▒█░   ▒▒█████▓ ▒ ▓███▀ ░▒██▒ █▄     ██████╔╝╚██████╔╝╚██████╔╝
 * ▒ ░   ░▒▓▒ ▒ ▒ ░ ░▒ ▒  ░▒ ▒▒ ▓▒     ╚═════╝  ╚═════╝  ╚═════╝
 * ░     ░░▒░ ░ ░   ░  ▒   ░ ░▒ ▒░
 * ░ ░    ░░░ ░ ░ ░        ░ ░░ ░
 * ░     ░ ░      ░  ░
 * Copyright 2022 Clover You.
 * <p>
 * 缓存配置
 * </p>
 *
 * @author Clover You
 * @email 2621869236@qq.com
 * @create 2022-01-07 11:05
 */
@Configuration
@EnableCaching
@EnableConfigurationProperties(CacheProperties.class)
public class CacheConfig {

  @Bean
  RedisCacheConfiguration redisCacheConfiguration(CacheProperties cacheProperties) {
    RedisCacheConfiguration config = RedisCacheConfiguration.defaultCacheConfig();
    config = config.serializeKeysWith(
      RedisSerializationContext.SerializationPair.fromSerializer(new StringRedisSerializer())
    );

    config = config.serializeValuesWith(
      RedisSerializationContext.SerializationPair.fromSerializer(new GenericJackson2JsonRedisSerializer())
    );
    CacheProperties.Redis redisProperties = cacheProperties.getRedis();
    if (redisProperties.getTimeToLive() != null) {
      config = config.entryTtl(redisProperties.getTimeToLive());
    }
    if (redisProperties.getKeyPrefix() != null) {
      config = config.prefixCacheNameWith(redisProperties.getKeyPrefix());
    }
    if (!redisProperties.isCacheNullValues()) {
      config = config.disableCachingNullValues();
    }
    if (!redisProperties.isUseKeyPrefix()) {
      config = config.disableKeyPrefix();
    }
    return config;
  }

}
需要指定一个唯一的标识,每一个需要缓存的数据我们都来指定要放到那个名字的缓存中「缓存分区(按照业务类型)」
@CacheEvict
当被标注的方法执行完后,删除指定的缓存,这可以做一个缓存失效模式。
可以在更新某个数据时将数据从缓存中删除,等下次请求进来获取数据缓存中就是一个新的数据。
/**
 * 集联更新分类
 *
 * @param category 分类信息
 * @author Clover You
 * @date 2021/11/27 11:00
 */
@CacheEvict(value = "category", key = "'leve1Category'")
@Transactional(rollbackFor = Exception.class)
@Override
public void updateCascade(CategoryEntity category) {
  this.updateById(category);
  if (StringUtils.hasText(category.getName())) {
    categoryBrandRelationService.updateCategory(category.getCatId(), category.getName());
  }
}
@Caching
例如我们需要删除多个缓存,当我们需要将多个 @CacheEvict 组合起来一起操作时,就需要 @Caching 。当然他除了 @CacheEvict ,还支持 @CachePut和@Cacheable 。
/**
 * 集联更新分类
 *
 * @param category 分类信息
 * @author Clover You
 * @date 2021/11/27 11:00
 */
@Caching(evict = {
  @CacheEvict(value = "category", key = "'leve1Category'"),
  @CacheEvict(value = "category", key = "'getCatalogJson'"),
})
@Transactional(rollbackFor = Exception.class)
@Override
public void updateCascade(CategoryEntity category) {
  this.updateById(category);
  if (StringUtils.hasText(cat egory.getName())) {
    categoryBrandRelationService.updateCategory(category.getCatId(), category.getName());
  }
}
缓存击穿
@Cacheable 默认情况下时有缓存击穿问题的,如果需要解决缓存击穿问题,需要修改 sync 属性的默认值,默认为 false
@Cacheable(cacheNames = {"category"}, key = "'leve1Category'", sync = true)
可以看到,默认加的是本地锁,不过这已经足够了
private synchronized <T> T getSynchronized(Object key, Callable<T> valueLoader) {
  ValueWrapper result = get(key);

  if (result != null) {
    return (T) result.get();
  }

  T value;
  try {
    value = valueLoader.call();
  } catch (Exception e) {
    throw new ValueRetrievalException(key, valueLoader, e);
  }
  put(key, value);
  return value;
}
常规数据「读多写少,即时性、一致性要求不高的数据」完全可以使用SpringCache。特殊数据需要自己特殊设计,例如使用Redisson操作分布式锁等等
欢迎访问我的个人博客
博文在博客中的链接: https://www.ctong.top/index.php/archives/92


 1586
1586


 被折叠的 条评论
为什么被折叠?
被折叠的 条评论
为什么被折叠?
 到【灌水乐园】发言


