


提示:文章写完后,目录可以自动生成,如何生成可参考右边的帮助文档
ckman部署安装
前言
CKMan 是一个用于管理 ClickHouse 的命令行工具,它提供了一种简单方便的方式来管理 ClickHouse 集群、执行查询和监控集群状态等功能。
使用 CKMan,你可以执行以下操作:
1.查看集群状态:使用 CKMan 可以查看 ClickHouse 集群的状态,包括节点的健康状况、副本分布情况等。
2.执行查询:CKMan 允许你在集群上执行 ClickHouse 查询。你可以输入 SQL 查询语句,并查看查询结果。
3.管理集群配置:CKMan 提供了配置管理功能,可以帮助你管理 ClickHouse 集群的配置文件,包括点击配置文件、上传配置文件等。
4.监控集群性能:CKMan 提供了监控 ClickHouse 集群性能的功能,可以查看节点的资源使用情况、查询性能等指标。
5.管理用户和权限:使用 CKMan,你可以管理 ClickHouse 的用户和权限,包括创建用户、授权等操作。
一、ckman安装与部署
【依赖】
prometheus(非必需)
node_exporter(非必需)
nacos(>1.4)(非必需)
zookeeper(>3.6.0, 推荐 )
mysql (当持久化策略设置为mysql时必需)
————————————————————————————————————————————
ckman安装部署分为rpm包安装和tar.gz包安装。下载地址:
https://github.com/housepower/ckman/releases
1.rpm方式
1.1 安装
rpm -ivh ckman-2.3.6.x86_64.rpm

rpm方式默认安装目录/etc/ckman
1.2 启动ckman
方式一:
/etc/ckman/bin/ckman

方式二:
systemctl start ckman
2. tar包方式
2.1 安装
根据个人需要解压到指定目录
tar -xzvf ckman-1.5.0-201216-6b03a3a.Linux.x86_64.tar.gz -C /opt
2.2 启动ckman
进入ckman的工作目录,执行:
cd /opt/ckman
bin/start
综上两种安装方式,ckman启动后,在浏览器输入 http://172.25.2.137:8808 跳出如下类似界面,说明启动成功:

默认账号:ckman
默认密码:Ckman123456!
但是需要注意的是,搭建promethues和nacos并不属于ckman程序自身的范畴。
3. ckman相关配置文件
ckman的配置文件在ckman 的工作目录下的conf/ckman.hjson。

二、安装部署node_exporter和prometheus
需要注意prometheus和node exporter版本匹配问题,node_exporter是用来监控clickhouse节点所在机器的一些系统指标的一款工具,因此需要安装在ck节点所在的机器,默认监听9100端口。
1.下载压缩包
代码如下(示例):
 cd /usr/local/src/
 wget https://github.com/prometheus/prometheus/releases/download/v2.4.2/prometheus-2.4.2.linux-amd64.tar.gz
 wget https://github.com/prometheus/alertmanager/releases/download/v0.15.2/alertmanager-0.15.2.linux-amd64.tar.gz
 wget https://github.com/prometheus/node_exporter/releases/download/v0.16.0/node_exporter-0.16.0.linux-amd64.tar.gz
2.安装Prometheus(一个节点)
创建 prometheus 用户。(用户需要在每台节点上都创建该用户。)
groupadd prometheus
useradd -g prometheus -m -d /var/lib/prometheus -s /sbin/nologin prometheus

解压安装
tar xf prometheus-2.4.2.linux-amd64.tar.gz -C /usr/local/
cd /usr/local/
mv prometheus-2.4.2.linux-amd64/ prometheus
创建启动脚本:
vim /usr/lib/systemd/system/prometheus.service
添加如下内容:

[Unit]
Description=prometheus
After=network.target
[Service]
Type=simple
User=prometheus
ExecStart=/usr/local/prometheus/prometheus --config.file=/usr/local/prometheus/prometheus.yml --storage.tsdb.path=/var/lib/prometheus --storage.tsdb.retention=15d --log.level=info
Restart=on-failure
[Install]
WantedBy=multi-user.target
配置 Prometheus 添加监控目标,前提是zookeeper已配置promethues的监控端口【可参考上一篇zookeeper部署】
cd /usr/local/prometheus
vim prometheus.yml
添加以下内容
# 新添加的对其它node节点抓取数据
  - job_name: 'node_exporter'
    #重写了全局抓取间隔时间,由15秒重写成5秒。
    scrape_interval: 5s
    static_configs:
    - targets: ['172.25.2.137:9100','172.25.2.138:9100','172.25.2.139:9100','172.25.2.140:9100','172.25.2.141:9100','172.25.2.145:9100']
# 新添加的对其它clickhouse节点抓取数据
  - job_name: 'clickhouse'
    #重写了全局抓取间隔时间,由15秒重写成5秒。
    scrape_interval: 5s
    static_configs:
    - targets: ['172.25.2.137:9363','172.25.2.138:9363','172.25.2.139:9363','172.25.2.140:9363','172.25.2.141:9363','172.25.2.145:9363']
# 新添加的对其它zookeeper节点抓取数据
  - job_name: 'zookeeper'
    #重写了全局抓取间隔时间,由15秒重写成5秒。
    scrape_interval: 5s
    static_configs:
    - targets: ['172.25.2.137:7070','172.25.2.138:7070','172.25.2.139:7070']
3.安装 node_exporter(每个节点)
node_exporter一般是用来监控系统性能指标的,因此一般是配置在各个节点上。
tar -zxvf node_exporter-0.16.0.linux-amd64.tar.gz -C /usr/local/
cd /usr/local/
mv node_exporter-0.16.0.linux-amd64/ node_exporter
chown -R prometheus:prometheus node_exporter/
创建 node_exporter 启动脚本:
vim /usr/lib/systemd/system/node_exporter.service

添加如下内容:

[Unit]
Description=node_export
Documentation=https://github.com/prometheus/node_exporter
After=network.target

[Service]
Type=simple
User=prometheus
ExecStart=/usr/local/node_exporter/node_exporter
Restart=on-failure
[Install]
WantedBy=multi-user.target
启动 node_exporter 服务:
 systemctl enable node_exporter.service
 systemctl start node_exporter.service
 systemctl status node_exporter.service
验证是否启动成功
ss -tnl | grep 9100
4.启动 Prometheus 服务(一个节点)
修改属主属组权限
cd /usr/local
chown -R prometheus:prometheus prometheus/
systemctl enable prometheus.service
systemctl start prometheus.service
systemctl status prometheus.service
注意:要留意启动之前的目录权限更改,否则可能会在启动的时候报错"Unable to create data directory" err=“mkdir data/: permission denied”。node_exporter和prometheus不一定要部署在同一台主机,在prometheus的配置文件中指定监控的node_exporter即可。
访问地址:http://172.25.2.137:9090/
三、ckman部署clickhouse
1.基于上面步骤配置prometheus及node_exporter,并已启动服务,重启ckman,登录
http://172.25.2.137:8808/

2.创建集群,配置clickhouse集群
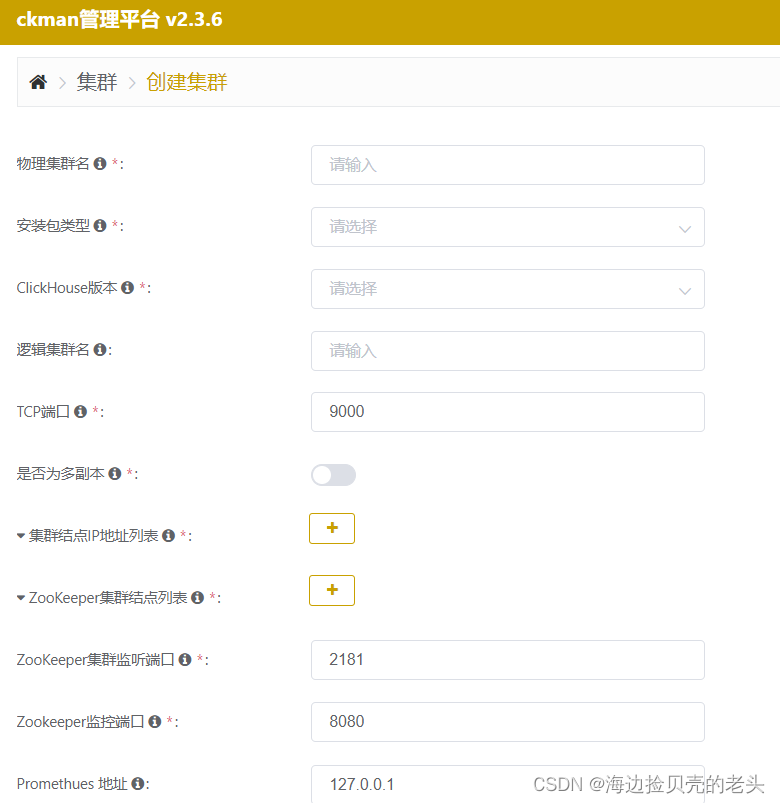
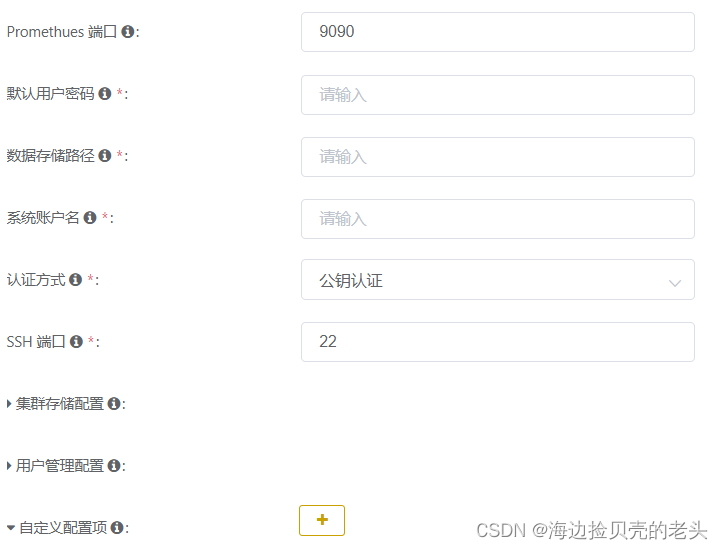
建议:认证方式使用密码认证(保存密码),确保服务器时间可以互相访问,建议之前部署ckman之前,服务器之间做免密。
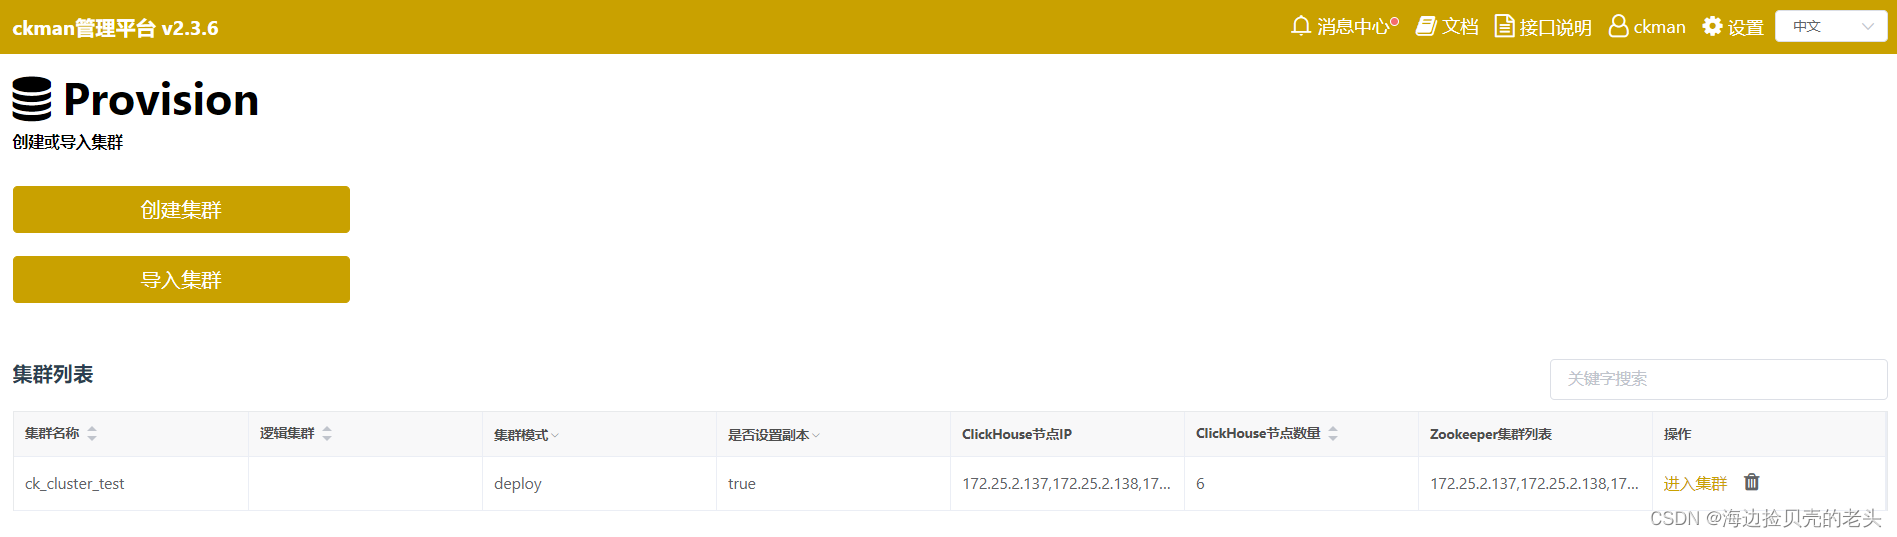
3.查看集群
SQL查询指标

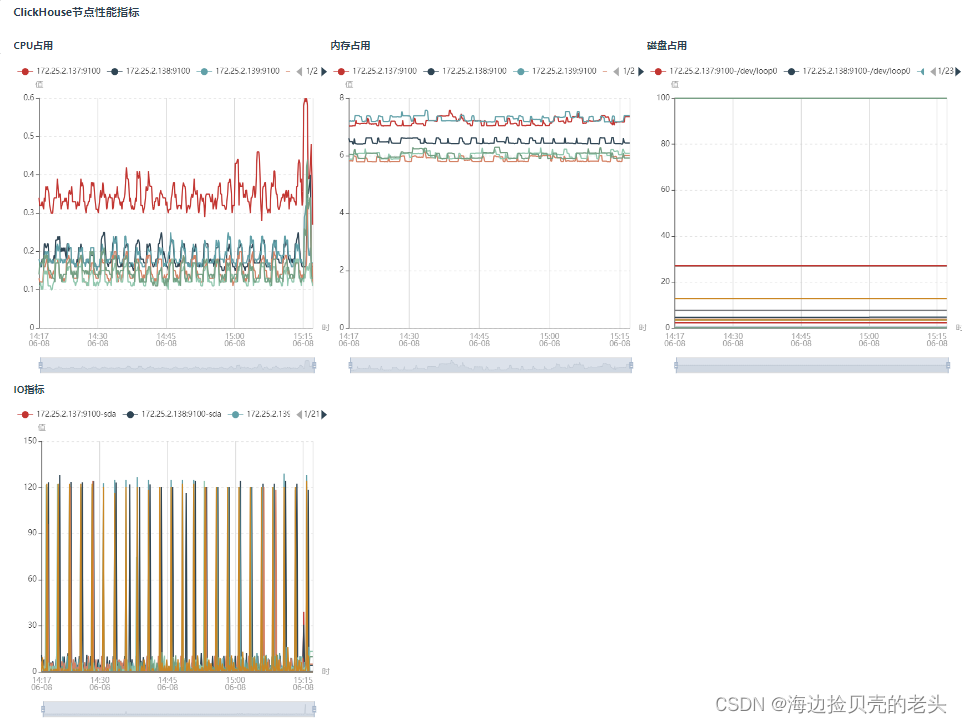
ClickHouse节点性能指标
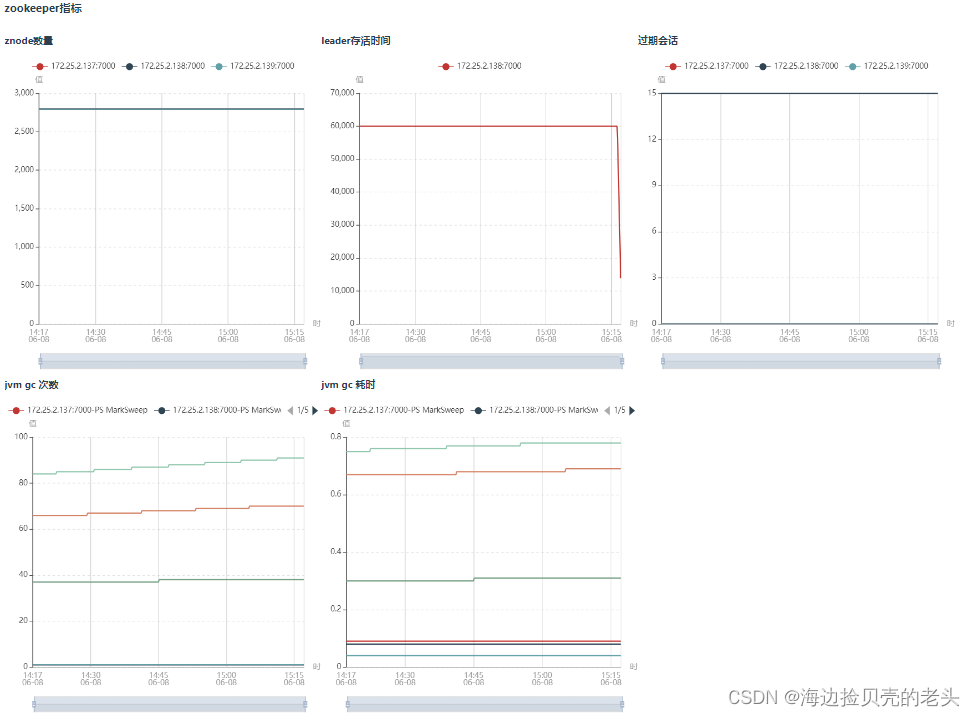
zookeeper指标
4.其他配置详见web端文档及接口文档

四、ckman部署clickhouse之集群存储配置
4.1 本地磁盘存储
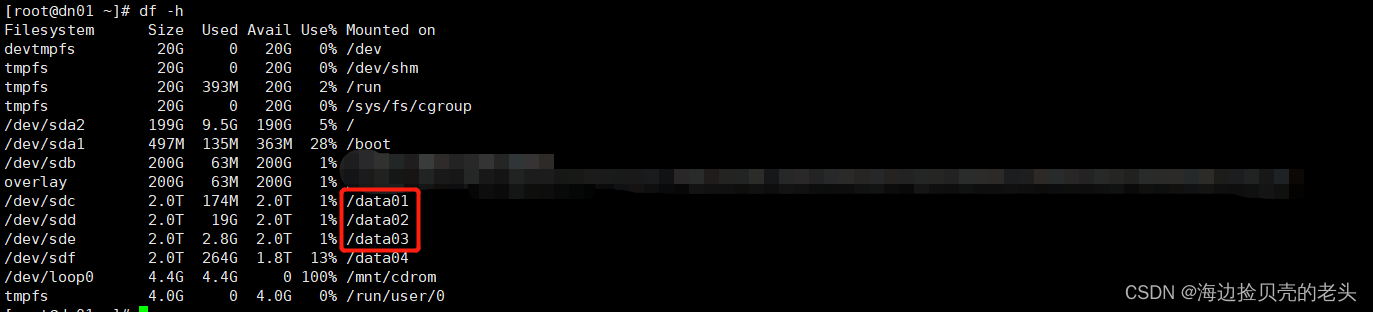
说明:3块本地磁盘,data01,data02,data03,其中data01作为默认default账户默认数据存储路径及元数据路径。为了表可以进行多路存储,故建表时,需要设置多路存储策略,或者后续对表进行alter操作以配置多路存储。必须对配置的硬盘进行属主属组权限修改。以/data02,data03举例说明,否则会报错:
<Error> void DB::SystemLog<DB::TraceLogElement>::flushImpl(const std::vector<LogElement> &, uint64_t) [LogElement = DB::TraceLogElement]: Code: 481, e.displayText() = DB::Exception:
  There is no RW access to the disk data02 (/data02/), Stack trace (when copying this message, always include the lines below):
修改挂载磁盘属主属组权限(所有clickhouse节点)
chown -R clickhouse:clickhouse /data02
chown -R clickhouse:clickhouse /data03
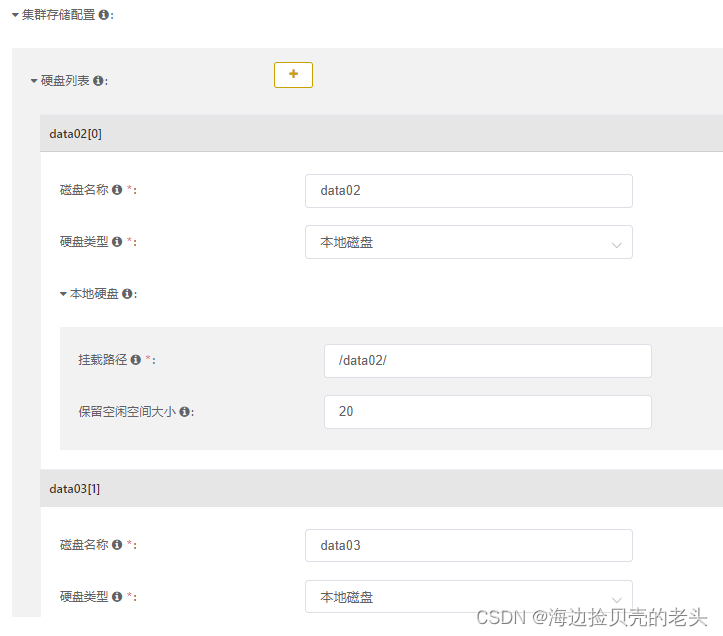
4.1.1 硬盘列表配置
磁盘名称:根据自己命名规则命令即可
硬盘类型:选择本地磁盘
本地硬盘-挂在路径:选择挂载磁盘实际路径
保留空闲空间大小:根据实际情况填写即可,个人感觉留有20g足矣
4.1.2 存储策略列表
根据实际情况配置,可以创建多个策略名称(一个策略名称下可以配置多个卷),该步骤配置的磁盘,对应步骤4.1.1的磁盘名称。

五、ckman部署clickhouse之用户管理配置(更新中…)
5.1 用户管理配置
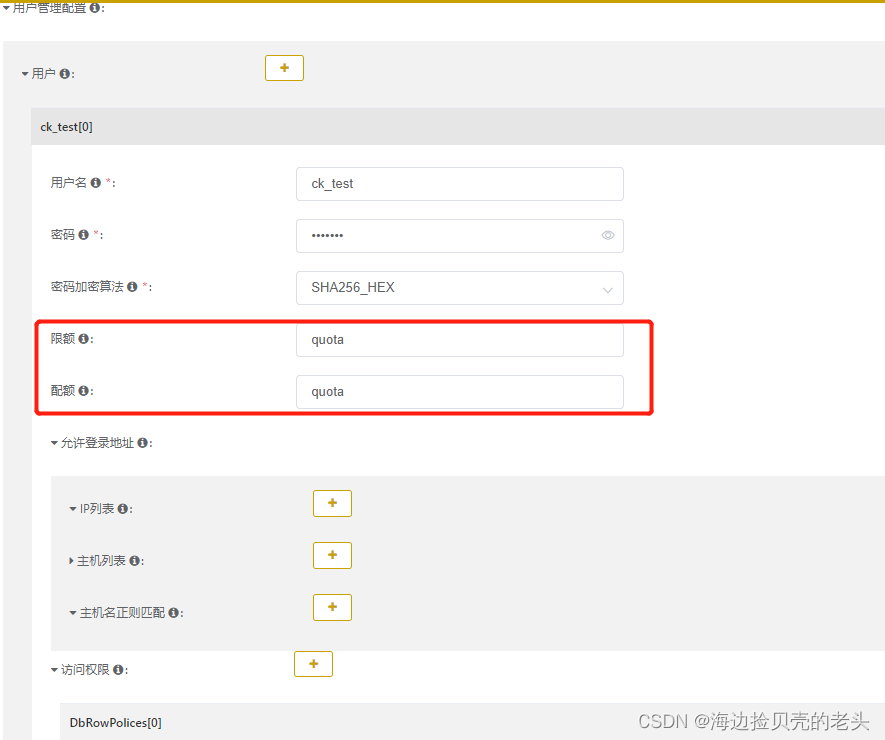
这里的【限额 】、【配额】要跟配置管理中的配置名称一致
5.2 配置管理
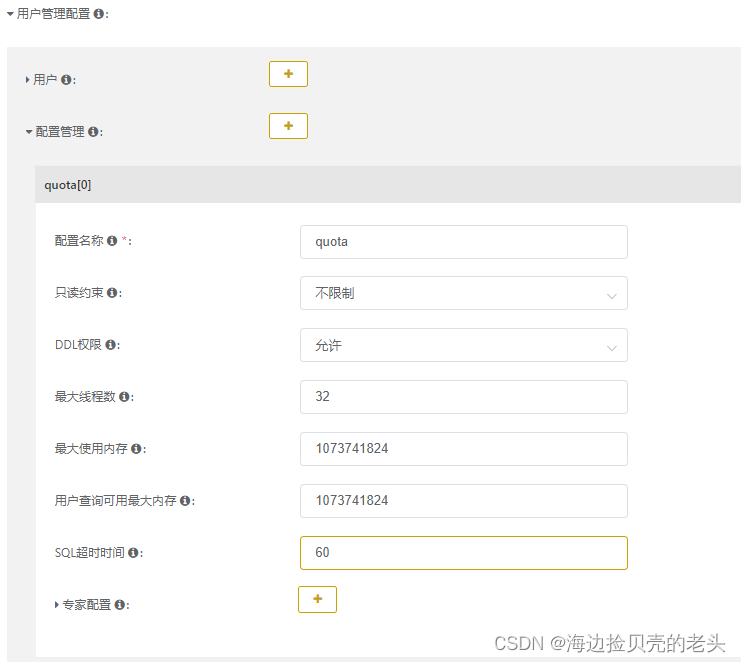
最大内存默认为单点服务器内存的50%,合理配置参数。
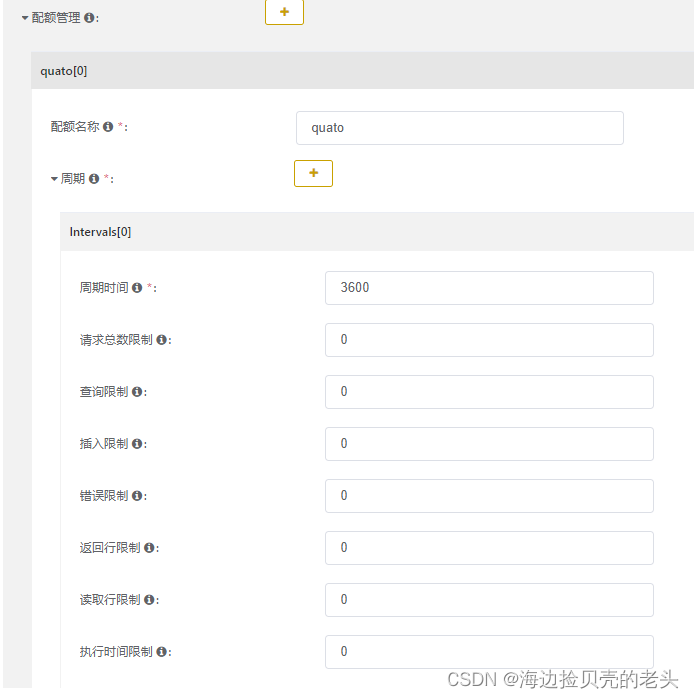
5.3 配额管理
5.4 用户高级配置

字段名称:用户高级配置
name: Expert
字段类型:map
默认值:无
是否必填:是
描述:自定义配置文件,语法接近xpath(https://www.w3schools.com/xml/xpath_syntax.asp); 举例:title[@lang=‘en’, @size=4]/header:header123, 最终生成的配置为:
六、ckman高可用配置(HA)
6.1 HA架构设计

6.2 配置文件(ckman.hjson,migrate.hjson)
修改…/ckman/conf/ckman.hjson,persistent_policy默认是local,改为mysql;打开persistent_config配置项。
port:ckman的监听端口,默认为8808
https: 是否监听https,默认为false
certfile: https的证书文件路径,如果开启了https,必须要有证书文件,默认使用conf下的server.crt,注意证书文件的路径ckman需要有访问权限
keyfile: https的key文件路径,如果开启了https,必须要有key文件,默认使用conf下的server.key,注意key文件的路径ckman需要有访问权限
pprof: 是否支持pprof监控,默认为true
session_timeout: 会话超时时间,如果超过该时间没有对ckman进行任何操作,则token失效,需要重新登录,默认超时时间为3600秒
public_key: 用来接入ckman的公钥,ckman可通过RSA配置公钥的方式跳过token鉴权,只需要在客户端对header配置userToken,并对userToken使用私钥加密,然后在ckman服务端使用该公钥进行解密即可。
swagger_enable: 是否开启swagger文档,默认不开启
task_interval: 执行异步运维动作的扫描时间间隔,前端请求部署、升级、销毁以及增删节点等比较耗时的操作时,ckman先记录状态,然后使用另外的协程异步扫描处理,异步扫描的时间间隔通过该参数可配,默认为5秒
persistant_policy: 持久化策略,主要用来存储集群的配置信息,包括集群配置、逻辑集群映射关系 、查询语句历史记录、运维操作状态等。
持久化策略支持local、mysql和postgres
local:存储到本地,在conf目录下生成一个clusters.json文件,不支持集群,为默认配置
mysql:持久化到mysql,支持ckman集群,支持HA,需要提前创建数据库,数据库编码为UTF-8,不需要创建表,ckman会自动创建数据库表
postgres:持久化到postgres,支持ckman集群,支持HA,需要提前创建数据库,并且需要提前创建数据库表。建表语句内置在dbscript/postgres.sql中。
除local策略外,其他持久化策略都依赖persistent_config中的配置项,当然local也可以配置该项。
persistent_config
mysql & postgres
mysql和postgres配置项基本一致,主要涉及以下配置项:

host: 连接数据库的ip地址
port: 连接数据库的端口号,如mysql默认为3306,postgres默认为5432
user: 连接数据库的用户
password: 连接数据库的密码,可选择是否加密,如果需要加密,可使用下面命令获得密码的密文 。
ckman --encrypt 123456
E310E892E56801CED9ED98AA177F18E6
如果数据库密码选择加密,请使用ENC()将密文包含起来,如:
password: ENC(E310E892E56801CED9ED98AA177F18E6)
database
需要连接的数据库,需提前创建,并且保证编码为UTF-8
local
format: 本地文件格式,支持JSON和yaml,默认为json
config_dir: 本地文件的目录,需要填写路径,默认为ckman工作路径的conf目录下
config_file: 本地文件的文件名,默认为clusters
vim …/ckman/conf/ckman.hjson
// ckman config file
// All password can be encrypt by ENC(xxxxxxxxx),
// you can get encrypt password by using: ./ckman --encrypt 123456 to get password like: E310E892E56801CED9ED98AA177F18E6
// If password not including by ENC(), that means it's a plaintext.
// hjson(https://hjson.github.io/)  is easy for humans to read and write.

{
  "server":{
    "port": 8808,
    "https": false,
    //certfile:
    //keyfile:
    "pprof": true,
    "session_timeout": 3600,
    "swagger_enable": true
    //support local, mysql, postgres
    "persistent_policy": "mysql",
    "task_interval": 5
    //public_key:
  },

  "log":{
    "level": "INFO",
    "max_count": 5,
    // megabyte
    "max_size": 10,
    // day
    "max_age": 10
  },

  // clickhouse connect pool options
  "clickhouse":{
    //sets the maximum number of open connections to the database
    "max_open_conns": 10,
    //sets the maximum number of connections in the idle
    "max_idle_conns": 2,
    //sets the maximum amount of time a connection may be idle.
    "conn_max_idle_time": 10
  },

  // cron job task
  "cron":{
    "sync_logic_schema": "0 * * * * ?",
    "watch_cluster_status": "0 */3 * * * ?",
    "sync_dist_schema": "30 */10 * * * ?"
  },

  "persistent_config":{
   // if peristent_policy is mysql, must config this
    "mysql":{
      "host": "XX.XX.XX.XX",
      "port": 3306,
      "user": "ckman",
      // you can use ./ckman --encrypt 123456 to get password like: E310E892E56801CED9ED98AA177F18E6
      "password": "ENC(XXX)",
      // database must be created before start ckman
      "database": "ckman_db"
    },
  //  "local":{
  //    "format": "json"
  //    "config_dir": "/etc/ckman/conf"
  //    "config_file": "clusters"
  //  }
  //},

  "nacos":{
    "enabled": false,
    "hosts":[
      "127.0.0.1"
    ],
    "port": 8848,
    "user_name": "nacos",
    // you can use './ckman --encrypt nacos' to get password like: A7561228101CB07938FAFF00C4444546
    "password": "ENC(XXXX)"
    //namespace:
  }
}
修改…/ckman/conf/migrate.hjson,调整mysql配置(password密码为非加密密码)
{
  "source": "local1",
  "target": "mysql",
  "persistent_config":{
    "local1":{
      "policy": "local",
      "config":{
        "format": ".json",
        "config_dir": "/etc/ckman/conf",
        "config_file": "clusters"
      }
    },
    "local2":{
      "policy": "local",
      "config":{
        "format": "yaml",
        "config_dir": "/etc/ckman/conf",
        "config_file": "clusters"
      }
    },
    "mysql":{
      "policy": "mysql",
      "config":{
        "host": "XX.XX.XX.XX",
        "port": 3306,
        "user": "ckman",
        "password": "XXXXXX",
        "database": "ckman_db"
      }
    }
  }
}
6.3 用migrate工具创建mysql相关库及表
创建mysql中对应的ckman的数据库ckman_db(根据自己的需求可以定义不同库名)
创建表,这里的报错可以忽略,执行完./migrate -config …/conf/migrate.hjson后,可以查看数据库对应的表是否已经创建
[root@dn01 bin]# ./migrate -config ../conf/migrate.hjson
2023-06-14T11:42:40.012+0800	ERROR	mysql/mysql.go:182	trace	{"error": "record not found", "elapsed": 0.000430275, "rows": 0, "sql": "SELECT * FROM `tbl_cluster` WHERE cluster_name = 'ck_cluster_test' AND `tbl_cluster`.`deleted_at` IS NULL ORDER BY `tbl_cluster`.`id` LIMIT 1"}
github.com/housepower/ckman/repository/mysql.(*MysqlPersistent).CreateCluster
	/root/chenyc/build/ckman/repository/mysql/mysql.go:182
main.Migrate
	/root/chenyc/build/ckman/cmd/migrate/migrate.go:130
main.main
	/root/chenyc/build/ckman/cmd/migrate/migrate.go:188
runtime.main
	/usr/local/go/src/runtime/proc.go:250
2023-06-14T11:42:40.021+0800	INFO	migrate/migrate.go:191	Form [local1] migrate to [mysql] success!
【表已创建】
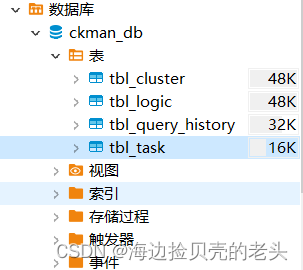
集群相关数据:

6.4 启动另外一个节点ckman服务
查看集群

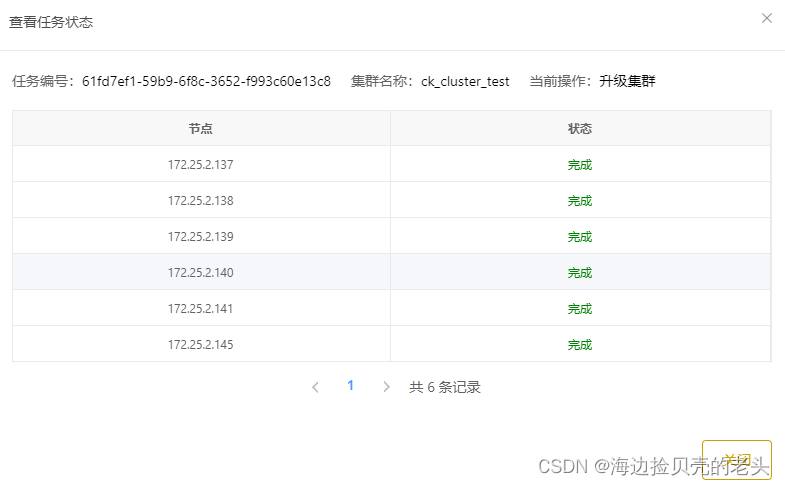
从另外一个节点升级集群,建议选择滚动升级

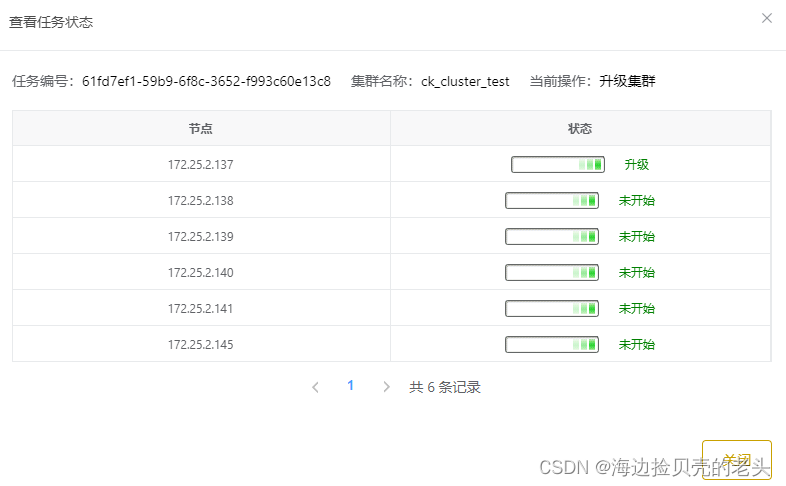

查看另外一个ckman服务节点的版本,升级成功!
总结
1.如果安装部署过程中有问题,及时查看日志
2.根据相关文档配置相应集群参数
3.根据实际情况可将clickhouse默认日志存储路径/var/log/clickhouse-server/clickhouse-server.log 改为自定义路径


 3315
3315


 被折叠的 条评论
为什么被折叠?
被折叠的 条评论
为什么被折叠?
 到【灌水乐园】发言


