


llama-2-7b模型下载
需要申请才能下载,参考如何在国内下载llama模型的思路,我申请了一个gmail邮箱,vpn挂澳大利亚,十分钟内通过了申请。
也可以直接下载hf版本
此外,迅雷云盘下载(来自中文大语言模型 Llama-2 7B(或13B) 本地化部署 (国内云服务器、GPU单卡16GB、中文模型、WEB页面TextUI、简单入门)):
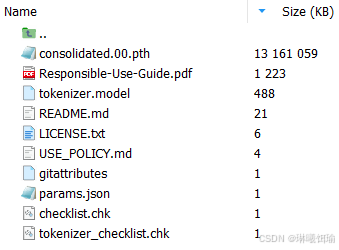
下载好的llama-2-7b文件包括:
转hf
在huggingface申请llama权限没能通过T T,拜托同学下了一个llama-2-7b模型,但是发现源代码使用不了,遂探索如何转为llama-2-7b-hf
参考下载 llama2-7b-hf 全流程【小白踩坑记录】的第一种方法
- 下载 convert_llama_weights_to_hf.py文件
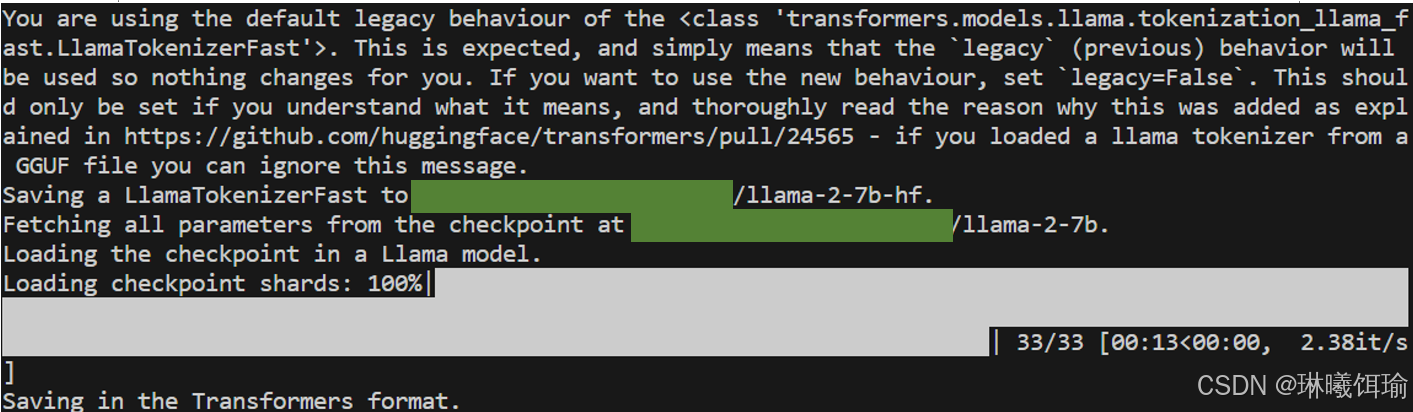
python convert_llama_weights_to_hf.py --input_dir llama-2-7b --output_dir llama-2-7b-hf --model_size 7B,其中llama-2-7b和llama-2-7b-hf分别是转换前后的文件夹路径。
遇见报错 ImportError:
LlamaConverter requires the protobuf library but it was not found in your environment. Checkout the instructions on the installation page of its repo: https://github.com/protocolbuffers/protobuf/tree/master/python#installation and follow the ones that match your environment. Please note that you may need to restart your runtime after installation.
解决:pip install protobuf==3.19.0

- 运行成功
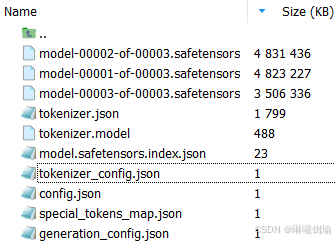
转换后的llama-2-7b-hf模型文件包括:
加载模型
from transformers import LlamaForCausalLM, LlamaTokenizer
self.base_tokenizer = LlamaTokenizer.from_pretrained(model_path)
self.base_model = LlamaForCausalLM.from_pretrained(model_path, device_map="auto", load_in_8bit=True)
报错与解决
SentencePiece library
报错
ImportError:
LlamaTokenizer requires the SentencePiece library but it was not found in your environment. Checkout the instructions on the installation page of its repo: https://github.com/google/sentencepiece#installation and follow the ones that match your environment. Please note that you may need to restart your runtime after installation.

解决
pip install SentencePiece
bitsandbytes
1.版本更新
报错
ImportError: Using `bitsandbytes` 8-bit quantization requires the latest version of bitsandbytes: `pip install -U bitsandbytes`
解决
pip install -U bitsandbytes
2.CUDA Setup failed despite GPU being available.
报错
/home/u2023141116/.conda/envs/seqxgpt_new/lib/python3.9/site-packages/bitsandbytes/cuda_setup/main.py:167: UserWarning: /home/u2023141116/.conda/envs/seqxgpt_new did not contain ['libcudart.so', 'libcudart.so.11.0', 'libcudart.so.12.0'] as expected! Searching further paths...
  warn(msg)
/home/u2023141116/.conda/envs/seqxgpt_new/lib/python3.9/site-packages/bitsandbytes/cuda_setup/main.py:167: UserWarning: Found duplicate ['libcudart.so', 'libcudart.so.11.0', 'libcudart.so.12.0'] files: {PosixPath('/home/u2023141116/cuda-11.3/lib64/libcudart.so.11.0'), PosixPath('/home/u2023141116/cuda-11.3/lib64/libcudart.so')}.. We select the PyTorch default libcudart.so, which is {torch.version.cuda},but this might missmatch with the CUDA version that is needed for bitsandbytes.To override this behavior set the BNB_CUDA_VERSION=<version string, e.g. 122> environmental variableFor example, if you want to use the CUDA version 122BNB_CUDA_VERSION=122 python ...OR set the environmental variable in your .bashrc: export BNB_CUDA_VERSION=122In the case of a manual override, make sure you set the LD_LIBRARY_PATH, e.g.export LD_LIBRARY_PATH=$LD_LIBRARY_PATH:/usr/local/cuda-11.2
  warn(msg)
/home/u2023141116/.conda/envs/seqxgpt_new/lib/python3.9/site-packages/bitsandbytes/cuda_setup/main.py:167: UserWarning: /home/u2023141116/cuda-11.3/extras/CUPTI/lib64:/home/u2023141116/cuda-11.3/lib64:/usr/local/nvidia/lib::/home/u2023141116/cuda-11.3/lib64 did not contain ['libcudart.so', 'libcudart.so.11.0', 'libcudart.so.12.0'] as expected! Searching further paths...
  warn(msg)
The following directories listed in your path were found to be non-existent: {PosixPath('() {  eval `/usr/bin/modulecmd bash $*`\n}')}
CUDA_SETUP: WARNING! libcudart.so not found in any environmental path. Searching in backup paths...
/home/u2023141116/.conda/envs/seqxgpt_new/lib/python3.9/site-packages/bitsandbytes/cuda_setup/main.py:167: UserWarning: Found duplicate ['libcudart.so', 'libcudart.so.11.0', 'libcudart.so.12.0'] files: {PosixPath('/usr/local/cuda/lib64/libcudart.so.11.0'), PosixPath('/usr/local/cuda/lib64/libcudart.so')}.. We select the PyTorch default libcudart.so, which is {torch.version.cuda},but this might missmatch with the CUDA version that is needed for bitsandbytes.To override this behavior set the BNB_CUDA_VERSION=<version string, e.g. 122> environmental variableFor example, if you want to use the CUDA version 122BNB_CUDA_VERSION=122 python ...OR set the environmental variable in your .bashrc: export BNB_CUDA_VERSION=122In the case of a manual override, make sure you set the LD_LIBRARY_PATH, e.g.export LD_LIBRARY_PATH=$LD_LIBRARY_PATH:/usr/local/cuda-11.2
  warn(msg)
DEBUG: Possible options found for libcudart.so: {PosixPath('/usr/local/cuda/lib64/libcudart.so.11.0'), PosixPath('/usr/local/cuda/lib64/libcudart.so')}
CUDA SETUP: PyTorch settings found: CUDA_VERSION=113, Highest Compute Capability: 8.0.
CUDA SETUP: To manually override the PyTorch CUDA version please see:https://github.com/TimDettmers/bitsandbytes/blob/main/how_to_use_nonpytorch_cuda.md
CUDA SETUP: Required library version not found: libbitsandbytes_cuda113.so. Maybe you need to compile it from source?
CUDA SETUP: Defaulting to libbitsandbytes_cpu.so...

================================================ERROR=====================================
CUDA SETUP: CUDA detection failed! Possible reasons:
1. You need to manually override the PyTorch CUDA version. Please see: "https://github.com/TimDettmers/bitsandbytes/blob/main/how_to_use_nonpytorch_cuda.md
2. CUDA driver not installed
3. CUDA not installed
4. You have multiple conflicting CUDA libraries
5. Required library not pre-compiled for this bitsandbytes release!
CUDA SETUP: If you compiled from source, try again with `make CUDA_VERSION=DETECTED_CUDA_VERSION` for example, `make CUDA_VERSION=113`.
CUDA SETUP: The CUDA version for the compile might depend on your conda install. Inspect CUDA version via `conda list | grep cuda`.
================================================================================

CUDA SETUP: Something unexpected happened. Please compile from source:
git clone https://github.com/TimDettmers/bitsandbytes.git
cd bitsandbytes
CUDA_VERSION=113 make cuda11x
python setup.py install
CUDA SETUP: Setup Failed!
RuntimeError: Failed to import transformers.integrations.bitsandbytes because of the following error (look up to see its traceback):

        CUDA Setup failed despite GPU being available. Please run the following command to get more information:

        python -m bitsandbytes

        Inspect the output of the command and see if you can locate CUDA libraries. You might need to add them
        to your LD_LIBRARY_PATH. If you suspect a bug, please take the information from python -m bitsandbytes
        and open an issue at: https://github.com/TimDettmers/bitsandbytes/issues
使用python -m bitsandbytes查看详细报错信息:
bin /home/u2023141116/.conda/envs/seqxgpt_new/lib/python3.9/site-packages/bitsandbytes/libbitsandbytes_cuda113.so
False
/home/u2023141116/.conda/envs/seqxgpt_new/lib/python3.9/site-packages/bitsandbytes/cuda_setup/main.py:149: UserWarning: /home/u2023141116/.conda/envs/seqxgpt_new did not contain ['libcudart.so', 'libcudart.so.11.0', 'libcudart.so.12.0'] as expected! Searching further paths...
  warn(msg)
CUDA SETUP: CUDA runtime path found: /home/u2023141116/cuda-11.3/lib64/libcudart.so.11.0
CUDA SETUP: Highest compute capability among GPUs detected: 8.0
CUDA SETUP: Detected CUDA version 113
CUDA SETUP: Loading binary /home/u2023141116/.conda/envs/seqxgpt_new/lib/python3.9/site-packages/bitsandbytes/libbitsandbytes_cuda113.so...
/lib64/libstdc++.so.6: version `CXXABI_1.3.9' not found (required by /home/u2023141116/.conda/envs/seqxgpt_new/lib/python3.9/site-packages/bitsandbytes/libbitsandbytes_cuda113.so)
CUDA SETUP: Something unexpected happened. Please compile from source:
git clone git@github.com:TimDettmers/bitsandbytes.git
cd bitsandbytes
CUDA_VERSION=113 make cuda11x
python setup.py install
解决
报错信息中比较重要的是
/lib64/libstdc++.so.6: version `CXXABI_1.3.9' not found (required by /home/u2023141116/.conda/envs/seqxgpt_new/lib/python3.9/site-packages/bitsandbytes/libbitsandbytes_cuda113.so)
尝试降低版本
bitsandbytes==0.39.0解决失败(参考deepspeed 或 bitsandbytes 遇到CUDA Setup failed despite GPU being available.)
通过添加环境变量成功(参考Potential issue with GNU C++ Library)
- 找到
libstdc++.so.6的对应路径
sudo find / -name "libstdc++.so.6*"
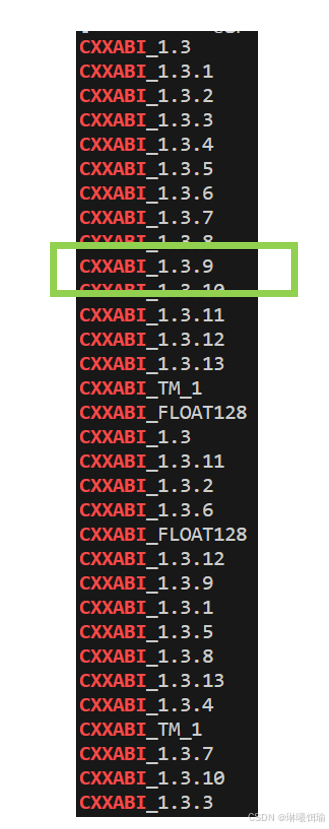
- 验证文件是否支持对应的版本,会出现很多CXXABI版本,找到和上述报错对应的那个。
strings /anaconda/envs/py38/lib/libstdc++.so.6 | grep CXXABI
- 添加环境变量
vim ~/.bashrc
在最后一行加入(PATH替换成第一步找到的路径)
export LD_LIBRARY_PATH=$LD_LIBRARY_PATH:/anaconda/envs/py38/lib/
激活
source ~/.bashrc
3.‘LlamaTokenizerFast’ object has no attribute ‘sp_model’
报错
AttributeError: 'LlamaTokenizerFast' object has no attribute 'sp_model'
解决
尝试降低transformers版本(原4.44.2)的方式无法解决
- 4.33.2(参考[linux] ‘LlamaTokenizer‘ object has no attribute ‘sp_model‘)
- 4.30.2
搜索发现
LlamaTokenizerFast现在还没有这个属性,遂不使用此tokenizer。(参考AttributeError: ‘LlamaTokenizerFast’ object has no attribute ‘sp_model’)
将代码中的AutoTokenizer和AutoModelForCausalLM固定为LlamaTokenizer和LlamaForCausalLM。
文本生成
from transformers import AutoModelForCausalLM, AutoTokenizer
import torch

# 加载Llama-2-7b模型和分词器
model_name = "model/llama-2-7b-hf"  # 确保这是正确的模型名称
tokenizer = AutoTokenizer.from_pretrained(model_name)
model = AutoModelForCausalLM.from_pretrained(model_name)

# 移动模型到GPU(如果可用)
device = torch.device("cuda" if torch.cuda.is_available() else "cpu")
model.to(device)

# 定义输入文本
input_text = "What is cat?"

# 将输入文本编码为模型输入
input_ids = tokenizer.encode(input_text, return_tensors="pt").to(device)

# 生成文本(定义生成的最大长度)
max_length = 500
output = model.generate(input_ids, max_length=max_length, num_return_sequences=1)

# 解码生成的文本
generated_text = tokenizer.decode(output[0], skip_special_tokens=True)

print(generated_text)


 5029
5029

 被折叠的 条评论
为什么被折叠?
被折叠的 条评论
为什么被折叠?
 到【灌水乐园】发言


