


我们的目标:
能够掌握轮廓查找与绘制的方法
能够掌握轮廓面积及长度的计算方法
能够编程实现形状匹配
能够掌握轮廓的几何形状拟合方法
任务一 凸包绘制
案例一 获取凸包
import cv2
# 读取图片并转至灰度模式
img = cv2.imread('contours2.png', 1)
gray = cv2.cvtColor(img, cv2.COLOR_BGR2GRAY)
# 二值化
ret, binary = cv2.threshold(gray, 127, 255, cv2.THRESH_BINARY)
# 图片轮廓
contours, hierarchy = cv2.findContours(binary,cv2.RETR_LIST,cv2.CHAIN_APPROX_NONE)
cnt = contours[0]
# 寻找凸包并绘制凸包(轮廓)
hull = cv2.convexHull(cnt)
cv2.polylines(img,[hull],True,(255,0,0),2)
# 显示图片
cv2.imshow('line', img)
cv2.waitKey()
cv2.destroyAllWindows()
练习:实物凸包检测
import cv2
# 读取图片并转至灰度模式
img = cv2.imread('hand.png', 1)
gray = cv2.cvtColor(img, cv2.COLOR_BGR2GRAY)
# 二值化
ret, binary = cv2.threshold(gray, 60, 255, cv2.THRESH_BINARY)
# 图片轮廓
contours, hierarchy = cv2.findContours(binary,cv2.RETR_LIST,cv2.CHAIN_APPROX_NONE)
n=len(contours) #轮廓个数
contoursImg=[]
x=0 #初始化要绘制的轮廓索引
for i in range(n):
area = cv2.contourArea(contours[i])
if area>10000:
print(f"轮廓{i}的面积:\n{area}")
x=i
cnt = contours[x]
cv2.imshow("binary",binary)
#寻找凸包并绘制凸包(轮廓)
hull = cv2.convexHull(cnt)
cv2.polylines(img,[hull],True,(0,255,0),2)
cv2.drawContours(img,contours,x,(0,0,255), 3)
# 显示图片
cv2.imshow('line', img)
cv2.waitKey(0)
cv2.destroyAllWindows()
任务二 凸缺陷检测
案例二:凸缺陷
import cv2
o = cv2.imread('contours2.png')
gray = cv2.cvtColor(o,cv2.COLOR_BGR2GRAY)
ret, binary = cv2.threshold(gray,127,255,cv2.THRESH_BINARY)
contours, hierarchy = cv2.findContours(binary,cv2.RETR_TREE,cv2.CHAIN_APPROX_SIMPLE)cnt = contours[0]
hull = cv2.convexHull(cnt,returnPoints = False)
defects = cv2.convexityDefects(cnt,hull)for i in range(defects.shape[0]):
s,e,f,d = defects[i,0]
start = tuple(cnt[s][0]) # 得到的是索引,要再轮廓中选出来
end = tuple(cnt[e][0])
far = tuple(cnt[f][0])
cv2.line(o,start,end,[0,0,255],2)
cv2.circle(o,far,5,[255,0,0],-1)cv2.imshow('result',o)
cv2.waitKey(0)
cv2.destroyAllWindows()
任务三 轮廓常见特征值
案例一:宽高比
import cv2
o = cv2.imread('binaryhand.png')
cv2.imshow("original",o)
gray = cv2.cvtColor(o,cv2.COLOR_BGR2GRAY)
ret, binary = cv2.threshold(gray,127,255,cv2.THRESH_BINARY)
contours, hierarchy = cv2.findContours(binary,cv2.RETR_LIST,cv2.CHAIN_APPROX_SIMPLE)
x,y,w,h = cv2.boundingRect(contours[0])
cv2.rectangle(o,(x,y),(x+w,y+h),(255,255,255),3)
aspectRatio = float(w)/h
print(aspectRatio)
cv2.imshow("result",o)
cv2.waitKey()
cv2.destroyAllWindows()
案例二:Extend
import cv2
o = cv2.imread('binaryhand.png')
cv2.imshow("original",o)
gray = cv2.cvtColor(o,cv2.COLOR_BGR2GRAY)
ret, binary = cv2.threshold(gray,127,255,cv2.THRESH_BINARY)
contours, hierarchy = cv2.findContours(binary,cv2.RETR_LIST,cv2.CHAIN_APPROX_SIMPLE)
x,y,w,h = cv2.boundingRect(contours[0])
cv2.drawContours(o,contours[0],-1,(0,0,255),3)
cv2.rectangle(o,(x,y),(x+w,y+h),(255,0,0),3)
rectArea=w*h
cntArea=cv2.contourArea(contours[0])
extend=float(cntArea)/rectArea
print(extend)
cv2.imshow("result",o)
cv2.waitKey()
cv2.destroyAllWindows()
案例三:最大值和最小值及它们的位置
import cv2
import numpy as np
o = cv2.imread('ct2.jpg')
cv2.imshow("original",o)
gray = cv2.cvtColor(o,cv2.COLOR_BGR2GRAY)
ret, binary = cv2.threshold(gray,127,255,cv2.THRESH_BINARY)
contours, hierarchy = cv2.findContours(binary,
cv2.RETR_LIST,
cv2.CHAIN_APPROX_SIMPLE)
cnt=contours[3] #coutours[0]、coutours[1]是左侧字母R
#--------使用掩膜获取感兴趣区域的最值-----------------
#需要注意minMaxLoc处理的对象为灰度图像,本例中处理对象为灰度图像gray
#如果希望获取彩色图像的,需要提取各个通道,将每个通道独立计算最值
mask = np.zeros(gray.shape,np.uint8)
mask=cv2.drawContours(mask,[cnt],-1,255,-1)
minVal, maxVal, minLoc, maxLoc = cv2.minMaxLoc(gray,mask = mask)
print("minVal=",minVal)
print("maxVal=",maxVal)
print("minLoc=",minLoc)
print("maxLoc=",maxLoc)
#--------使用掩膜获取感兴趣区域并显示-----------------
masko = np.zeros(o.shape,np.uint8)
masko=cv2.drawContours(masko,[cnt],-1,(255,255,255),-1)
loc=cv2.bitwise_and(o,masko)
cv2.imshow("mask",loc)
#显示灰度结果
#loc=cv2.bitwise_and(gray,mask)
#cv2.imshow("mask",loc)
#--------释放窗口-----------------
cv2.waitKey()
cv2.destroyAllWindows()
案例四:平均颜色及平均灰度
meanVal = cv2.mean(o,mask = mask) #mask是区域,所以必须是单通道的
print("meanVal=\n",meanVal)
任务四 实践:轮廓特征值的应用场景

案例:分类1
import cv2
import numpy as np
img = cv2.imread('face.png')
cv2.imshow("original",img)
gray = cv2.cvtColor(img,cv2.COLOR_BGR2GRAY)
ret, binary = cv2.threshold(gray,0,255,cv2.THRESH_BINARY)
contours, hierarchy = cv2.findContours(binary,cv2.RETR_LIST,cv2.CHAIN_APPROX_SIMPLE)
h,w,c=img.shape
mask = np.zeros((h,w,c),np.uint8)
for cnt in contours:
x,y,w,h = cv2.boundingRect(cnt)
cv2.rectangle(img,(x,y),(x+w,y+h),(255,255,255),3)
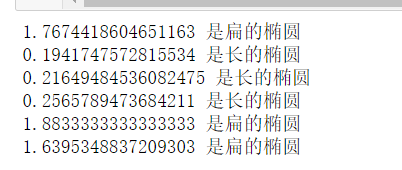
ratio = float(w)/h
if ratio<1:
cv2.drawContours(mask,[cnt],-1,(0,0,255), -1)
#n+=1
print(ratio,"是长的椭圆")
else:
cv2.drawContours(mask,[cnt],-1,(0,255,255), -1)
#n+=1
print(ratio,"是扁的椭圆")
cv2.imshow("result",mask)
cv2.waitKey()
cv2.destroyAllWindows()
案例:分类2
import cv2
import numpy as np
img = cv2.imread('face.png')
cv2.imshow("original",img)
gray = cv2.cvtColor(img,cv2.COLOR_BGR2GRAY)
ret, binary = cv2.threshold(gray,0,255,cv2.THRESH_BINARY)
contours, hierarchy = cv2.findContours(binary,cv2.RETR_LIST,cv2.CHAIN_APPROX_SIMPLE)
h,w,c=img.shape
mask = np.zeros((h,w,c),np.uint8)for cnt in contours:
x,y,w,h = cv2.boundingRect(cnt)
cv2.rectangle(img,(x,y),(x+w,y+h),(255,255,255),3)
ratio = float(w)/h
rectArea=w*h
cntArea=cv2.contourArea(contours[0])
extend=float(cntArea)/rectArea
print(extend)
if ratio<1:
cv2.drawContours(mask,[cnt],-1,(0,0,255), -1)
print(ratio,"是长的椭圆")
else:
cv2.drawContours(mask,[cnt],-1,(0,255,255), -1)
print(ratio,"是扁的椭圆")
if extend==0.9818696450428397:
cv2.drawContours(mask,[cnt],-1,(255,0,255), -1)
cv2.imshow("result",mask)
cv2.waitKey()
cv2.destroyAllWindows()

我们下次见拜拜!


 4万+
4万+


 被折叠的 条评论
为什么被折叠?
被折叠的 条评论
为什么被折叠?
 到【灌水乐园】发言


