


基于TensorFlow+OpenCV的焊缝识别
焊缝识别
原GitHub项目 跑通后进行了优化和进度显示
资源:
download.csdn.net/download/weixin_53403301/85244581
训练部分代码:
import numpy as np
import cv2
import os
import random
import tensorflow as tf

h,w = 512,512

def create_model():

    inputs = tf.keras.layers.Input(shape=(h,w,3))

    conv1 = tf.keras.layers.Conv2D(16,(3,3),activation='relu',padding='same')(inputs)
    pool1 = tf.keras.layers.MaxPool2D()(conv1)

    conv2 = tf.keras.layers.Conv2D(32,(3,3),activation='relu',padding='same')(pool1)
    pool2 = tf.keras.layers.MaxPool2D()(conv2)

    conv3 = tf.keras.layers.Conv2D(64,(3,3),activation='relu',padding='same')(pool2)
    pool3 = tf.keras.layers.MaxPool2D()(conv3)

    conv4 = tf.keras.layers.Conv2D(64,(3,3),activation='relu',padding='same')(pool3)

    upsm5 = tf.keras.layers.UpSampling2D()(conv4)
    upad5 = tf.keras.layers.Add()([conv3,upsm5])
    conv5 = tf.keras.layers.Conv2D(32,(3,3),activation='relu',padding='same')(upad5)

    upsm6 = tf.keras.layers.UpSampling2D()(conv5)
    upad6 = tf.keras.layers.Add()([conv2,upsm6])
    conv6 = tf.keras.layers.Conv2D(16,(3,3),activation='relu',padding='same')(upad6)

    upsm7 = tf.keras.layers.UpSampling2D()(conv6)
    upad7 = tf.keras.layers.Add()([conv1,upsm7])
    conv7 = tf.keras.layers.Conv2D(1,(3,3),activation='relu',padding='same')(upad7)

    model = tf.keras.models.Model(inputs=inputs, outputs=conv7)

    return model

images = []
labels = []

files = os.listdir('./dataset/images/')
random.shuffle(files)

for f in files:
    img = cv2.imread('./dataset/images/' + f)
    parts = f.split('_')
    label_name = './dataset/labels/' + 'W0002_' + parts[1]
    label = cv2.imread(label_name,2)

    img = cv2.resize(img,(w,h))
    label = cv2.resize(label,(w,h))

    images.append(img)
    labels.append(label)

images = np.array(images)
labels = np.array(labels)
labels = np.reshape(labels,
    (labels.shape[0],labels.shape[1],labels.shape[2],1))

print(images.shape)
print(labels.shape)

images = images/255
labels = labels/255

model = tf.keras.models.load_model('my_model')

model = create_model()  # uncomment this to create a new model
print(model.summary())

model.compile(optimizer='adam', loss='binary_crossentropy',metrics=['accuracy'])
model.fit(images,labels,epochs=100,batch_size=10)
model.evaluate(images,labels)

model.save('my_model')
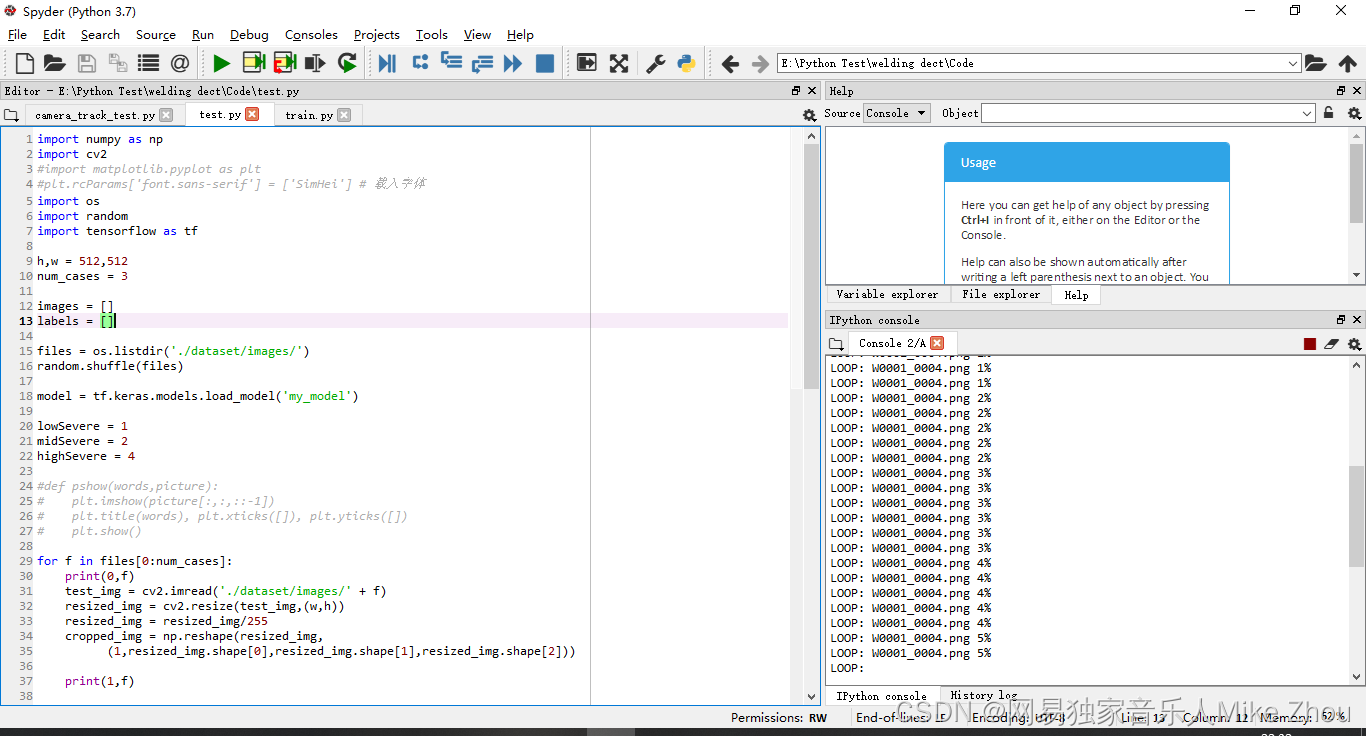
识别及标定代码:
import numpy as np
import cv2
#import matplotlib.pyplot as plt
#plt.rcParams['font.sans-serif'] = ['SimHei'] # 载入字体
import os
import random
import tensorflow as tf

h,w = 512,512
num_cases = 3

images = []
labels = []

files = os.listdir('./dataset/images/')
random.shuffle(files)

model = tf.keras.models.load_model('my_model')

lowSevere = 1
midSevere = 2
highSevere = 4

#def pshow(words,picture):
#    plt.imshow(picture[:,:,::-1])
#    plt.title(words), plt.xticks([]), plt.yticks([])
#    plt.show()

for f in files[0:num_cases]:
    print(0,f)
    test_img = cv2.imread('./dataset/images/' + f)
    resized_img = cv2.resize(test_img,(w,h))
    resized_img = resized_img/255
    cropped_img = np.reshape(resized_img,
          (1,resized_img.shape[0],resized_img.shape[1],resized_img.shape[2]))

    print(1,f)

    test_out = model.predict(cropped_img)

    test_out = test_out[0,:,:,0]*1000
    test_out = np.clip(test_out,0,255)

    resized_test_out = cv2.resize(test_out,(test_img.shape[1],test_img.shape[0]))
    resized_test_out = resized_test_out.astype(np.uint16)

    test_img = test_img.astype(np.uint16)

    grey = cv2.cvtColor(test_img, cv2.COLOR_BGR2GRAY)

    print("LOOP:",f)
    img_len = test_img.shape[0]
    print(img_len)
    for i in range(img_len):
        print("LOOP:",f,str(int(i/img_len*100))+"%")
        for j in range(test_img.shape[1]):
            if(grey[i,j]>150 & resized_test_out[i,j]>40):
                test_img[i,j,1]=test_img[i,j,1] + resized_test_out[i,j]
                resized_test_out[i,j] = lowSevere
            elif(grey[i,j]<100 & resized_test_out[i,j]>40):
                test_img[i,j,2]=test_img[i,j,2] + resized_test_out[i,j]
                resized_test_out[i,j] = highSevere
            elif(resized_test_out[i,j]>40):
                test_img[i,j,0]=test_img[i,j,0] + resized_test_out[i,j]
                resized_test_out[i,j] = midSevere
            else:
                resized_test_out[i,j] = 0

    print("END_LOOP:",f)
    M = cv2.moments(resized_test_out)
    maxMomentArea = resized_test_out.shape[1]*resized_test_out.shape[0]*highSevere
    print("0th Moment = " , (M["m00"]*100/maxMomentArea), "%")

    test_img = np.clip(test_img,0,255)

    test_img = test_img.astype(np.uint8)

#    pshow(str(f),test_img)
#    cv2.imshow(str(f),test_img)
    cv2.imwrite('./save/end_'+f,test_img)
#    cv2.waitKey(0)
训练进度显示:
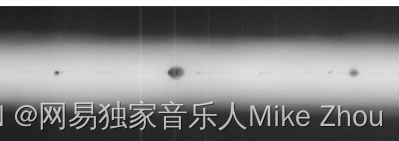
检测图

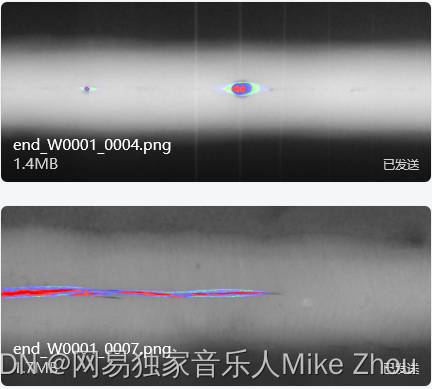
识别结果
附录:列表的赋值类型和py打包
列表赋值
BUG复现
闲来无事写了个小程序 代码如下:
# -*- coding: utf-8 -*-
"""
Created on Fri Nov 19 19:47:01 2021

@author: 16016
"""

a_list = ['0','1','2','3','4','5','6','7','8','9','10','11','12','13','14','15']
#print(len(a_list))
#b_list = ['','','','','','','','','','','','','','','','']
c_list = [[],[],[],[],[],[],[],[],[],[],[],[],[],[],[],[]]
#for i in range(16):
if len(a_list):
    for j in range(16):
        a_list[j]=str(a_list[j])+'_'+str(j)
        print("序号:",j)
        print('a_list:\n',a_list)


        c_list[j]=a_list
        print('c_list[0]:\n',c_list[0])
        print('\n')
#        b_list[j]=a_list[7],a_list[8]
#        print(b_list[j])
        # 写入到Excel:
#print(c_list,'\n')
我在程序中 做了一个16次的for循环 把列表a的每个值后面依次加上"_"和循环序号
比如循环第x次 就是把第x位加上_x 这一位变成x_x 我在输出测试中 列表a的每一次输出也是对的
循环16次后列表a应该变成[‘0_0’, ‘1_1’, ‘2_2’, ‘3_3’, ‘4_4’, ‘5_5’, ‘6_6’, ‘7_7’, ‘8_8’, ‘9_9’, ‘10_10’, ‘11_11’, ‘12_12’, ‘13_13’, ‘14_14’, ‘15_15’] 这也是对的
同时 我将每一次循环时列表a的值 写入到空列表c中 比如第x次循环 就是把更改以后的列表a的值 写入到列表c的第x位
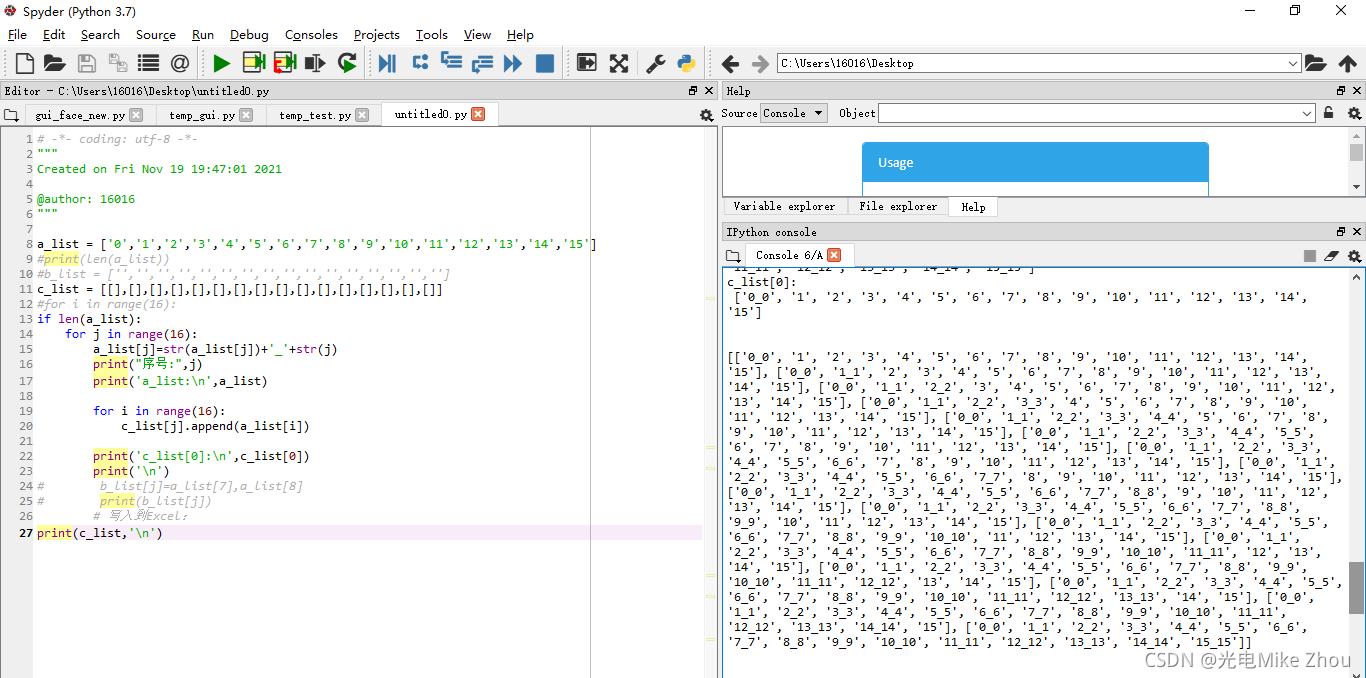
第0次循环后 c[0]的值应该是[‘0_0’, ‘1’, ‘2’, ‘3’, ‘4’, ‘5’, ‘6’, ‘7’, ‘8’, ‘9’, ‘10’, ‘11’, ‘12’, ‘13’, ‘14’, ‘15’] 这也是对的
但是在第1次循环以后 c[0]的值就一直在变 变成了c[x]的值
相当于把c_list[0]变成了c_list[1]…以此类推 最后得出的列表c的值也是每一项完全一样
我不明白这是怎么回事
我的c[0]只在第0次循环时被赋值了 但是后面它的值跟着在改变
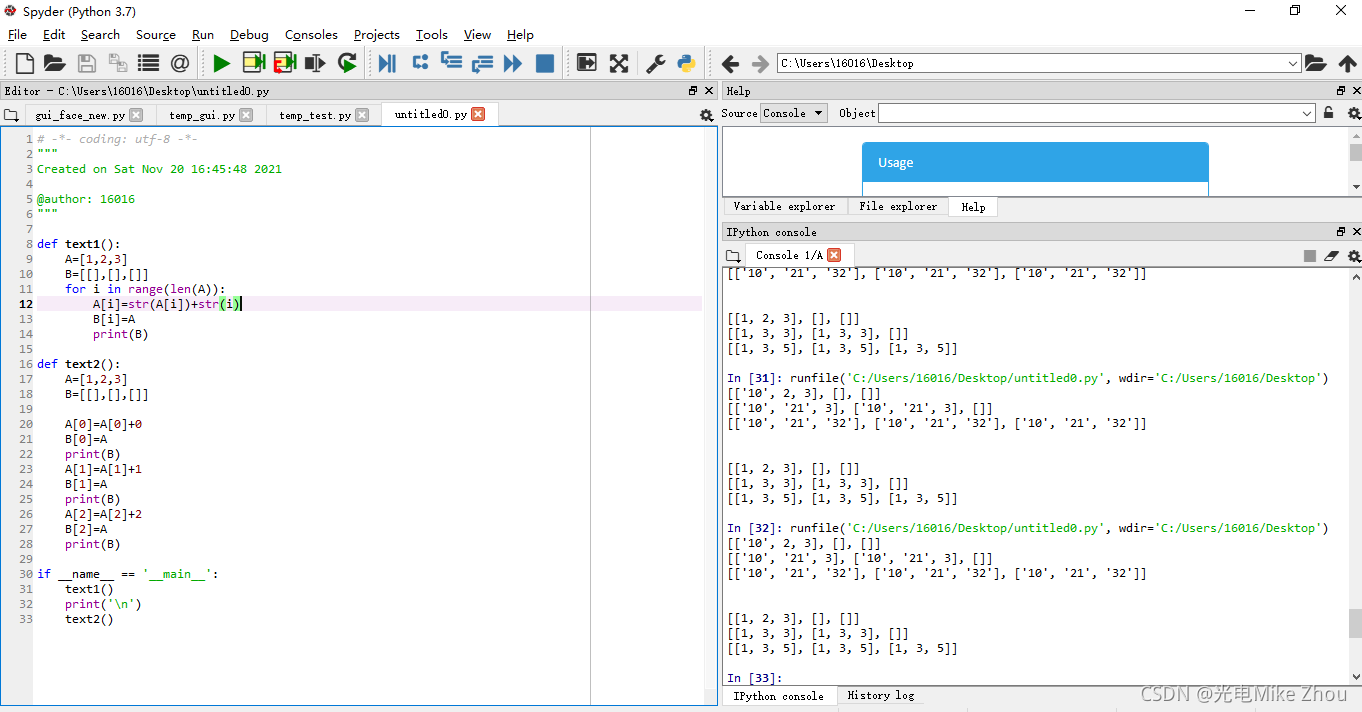
如图:
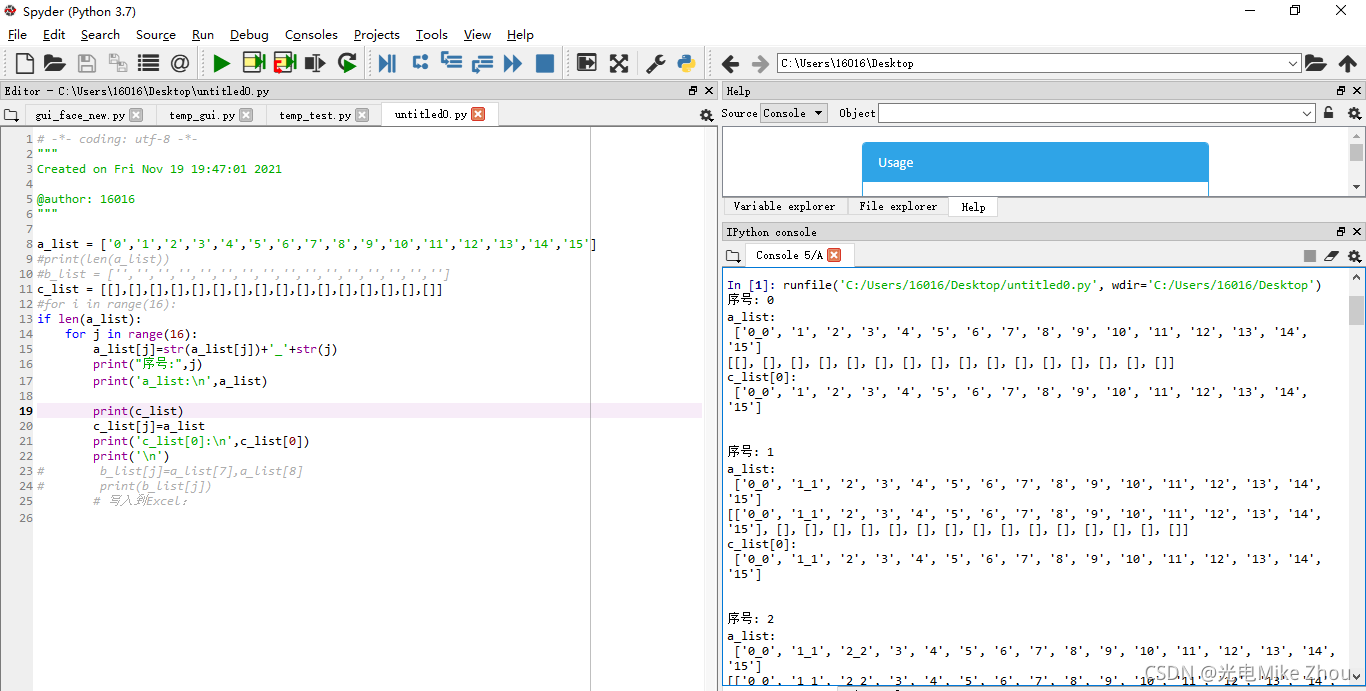
第一次老出bug 赋值以后 每次循环都改变c[0]的值 搞了半天都没搞出来
无论是用appen函数添加 还是用二维数组定义 或者增加第三个空数组来过渡 都无法解决
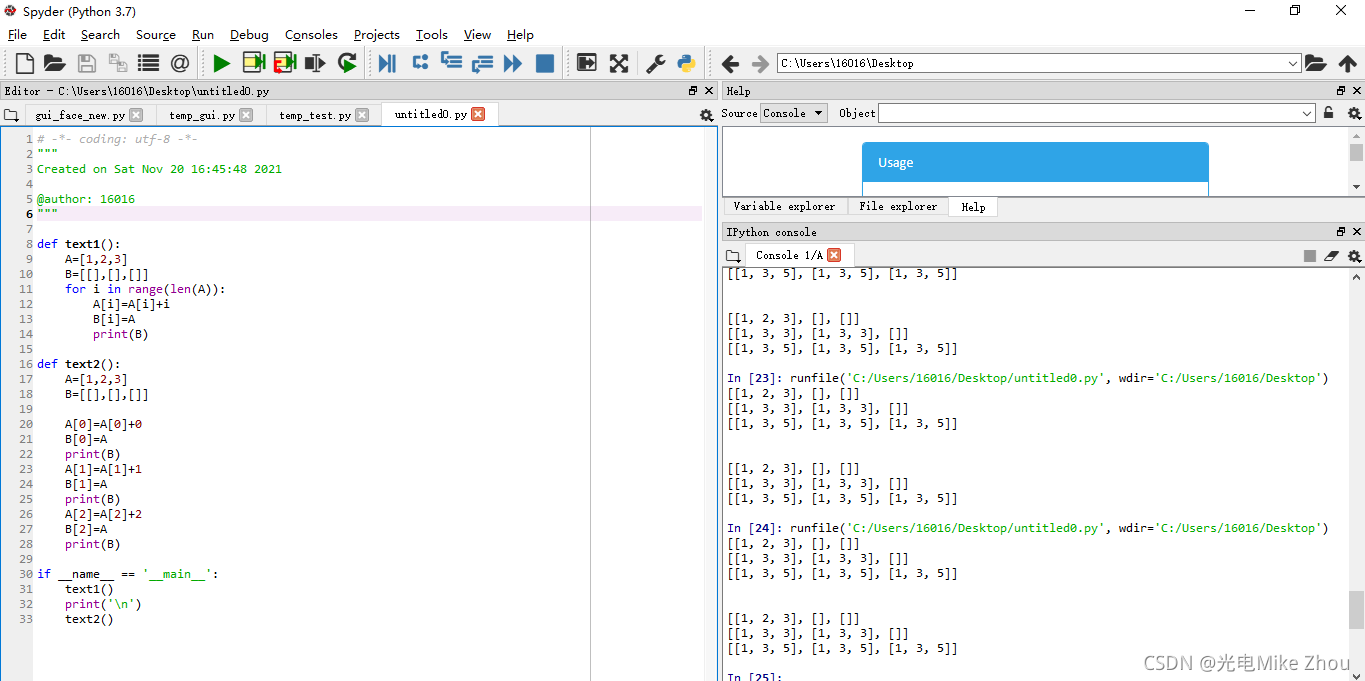
代码改进
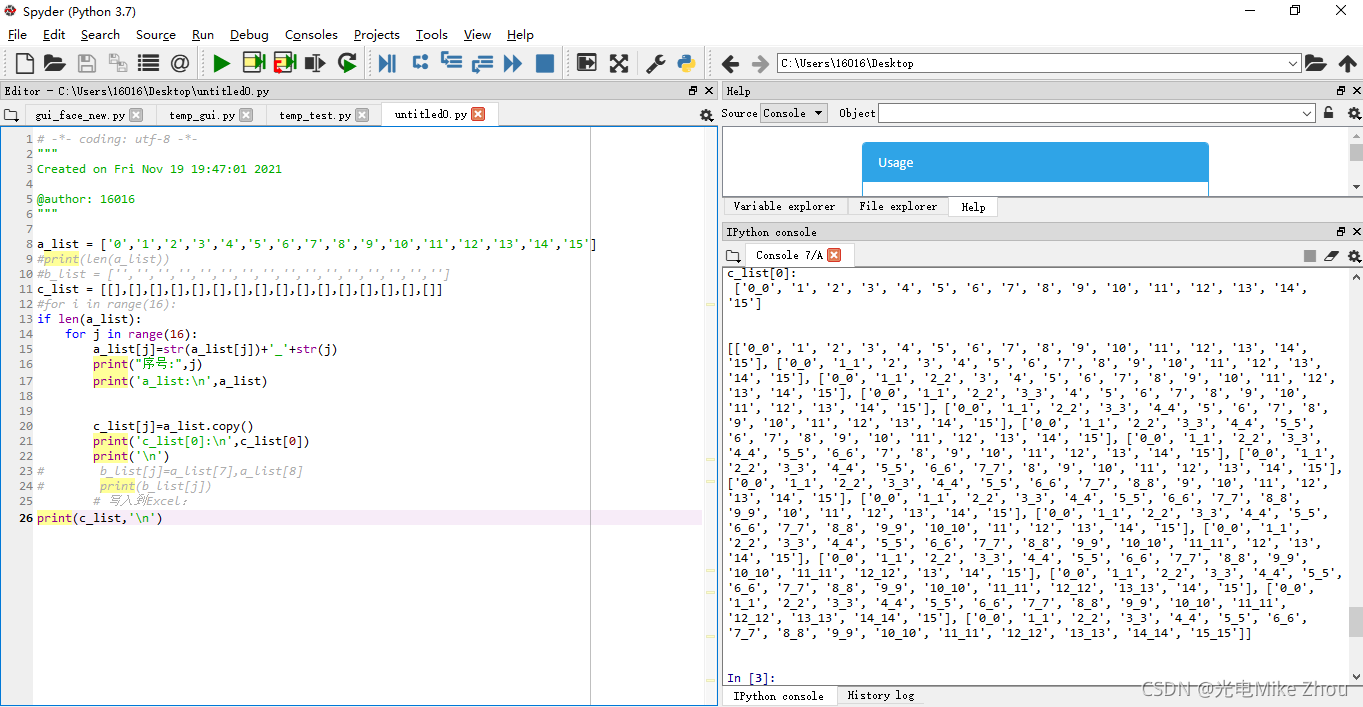
后来在我华科同学的指导下 突然想到赋值可以赋的是个地址 地址里面的值一直变化 导致赋值也一直变化 于是用第二张图的循环套循环深度复制实现了
代码如下:
# -*- coding: utf-8 -*-
"""
Created on Fri Nov 19 19:47:01 2021

@author: 16016
"""

a_list = ['0','1','2','3','4','5','6','7','8','9','10','11','12','13','14','15']
#print(len(a_list))
#b_list = ['','','','','','','','','','','','','','','','']
c_list = [[],[],[],[],[],[],[],[],[],[],[],[],[],[],[],[]]
#for i in range(16):
if len(a_list):
    for j in range(16):
        a_list[j]=str(a_list[j])+'_'+str(j)
        print("序号:",j)
        print('a_list:\n',a_list)


        for i in range(16):
            c_list[j].append(a_list[i])
        print('c_list[0]:\n',c_list[0])
        print('\n')
#        b_list[j]=a_list[7],a_list[8]
#        print(b_list[j])
        # 写入到Excel:
print(c_list,'\n')
解决了问题
优化
第三次是请教了老师 用copy函数来赋真值
代码如下:
# -*- coding: utf-8 -*-
"""
Created on Fri Nov 19 19:47:01 2021

@author: 16016
"""

a_list = ['0','1','2','3','4','5','6','7','8','9','10','11','12','13','14','15']
#print(len(a_list))
#b_list = ['','','','','','','','','','','','','','','','']
c_list = [[],[],[],[],[],[],[],[],[],[],[],[],[],[],[],[]]
#for i in range(16):
if len(a_list):
    for j in range(16):
        a_list[j]=str(a_list[j])+'_'+str(j)
        print("序号:",j)
        print('a_list:\n',a_list)


        c_list[j]=a_list.copy()
        print('c_list[0]:\n',c_list[0])
        print('\n')
#        b_list[j]=a_list[7],a_list[8]
#        print(b_list[j])
        # 写入到Excel:
#print(c_list,'\n')
同样能解决问题
最后得出问题 就是指针惹的祸!
a_list指向的是个地址 而不是值 a_list[i]指向的才是单个的值 copy()函数也是复制值而不是地址
如果这个用C语言来写 就直观一些了 难怪C语言是基础 光学Python不学C 遇到这样的问题就解决不了
C语言yyds Python是什么垃圾弱智语言
总结
由于Python无法单独定义一个值为指针或者独立的值 所以只能用列表来传送
只要赋值是指向一个列表整体的 那么就是指向的一个指针内存地址 解决方法只有一个 那就是将每个值深度复制赋值(子列表内的元素提取出来重新依次连接) 或者用copy函数单独赋值
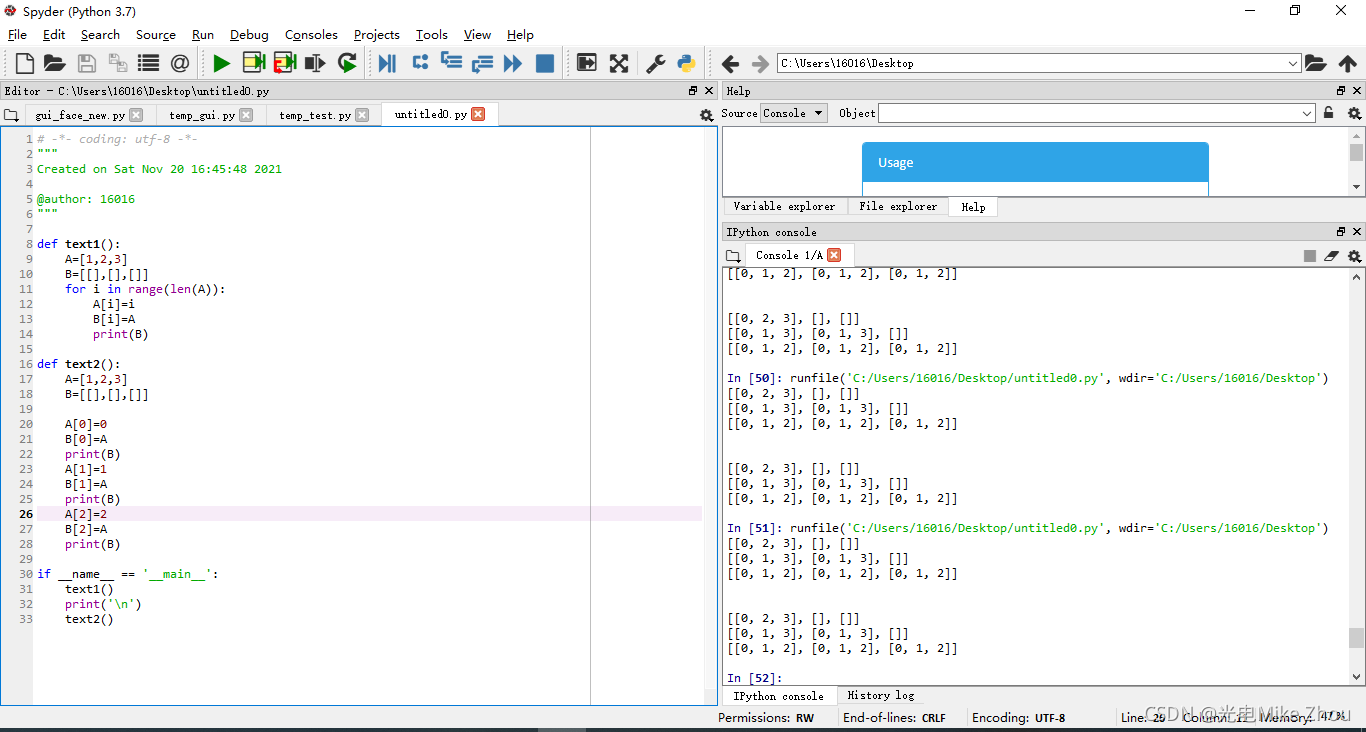
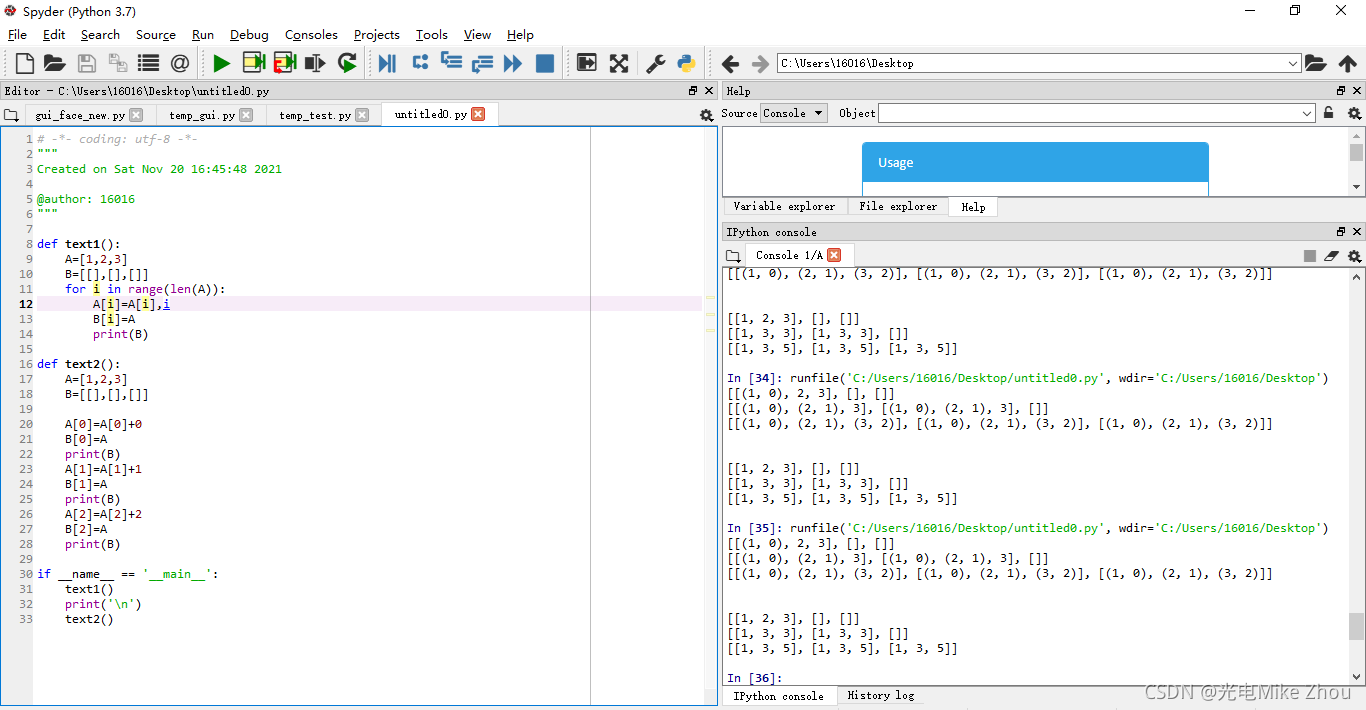
如图测试:

部分代码:
# -*- coding: utf-8 -*-
"""
Created on Sat Nov 20 16:45:48 2021

@author: 16016
"""

def text1():
    A=[1,2,3]
    B=[[],[],[]]
    for i in range(len(A)):
        A[i]=A[i]+i
        B[i]=A
        print(B)

def text2():
    A=[1,2,3]
    B=[[],[],[]]

    A[0]=A[0]+0
    B[0]=A
    print(B)
    A[1]=A[1]+1
    B[1]=A
    print(B)
    A[2]=A[2]+2
    B[2]=A
    print(B)

if __name__ == '__main__':
    text1()
    print('\n')
    text2()
py打包
Pyinstaller打包exe(包括打包资源文件 绝不出错版)
依赖包及其对应的版本号
PyQt5 5.10.1
PyQt5-Qt5 5.15.2
PyQt5-sip 12.9.0
pyinstaller 4.5.1
pyinstaller-hooks-contrib 2021.3
Pyinstaller -F setup.py 打包exe
Pyinstaller -F -w setup.py 不带控制台的打包
Pyinstaller -F -i xx.ico setup.py 打包指定exe图标打包
打包exe参数说明:
-F:打包后只生成单个exe格式文件;
-D:默认选项,创建一个目录,包含exe文件以及大量依赖文件;
-c:默认选项,使用控制台(就是类似cmd的黑框);
-w:不使用控制台;
-p:添加搜索路径,让其找到对应的库;
-i:改变生成程序的icon图标。
如果要打包资源文件
则需要对代码中的路径进行转换处理
另外要注意的是 如果要打包资源文件 则py程序里面的路径要从./xxx/yy换成xxx/yy 并且进行路径转换
但如果不打包资源文件的话 最好路径还是用作./xxx/yy 并且不进行路径转换
def get_resource_path(relative_path):
    if hasattr(sys, '_MEIPASS'):
        return os.path.join(sys._MEIPASS, relative_path)
    return os.path.join(os.path.abspath("."), relative_path)
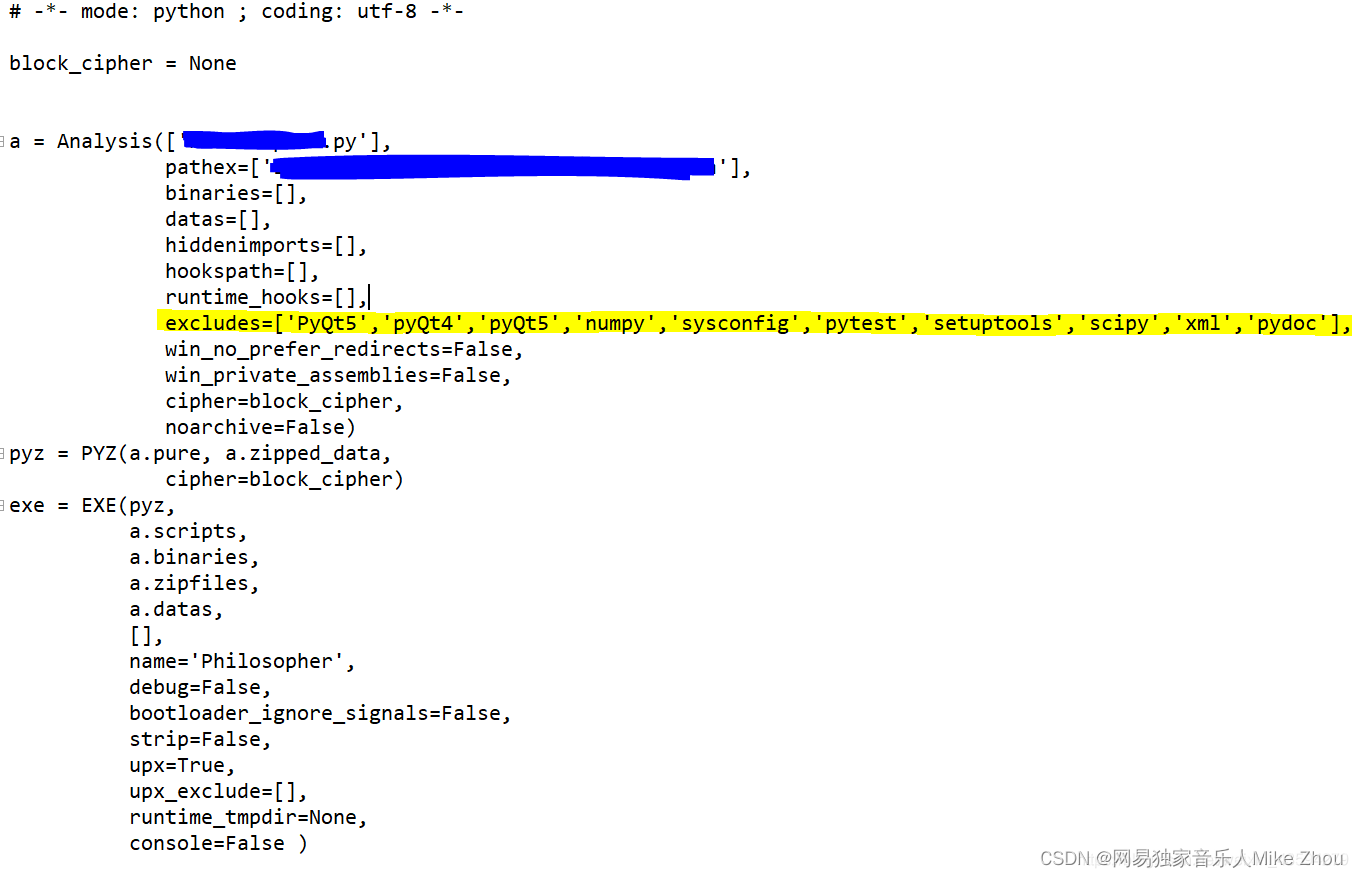
而后再spec文件中的datas部分加入目录
如:
a = Analysis(['cxk.py'],
             pathex=['D:\\Python Test\\cxk'],
             binaries=[],
             datas=[('root','root')],
             hiddenimports=[],
             hookspath=[],
             hooksconfig={},
             runtime_hooks=[],
             excludes=[],
             win_no_prefer_redirects=False,
             win_private_assemblies=False,
             cipher=block_cipher,
             noarchive=False)
而后直接Pyinstaller -F setup.spec即可
如果打包的文件过大则更改spec文件中的excludes 把不需要的库写进去(但是已经在环境中安装了的)就行
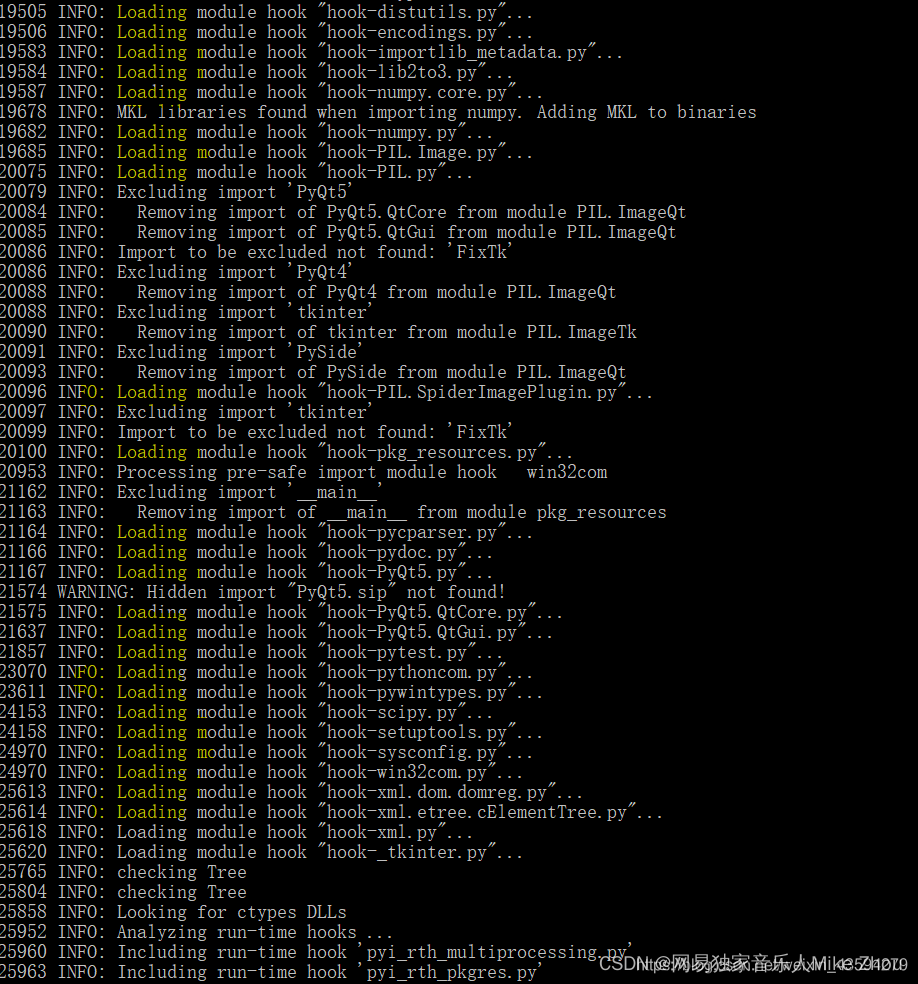
这些不要了的库在上一次编译时的shell里面输出
比如:
然后用pyinstaller --clean -F 某某.spec


 250
250


 被折叠的 条评论
为什么被折叠?
被折叠的 条评论
为什么被折叠?
 到【灌水乐园】发言


