


文章目录
一、vue-print-nb
官网地址:https://github.com/Power-kxLee/vue3-print-nb
【1】安装
// 安装 打印组件
npm install vue-print-nb --save
【2】引用
vue2引用
import Print from 'vue-print-nb'
// 全局引用
Vue.use(Print);

// 或者

// 单组件引用
import print from 'vue-print-nb'
// 在自定义指令中注册
directives: {
    print
}
vue3引用
// 全局引用
import { createApp } from 'vue'
import App from './App.vue'
import print from 'vue3-print-nb'
const app = createApp(App)
app.use(print)
app.mount('#app')

// 或者

// 单组件引用
import print from 'vue3-print-nb'
// 在自定义指令中注册
directives: {
    print
}
【3】API
| 属性 | 类型 | 默认值 | 必要 | 可选值 | 描述 |
|---|---|---|---|---|---|
| id | String | - | 是 | - | 范围打印 ID(如果设置url则可以不设置id) |
| url | String | - | 否 | - | 打印指定的 URL。(不允许同时设置ID |
| popTitle | String | - | 否 | - | 默认使用浏览器标签名,为空时为undefined |
| standard | String | HTML5 | 否 | html5,loose,strict | 打印的文档类型 |
| extraHead | String | - | 否 | - | 在节点中添加 DOM 节点, 并用,(Print local range only)分隔多个节点 |
| extraCss | String | - | 否 | - | 新的 CSS 样式表, 并使用,(仅打印本地范围)分隔多个节点 |
| openCallback | Function | - | 否 | - | 调用打印工具成功回调函数 |
| closeCallback | Function | - | 否 | - | 关闭打印工具成功回调函数 |
| beforeOpenCallback | Function | - | 否 | - | 调用打印工具前的回调函数 |
| preview | Boolean | false | 否 | true,false | 预览工具 |
| previewTitle String | - | 否 | - | ‘打印预览’ | |
| previewPrintBtnLabel | String | 打印 | 否 | - | 打印按钮名称 |
| previewBeforeOpenCallback | Function | - | 否 | - | 预览打开前回调函数 |
| previewOpenCallback | Function | - | 否 | - | 预览打开回调函数 |
| clickMounted | Function | - | 否 | - | 点击打印按钮回调函数 |
【4】示例代码
全页面打印
<button v-print>打印整个页面</button>
局部打印(Tip:被打印的区域需要被渲染出来并且不能被隐藏才可以打印)
<template>
	<div>
		<button v-print="printOption">NB打印</button>
		<div id="nbprint">
			<table>
				<tr>
					<th>序号</th>
					<th>姓名</th>
					<th>年龄</th>
					<th>性别</th>
					<th>手机</th>
				</tr>
				<tr v-for="(item, index) in list" key="index">
					<td>{{ index + 1}}</td>
					<td>{{ item.name }}</td>
					<td>{{ item.age }}</td>
					<td>{{ item.sex }}</td>
					<td>{{ item.phone }}</td>
				</tr>
			</table>
		</div>
	</div>
</template>

<script>
	export default {
		name: "nb-print",
		data() {
			return {
				printOption: {
					id: 'nbprint', // 打印元素的id 不需要携带#号
					popTitle: '员工信息' // 页眉标题 默认浏览器标题 空字符串时显示undefined 使用html语言
				},
				list: [{
						name: "阿哒",
						age: 26,
						sex: "男",
						phone: "12345678901",
					},
					{
						name: "阿荣",
						age: 24,
						sex: "男",
						phone: "12345678901",
					}
				]
			}
		}
	}
</script>
打印预览
<script>
	export default {
		name: "nb-print",
		data() {
			return {
				printOption: {
					id: 'nbprint', // 打印元素的id 不需要携带#号
					preview: true, // 开启打印预览
					previewTitle: '打印预览', // 打印预览标题
					popTitle: '员工信息', // 页眉标题 默认浏览器标题 空字符串时显示undefined 使用html语言
                      // 头部文字 默认空 在节点中添加 DOM 节点, 并用,(Print local range only)分隔多个节点
					extraHead:'https://***/***.css, https://***/***.css',
                      // 新的 CSS 样式表, 并使用,(仅打印本地范围)分隔多个节点
					extraCss: '<meta http-equiv="Content-Language"content="zh-cn"/>',
					previewBeforeOpenCallback: () => {
						console.log("触发打印预览打开前回调");
					},
					previewOpenCallback: () => {
						console.log("触发打开打印预览回调");
					},
					beforeOpenCallback: () => {
						console.log("触发打印工具打开前回调");
					},
					openCallback: () => {
						console.log("触发打开打印工具回调");
					},
					closeCallback: () => {
						console.log("触发关闭打印工具回调");
					},
					clickMounted: () => {
						console.log("触发点击打印回调");
					}
				}
             }
		}
	}
</script>
分页打印
<template>
	<div>
		<button v-print="'#nbprint'">NB打印</button>
		<div id="nbprint">
             // 方法一
             // 使用div包裹需要分页的块 使用 css属性 page-break-after:always进行分页
			<div style="page-break-after:always">这是第二页</div>
			<div style="page-break-after:always">这是第二页</div>
		</div>
	</div>
</template>

<style>
     // 方法二
     // 使用媒体查询 在打印时设置 body 和 html 的高度为auto
     @media print {
        @page {
          size:  auto;
        }
        body, html {
          height: auto !important;
        }
      }
</style>
【5】vue-print-nb插件的一些优化
去掉页眉页脚
<style>
@page {
    size: auto;
    margin: 0mm;
  }
</style>
打印內容不自动换行问题
<style>
  .procedure{
      word-wrap:break-word;
   }
</style>
【6】注意事项:
(1)无法打印本地图片,当需要打印的部分有本地图片时,打印之后图片不会显示。

(2)使用elementUI表格vxe-table表格打印时,会出现样式问题
二、print.js :解决了无法打印本地图片的问题
官网地址:https://printjs.crabbly.com/
GitHub:https://github.com/crabbly/Print.js/releases
【1】安装
npm install print-js --save
【2】使用
import print from 'print-is'

<div id='printBill'>
    <!--需要打印的内容-->
        ...
    <!--需要打印的内容-->
</div>
<el-button type="primary"  @click="billPrintClick">打印</el-button>


 billPrintClick(){
      const style = '@page {margin:0 10mm};'//打印时去掉眉页眉尾
      //打印为什么要去掉眉页眉尾?因为眉页title时打印当前页面的title,相当于是获取html中title标签里面的内容,但是比如我打印的内容只是一个弹框里面的内容,是没有title的,这时候就会出现undefined,为了避免出现这种情况,就可以隐藏眉页眉尾
      printJS({
        printable: 'printBill',// 标签元素id
        type: 'html',
        header: '',
        targetStyles: ['*'],
        style
      });
      //各个配置项
      //printable:要打印的id。
      //type:可以是 html 、pdf、 json 等。
      //properties:是打印json时所需要的数据属性。
      //gridHeaderStyle和gridStyle都是打印json时可选的样式。
      //repeatTableHeader:在打印JSON数据时使用。设置为时false,数据表标题将仅在第一页显示。
      //scanStyles:设置为false时,库将不处理应用于正在打印的html的样式。使用css参数时很有用,此时自己设置的原来想要打印的样式就会失效,在打印预览时可以看到效果
      //targetStyles: [’*’],这样设置继承了页面要打印元素原有的css属性。
      //style:传入自定义样式的字符串,使用在要打印的html页面 也就是纸上的样子。
      //ignoreElements:传入要打印的div中的子元素id,使其不打印。非常好用
    },
【3】注意点:
(1)打印预览时样式写法
@media print {
  /*样式内容*/
}
(2)css设置打印时强制分页,使用这个属性,该div的以后的内容就会在打印时分页(此属性在div display属性为flex时无效,使用了浮动float时也会无效)
.print{
   page-break-after:always
}
(3)table自动分页
table tr{
   page-break-inside:avoid;
   page-break-after:auto
}
(4)打印最好使用原生table标签,使用其他ui框架会出现很大的样式问题,使用原生table表格要自己重写表格边框,不然会出现表格边框很粗的情况,预览时看不出来,打印就很明显。在使用了单元格合并也会出现表格边框有的粗有的细的情况,目前还在研究如何解决。
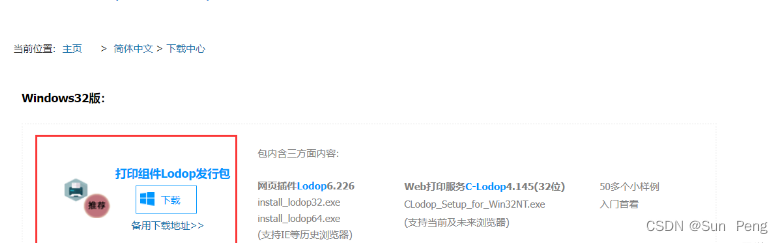
三、lodop打印功能(可以指定打印机)
【1】官网下载
http://www.lodop.net/download.html
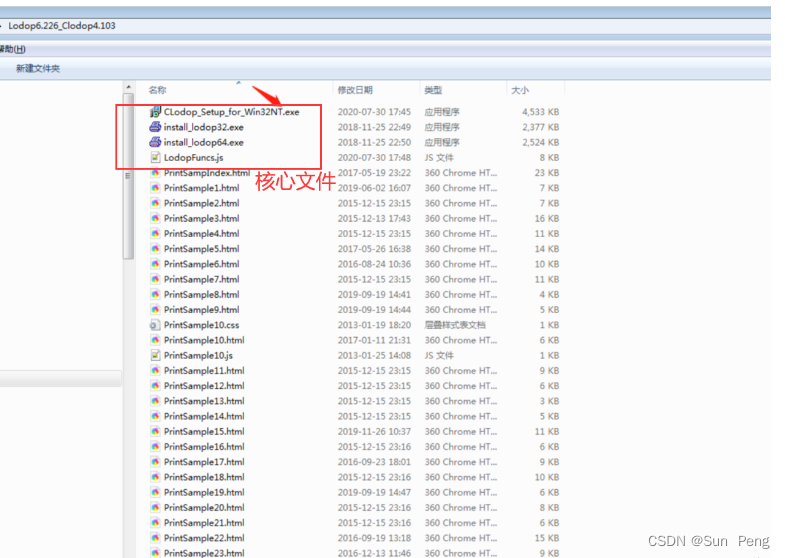
【2】解压安装运行
点击CLodop_Setup_for_Win32NT.exe进行安装
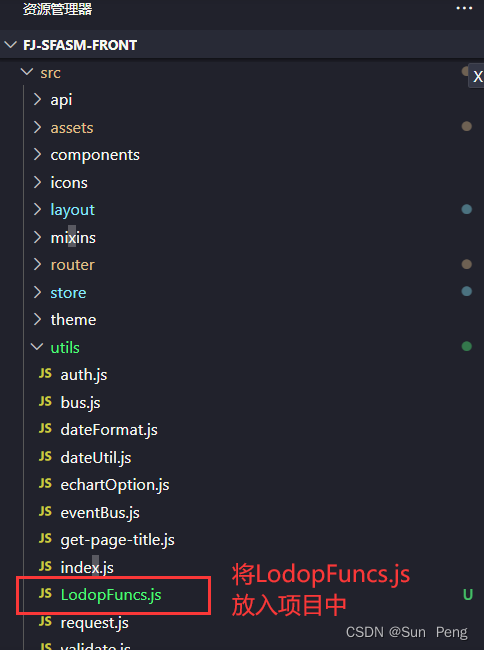
【3】vue代码实现(具体操作见官网:http://www.lodop.net/faq/pp35.html)
【1】把官方提供的LodopFuncs.js文件保存到项目某个目录下
【2】修改LodopFuncs.js文件
//在文件最底部添加一行代码
export { getLodop }; //导出getLodop 把该文件中的getLodop函数 export 出来。

或者

// 改造lodopfuncs.js
//====判断是否需要安装clodop云打印服务器:====
export function needcLodop(){ ...... }

//====获取lodop对象的主过程:====
export function getLodop(oobject,oembed){ ...... }
【3】所有方法
PRINT_INIT(strPrintTaskName)打印初始化

SET_PRINT_PAGESIZE(intOrient,intPageWidth,intPageHeight,strPageName)设定纸张大小 (1横向2竖向,宽度,高度,页面大小名称宽高都设置为0的时候才可以设置"A5","A4")

ADD_PRINT_HTM(intTop,intLeft,intWidth,intHeight,strHtml)增加超文本项

ADD_PRINT_TEXT(intTop,intLeft,intWidth,intHeight,strContent)增加纯文本项

ADD_PRINT_TABLE(intTop,intLeft,intWidth,intHeight,strHtml)增加表格项(strHtml为html模板字符串)

ADD_PRINT_SHAPE(intShapeType,intTop,intLeft,intWidth,intHeight,intLineStyle,intLineWidth,intColor)画图形

SET_PRINT_STYLE(strStyleName, varStyleValue)设置对象风格

PREVIEW打印预览

PRINT直接打印

PRINT_SETUP打印维护

PRINT_DESIGN打印设计
【4】案例
<el-form-item v-if="form.tempType === 0" label="模板内容" prop="content">
<el-link type="primary" @click="openDesign(0)">设计模板</el-link>
<el-link type="info" @click="openDesign(1)">预览模板</el-link>
</el-form-item>
<el-form-item label="模板内容" prop="content" v-if="form.tempType === 1">
<el-input type="textarea" rows="6" v-model="form.content" placeholder="请输入模板内容" style="width: 530px"></el-input>
</el-form-item>
import { getLodop, loadTemp, previewTemp } from "@/utils/LodopFuncs";

methods: {
   openDesign(opt) {
      let _self = this;
      let LODOP = getLodop();
      if (_self.form.content) {
          loadTemp(LODOP, _self.form.content);
      }
      if (opt === 0) {
         const tid = LODOP.PRINT_DESIGN();
         LODOP.On_Return = function (taskID, value) {
              _self.form.content = value;
         };
      }
      if (opt === 1) {
          LODOP.PREVIEW();
      }
   },
}
LodopFuncs.js
var CreatedOKLodop7766 = null;
import {
  Message,
  MessageBox
} from 'element-ui'
//====判断是否需要安装CLodop云打印服务器:====
export function needCLodop() {
  try {
    var ua = navigator.userAgent;
    if (ua.match(/Windows\sPhone/i) != null) return true;
    if (ua.match(/iPhone|iPod/i) != null) return true;
    if (ua.match(/Android/i) != null) return true;
    if (ua.match(/Edge\D?\d+/i) != null) return true;

    var verTrident = ua.match(/Trident\D?\d+/i);
    var verIE = ua.match(/MSIE\D?\d+/i);
    var verOPR = ua.match(/OPR\D?\d+/i);
    var verFF = ua.match(/Firefox\D?\d+/i);
    var x64 = ua.match(/x64/i);
    if ((verTrident == null) && (verIE == null) && (x64 !== null))
      return true;
    else
    if (verFF !== null) {
      verFF = verFF[0].match(/\d+/);
      if ((verFF[0] >= 41) || (x64 !== null)) return true;
    } else
    if (verOPR !== null) {
      verOPR = verOPR[0].match(/\d+/);
      if (verOPR[0] >= 32) return true;
    } else
    if ((verTrident == null) && (verIE == null)) {
      var verChrome = ua.match(/Chrome\D?\d+/i);
      if (verChrome !== null) {
        verChrome = verChrome[0].match(/\d+/);
        if (verChrome[0] >= 41) return true;
      };
    };
    return false;
  } catch (err) {
    return true;
  };
};

//====页面引用CLodop云打印必须的JS文件:====
if (needCLodop()) {
  var head = document.head || document.getElementsByTagName("head")[0] || document.documentElement;
  var oscript = document.createElement("script");
  oscript.src = "http://localhost:8000/CLodopfuncs.js?priority=1";
  head.insertBefore(oscript, head.firstChild);

  //引用双端口(8000和18000)避免其中某个被占用:
  oscript = document.createElement("script");
  oscript.src = "http://localhost:18000/CLodopfuncs.js?priority=0";
  head.insertBefore(oscript, head.firstChild);
};
//====获取LODOP对象的主过程:====
export function getLodop(oOBJECT, oEMBED) {
  var strHtmInstall = "<br><font color='#000'>打印控件未安装!点击这里<a style='color:#0a49e8;' href='http://www.lodop.net/demolist/CLodop_Setup_for_Win32NT.zip' target='_self'>[执行安装]</a>,安装后请刷新页面或重新进入。</font>";
  var strHtmUpdate = "<br><font color='#000'>打印控件需要升级!点击这里<a style='color:#0a49e8;' href='http://www.lodop.net/demolist/CLodop_Setup_for_Win32NT.zip' target='_self'>[执行升级]</a>,升级后请重新进入。</font>";
  var strHtm64_Install = "<br><font color='#000'>打印控件未安装!点击这里<a style='color:#0a49e8;' href='http://www.lodop.net/demolist/install_lodop64.zip' target='_self'>[执行安装]</a>,安装后请刷新页面或重新进入。</font>";
  var strHtm64_Update = "<br><font color='#000'>打印控件需要升级!点击这里<a style='color:#0a49e8;' href='http://www.lodop.net/demolist/install_lodop64.zip' target='_self'>[执行升级]</a>,升级后请重新进入。</font>";
  var strHtmFireFox = "<br><br><font color='#000'>(注意:如曾安装过Lodop旧版附件npActiveXPLugin,请在【工具】->【附加组件】->【扩展】中先卸它)</font>";
  var strHtmChrome = "<br><br><font color='#000'>(如果此前正常,仅因浏览器升级或重安装而出问题,需重新执行以上安装)</font>";
  var strCLodopInstall = "<br><font color='#000'>CLodop云打印服务未安装启动!点击这里<a style='color:#0a49e8;' href='http://www.lodop.net/demolist/CLodop_Setup_for_Win32NT.zip' target='_self'>[执行安装]</a>,安装后请刷新页面。</font>";
  var strCLodopUpdate = "<br><font color='#000'>CLodop云打印服务需升级!点击这里<a style='color:#0a49e8;' href='http://www.lodop.net/demolist/CLodop_Setup_for_Win32NT.zip' target='_self'>[执行升级]</a>,升级后请刷新页面。</font>";
  var LODOP;
  try {
    var isIE = (navigator.userAgent.indexOf('MSIE') >= 0) || (navigator.userAgent.indexOf('Trident') >= 0);
    if (needCLodop()) {
      try {
        LODOP = getCLodop();
      } catch (err) {};
      if (!LODOP && document.readyState !== "complete") {
        Message({
          message: "C-Lodop正在启动中,请稍后再试!",
          type: 'error',
          duration: 2 * 1000
        })
        return;
      };
      if (!LODOP) {
        if (isIE)
          MessageBox.alert(strCLodopInstall, '提示', {
            dangerouslyUseHTMLString: true,
            showConfirmButton: false,
            showCancelButton: true
          });
        else
          MessageBox.alert(strCLodopInstall, '提示', {
            dangerouslyUseHTMLString: true,
            showConfirmButton: false,
            showCancelButton: true
          });
        return;
      } else {
        if (CLODOP.CVERSION < "3.0.2.9") {
          if (isIE)
            MessageBox.alert(strCLodopUpdate, '提示', {
              dangerouslyUseHTMLString: true,
              showConfirmButton: false,
              showCancelButton: true
            });
          else
            MessageBox.alert(strCLodopUpdate, '提示', {
              dangerouslyUseHTMLString: true,
              showConfirmButton: false,
              showCancelButton: true
            });
        };
        if (oEMBED && oEMBED.parentNode) oEMBED.parentNode.removeChild(oEMBED);
        if (oOBJECT && oOBJECT.parentNode) oOBJECT.parentNode.removeChild(oOBJECT);
      };
    } else {
      var is64IE = isIE && (navigator.userAgent.indexOf('x64') >= 0);
      //=====如果页面有Lodop就直接使用,没有则新建:==========
      if (oOBJECT != undefined || oEMBED != undefined) {
        if (isIE) LODOP = oOBJECT;
        else LODOP = oEMBED;
      } else if (CreatedOKLodop7766 == null) {
        LODOP = document.createElement("object");
        LODOP.setAttribute("width", 0);
        LODOP.setAttribute("height", 0);
        LODOP.setAttribute("style", "position:absolute;left:0px;top:-100px;width:0px;height:0px;");
        if (isIE) LODOP.setAttribute("classid", "clsid:2105C259-1E0C-4534-8141-A753534CB4CA");
        else LODOP.setAttribute("type", "application/x-print-lodop");
        document.documentElement.appendChild(LODOP);
        CreatedOKLodop7766 = LODOP;
      } else LODOP = CreatedOKLodop7766;
      //=====Lodop插件未安装时提示下载地址:==========
      if ((LODOP == null) || (typeof (LODOP.VERSION) == "undefined")) {
        if (navigator.userAgent.indexOf('Chrome') >= 0)
          MessageBox.alert(strHtmChrome, '提示', {
            dangerouslyUseHTMLString: true,
            showConfirmButton: false,
            showCancelButton: true
          });
        //document.body.innerHTML=strHtmChrome+document.body.innerHTML;
        if (navigator.userAgent.indexOf('Firefox') >= 0)
          //document.body.innerHTML=strHtmFireFox+document.body.innerHTML;
          if (is64IE) $alert(strHtm64_Install, '提示', {
            dangerouslyUseHTMLString: true,
            showConfirmButton: false,
            showCancelButton: true
          });
          else
        if (isIE) MessageBox.alert(strHtmInstall, '提示', {
          dangerouslyUseHTMLString: true,
          showConfirmButton: false,
          showCancelButton: true
        });
        else
          MessageBox.alert(strHtmInstall, '提示', {
            dangerouslyUseHTMLString: true,
            showConfirmButton: false,
            showCancelButton: true
          })
        return LODOP;
      };
    };
    if (LODOP.VERSION < "6.2.2.1") {
      if (!needCLodop()) {
        if (is64IE) MessageBox.alert(strHtm64_Update, '提示', {
          dangerouslyUseHTMLString: true,
          showConfirmButton: false,
          showCancelButton: true
        });
        else
        if (isIE) MessageBox.alert(strHtmUpdate, '提示', {
          dangerouslyUseHTMLString: true,
          showConfirmButton: false,
          showCancelButton: true
        });
        else
          MessageBox.alert(strHtmUpdate, '提示', {
            dangerouslyUseHTMLString: true,
            showConfirmButton: false,
            showCancelButton: true
          });
      };
      return LODOP;
    };
    //===如下空白位置适合调用统一功能(如注册语句、语言选择等):===
    LODOP.SET_LICENSES("", "", "", "");
    //===========================================================
    return LODOP;
  } catch (err) {
    Message({
      message: "getLodop出错:" + err,
      type: 'error',
      duration: 5 * 1000
    })
  };
};

export function loadTemp(LODOP, code) {
  var parser = /LODOP\.([^(]+)\(([^\n]+)\);/i;
  code.split("\n").forEach(line => {
    const res = parser.exec(line.trim());
    if (!res) return;
    const fn = LODOP[res[1]];
    if (fn) {
      let arr = [];
      try {
        const fakeFn = new Function(`return [${res[2]}]`);
        arr = fakeFn();
      } catch { }
      fn.apply(LODOP, arr);
    }
  });
}
【5】遇到的一些问题
1、lodop热敏打印机小票打印
LODOP.PREVIEW();先预览,再点击打印,切纸正常,会在文档结束自动切纸

LODOP.PRINT();直接打印就不会在文档结束切纸,并且末尾会有小字样水印
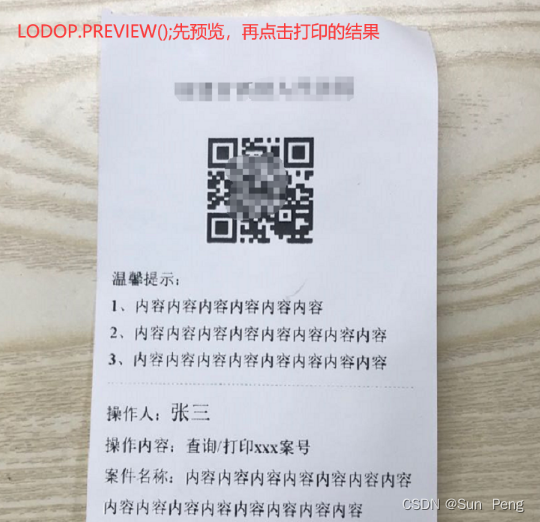
原因:不经过预览的“直接打印”功能需要注册
如下功能需要注册使用权:
	1、 (不经过预览的)“直接打印”功能;
	2、 “导出数据到Excel文件” 功能;

不经注册使用以上功能时,打印输出结果的左下角会出现“本页由【试用版打印控件LodopX.0】输出”小字样水印。


 3631
3631


 被折叠的 条评论
为什么被折叠?
被折叠的 条评论
为什么被折叠?
 到【灌水乐园】发言


