


MDN:Canvas - Web API 接口参考 | MDN
目录
MDN:Canvas - Web API 接口参考 | MDN
1. 初始canvas
<body>
  <!--
      id:标识元素的唯一性
      width:画布的宽度
      height:画布的高度
   -->
   <canvas id="c1" width="800" height="600"></canvas>
   <script >
    // 1. 找到画布
    let c1 = document.getElementById('c1')
    // 2. 获取画笔,上下文对象
    let ctx = c1.getContext('2d')
    // 3. 绘制图形
        // 设置颜色
    ctx.fillStyle = 'skyblue'
        // 3.1 绘制矩形fillRect(位置X,位置Y,宽度,高度)-填充模式
    ctx.fillRect(10,20,300,200)
        // 3.2 绘制矩形strokeRect(位置X,位置Y,宽度,高度)-路径模式
    ctx.strokeRect(360,200,300,200)
        //3.3 清除模式
          //3.3.1 立即清除
          // ctx.clearRect(0, 0, c1.clientWidth, c1.clientHeight)
         // 3.3.2 计时器清除
         let height = 0;
         let timer = setInterval(() => {
           height++;
           if (height > c1.clientHeight) {
             clearInterval(timer)
             return
           }
           ctx.clearRect(0, 0, c1.clientWidth, height)
         }, 10)
   </script>
</body>
2. 绘制图形也可以分开写
    // 1. 找到画布
    let c1 = document.getElementById('c1')
    // 2. 获取画笔,上下文对象
    let ctx = c1.getContext('2d')
    // 3. 绘制图形
    // 绘制图形也可以分开写(但是需要写开始和结束的路径,不然他会以为画笔是一次性的,会全部都是后面写的那种模式)
    ctx.beginPath()
    ctx.rect(10, 260, 300, 200)
    ctx.fill()
    ctx.closePath()

    ctx.beginPath()
    ctx.rect(360, 10, 300, 200)
    ctx.stroke()
    ctx.closePath()
3.绘制圆形(笑脸)

<body>
  <!--
      id:标识元素的唯一性
      width:画布的宽度
      height:画布的高度
   -->
  <canvas id="c1" width="800" height="600"></canvas>
  <script>
    // 1. 找到画布
    let c1 = document.getElementById('c1')
    // 2. 获取画笔,上下文对象
    let ctx = c1.getContext('2d')
    // 3. 绘制图形
    //3.1 绘制圆弧arc(圆心x,圆心y,半径,开始的角度,结束的角度,逆时针还是顺时针:默认顺时针false)
    // ctx.beginPath()
    // ctx.arc(200, 100, 50,0,Math.PI*2)
    // // 3.2 填充
    // ctx.stroke()
    // ctx.closePath()
    // ctx.beginPath()
    // ctx.arc(180,85,8,0,Math.PI*2)
    // ctx.stroke()
    // ctx.closePath()
    // ctx.beginPath()
    // ctx.arc(220,85,8,0,Math.PI*2)
    // ctx.stroke()
    // ctx.closePath()
    // ctx.beginPath()
    // ctx.arc(200,100,30,0,Math.PI)
    // ctx.stroke()
    // ctx.closePath()

    // 使用moveTo-移动(绘制一条不连续的路径)
    ctx.beginPath()
    ctx.arc(200, 100, 50, 0, Math.PI * 2)
    // 3.2 填充
    ctx.stroke()
    ctx.moveTo(230, 100)
    // 嘴巴
    ctx.arc(200, 100, 30, 0, Math.PI)
    ctx.stroke()
    ctx.moveTo(188, 85)
    // 左眼
    ctx.arc(180, 85, 8, 0, Math.PI * 2)
    ctx.stroke()
    ctx.moveTo(228, 85)
    // 右眼
    ctx.arc(220, 85, 8, 0, Math.PI * 2)
    ctx.stroke()
    ctx.closePath()
  </script>
</body>
4.绘制直线(三角形)
<body>
  <canvas id="c1" width="800" height="600"></canvas>
  <script>
    // 1. 找到画布
    let c1 = document.getElementById('c1')
    // 2. 获取画笔,上下文对象
    let ctx = c1.getContext('2d')
    ctx.fillStyle = 'skyblue'
    // 3. 绘制路径
    // 3.1 绘制三角形--路径
    ctx.beginPath()
    ctx.moveTo(300, 200)
    ctx.lineTo(350, 250)
    ctx.lineTo(350, 200)
    ctx.lineTo(300, 200)
    ctx.stroke()
    ctx.closePath()

    //3.2 绘制三角形--填充
    ctx.beginPath()
    ctx.moveTo(100, 100)
    ctx.lineTo(150, 150)
    ctx.lineTo(150, 100)
    ctx.fill()
    ctx.closePath()

  </script>
</body>
5. 绘制圆弧
<body>
  <canvas id="c1" width="800" height="600"></canvas>
  <script>
    // 1. 找到画布
    let c1 = document.getElementById('c1')
    // 2. 获取画笔,上下文对象
    let ctx = c1.getContext('2d')
    ctx.fillStyle = 'skyblue'
    // 3. 绘制圆弧
    // arcTo()
    // 3.1 绘制三角形--路径
    ctx.beginPath()
    // 绘制第一个点
    ctx.moveTo(300, 200)
    // 绘制第二个点和第三个点,以及圆弧半径
    ctx.arcTo(300, 250, 250, 250, 50)
    ctx.stroke()
    ctx.closePath()
  </script>
</body>
6. 贝塞曲线(二次贝塞曲线)

<body>
  <canvas id="c1" width="800" height="600"></canvas>
  <script>
    // 1. 找到画布
    let c1 = document.getElementById('c1')
    // 2. 获取画笔,上下文对象
    let ctx = c1.getContext('2d')
    ctx.fillStyle = 'skyblue'
    // 3. 绘制圆弧
    // 3.2 贝塞曲线--(二次贝塞曲线--气泡聊天框)
    ctx.beginPath()
    // 绘制第一个点
    ctx.moveTo(200, 300)
    // 绘制第二个点和第三个点,以及圆弧半径
    ctx.quadraticCurveTo(150, 300, 150, 200)
    ctx.quadraticCurveTo(150, 100, 300, 100)
    ctx.quadraticCurveTo(450, 100, 450, 200)
    ctx.quadraticCurveTo(450, 300, 250, 300)
    ctx.quadraticCurveTo(250, 350, 150, 350)
    ctx.quadraticCurveTo(200, 350, 200, 300)
    ctx.stroke()
    ctx.closePath()
  </script>
</body>
7. 贝塞曲线(三次贝塞曲线)

<body>
  <canvas id="c1" width="800" height="600"></canvas>
  <script>
    // 1. 找到画布
    let c1 = document.getElementById('c1')
    // 2. 获取画笔,上下文对象
    let ctx = c1.getContext('2d')
    // 3. 贝塞曲线(三次杯赛曲线)
    ctx.fillStyle='red'
    ctx.beginPath()
    ctx.moveTo(300,200)
    ctx.bezierCurveTo(350,150,400,200,300,300)
    ctx.bezierCurveTo(200,200,250,150,300,200)
    ctx.fill()
    ctx.closePath()
  </script>
</body>
8. 封装路径Path2d
<body>
<canvas id="c1" width="800" height="600"></canvas>
<script>
// 1. 找到画布
let c1 = document.getElementById('c1')
// 2. 获取画笔,上下文对象
let ctx = c1.getContext('2d')
// 3. 封装路径Path2d
ctx.fillStyle='red'
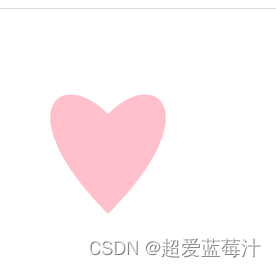
let heartPath= new Path2D()
heartPath.moveTo(300,200)
heartPath.bezierCurveTo(350,150,400,200,300,300)
heartPath.bezierCurveTo(200,200,250,150,300,200)
ctx.fill(heartPath)
// 绘制一条折线
let polyPath=new Path2D('M10 10 h 80 v 80 h -80 z')
ctx.stroke(polyPath)
</script>
</body>9. 颜色设置
// 路径颜色
ctx.strokeStyle='skyblue'
ctx.strokeStyle='rgb(135,206,235)'
ctx.strokeStyle='rbga(135,206,235,0.8)'
ctx.strokeStyle='#87CEEB'

// 颜色填充
ctx.fillStyle='red'

// 全局透明度
ctx.globalAlpha = 0.5
10. 渐变(线型渐变-径向渐变)

<body>
  <canvas id="c1" width="800" height="600"></canvas>
  <script>
    // 1. 找到画布
    let c1 = document.getElementById('c1')
    // 2. 获取画笔,上下文对象
    let ctx = c1.getContext('2d')
    // 3. 线性渐变
    let linearGradient = ctx.createLinearGradient(200, 200, 400, 400)
    linearGradient.addColorStop(0,'red')
    linearGradient.addColorStop(0.5,'pink')
    linearGradient.addColorStop(1,'blue')
    ctx.fillStyle= linearGradient
    ctx.fillRect(200, 200, 200, 200)
  </script>
</body>
<body>
<canvas id="c1" width="800" height="600"></canvas>
<script>
// 1. 找到画布
let c1 = document.getElementById('c1')
// 2. 获取画笔,上下文对象
let ctx = c1.getContext('2d')
// 3. 线性渐变
let index = 0
function render() {
ctx.clearRect(200, 200, 400, 400)
index += 0.01
if (index > 1) {
index = 0
}
let linearGradient = ctx.createLinearGradient(200, 200, 400, 400)
linearGradient.addColorStop(0, 'red')
linearGradient.addColorStop(index, 'pink')
linearGradient.addColorStop(1, 'blue')
ctx.fillStyle = linearGradient
ctx.fillRect(200, 200, 200, 200)
requestAnimationFrame(render)
}
// 动画效果
requestAnimationFrame(render)
</script>
</body>
<body>
  <canvas id="c1" width="800" height="600"></canvas>
  <script>
    // 1. 找到画布
    let c1 = document.getElementById('c1')
    // 2. 获取画笔,上下文对象
    let ctx = c1.getContext('2d')
    // 3. 径向渐变
      let radiaGradient = ctx.createRadialGradient(300, 200, 0, 300, 200, 100)
      radiaGradient.addColorStop(0, 'red')
      radiaGradient.addColorStop(0.5, 'pink')
      radiaGradient.addColorStop(1, 'blue')
      ctx.fillStyle = radiaGradient
      ctx.fillRect(0, 0, 600, 400)
  </script>
</body>
<body>
<canvas id="c1" width="800" height="600"></canvas>
<script>
// 1. 找到画布
let c1 = document.getElementById('c1')
// 2. 获取画笔,上下文对象
let ctx = c1.getContext('2d')
// 3. 径向渐变
let index = 0
function render() {
ctx.clearRect(200, 200, 400, 400)
index += 0.01
if (index > 1) {
index = 0
}
let radiaGradient = ctx.createRadialGradient(300, 200, 0, 300, 200, 100)
radiaGradient.addColorStop(0, 'red')
radiaGradient.addColorStop(index, 'pink')
radiaGradient.addColorStop(1, 'blue')
ctx.fillStyle = radiaGradient
ctx.fillRect(0, 0, 600, 400)
requestAnimationFrame(render)
}
requestAnimationFrame(render)
</script>
</body>
<body>
  <canvas id="c1" width="800" height="600"></canvas>
  <script>
    // 1. 找到画布
    let c1 = document.getElementById('c1')
    // 2. 获取画笔,上下文对象
    let ctx = c1.getContext('2d')
    // 3. 径向渐变
    let radiaGradient = ctx.createRadialGradient(250, 150, 10, 300, 200, 100)
    radiaGradient.addColorStop(1, 'red')
    radiaGradient.addColorStop(0, 'pink')
    ctx.fillStyle = radiaGradient
    ctx.arc(300, 200, 100, 0, Math.PI * 2)
    ctx.fill()
  </script>
</body>
11. 图案样式:pattern

<body>
  <canvas id="c1" width="800" height="600"></canvas>
  <script>
    // 1. 找到画布
    let c1 = document.getElementById('c1')
    // 2. 获取画笔,上下文对象
    let ctx = c1.getContext('2d')
    // 3. pattern
    var img = new Image();
    img.src = 'https://img0.baidu.com/it/u=1685203771,1473174621&fm=253&fmt=auto&app=138&f=JPEG?w=224&h=219';
    img.onload = function () {

      // createPattern(图片,重复方式:重复:repeat;不重复:no-repeat;水平重复:repeat-x,垂直重复:repeat-y)
      var pattern = ctx.createPattern(img, 'repeat');
      ctx.fillStyle = pattern;
      ctx.fillRect(0, 0, 500, 500);
    }
  </script>
</body>
12.绘制图片
<body>
  <canvas id="c1" width="800" height="600"></canvas>
  <script>
    // 1. 找到画布
    let c1 = document.getElementById('c1')
    // 2. 获取画笔,上下文对象
    let ctx = c1.getContext('2d')
    // 3. 绘制图片
    var img = new Image();
    img.src = 'https://img0.baidu.com/it/u=1685203771,1473174621&fm=253&fmt=auto&app=138&f=JPEG?w=224&h=219';
    img.onload = function () {
      // 第一种:drawImage(图片,将图片渲染到画布的x位置,将图片渲染到画布的y位置)
      // ctx.drawImage(img,0,0)
      // 第二种:drawImage(图片,将图片渲染到画布的x位置,将图片渲染到画布的y位置,图片的宽,图片的高)
      // ctx.drawImage(img,0,0,800,600)
      // 第三种:drawImage(图片,裁剪的起点x,裁剪的起点y,裁剪的宽,裁剪的高,将图片渲染到画布的x位置,将图片渲染到画布的y位置,图片的宽,图片的高)
      ctx.drawImage(img,155,0,50,50,0,0,100,100)
    }
  </script>
</body>
13.绘制视频

<body>
  <canvas id="c1" width="800" height="600"></canvas>
  <video src="视频地址"  style="width: 400px;height:400px"></video>
  <button id="btn">播放/暂停</button>
  <script>
    // 1. 找到画布
    let c1 = document.getElementById('c1')
    // 2. 获取画笔,上下文对象
    let ctx = c1.getContext('2d')
    // 3. 绘制视频
    // 获取绘制视频对象
    let video = document.querySelector('video')
    // 获取按钮
    let btn = document.getElementById('btn')
    btn.onclick = function () {
      if (video.paused) {
        video.play()
        render()
      } else {
        video.pause()
      }
    }
    // 添加水印
    let image = new Image()
    image.src = 'https://img0.baidu.com/it/u=1685203771,1473174621&fm=253&fmt=auto&app=138&f=JPEG?w=224&h=219'
    // 播放
    function render() {
      ctx.drawImage(video, 0, 0, 600, 400)
      ctx.drawImage(image, 480, 350, 100, 20)
      requestAnimationFrame(render)
    }
  </script>
</body>
14.文本绘制
<body>
  <canvas id="c1" width="600" height="400"></canvas>
  <script>
    // 1. 找到画布
    let c1 = document.getElementById('c1')
    // 2. 获取画笔,上下文对象
    let ctx = c1.getContext('2d')
    // 3.  文字  大小/字体
    ctx.font = '100px Microsoft YaHei'
    ctx.strokeStyle = 'pink'
    // ctx.fillStyle = 'skyblue'
    // 文本对齐(start(默认),end,left,right,center)
    ctx.textAlign = 'center'
    // 文本基线对齐(middle,top,bottom,alphabetic)
    ctx.textBaseline = 'middle'
    // 文本方向(ltr, rtl, inherit)
    // ctx.direction = 'rtl'
    // 预测量文本的宽度
    let text = ctx.measureText('Wlop!')
    console.log(text);
    // 填充渲染文字--ctx.fillText('渲染的文字',位置x,位置y,绘制文本的最大宽度)
    // ctx.fillText('Wlop', 300, 200)
    ctx.strokeText('Wlop!', 300, 200)
    ctx.arc(300, 200, 5, 0, Math.PI * 2)
    ctx.fill()

  </script>
</body>
15.位移、缩放、旋转

<body>
  <canvas id="c1" width="600" height="400"></canvas>
  <script>
    // 1. 找到画布
    let c1 = document.getElementById('c1')
    // 2. 获取画笔,上下文对象
    let ctx = c1.getContext('2d')
    // 位移(*x *是左右偏移量,y 是上下偏移量)
    ctx.translate(100, 100)
    ctx.fillRect(0, 0, 50, 50)
    ctx.translate(100, 100)
    ctx.fillRect(0, 0, 50, 50)


    // 矩阵控制变换(a,b,c,d,e,f)(水平方向的缩放,竖直方向的倾斜偏移,水平方向的倾斜偏移,竖直方向的缩放,水平方向的移动.竖直方向的移动)
    // 初始值:ctx.transform(1, 0, 0, 1, 0, 0);
    // ctx.transform(1, 0, 0, 1, 0, 0)
    // ctx.fillRect(0, 0, 50, 50)
    //  ctx.transform(1, 0, 0, 1, 100, 100)
    // ctx.fillRect(0, 0, 50, 50)

  </script>
</body>
<body>
<canvas id="c1" width="600" height="400"></canvas>
<script>
// 1. 找到画布
let c1 = document.getElementById('c1')
// 2. 获取画笔,上下文对象
let ctx = c1.getContext('2d')
// 缩放(*x *是水平放大,y 是垂直放大)
// ctx.scale(5, 2)
// ctx.fillRect(0, 0, 50, 50)
// 旋转(角度)
// ctx.rotate(Math.PI / 6)
// ctx.fillRect(0, 100, 200, 50)
// 先移动,在旋转
ctx.translate(300, 200)
ctx.rotate(Math.PI / 4)
ctx.scale(5, 2)
ctx.fillRect(-100, -25, 200, 50)
// 矩阵控制变换(a,b,c,d,e,f)(水平方向的缩放,竖直方向的倾斜偏移,水平方向的倾斜偏移,竖直方向的缩放,水平方向的移动.竖直方向的移动)
// 初始值:ctx.transform(1, 0, 0, 1, 0, 0);
// ctx.transform(1, 1, -1, 1, 0, 0)
// ctx.fillRect(0, 0, 200, 50)
</script>
</body>16.合成与裁剪

<body>
  <div id="ggk">谢谢惠顾</div>
  <canvas id="c1" width="600" height="400"></canvas>
  <script>
    // 1. 找到画布
    let c1 = document.getElementById('c1')
    let ctx = c1.getContext('2d')
    let img = new Image()
    img.src = 'https://img0.baidu.com/it/u=3313956622,100749147&fm=253&fmt=auto&app=138&f=JPEG?w=480&h=240'
    img.onload = function () {
      ctx.drawImage(img, 0, 0, 600, 400)
    }
    let isDraw = false
    c1.onmousedown = function () {
      isDraw = true
    }
    c1.onmouseup = function () {
      isDraw = false
    }
    c1.onmousemove = function (e) {
      if (isDraw) {
        var x = e.pageX
        var y = e.pageY
        ctx.globalCompositeOperation = 'destination-out'
        ctx.arc(x, y, 20, 0, 2 * Math.PI)
        ctx.fill()
      }
    }
    let ran = Math.random()
    if (ran < 0.1) {
      var ggkDiv = document.getElementById('ggk')
      ggkDiv.innerHTML = '恭喜您获得内马尔合影机会一次!!'
    }
  </script>
</body>
  <style>
    * {
      padding: 0;
      margin: 0;
    }

    #ggk {
      width: 600px;
      height: 400px;
      font-size: 30px;
      font-weight: 400;
      text-align: center;
      line-height: 400px;
      overflow: hidden;
      position: absolute;
      left: 0;
      top: 0;
      color: #f00;
    }

    canvas {
      position: absolute;
      left: 0;
      top: 0;
      z-index: 10;
    }
</style> 
<body>
  <canvas id="c1" width="800" height="600"></canvas>
  <script>
    // 1. 找到画布
    let c1 = document.getElementById('c1')
    // 2. 获取画笔,上下文对象
    let ctx = c1.getContext('2d')
    // 3. 绘制圆弧
    let heartPath = new Path2D()
    // 绘制第一个点
    heartPath.moveTo(200, 300)
    // 绘制第二个点和第三个点,以及圆弧半径
    heartPath.quadraticCurveTo(150, 300, 150, 200)
    heartPath.quadraticCurveTo(150, 100, 300, 100)
    heartPath.quadraticCurveTo(450, 100, 450, 200)
    heartPath.quadraticCurveTo(450, 300, 250, 300)
    heartPath.quadraticCurveTo(250, 350, 150, 350)
    heartPath.quadraticCurveTo(200, 350, 200, 300)
    // 裁剪
    ctx.clip(heartPath)
    ctx.stroke(heartPath)
    let img = new Image()
    img.src = 'https://img0.baidu.com/it/u=3313956622,100749147&fm=253&fmt=auto&app=138&f=JPEG?w=480&h=240'
    img.onload = function () {
      ctx.drawImage(img, 0, 0, 600, 400)
    }
  </script>
</body>
17.状态的保存和恢复

<body>
  <canvas id="c1" width="800" height="800"></canvas>
  <script>
    let c1 = document.getElementById('c1')
    let ctx = c1.getContext('2d')
    ctx.fillStyle = 'red'
    ctx.fillRect(0, 0, 100, 100)
    ctx.save()

    ctx.fillStyle = 'Orange'
    ctx.fillRect(100, 100, 100, 100)
    ctx.save()

    ctx.fillStyle = 'green'
    ctx.fillRect(200, 200, 100, 100)
    ctx.save()
    ctx.fillStyle = 'Purple'
    ctx.fillRect(300, 300, 100, 100)


    ctx.restore()
    ctx.fillRect(400, 400, 100, 100)
    ctx.restore()
    ctx.fillRect(500, 500, 100, 100)
    ctx.restore()
    ctx.fillRect(600, 600, 100, 100)
  </script>
</body>
18.像素

<body>
  <canvas id="c1" width="800" height="600"></canvas>
  <script>
    // 1. 找到画布
    let c1 = document.getElementById('c1')
    // 2. 获取画笔,上下文对象
    let ctx = c1.getContext('2d')
    // 3. 绘制图片
    var img = new Image();
    //解决报错--:DOMException: Failed to execute 'getImageData' on 'CanvasRenderingContext2D': The canvas has been tainted by cross-origin data.
    img.crossOrigin = ''
    img.src = 'https://img2.baidu.com/it/u=1694308595,2732789570&fm=253&fmt=auto&app=138&f=JPEG?w=500&h=500';
    img.onload = function () {
      // 第一种:drawImage(图片,将图片渲染到画布的x位置,将图片渲染到画布的y位置)
      // ctx.drawImage(img,0,0)
      // 第二种:drawImage(图片,将图片渲染到画布的x位置,将图片渲染到画布的y位置,图片的宽,图片的高)
      // ctx.drawImage(img,0,0,800,600)
      // 第三种:drawImage(图片,裁剪的起点x,裁剪的起点y,裁剪的宽,裁剪的高,将图片渲染到画布的x位置,将图片渲染到画布的y位置,图片的宽,图片的高)
      ctx.drawImage(img, 0, 0, 600, 400)
      //获取像素数据
      let imageData = ctx.getImageData(0, 0, 600, 400)
      console.log(imageData);
      // 修改数据
      for (let i = 0; i < imageData.data.length; i += 4) {
        // 计算当前像素的平均值
        let avg = (imageData.data[i] + imageData.data[i + 1] + imageData.data[i + 2]) / 3
        imageData.data[i] = avg
        imageData.data[i + 1] = avg
        imageData.data[i + 2] = avg
        imageData.data[i + 3] = 255
      }
      // 将修改的数据重新渲染到画布上
      // ctx.putImageData(imageData, 0, 0)  // 全部成灰色
      ctx.putImageData(imageData, 0, 0,0,0,300,200)  // 局部灰色
    }
  </script>
</body>
19. 高级封装和元素交互
<body>
  <canvas id="c1" width="800" height="600"></canvas>
  <script>
    // 1. 找到画布
    let c1 = document.getElementById('c1')
    // 2. 获取画笔,上下文对象
    let ctx = c1.getContext('2d')
    // 3. 高级封装
    // class Heat {
    //   constructor(x, y) {
    //     this.x = x;
    //     this.y = y;
    //     this.heartPath = new Path2D();
    //     this.heartPath.moveTo(this.x, this.y);
    //     this.heartPath.bezierCurveTo(this.x + 50, this.y - 50, this.x + 100, this.y, this.x, this.y + 100);
    //     this.heartPath.bezierCurveTo(this.x - 100, this.y, this.x - 50, this.y - 50, this.x, this.y)
    //   }
    //   draw() {
    //     ctx.save()
    //     ctx.fillStyle = 'red'
    //     ctx.fill(this.heartPath)
    //     ctx.restore()
    //   }
    // }
    // let heart = new Heat(100, 100)
    // heart.draw()


    // 4. 交互
    class Heat2 {
      constructor(x, y) {
        this.x = x;
        this.y = y;
        this.color = 'red';
        this.isIn = false;
        this.eventMapList = {
          hover: [],
          leave: []
        }
        c1.onmousemove = (e) => {
          let x = e.offsetX;
          let y = e.offsetY;
          this.isIn = ctx.isPointInPath(this.heartPath, x, y)
          if (this.isIn) {
            // this.color = 'skyblue'
            this.eventMapList.hover.forEach(item => {
              item()
            })
          } else {
            // this.color = 'red'
            this.eventMapList.leave.forEach(item => {
              item()
            })
          }
        }
      }
      // 鼠标划上事件
      onHover(fn) {
        this.eventMapList.hover.push(fn)
      }
      // 鼠标离开事件
      onLeave(fn) {
        this.eventMapList.leave.push(fn)
      }
      // 改变位置
      setPosition(x, y) {
        this.x = x;
        this.y = y
      }
      draw() {
        this.heartPath = new Path2D();
        this.heartPath.moveTo(this.x, this.y);
        this.heartPath.bezierCurveTo(this.x + 50, this.y - 50, this.x + 100, this.y, this.x, this.y + 100);
        this.heartPath.bezierCurveTo(this.x - 100, this.y, this.x - 50, this.y - 50, this.x, this.y)
        ctx.save()
        ctx.fillStyle = this.color
        ctx.fill(this.heartPath)
        ctx.restore()
      }
    }
    let heart2 = new Heat2(100, 100)
    heart2.onHover(() => {
      heart2.color = 'pink'
    })
    heart2.onLeave(() => {
      heart2.color = 'red'
    })
    function render() {
      ctx.clearRect(0, 0, c1.width, c1.height)
      heart2.draw()
      requestAnimationFrame(render)
    }
    render()
  </script>
</body>
20.在线画板

<style>
    button.active {
      color: #fff;
      background-color: orange;
    }
  </style>
<body>
  <canvas id="c1" width="800" height="600"></canvas>
  <hr>
  <button id="boldBtn" type="button">粗线条</button>
  <button id="thinBtn" type="button">细线条</button>
  <button id="saveBtn" type="button">保存签名</button>
  <input type="color" name="" id="color" value="" />
  <button id="clearBtn">橡皮擦</button>
  <button id="nullBtn">清空画布</button>

  <script>
    // 获取画布
    let canvas = document.getElementById('c1')
    let ctx = canvas.getContext('2d')
    // 连接处圆润
    ctx.lineJoin = 'round'
    // 开端和结束端也是圆的
    ctx.lineCap = 'round'
    // 获取画笔(输入框和按钮)
    let boldBtn = document.getElementById('boldBtn')
    let thinBtn = document.getElementById('thinBtn')
    // 保存签名
    let saveBtn = document.getElementById('saveBtn')
    // 颜色
    let inputColor = document.getElementById('color')
    // 橡皮擦
    let clearBtn = document.getElementById('clearBtn')
    // 清空画布
    let nullBtn = document.getElementById('nullBtn')
    // 设置允许绘制的变量
    let isDraw = false
    // 鼠标按下事件
    canvas.onmousedown = function (event) {
      isDraw = true
      // 开始画
      ctx.beginPath()
      // 开始绘制的点
      var x = event.pageX - canvas.offsetLeft
      var y = event.pageY - canvas.offsetTop
      ctx.moveTo(x, y)
    }
    // 鼠标抬起
    canvas.onmouseup = function () {
      isDraw = false
      ctx.closePath()
    }
    // 鼠标离开
    canvas.onmouseleave = function () {
      isDraw = false
      ctx.closePath()
    }
    // 鼠标移动
    canvas.onmousemove = function (event) {
      if (isDraw) {
        var x = event.pageX - canvas.offsetLeft
        var y = event.pageY - canvas.offsetTop
        ctx.lineTo(x, y)
        ctx.stroke()
      }
    }
    // 切换粗线条
    boldBtn.onclick = function () {
      ctx.globalCompositeOperation = 'source-over';
      ctx.lineWidth = 20
      boldBtn.classList.add('active')
      thinBtn.classList.remove('active')
      clearBtn.classList.remove('active')
    }
    // 切换细线条
    thinBtn.onclick = function () {
      ctx.globalCompositeOperation = 'source-over';
      ctx.lineWidth = 2
      thinBtn.classList.add('active')
      boldBtn.classList.remove('active')
      clearBtn.classList.remove('active')
    }
    // 切换橡皮擦
    clearBtn.onclick = function () {
      ctx.globalCompositeOperation = 'destination-out';
      ctx.lineWidth = 30
      clearBtn.classList.add('active')
      thinBtn.classList.remove('active')
      boldBtn.classList.remove('active')
    }
    // 清空画布
    nullBtn.onclick = function () {
      ctx.clearRect(0, 0, 800, 600)
    }
    // 保存签名
    saveBtn.onclick = function () {
      let urlData = canvas.toDataURL()
      // let img = new Image()
      // img.src = urlData
      // document.body.appendChild(img)
      let downLoadA = document.createElement('a')
      downLoadA.setAttribute('download', '签名')
      downLoadA.href = urlData
      downLoadA.click()
    }
    // 切换颜色
    inputColor.onchange = function () {
      ctx.strokeStyle = inputColor.value
    }
  </script>
</body>
20.动态时钟

<body>
  <canvas id="c1" width="800" height="600"></canvas>
  <script>
    // 获取画布
    let canvas = document.getElementById('c1')
    let ctx = canvas.getContext('2d')
    //保存当前坐标位置和上下文对象的状态
    function rander() {
      ctx.clearRect(0, 0, 800, 600)
      ctx.save()
      // 移动
      ctx.translate(400, 300)
      ctx.rotate(-Math.PI / 2)

      ctx.save()
      for (let i = 0; i < 12; i++) {
        // 开始画--绘制小时的刻度
        ctx.beginPath()
        ctx.moveTo(170, 0)
        ctx.lineTo(190, 0)
        ctx.lineWidth = 8
        ctx.strokeStyle = 'gray'
        ctx.stroke()
        ctx.closePath()
        ctx.rotate(2 * Math.PI / 12)
      }

      ctx.restore()
      ctx.save()
      for (let i = 0; i < 60; i++) {
        // 开始画--绘制小时的刻度
        ctx.beginPath()
        ctx.moveTo(180, 0)
        ctx.lineTo(190, 0)
        ctx.lineWidth = 2
        ctx.strokeStyle = 'gray'
        ctx.stroke()
        ctx.closePath()
        ctx.rotate(2 * Math.PI / 60)
      }
      ctx.restore()
      ctx.save()
      // 获取时间
      let time = new Date()
      let hour = time.getHours()
      let min = time.getMinutes()
      let sec = time.getSeconds()
      hour = hour >= 12 ? hour - 12 : hour

      // 绘制秒针
      ctx.rotate(2 * Math.PI / 60 * sec)
      ctx.beginPath()
      ctx.moveTo(-30, 0)
      ctx.lineTo(190, 0)
      ctx.lineWidth = 2
      ctx.strokeStyle = 'red'
      ctx.stroke()
      ctx.closePath()
      ctx.restore()
      ctx.save()

      // 绘制分针
      ctx.rotate(2 * Math.PI / 60 * min + 2 * Math.PI / 60 / 60 * sec)
      ctx.beginPath()
      ctx.moveTo(-20, 0)
      ctx.lineTo(130, 0)
      ctx.lineWidth = 4
      ctx.strokeStyle = '#888'
      ctx.stroke()
      ctx.closePath()
      ctx.restore()
      ctx.save()

      // 绘制时针
      ctx.rotate(2 * Math.PI / 12 * hour + 2 * Math.PI / 12 / 60 * min + 2 * Math.PI / 12 / 60 / 60 * sec)
      ctx.beginPath()
      ctx.moveTo(-15, 0)
      ctx.lineTo(110, 0)
      ctx.lineWidth = 8
      ctx.strokeStyle = '#333'
      ctx.stroke()
      ctx.closePath()
      ctx.restore()
      // 动起来
      ctx.restore()
      requestAnimationFrame(rander)
    }
    rander()
  </script>
</body>


 444
444

 被折叠的 条评论
为什么被折叠?
被折叠的 条评论
为什么被折叠?
 到【灌水乐园】发言


