


1. 准备工作
(1)需要准备两台服务器
这里我的:192.168.137.100(主) 和 192.168.137.18(备)
(2)两台服务器都安装nginx
(3)在两台服务器安装keepalived
2. 安装Nginx
(1)使⽤用Nginx官⽅方提供的rpm包。
[root@nginx ~]# cat /etc/yum.repos.d/nginx.repo

[nginx]

name=nginx repo

baseurl=http://nginx.org/packages/centos/7/$basearch/

gpgcheck=0

enabled=1

(2)执行yum安装

[root@nginx ~]# yum install nginx -y

[root@nginx ~]# systemctl start nginx

[root@nginx ~]# systemctl enable nginx
3. 安装keepalived
[root@test ~]# yum install keepalived -y
4. 配置主keepalived
[root@test ~]# cd /etc/keepalived/
[root@test keepalived]# cp keepalived.conf keepalived.conf.bak
[root@test keepalived]# > keepalived.conf
[root@test keepalived]# vi keepalived.conf
global_defs {

    vrrp_garp_interval 0

    vrrp_gna_interval 0

}


#VIP1

    vrrp_instance VI_1 {

      state MASTER

      interface ens33

      virtual_router_id 50

      priority 100

      advert_int 1

      authentication {

         auth_type PASS

         auth_pass 1111

      }

      virtual_ipaddress {

         192.168.137.50   #这里填入自己想用的虚拟ip

       }

   }
5. 主keepalived.conf传到备机并修改
[root@test keepalived]# scp keepalived.conf root@192.168.137.18:/etc/keepalived/
#切换到备机192.168.137.18(备)上去修改keepalived.conf,只需修改
state BACKUP
priority 90
[root@localhost keepalived]# vi keepalived.conf
#VIP1

    vrrp_instance VI_1 {

      state BACKUP  #这里

      interface ens33

      virtual_router_id 50

      priority 90  #这里

      advert_int 1

      authentication {

         auth_type PASS

         auth_pass 1111

      }

      virtual_ipaddress {

         192.168.137.50

      }

   }
6. 配置准备nginx
#主192.168.137.100
[root@test yum.repos.d]# cp /usr/share/nginx/html/index.html /usr/share/nginx/html/index.html.bak
[root@test yum.repos.d]# >/usr/share/nginx/html/index.html
[root@test yum.repos.d]# vi /usr/share/nginx/html/index.html
web01
#备 192.168.137.18
[root@test yum.repos.d]# cp /usr/share/nginx/html/index.html /usr/share/nginx/html/index.html.bak
[root@test yum.repos.d]# >/usr/share/nginx/html/index.html
[root@test yum.repos.d]# vi /usr/share/nginx/html/index.html
web02
7. 启动服务并开机自启
[root@test yum.repos.d]# systemctl start nginx
[root@test yum.repos.d]# systemctl start keepalived
[root@test yum.repos.d]# systemctl enable nginx
[root@test yum.repos.d]# systemctl enable keepalived
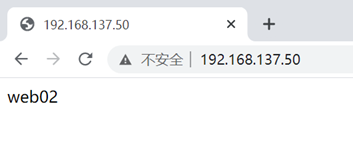
8. 访问各站点(主备及vip)

9. 测试主备切换
在192.168.137.100(主)上,停掉keepalived,测试主备切换
[root@test ~]# systemctl stop keepalived
刷新页面,vip已经切换到备(192.168.137.18上)
再主上启动keepalived
[root@test ~]# systemctl start keepalived
刷新页面,发现又切换回来了

10. nginx存活测试
在主服务器192.168.137.100上添加如下参数:
global_defs {

    vrrp_garp_interval 0

    vrrp_gna_interval 0

}

vrrp_script chk_nginx {

    script "/opt/chknginx.sh"

    interval 1

    weight -20

}

#VIP1

    vrrp_instance VI_1 {

      state MASTER

      interface ens33

      virtual_router_id 50

      priority 100

      advert_int 1

      authentication {

         auth_type PASS

         auth_pass 1111

      }

      virtual_ipaddress {

         192.168.137.50

      }

      track_script {

        chk_nginx

      }

   }


#VIP1

    vrrp_instance VI_1 {

      state BACKUP

      interface ens33

      virtual_router_id 50

      priority 90

      advert_int 1

      authentication {

         auth_type PASS

         auth_pass 1111

      }

      virtual_ipaddress {

         192.168.137.50

      }

      track_script {

        chk_nginx

      }

   }
在/opt下创建chknginx.sh文件,授予权限
[root@test ~]# vi /opt/chknginx.sh
#!/bin/bash

A=`ps -C nginx --no-header|wc -l`

if [ $A -eq 0 ];then

    systemctl start nginx

    if [ `ps -C nginx --no-header|wc -l` -eq 0 ];then

        killall keepalived

    fi

fi
[root@test ~]# chmod 775 /opt/chknginx.sh
在主nginx上关闭服务器
[root@test ~]# shutdown -h now
则vip会漂移到备服务器192.168.137.18上。
浏览器输入 http://192.168.137.50 可查看是否有跳转到备服务器上


 3524
3524


 被折叠的 条评论
为什么被折叠?
被折叠的 条评论
为什么被折叠?
 到【灌水乐园】发言


