


Stable Diffusion WebUI 是一款基于深度学习的图像生成工具,根据用户的输入文本或图像,生成高质量的新图像,特点如下:
- 支持多种图像生成任务,如人脸生成、风格迁移、图像修复、图像超分辨率等。
- 使用稳定扩散模型(Stable Diffusion Model)作为图像生成的核心算法,该模型具有高效、稳定、可控的优势。
- 提供友好的 Web 界面,用户可以通过浏览器访问和使用,无需安装任何软件或插件。
- 支持自定义参数和模型,用户可以根据自己的需求和喜好,调整图像生成的效果和风格。
Stable Diffusion WebUI 是一款适合各类用户的图像生成工具,无论你是专业的设计师、艺术家、摄影师,还是普通的爱好者、学习者,都可以在这里发挥你的创意和想象力,生成你想要的图像。
运行 WebUI 环境 :
source venv/bin/activate

python -u launch.py --listen --port 9301 --xformers --no-half-vae --enable-insecure-extension-access --theme dark --gradio-queue

nohup python -u launch.py --listen --port 9301 --xformers --no-half-vae --enable-insecure-extension-access --theme dark --gradio-queue > nohup.62.out &
网页版本:
- GitHub:https://github.com/AUTOMATIC1111/stable-diffusion-webui
- 安装文档:https://stable-diffusion-book.vercel.app/install/WebUi/launch/
1. 环境配置
下载工程(工程文件约 23118 个,下载速度较慢):
git clone git@github.com:AUTOMATIC1111/stable-diffusion-webui.git
自动配置环境(需要安装的 Python 环境较多,下载速度较慢):
cd stable-diffusion-webui
bash webui.sh  # 自动安装环境
日志如下:
################################################################
Install script for stable-diffusion + Web UI
Tested on Debian 11 (Bullseye)
################################################################

################################################################
Running on [your name] user
################################################################

################################################################
Repo already cloned, using it as install directory
################################################################

################################################################
Create and activate python venv
################################################################
默认配置的 Python 环境位于: stable-diffusion-webui/venv/bin/activate,即使用虚拟环境 virtualenv,即:
conda deactivate   # 取消 conda
source venv/bin/activate  # 激活
遇到 PyTorch GPU 错误,重新安装 PyTorch 即可。
遇到问题,在虚拟环境中,手动安装一些包,注意解决 Python 包的版本冲突:
pip install einops==0.3.0 kornia==0.6 omegaconf==2.1.1 pytorch-lightning==1.4.2 torchmetrics==0.6.0 transformers==4.26.1 torch==2.0.1 torchvision==0.15.2 google-auth==2.22.0rc1 urllib3==1.26.16

pip install facexlib==0.3.0 tb-nightly==2.14.0a20230702 sdkit==1.0.112 opencv-python==4.6.0.66 -i https://mirrors.aliyun.com/pypi/simple

# 需要安装
# pip install git+https://ghproxy.com/https://github.com/mlfoundations/open_clip.git --prefer-binary
pip install open-clip-torch==2.0.2 deepspeed==0.9.5
pip install opencv-python-headless==4.8.0.74 opencv-python==4.8.0.74
默认配置的工程环境位于:stable-diffusion-webui/repositories,手动下载依赖工程:
cd repositories/
git clone https://ghproxy.com/https://github.com/Stability-AI/stablediffusion.git stable-diffusion-stability-ai
git clone https://ghproxy.com/https://github.com/crowsonkb/k-diffusion.git/ k-diffusion
git clone https://ghproxy.com/https://github.com/sczhou/CodeFormer.git
git clone https://ghproxy.com/https://github.com/salesforce/BLIP.git
git clone https://ghproxy.com/https://github.com/CompVis/taming-transformers
最终 5 个文件夹:
BLIP/
CodeFormer/
k-diffusion/
stable-diffusion-stability-ai/
taming-transformers/
运行 WebUI 环境 :
conda deactivate
source venv/bin/activate
python launch.py --port 9301 --xformers
启动成功:
Bug1: 遇到Bug “AttributeError: module ‘open_clip’ has no attribute ‘transformer’”
从源码安装open_clip,即可:
pip install git+https://github.com/mlfoundations/open_clip.git --prefer-binary
**Bug2: 遇到Bug “FileNotFoundError: No checkpoints found. When searching for checkpoints for Stable-diffusion” **
Stable-diffusion模型没有下载完成,即:
FileNotFoundError: No checkpoints found. When searching for checkpoints, looked at:
 - file stable_diffusion/stable-diffusion-webui/model.ckpt
 - directory stable_diffusion/stable-diffusion-webui/models/Stable-diffusion
 Can't run without a checkpoint. Find and place a .ckpt or .safetensors file into any of those locations.
手动下载,大约4个G
cd models/Stable-diffusion
wget https://huggingface.co/runwayml/stable-diffusion-v1-5/resolve/main/v1-5-pruned-emaonly.safetensors
Bug3: 遇到Bug “No module ‘xformers’. Proceeding without it.”
已经安装 xformers,不是Bug,因为没有启动命令参数所导致,launch.py 增加 --xformers 参数,即可:
python launch.py --port 9301 --listen --xformers
Bug4: 遇到Bug “Cannot locate TCMalloc”
缺少安装包 google-perftools,安装即可。
sudo apt install --no-install-recommends google-perftools
Bug5: 遇到 RuntimeError: Torch is not able to use GPU; add --skip-torch-cuda-test to COMMANDLINE_ARGS variable to disable this check
原因是 PyTorch 安装异常,在 Python 中,调用 import torch 时,同样出现异常:
ImportError: cannot import name '_get_cpp_backtrace' from 'torch._C'。
重新安装 PyTorch 即可,即先查看并卸载 PyTorch,再安装:
pip list | grep torch
pip uninstall torch torchvision
pip install torch==2.0.1 torchvision==0.15.2
测试命令,确保 PyTorch 运行正常:
import torch
print(torch.__version__)  # 2.0.1+cu117
import torchvision
print(torchvision.__version__)  # 0.15.2+cu117
也可使用,如下命令验证:
python -c "import torchvision; print(torchvision.__version__)"
python -c "import torch; print(torch.__version__)"
Bug6: 遇到 AttributeError: partially initialized module 'cv2' has no attribute '_registerMatType'
pip install opencv-python-headless==4.8.0.74 opencv-python==4.8.0.74
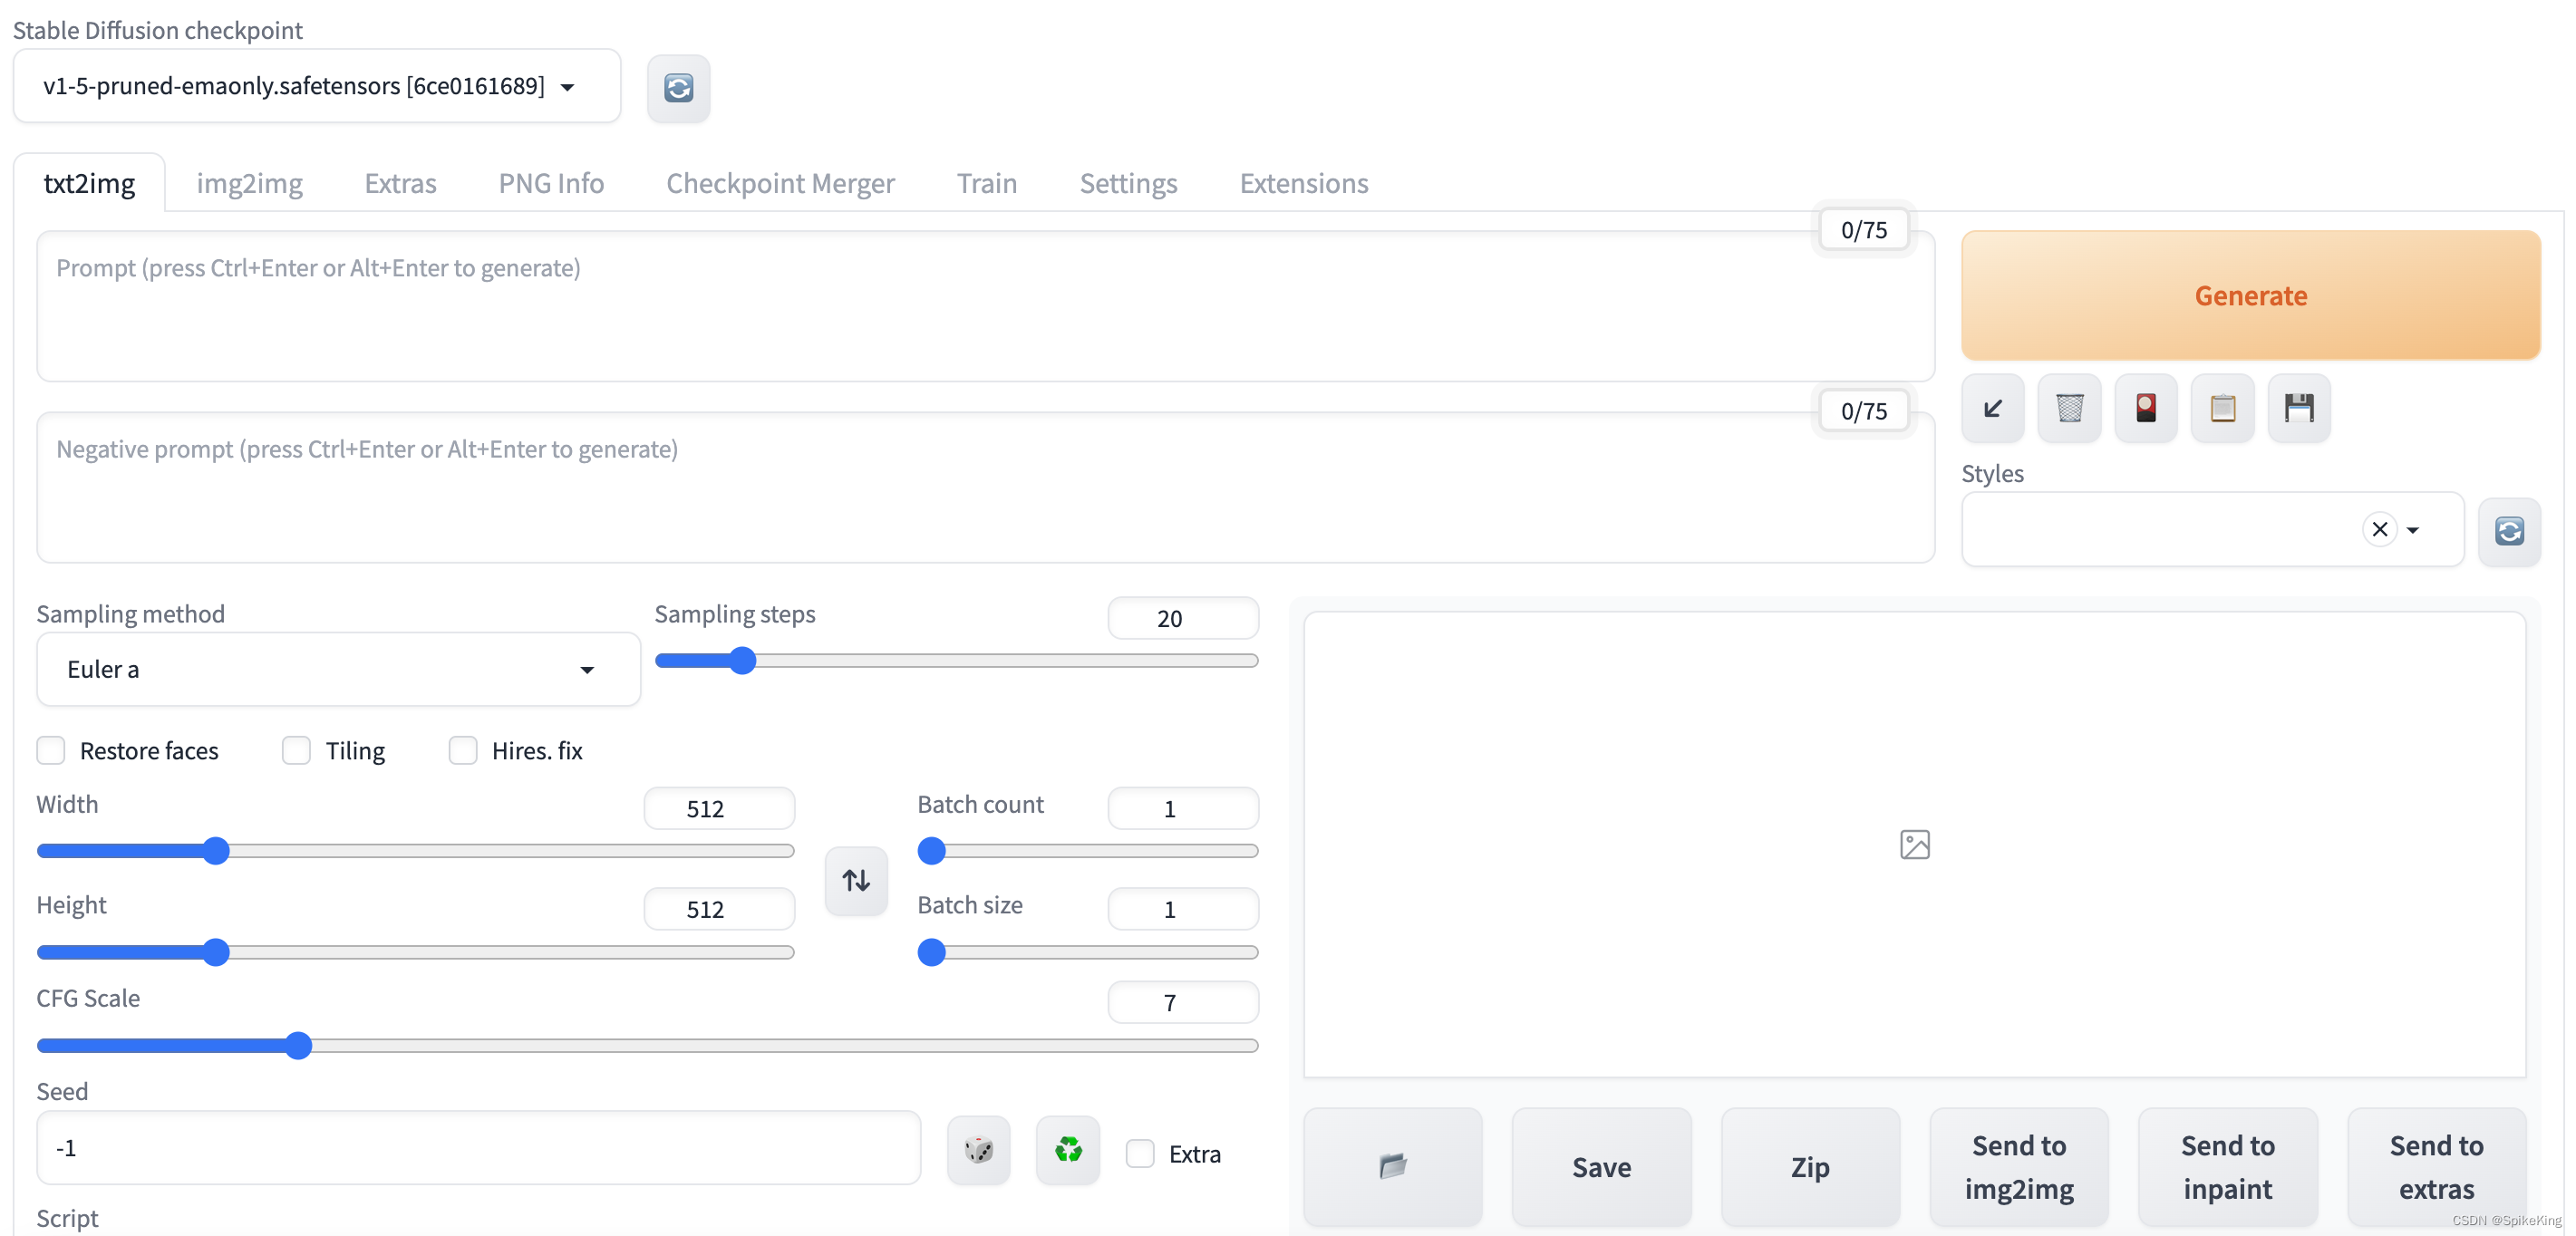
2. 测试工程
第1块输入是正向Prompts,第2块输入是反向Prompts。
正向Prompts:
A girl,walking in the forest,the sun fell on her body,(masterpiece:1,2),best quality,masterpiece,highres,original,extremely detailed wallpaper,perfect lighting,(extremely detailed CG:1.2),drawing,paintbrush,
反向Prompts:
NSFW,(worst quality:2),(low quality:2),(normal quality:2),lowres,normal quality,((monochrome)),((grayscale)),skin spots,acnes,skin blemishes,age spot,(ugly:1.331),(duplicate:1.331),(morbid:1.21),(mutilated:1.21),(tranny:1.331),mutated hands,(poorly drawn hands:1.5),blurry,(bad anatomy:1.21),(bad proportions:1.331),extra limbs,(disfigured:1.331),(missing arms:1.331),(extra legs:1.331),(fused fingers:1.61051),(too many dingers:1.61051),(unclear eyes:1.331),lowers,bad hands,missing fingers,extra digit,bad hands,missing fingers,(((extra arms and legs)))
Restore faces(面部修复) 需要下载模型:
Downloading: "https://github.com/xinntao/facexlib/releases/download/v0.1.0/detection_Resnet50_Final.pth" to stable-diffusion-webui/repositories/CodeFormer/weights/facelib/detection_Resnet50_Final.pth

# 下载失败,手动下载
cd repositories/CodeFormer/weights/facelib/
wget https://github.com/xinntao/facexlib/releases/download/v0.1.0/detection_Resnet50_Final.pth
配置信息如下:Sampling method,Restore faces,CFG Scale

近景Prompts
look at viewer,close up,upper body
参考:
- GtiHub - StableDiffusionBook
- stable-diffusion-webui的安装教程 ubuntu
- Stable Diffusion - 安装过程中常见报错解决方法
- GitHub - Xformers
- GitHub - Bug: Cannot locate TCMalloc
关于AI绘画技术储备
学好 AI绘画 不论是就业还是做副业赚钱都不错,但要学会 AI绘画 还是要有一个学习规划。最后大家分享一份全套的 AI绘画 学习资料,给那些想学习 AI绘画 的小伙伴们一点帮助!
👉[[CSDN大礼包:《StableDiffusion安装包&AI绘画入门学习资料》免费分享]](安全链接,放心点击)
对于0基础小白入门:
如果你是零基础小白,想快速入门AI绘画是可以考虑的。
一方面是学习时间相对较短,学习内容更全面更集中。
二方面是可以找到适合自己的学习方案
包括:stable diffusion安装包、stable diffusion0基础入门全套PDF,视频学习教程。带你从零基础系统性的学好AI绘画!
零基础AI绘画学习资源介绍
👉stable diffusion新手0基础入门PDF👈
(全套教程文末领取哈)

👉AI绘画必备工具👈

👉AI绘画基础+速成+进阶使用教程👈
观看零基础学习视频,看视频学习是最快捷也是最有效果的方式,跟着视频中老师的思路,从基础到深入,还是很容易入门的。

温馨提示:篇幅有限,已打包文件夹,获取方式在:文末
👉大厂AIGC实战案例👈
光学理论是没用的,要学会跟着一起敲,要动手实操,才能将自己的所学运用到实际当中去,这时候可以搞点实战案例来学习。

👉12000+AI关键词大合集👈

这份完整版的学习资料已经上传CSDN,朋友们如果需要可以微信扫描下方CSDN官方认证二维码免费领取【保证100%免费】


 1万+
1万+

 被折叠的 条评论
为什么被折叠?
被折叠的 条评论
为什么被折叠?
 到【灌水乐园】发言


