


一、Gojs图形库介绍
实现此效果可看此文章传送门
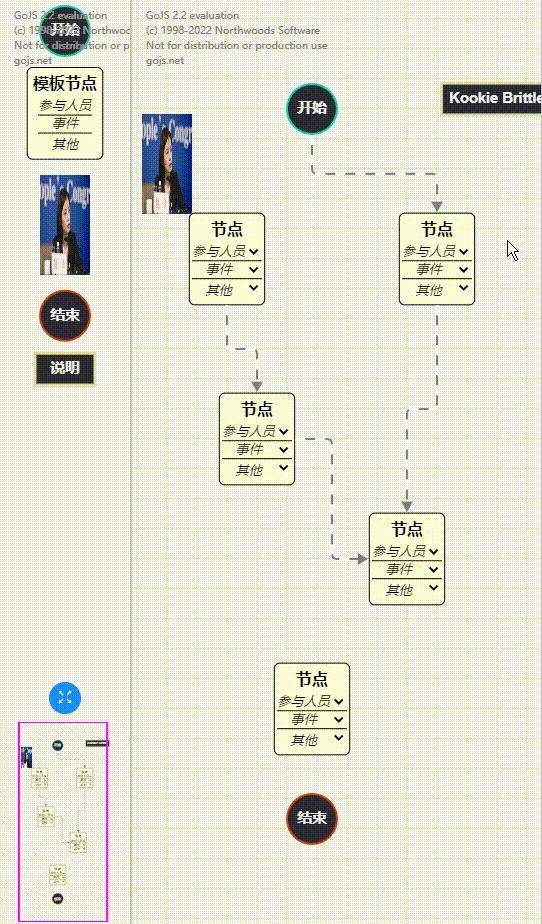
gojs是javascript中一个非常强大交互式图形库 支持TS
GoJS 为用户交互提供了许多高级功能,例如拖放、复制和粘贴、就地文本编辑、工具提示、上下文菜单、自动布局、模板、数据绑定和模型、事务状态和撤消管理、调色板、概述、事件处理程序、命令和用于自定义操作的可扩展工具系统。
官网示例比较丰富,基本可满足日常需求!
二 、常用的api及实例
1. 每一个GoJS画布都是包含在一个HTML标签中,必须有ID,样式可进行自定义!
<div id="myDiagramDiv" style="width:400px; height:150px; background-color: #DAE4E4;">
</div>
2. 在js中创建Diagram画布,指定相应的标签id
此步骤可设置一些属性及方法,如点击画布时的方法
let $ = go.GraphObject.make;
let myDiagram = $(go.Diagram, "myDiagramDiv",{
                   //模型图的中心位置所在坐标
                   initialContentAlignment: go.Spot.Center,
                   //允许用户操作图表的时候使用Ctrl-Z撤销和Ctrl-Y重做快捷键
                   "undoManager.isEnabled": true,
                   //不运行用户改变图表的规模
                   allowZoom: false,
                   //画布上面是否出现网格
                   "grid.visible": true,
                   //允许在画布上面双击的时候创建节点
                   "clickCreatingTool.archetypeNodeData": { text: "Node" },
                   //允许使用ctrl+c、ctrl+v复制粘贴
                   "commandHandler.copiesTree": true,
                   //允许使用delete键删除节点
                   "commandHandler.deletesTree": true,
                   // dragging for both move and copy
                   "draggingTool.dragsTree": true,
                     // 开启分组
                   "commandHandler.archetypeGroupData": {
                    text: "Group",
                    isGroup: true,
                    color: "blue",
                   },
                   click:()=>{alert(666)}
            });
3. 定义节点样式
partContextMenu是需要我们对右键菜单进行的一些配置,下方会讲如何配置右键菜单
myDiagram.nodeTemplate =
    // go.Node 生成一个节点  新增节点时第一次必须为go.Node
		$(go.Node, "Auto",
		  { locationSpot: go.Spot.Center },
		  $(go.Shape, "RoundedRectangle",
			{
		   fill: "white", // 如果下方没有数据绑定的话,则默认填充为白色
		   portId: "",
       cursor: "pointer",  // 这里应该是线指针
       // 允许从某端口到某端口进行连接
	     fromLinkable: true, fromLinkableSelfNode: true, fromLinkableDuplicates: true,
		   toLinkable: true, toLinkableSelfNode: true, toLinkableDuplicates: true
	    },
      // 根据数据字段确定当前节点的主题色
      // 如当前数据color值为black,当前节点的主题色则为黑色
			new go.Binding("fill", "color")),
      // 当前节点下新增一个文本模块
      // 一些样式可进行自定义
		  $(go.TextBlock,
			 {
		     font: "bold 14px sans-serif",
		     stroke: '#333',
	       margin: 6,
	       isMultiline: false,  // 不允许换行
		     editable: true  // allow in-place editing by user
    	 },
        // 和上方的fill一样,此处也可以对文本块的值进行绑定
			 new go.Binding("text", "text").makeTwoWay()),
    // 这里就是节点的一些配置,可以添加右键菜单、悬浮提示等!
		{
      //  悬浮提示
	  	toolTip:
		  $("ToolTip",
		    $(go.TextBlock, { margin: 4 },
		  	new go.Binding("text", "", nodeInfo))
		    ),
	  	// 右键菜单
	    contextMenu: partContextMenu
	  }
);
4. 如何配置右键菜单
var partContextMenu =
	$("ContextMenu",
		  makeButton("Properties",
					 function(e, obj) {  // obj是定义的Properties按钮
			         var contextmenu = obj.part;  // 按钮在上下文菜单装饰中
			         var part = contextmenu.adornedPart;  // adornedPart是上下文菜单装饰的部分
		        	// 现在则可以根据part提供的数据做一些事情!
		        	if (part instanceof go.Link) alert(linkInfo(part.data));
		        	else if (part instanceof go.Group) alert(groupInfo(contextmenu));
		        	else alert(nodeInfo(part.data));
	       }),
      // 剪切
	  makeButton("Cut",
					 function(e, obj) { e.diagram.commandHandler.cutSelection(); },
					 function(o) { return o.diagram.commandHandler.canCutSelection(); }),
	  // 复制
      makeButton("Copy",
					 function(e, obj) { e.diagram.commandHandler.copySelection(); },
					 function(o) { return o.diagram.commandHandler.canCopySelection(); }),
	  // 粘贴
      makeButton("Paste",
					 function(e, obj) { e.diagram.commandHandler.pasteSelection(e.diagram.toolManager.contextMenuTool.mouseDownPoint); },
					 function(o) { return o.diagram.commandHandler.canPasteSelection(o.diagram.toolManager.contextMenuTool.mouseDownPoint); }),
	  // 删除
      makeButton("Delete",
					 function(e, obj) { e.diagram.commandHandler.deleteSelection(); },
					 function(o) { return o.diagram.commandHandler.canDeleteSelection(); }),
	  // 撤销
      makeButton("Undo",
					 function(e, obj) { e.diagram.commandHandler.undo(); },
					 function(o) { return o.diagram.commandHandler.canUndo(); }),
	  // 重做
      makeButton("Redo",
					 function(e, obj) { e.diagram.commandHandler.redo(); },
					 function(o) { return o.diagram.commandHandler.canRedo(); }),
	  // 分组
      makeButton("Group",
					 function(e, obj) { e.diagram.commandHandler.groupSelection(); },
					 function(o) { return o.diagram.commandHandler.canGroupSelection(); }),
	  // 取消分组
      makeButton("Ungroup",
					 function(e, obj) { e.diagram.commandHandler.ungroupSelection(); },
					 function(o) { return o.diagram.commandHandler.canUngroupSelection(); })
		 );
5. 如何定义链接线
linkInfo:自定义的一个函数,返回悬浮提示的文字
myDiagram.linkTemplate =
		$(go.Link,
		  {  // 线条结束点的宽度
         toShortLength: 3,
         // 起点可以重新链接
         relinkableFrom: true,
         // 结束点可以重新链接
         relinkableTo: true
      },
      // go.Shape 一般为样式设置
		  $(go.Shape,
         // 线条宽度
		  	 { strokeWidth: 2 },
         // 绑定的数据  如颜色则绑定数据的color属性
		     new go.Binding("stroke", "color")),
		  $(go.Shape,
        // 线条箭头的样式设置
			  { toArrow: "Standard", stroke: null },
			  new go.Binding("fill", "color")),
		  { //为线条增加悬浮提示
		   toolTip:
	   	 $("ToolTip",
		     $(go.TextBlock, { margin: 4 },
			     new go.Binding("text", "", linkInfo))
		  ),
		// 线条也可以具有右键菜单
		contextMenu: partContextMenu
	}
);
// linkInfo自定义悬浮提示内容
function linkInfo(d) {  // Tooltip info for a link data object
		return "Link:\nfrom " + d.from + " to " + d.to;
}
6. 如何自定义分组
myDiagram.groupTemplate =
		$(go.Group, "Vertical",
		 {
		  selectionObjectName: "PANEL",  // 组的样式,设置为环绕,具体查看文档
		  ungroupable: true  // 启用 Ctrl-Shift-G 取消当前组
	   },
     // 这里应该是绑定组名称
		 $(go.TextBlock,
			{
	     	alignment: go.Spot.Right, //设置对齐方式 靠右
	     	font: "bold 19px sans-serif",
	    	isMultiline: false,  // 关闭强制一行
		    editable: true  // 允许用户编辑
	    },
			new go.Binding("text", "text").makeTwoWay(),
			new go.Binding("stroke", "color")
     ),
     // 构建组的样式
		 $(go.Panel, "Auto",
			{ name: "PANEL" },
			$(go.Shape, "Rectangle",  //构建组的矩形
					{
     			 	//组背景色                      // 组边框色      // 组边框宽度
						fill: "rgba(128,128,128,0.2)", stroke: "gray", strokeWidth: 3,
						portId: "", cursor: "pointer",  // 组也可以被连线的
						// 组连接线的规则配置
						fromLinkable: true, fromLinkableSelfNode: true, fromLinkableDuplicates: true,
						toLinkable: true, toLinkableSelfNode: true, toLinkableDuplicates: true
	   		 }
      ),
			$(go.Placeholder, { margin: 10, background: "transparent" })  // 表示成员所在位置
		   ),
		  { // 组的悬浮提示
				toolTip:
				$("ToolTip",
				  $(go.TextBlock, { margin: 4 },
					  new go.Binding("text", "", groupInfo).ofObject())
				 ),
				//组的右键菜单,所有的右键菜单都可以用上方右键菜单的配置,也可以根据需求自定义
				contextMenu: partContextMenu
	}
		 );


// groupInfo 自定义分组悬浮提示的内容
function groupInfo(adornment) {
		var g = adornment.adornedPart;
		var mems = g.memberParts.count;
		var links = 0;
		g.memberParts.each(function(part) {
			if (part instanceof go.Link) links++;
		});
		return "Group " + g.data.key + ": " + g.data.text + "\n" + mems + " members including " + links + " links";
	}
7. 如何让给当前画布赋值
var nodeDataArray = [
		{ key: 1, text: "Alpha", color: "lightblue" },
		{ key: 2, text: "Beta", color: "orange" },
		{ key: 3, text: "Gamma", color: "lightgreen", group: 5 },
		{ key: 4, text: "Delta", color: "pink", group: 5 },
		{ key: 5, text: "Epsilon", color: "green", isGroup: true }
	];
var linkDataArray = [
		{ from: 1, to: 2, color: "blue" },
		{ from: 2, to: 2 },
		{ from: 3, to: 4, color: "green" },
		{ from: 3, to: 1, color: "purple" }
	];
myDiagram.model = new go.GraphLinksModel(nodeDataArray, linkDataArray);
三、如何让节点线条流动
// 首先,线条的颜色肯定不能是单一的,不然就体现不出流动的效果
//这个将线条设置为白色
 $(go.Shape, {
          isPanelMain: true,
          stroke: "white",
          strokeWidth: 3,
          name: "PIPE",
          strokeDashArray: [10, 10],
        }),
   // 这里要根据当前线条绑定的属性来判断,如果isHighlighted 则将背景色设置为红色
   new go.Binding("stroke", "isHighlighted", function (h, xx) {
            return h ? "red" : "gray";
    }).ofObject()

// 此时可以在节点选中切换时为当前节点的子标签,添加isHighlighted属性为true
// 并将其他节点的动画全部结束,再为当前节点的线添加动画
// selectionChanged 为当前节点选中切换的函数 是官方给每个节点提供的,我们只需要为它绑定方法即可
let animonList = [];
selectionChanged: (e, node) => {
              // 点击节点后高亮其名下所有节点
              // 获取当前节点实例
              var diagram = e.diagram;
              // 此处为我们在做一下对画布有改变的动作时,需要执行的函数
              diagram.startTransaction("highlight");
              // 清除高亮
              diagram.clearHighlighteds();
              // 将当前选择节点的出线 设置为反
              e.findNodesOutOf().each(function (n) {
                n.isHighlighted = !n.isHighlighted;
              });
              diagram.commitTransaction("highlight");
              // 判断当前是否选中,选中则开始动画,不选中则结束动画
              if (e.isSelected) {
                let index = animonList.findIndex((item) => {
                  if (item.key == e.data.key) {
                    return true;
                  }
                });
                // 不能直接添加动画,需要去动画列表里找,如果有的话就赋值就好了,没有就添加
                let animation = {};
                if (index == -1) {
                  animation = new go.Animation();
                  animation.easing = go.Animation.EaseLinear;
                } else {
                  animation = animonList[index].animation;
                }
                // 为当前动画函数赋值
                e.findLinksOutOf().each((a) => {
                  animation.add(
                    a.findObject("PIPE"),
                    "strokeDashOffset",
                    20,
                    0
                  );
                  //设置为无线循环
                  animation.runCount = Infinity;
                  if (index == -1) {
                    animonList.push({ key: e.data.key, animation: animation });
                  }
                  // 动画开始
                  animation.start();
                });
                return;
              } else {
                // 此处为当前节点未选中时执行的函数
                // 当节点不是选中的时候就需要把动画 停止了,首先要去动画列表里查找当前节点的动画
                // 找到以后直接停止,再将它从当前动画列表中删除就好了
                let index = animonList.findIndex((item) => {
                  if (item.key == e.data.key) {
                    return true;
                  }
                });
                if (index !== -1) {
                  animonList[index].animation.stop();
                  animonList.splice(index, 1);
                }
              }
            },


 1864
1864


 被折叠的 条评论
为什么被折叠?
被折叠的 条评论
为什么被折叠?
 到【灌水乐园】发言


