


手动实现RPC框架系列文章
文章写到这里,其实就已经快进入尾声了,因为目前我们这个系列的文章几乎已经把整个RPC框架搭建的过程,所需的步骤等等都进行了讲解,其实在过第一遍的时候,我觉得可能有很多小伙伴们跟我一样,心中有了个大致的了解,也知道需要设计哪些东西,但是对于核心代码的理解或者说让我们自己手动来写这样的代码还是感觉力不从心。
我个人觉得最好的方式就是,我们可以在过完第一遍的基础上,我们启动RPC的框架,然后通过DEbug的方式去实际的代码中看一看整个流程是怎么运转的。呃,我也会这样去做,如果有机会的话,我也会把我第二遍学习,甚至是第三步学习的过程再记录到这个专栏的博客中,因为我也感觉还是有挺多地方有待深刻的学习的。
学习是一个循循渐进的过程,唯有反复钻研,方可铭记于心。
本系列文章,功能实现来自于 Github 作者 Java Guide的开源作品,我个人是选择边实现边学习的方式,本系列的文章是对Guide哥的作品地实现进行讲解和学习。( 作为我实现作品的笔记)
下面是Guide作品的连接,推荐大家可以直接进去下载并且学习
mirrors / Snailclimb / guide-rpc-framework · GitCode
个人推荐,关于代码和实现部分直接在GitHub上拉取Guide哥的作品,也可以结合我本系列的文章一起学习,因为我写的文章相当于结合Guide哥的代码和文章再进行一个解读和分析,搭配使用味道更佳,我也是一个初学者,因为记录的是本人的学习过程,所以可能有不严谨和出错的地方,望海涵。如果有能帮助到您的地方,我将万分荣幸。
手动实现RPC框架_种一棵橙子树的博客-CSDN博客
目录
前言
一、动态代理屏蔽网络传输细节
前面我们提到过,在PRC框架中我们会使用动态代理的方式来屏蔽网络传输细节。
这是我们写的动态代理类
@Slf4j
public class RpcClientProxy implements InvocationHandler {
    public <T> T getProxy(Class<T> clazz) {
        return (T) Proxy.newProxyInstance(clazz.getClassLoader(), new Class<?>[]{clazz}, this);
    }
    @Override
    public Object invoke(Object proxy, Method method, Object[] args) {
    }
}
这里我们使用的JDK默认的动态代理方式。当我们去调用一个远程的方法的时候,实际上是通过代理对象去调用的。
以下是动态代理类的完整代码
整体流程其实也比较容易看懂,不过这里的两个构造函数分别对应了不同的实现方式,Socket和Netty的网络传输,注意区分一下即可。
代理对象会通过invoke方法去监听被代理对象的方法,然后实际上是通过代理对象的方法来完成网络传输的。
@Slf4j
public class RpcClientProxy implements InvocationHandler {

    private static final String INTERFACE_NAME = "interfaceName";

    /**
     * Used to send requests to the server.And there are two implementations: socket and netty
     */
    private final RpcRequestTransport rpcRequestTransport;
    private final RpcServiceConfig rpcServiceConfig;

    public RpcClientProxy(RpcRequestTransport rpcRequestTransport, RpcServiceConfig rpcServiceConfig) {
        this.rpcRequestTransport = rpcRequestTransport;
        this.rpcServiceConfig = rpcServiceConfig;
    }


    public RpcClientProxy(RpcRequestTransport rpcRequestTransport) {
        this.rpcRequestTransport = rpcRequestTransport;
        this.rpcServiceConfig = new RpcServiceConfig();
    }

    /**
     * get the proxy object
     */
    @SuppressWarnings("unchecked")
    public <T> T getProxy(Class<T> clazz) {
        return (T) Proxy.newProxyInstance(clazz.getClassLoader(), new Class<?>[]{clazz}, this);
    }

    /**
     * This method is actually called when you use a proxy object to call a method.
     * The proxy object is the object you get through the getProxy method.
     */
    @SneakyThrows
    @SuppressWarnings("unchecked")
    @Override
    public Object invoke(Object proxy, Method method, Object[] args) {
        log.info("invoked method: [{}]", method.getName());
        RpcRequest rpcRequest = RpcRequest.builder().methodName(method.getName())
                .parameters(args)
                .interfaceName(method.getDeclaringClass().getName())
                .paramTypes(method.getParameterTypes())
                .requestId(UUID.randomUUID().toString())
                .group(rpcServiceConfig.getGroup())
                .version(rpcServiceConfig.getVersion())
                .build();
        RpcResponse<Object> rpcResponse = null;
        if (rpcRequestTransport instanceof NettyRpcClient) {
            CompletableFuture<RpcResponse<Object>> completableFuture = (CompletableFuture<RpcResponse<Object>>) rpcRequestTransport.sendRpcRequest(rpcRequest);
            rpcResponse = completableFuture.get();
        }
        if (rpcRequestTransport instanceof SocketRpcClient) {
            rpcResponse = (RpcResponse<Object>) rpcRequestTransport.sendRpcRequest(rpcRequest);
        }
        this.check(rpcResponse, rpcRequest);
        return rpcResponse.getData();
    }

    private void check(RpcResponse<Object> rpcResponse, RpcRequest rpcRequest) {
        if (rpcResponse == null) {
            throw new RpcException(RpcErrorMessageEnum.SERVICE_INVOCATION_FAILURE, INTERFACE_NAME + ":" + rpcRequest.getInterfaceName());
        }

        if (!rpcRequest.getRequestId().equals(rpcResponse.getRequestId())) {
            throw new RpcException(RpcErrorMessageEnum.REQUEST_NOT_MATCH_RESPONSE, INTERFACE_NAME + ":" + rpcRequest.getInterfaceName());
        }

        if (rpcResponse.getCode() == null || !rpcResponse.getCode().equals(RpcResponseCodeEnum.SUCCESS.getCode())) {
            throw new RpcException(RpcErrorMessageEnum.SERVICE_INVOCATION_FAILURE, INTERFACE_NAME + ":" + rpcRequest.getInterfaceName());
        }
    }
}
二、通过注解注册和消费服务
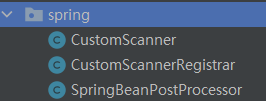
之前我们通过代码的形式来注册和发现服务,但是现在我们可以引入Spring 容器的功能来实现IOC的功能。核心代码在这个包下面
然后我们自定义两个注解
RpcService
@Documented
@Retention(RetentionPolicy.RUNTIME)
@Target({ElementType.TYPE})
@Inherited
public @interface RpcService {

    /**
     * Service version, default value is empty string
     */
    String version() default "";

    /**
     * Service group, default value is empty string
     */
    String group() default "";

}
RpcReference
@Documented
@Retention(RetentionPolicy.RUNTIME)
@Target({ElementType.FIELD})
@Inherited
public @interface RpcReference {

    /**
     * Service version, default value is empty string
     */
    String version() default "";

    /**
     * Service group, default value is empty string
     */
    String group() default "";

}在SpringBeanPostProcessor这个类中,我们实现 BeanPostProcessor接口并且重写了里面的postProcessBeforeInitializtion方法和postProcessAfterInitialization方法。
当我们标注为Spring Bean的类在实例化前会调用postProcessBeforeInitializtion 方法,在实例化后会调用postProcessAfterInitialization方法。
@Slf4j
@Component
public class SpringBeanPostProcessor implements BeanPostProcessor {

    @Override
    public Object postProcessBeforeInitialization(Object bean, String beanName) throws BeansException {

    }

    @Override
    public Object postProcessAfterInitialization(Object bean, String beanName) throws BeansException {

    }
}
而在之前我们创建的 RpcService 和 RpcReference 注解,被这两个注解标注的类都是Spring Bean。 我们在 postProcessBeforeInitializtion 方法中判断类上是否有 RpcService 注解,如果有的话,就取出 group 和 version 的值。然后调用 ServiceProvider的 publishService方法即可发布服务。
相同的,我们可以在postProcessAfterInitialization方法中遍历类的属性上是否有 RpcReference注解,如果有的话,就通过反射对这个属性赋值。
总结
目前,我们的RPC框架就到了尾声了,其实功能到这里就已经完善了,大家也可以尝试自己启动来实现以下,在后续,我会继续写文章来对整个框架进行更深的学习和讲解。


 2万+
2万+


 被折叠的 条评论
为什么被折叠?
被折叠的 条评论
为什么被折叠?
 到【灌水乐园】发言


