


目录
11.Cannot read property '0' of undefined"
vue
1.vue项目中导出表格
npm install --save xlsx file-saver
创建文件

// 在新创建的文件下引入
// 导出表格
import FileSaver from 'file-saver'
import * as XLSX from 'xlsx'
export default {
  // 导出Excel表格
  exportExcel (name, tableName) {
    // name表示生成excel的文件名     tableName表示表格的id
    var sel = XLSX.utils.table_to_book(document.querySelector(tableName))
    var selIn = XLSX.write(sel, { bookType: 'xlsx', bookSST: true, type: 'array' })
    try {
      FileSaver.saveAs(new Blob([selIn], { type: 'application/octet-stream' }), name)
    } catch (e) {
      if (typeof console !== 'undefined') console.log(e, selIn)
    }
    return selIn
  }
}
刚开始用如果只是
import XLSX from 'xlsx'
会报一个错误
Cannot read properties of undefined (reading 'utils')"
只要加上 * as 就可以了
// 在main.js中引入
import htmltoexcel from './excel/htmltotxcel'
Vue.prototype.$htmltoexcels = htmltoexcel
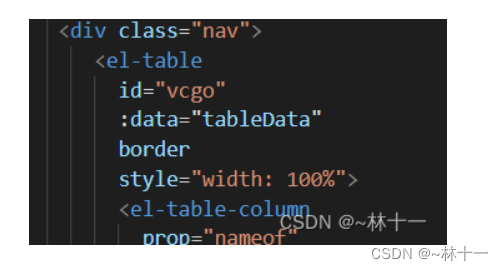
在要导出的表格加id
定义一个方法
exportexcel () {
this.$htmltoexcels.exportExcel('mocj设置.xlsx', '#vcgo')
}
就可以调用这个方法
2.使用轮播展示数据

显示效果是往上一直无缝滚动
//安装vue-seamless-scroll插件
npm install vue-seamless-scroll --save
//在mian.js文件中引入
import scroll from 'vue-seamless-scroll'
Vue.use(scroll)
      <div class="scroll-one two">
          <vue-seamless-scroll :data="twolist" :class-option="classOption">
          <div class="scroll-one-top">
            <span>组名</span>
            <span>组长</span>
            <span>年龄</span>
            <span>评分</span>
          </div>
          <ul>
            <li v-for="(item,index) in twolist" :key="index">
              <span>{
  {item.group}}</span>
              <span>{
  {item.captain}}</span>
              <span>{
  {item.age}}</span>
              <span>{
  {item.integral}}</span>
            </li>
          </ul>
          </vue-seamless-scroll>
        </div>
computed: {
classOption () {
return {
step: 2, // 数值越大速度滚动越快
limitMoveNum: 3, // 开启无缝滚动的数据量 设置(数值<=页面展示数据条数不滚)(超过页面展示条数滚动)
openWatch: true, // 开启数据实时监控刷新dom
singleHeight: 40,
waitTime: 1 // 单行停顿时间(singleHeight,waitTime)
}
}
}其他配置可以查看文档chenxuan0000
3.全局事件总线的运用
// main.js中
new Vue({
  router,
  store,
  render: h => h(App),
  beforeCreate () {
    Vue.prototype.$bus = this // 事件总线
  }
}).$mount('#app')

// 在这里定义
<el-color-picker v-model="color2" @change="status(1)"></el-color-picker>
status (e) {
// console.log('1')
if (e === 1) {
this.$bus.$emit('changecolor', this.color2)
}
}
// 相当于 $emit this.$bus.$on('changecolor', data => {
// console.log(data)
this.bgcolor = data
})
// 可以写到methods或者mounted中4.获取焦点元素上移,加阴影
类似商城类
	.box1{
			width: 50px;
			height: 50px;
			background-color: red;
			border-radius: 50%;
			transition: .2s;
		}
		.box1:hover{
			transform: translateY(-10px);
			box-shadow: 1px 1px 9px rgba(0, 0, 0, .3);
		}
5. 使用echarts
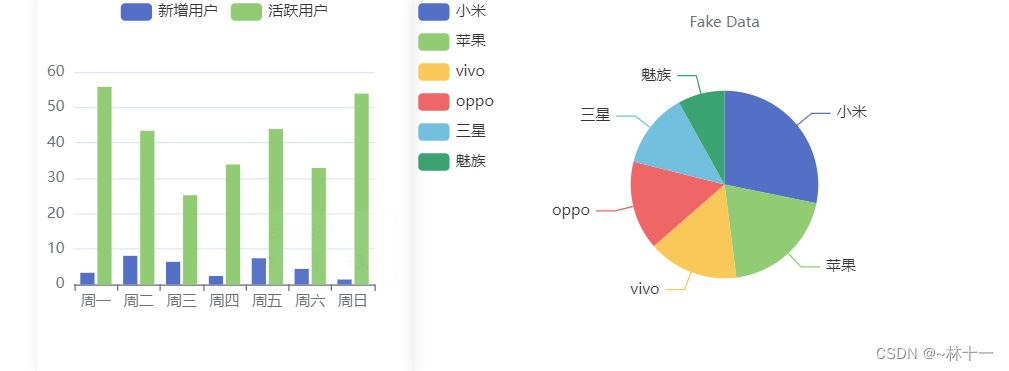
实现上述效果
npm install echarts --save
main.js
import * as Echarts from 'echarts'
Vue.prototype.echarts = Echarts
Vue.use(Echarts)
相应页面

html部分
<div class="right-c">
          <div class="right-c-a">
            <div ref="left" style="width: 300px; height: 300px;"></div>
          </div>
          <div class="right-c-b">
            <div ref="right" style="width: 500px; height: 300px;"></div>
          </div>
 </div>
 mounted () {
//调用
    this.drawChart()
    this.showleft()
    this.showright()
  },
js部分
 async showleft () {
      // 发起请求拿数据
      const res = await this.$axios.get('/user/payinforleft')
      this.leftlist = res.data.data[0].leftlist
      // console.log(res.data.status)
      if (res.data.status !== 200) {
        return
      }
      // console.log('1')
      // this.$refs.left 可以直接访问页面res=left的部分
      const myechart = this.echarts.init(this.$refs.left)
      const option = {
        legend: {},
        tooltip: {},
        dataset: {
          dimensions: ['product', '新增用户', '活跃用户'],
          source: this.leftlist
        },
        xAxis: { type: 'category' },
        yAxis: {},
        // Declare several bar series, each will be mapped
        // to a column of dataset.source by default.
        series: [{ type: 'bar' }, { type: 'bar' }]
      }
      myechart.setOption(option)
    },
    async showright () {
      const res = await this.$axios.get('/user/payinforright')
      // console.log(res)
      if (res.data.status !== 200) {
        return
      }
      this.rightlist = res.data.data[0].rightlist
      const myechart = this.echarts.init(this.$refs.right)
      const option = {
        title: {
          text: '',
          subtext: 'Fake Data',
          left: 'center'
        },
        tooltip: {
          trigger: 'item'
        },
        legend: {
          orient: 'vertical',
          left: 'left'
        },
        series: [
          {
            name: 'Access From',
            type: 'pie',
            radius: '50%',
            data: this.rightlist,
            emphasis: {
              itemStyle: {
                shadowBlur: 10,
                shadowOffsetX: 0,
                shadowColor: 'rgba(0, 0, 0, 0.5)'
              }
            }
          }
        ]
      }
      myechart.setOption(option)
    },
6.添加加载的进度条
使用第三方组件库nprogress
下载
npm install --save nprogress
有多种方式在路由中使用,或者在axios中使用
import axios from 'axios'
import 'nprogress/nprogress.css
最低0.47元/天 解锁文章


 3万+
3万+


 被折叠的 条评论
为什么被折叠?
被折叠的 条评论
为什么被折叠?
 到【灌水乐园】发言


