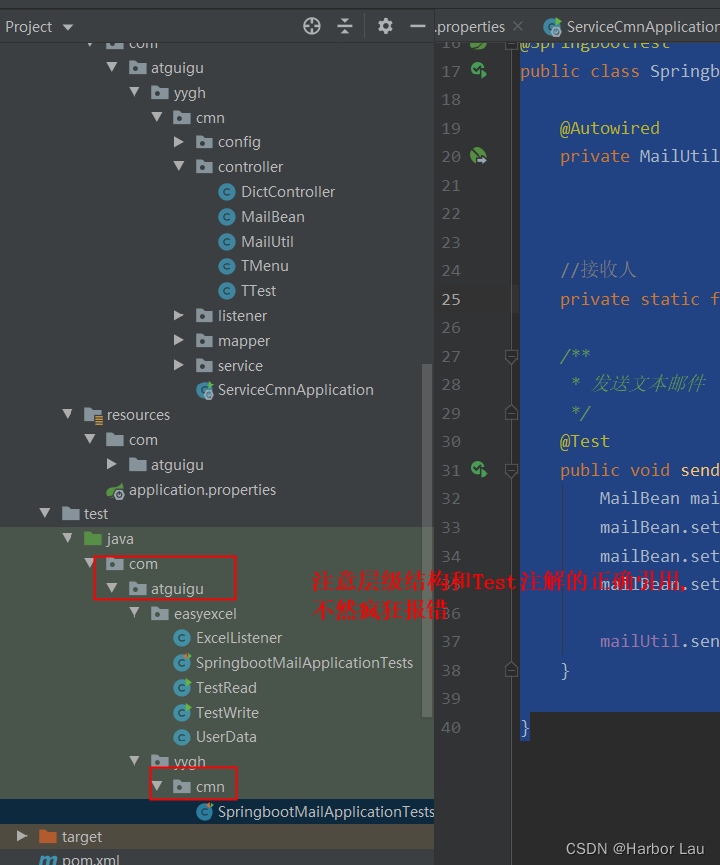
1.maven依赖
 <!-- email依赖 -->
        <dependency>
            <groupId>org.springframework.boot</groupId>
            <artifactId>spring-boot-starter-mail</artifactId>
        </dependency>
        <dependency>
            <groupId>org.springframework.boot</groupId>
            <artifactId>spring-boot-starter-test</artifactId>
            <scope>test</scope>
        </dependency>
        <dependency>
            <groupId>junit</groupId>
            <artifactId>junit</artifactId>
            <scope>test</scope>
        </dependency>
package com.atguigu.yygh.cmn.controller;
import lombok.Data;
import java.io.Serializable;
@Data
public class MailBean implements Serializable {
private static final long serialVersionUID = -2116367492649751914L;
private String recipient;//邮件接收人
private String subject; //邮件主题
private String content; //邮件内容
// 省略setget方法
}package com.atguigu.yygh.cmn.controller;
import org.mybatis.logging.Logger;
import org.mybatis.logging.LoggerFactory;
import org.springframework.beans.factory.annotation.Autowired;
import org.springframework.beans.factory.annotation.Value;
import org.springframework.mail.SimpleMailMessage;
import org.springframework.mail.javamail.JavaMailSender;
import org.springframework.stereotype.Component;
@Component
public class MailUtil {
@Value("${spring.mail.username}")
private String MAIL_SENDER; //邮件发送者
@Autowired
private JavaMailSender javaMailSender;
private Logger logger = LoggerFactory.getLogger(MailUtil.class);
/**
* 发送文本邮件
*
* @param mailBean
*/
public void sendSimpleMail(MailBean mailBean) {
try {
SimpleMailMessage mailMessage= new SimpleMailMessage();
mailMessage.setFrom(MAIL_SENDER);
mailMessage.setTo(mailBean.getRecipient());
mailMessage.setSubject(mailBean.getSubject());
mailMessage.setText(mailBean.getContent());
//mailMessage.copyTo(copyTo);
javaMailSender.send(mailMessage);
} catch (Exception e) {
}
}
}配置文件
spring.mail.host=smtp.qq.com
# 邮箱地址
spring.mail.username=906533692@qq.com
# 邮箱授权码
spring.mail.password=ymfxhjieunuzbdgg
spring.mail.properties.mail.smtp.auth=true
spring.mail.properties.mail.smtp.starttls.enable=true
spring.mail.properties.mail.smtp.starttls.required=true
spring.mail.default-encoding=UTF-8
测试类
package com.atguigu.yygh.cmn;

import com.alibaba.excel.util.DateUtils;
import com.atguigu.yygh.cmn.controller.MailBean;
import com.atguigu.yygh.cmn.controller.MailUtil;

import org.junit.Test;
import org.junit.runner.RunWith;
import org.springframework.beans.factory.annotation.Autowired;
import org.springframework.boot.test.context.SpringBootTest;
import org.springframework.test.context.junit4.SpringRunner;

import java.util.Date;

@RunWith(SpringRunner.class)
@SpringBootTest
public class SpringbootMailApplicationTests {

    @Autowired
    private MailUtil mailUtil;


    //接收人
    private static final String RECIPINET = "3330397915a@qq.com";

    /**
     * 发送文本邮件
     */
    @Test
    public void sendSimpleMail() {
        MailBean mailBean = new MailBean();
        mailBean.setRecipient(RECIPINET);
        mailBean.setSubject("SpringBootMail之这是一封文本的邮件");
        mailBean.setContent("SpringBootMail发送一个简单格式的邮件666666,时间为:" + DateUtils.format(new Date()));

        mailUtil.sendSimpleMail(mailBean);
    }

}
参考地址


 631
631


 被折叠的 条评论
为什么被折叠?


