


介绍
本示例介绍利用 Canvas 和定时器实现模拟时钟场景,该案例多用于用户需要显示自定义模拟时钟的场景。
效果图预览

使用说明
无需任何操作,进入本案例页面后,所见即模拟时钟的展示。
使用说明
无需任何操作,进入本案例页面后,所见即模拟时钟的展示。
实现思路
本例的的主要实现思路如下:
- 利用CanvasRenderingContext2D中的drawImage将表盘和表针绘制出来;
- 利用定时器每秒刷新一次,计算好时针、分针、秒针对应的偏移量,重新绘制表盘和表针,实现表针的转动。
本例中代码详情可参考AnalogClock.ets和TimeChangeListener.ets
1.在aboutToAppear中执行init函数,初始化表盘和表针对应的pixelMap,并首次绘制表盘和表针,保证进入页面即展示时钟。
// 初始化表盘和表针对应的变量,并首次绘制。
private init() {
  let clockBgSource = image.createImageSource(this.resourceDir + '/' + CLOCK_BG_PATH);
  let hourSource = image.createImageSource(this.resourceDir + '/' + CLOCK_HOUR_PATH);
  let minuteSource = image.createImageSource(this.resourceDir + '/' + CLOCK_MINUTE_PATH);
  let secondSource = image.createImageSource(this.resourceDir + '/' + CLOCK_SECOND_PATH);

  const now = new Date();
  const currentHour = now.getHours();
  const currentMinute = now.getMinutes();
  const currentSecond = now.getSeconds();
  this.time = this.getTime(currentHour, currentMinute, currentSecond);

  // 创建表盘对应的PixelMap并绘制。
  let paintDial = clockBgSource.createPixelMap().then((pixelMap: image.PixelMap) => {
    this.clockPixelMap = pixelMap;
    this.paintDial();
  }).catch((err: BusinessError) => {
    logger.error(`[error]error at clockBgSource.createPixelMap:${err.message}`);
  });

  // 创建时针对应的PixelMap并绘制。
  hourSource.createPixelMap().then(async (pixelMap: image.PixelMap) => {
    await paintDial;
    const hourOffset = currentMinute / 2;
    this.paintPin(ANGLE_PRE_HOUR * currentHour + hourOffset, pixelMap);
    this.hourPixelMap = pixelMap;
  }).catch((err: BusinessError) => {
    logger.error(`[error]error at hourSource.createPixelMap:${err.message}`);
  });

  ...
}
2.为表盘和表针的绘制注册监听,每秒钟重新绘制一次,实现时钟的转动。
// 2.监听时间变化,每秒重新绘制一次
this.timeListener = new TimeChangeListener(
  (hour: number, minute: number, second: number) => {
    this.renderContext.clearRect(-this.clockRadius, -this.clockRadius, this.canvasSize, this.canvasSize);
    this.paintDial();
    this.timeChanged(hour, minute, second);
    this.time = this.getTime(hour, minute, second);
  },
);
3.表针的绘制逻辑也是关键的一部分,因表针的绘制涉及旋转场景,需每次在旋转前先保存当前的绘制状态,旋转绘制结束后再恢复,防止多次旋转导致时间错乱。
// 绘制表针
private paintPin(degree: number, pinImgRes: image.PixelMap | null) {
  // TODO:知识点:先将当前绘制上下文保存再旋转画布,先保存旋转前的状态,避免状态混乱。
  this.renderContext.save();
  const angleToRadian = Math.PI / 180;
  let theta = degree * angleToRadian;
  this.renderContext.rotate(theta);
  this.renderContext.beginPath();
  if (pinImgRes) {
    this.renderContext.drawImage(
      pinImgRes,
      -IMAGE_WIDTH / 2,
      -this.clockRadius,
      IMAGE_WIDTH,
      this.canvasSize);
  } else {
    logger.error('PixelMap is null!');
  }
  this.renderContext.restore();
}
高性能知识点
不涉及
工程结构&模块类型
analogclock                             // har类型
|---src/main/ets/pages
|   |---AnalogClock.ets                 // 页面及时钟绘制的主要逻辑
|   |---TimeChangeListener.ets          // 时间变化监听文件
模块依赖
参考资料
为了能让大家更好的学习鸿蒙(HarmonyOS NEXT)开发技术,这边特意整理了《鸿蒙开发学习手册》(共计890页),希望对大家有所帮助:https://qr21.cn/FV7h05
《鸿蒙开发学习手册》:
如何快速入门:https://qr21.cn/FV7h05
- 基本概念
- 构建第一个ArkTS应用
- ……
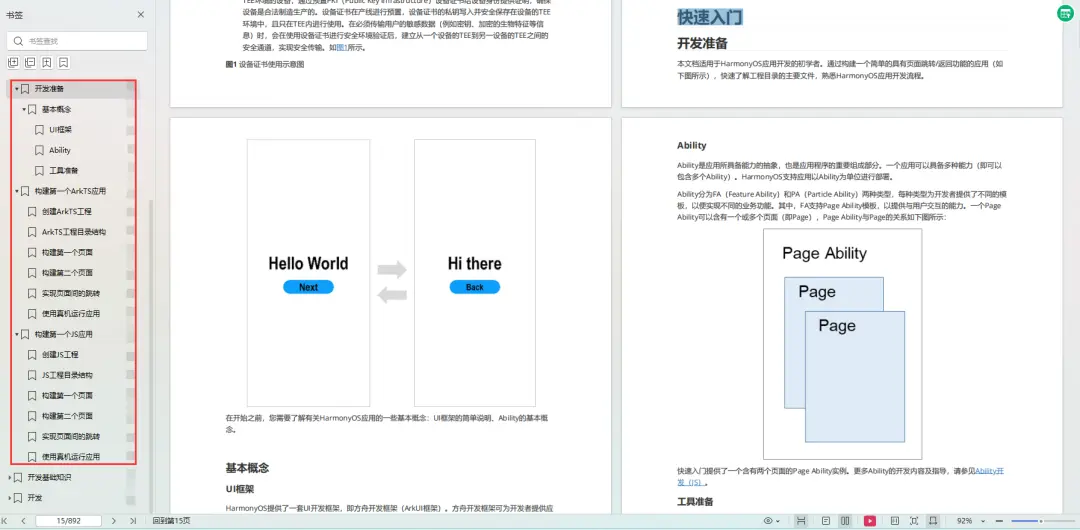
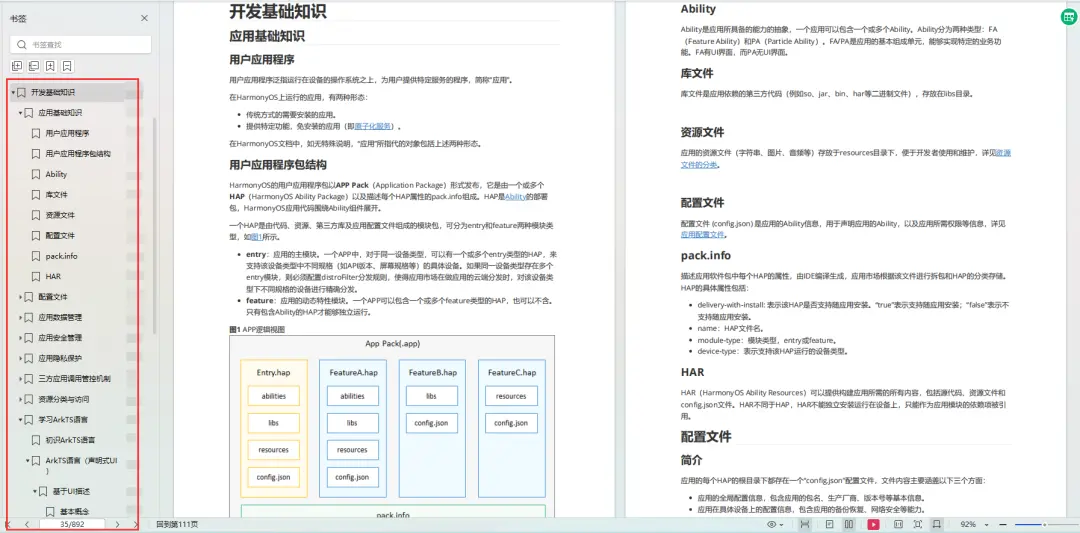
开发基础知识:https://qr21.cn/FV7h05
- 应用基础知识
- 配置文件
- 应用数据管理
- 应用安全管理
- 应用隐私保护
- 三方应用调用管控机制
- 资源分类与访问
- 学习ArkTS语言
- ……
基于ArkTS 开发:https://qr21.cn/FV7h05
- Ability开发
- UI开发
- 公共事件与通知
- 窗口管理
- 媒体
- 安全
- 网络与链接
- 电话服务
- 数据管理
- 后台任务(Background Task)管理
- 设备管理
- 设备使用信息统计
- DFX
- 国际化开发
- 折叠屏系列
- ……

鸿蒙开发面试真题(含参考答案):https://qr18.cn/F781PH
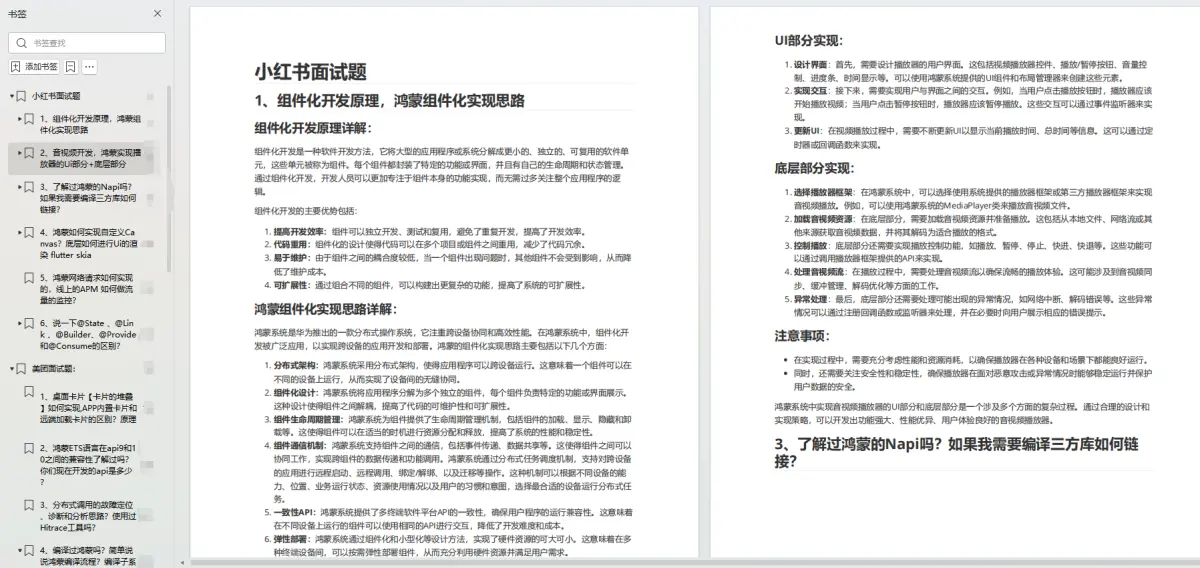
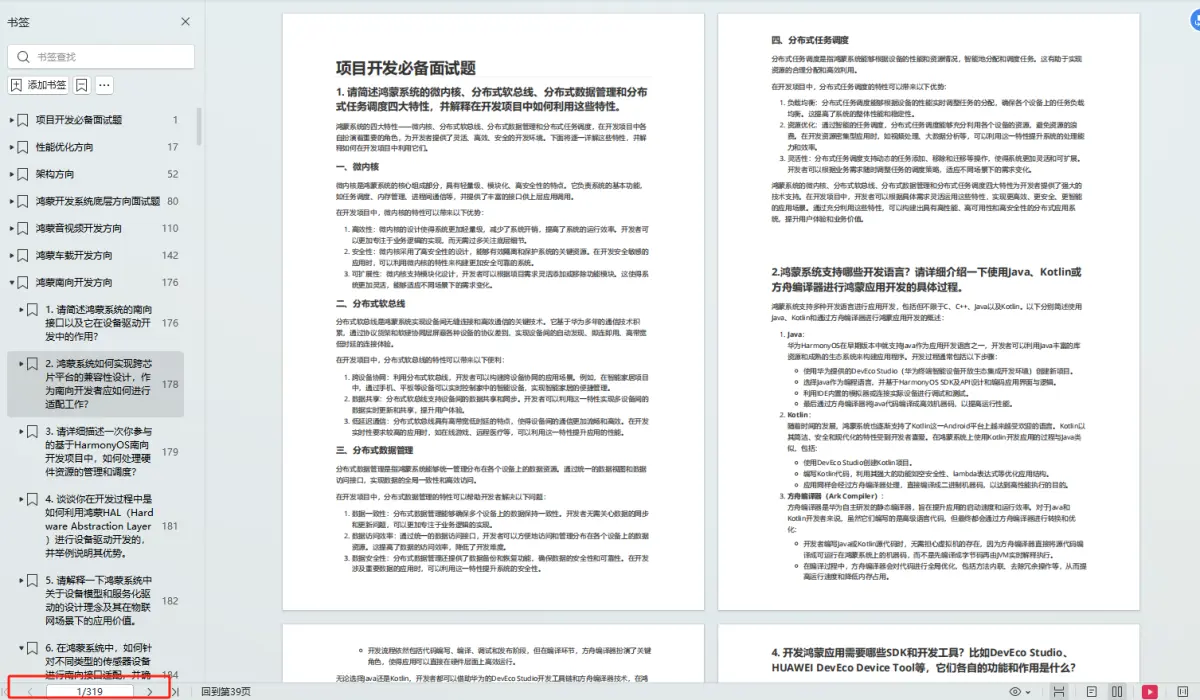
鸿蒙开发面试大盘集篇(共计319页):https://qr18.cn/F781PH
1.项目开发必备面试题
2.性能优化方向
3.架构方向
4.鸿蒙开发系统底层方向
5.鸿蒙音视频开发方向
6.鸿蒙车载开发方向
7.鸿蒙南向开发方向


 11万+
11万+


 被折叠的 条评论
为什么被折叠?
被折叠的 条评论
为什么被折叠?
 到【灌水乐园】发言


