


2023年夏季《移动软件开发》实验报告
一、实验目标
1、掌握视频API的操作方法;2、掌握如何发送随机颜色的弹幕。
二、实验步骤
1.导航栏设计
"window": {
"backgroundTextStyle": "light",
"navigationBarBackgroundColor": "#987938",
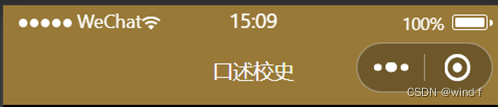
"navigationBarTitleText": "口述校史",
"navigationBarTextStyle": "white"
},
2.页面设计及其逻辑实现
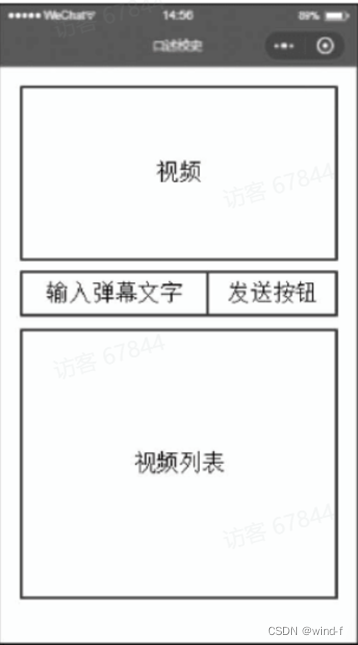
页面主要包含三个区域:
区域1:视频播放区:video组件
区域2:弹幕发送区域:view组件,内部包含input(用于文本输入)和button(发送弹幕按钮)组件
区域3:视频列表:view组件
(1)区域1:视频组件设计
index.wxml
 <!-- 区域1:视频播放器 -->
  <video id='myVideo' src='{{src}}' controls enable-danmu danmu-btn></video>
index.wxss
/* 区域1 视频播放区域 */
video{
  width:100%;
}
(2)区域2:弹幕区域设计
区域2需要使用组件实现一个单行区域,包括文本输入框和发送按钮
index.wxml
<!-- 区域2:弹幕发送区域 -->
  <view class='danmuArea'>
    <!-- 2.1 弹幕发送 -->
    <input type='text' placeholder='请输入弹幕内容' bindinput='getDanmu'></input>
    <!-- 2.2 弹幕发送按钮 -->
    <button bindtap='sendDanmu'>发送弹幕</button>
  </view>
index.wxss
/* 区域2  弹幕区域 */
.danmuArea{
  display:flex;
  flex-direction: row;
}
input{
  border:1rpx solid #987938;
  flex-grow: 1;
  height:100rpx;
}
button{
  color:white;
  background-color: #987938;
}
(3)区域3:视频列表设计
区域3需要使用组件实现一个可扩展的多行区域,每行包含一个播放图标和一个视频标题文本,使用wx:for属性循环添加全部内容。
index.wxml
<!-- 区域3:视频列表 -->
  <view class='videoList'>
    <view class='videoBar' wx:for='{{list}}' wx:key='video{{index}}' data-url='{{item.videoUrl}}' bindtap='playVideo'>
    <image src='/image/play.png'></image>
    <text>{{item.title}}</text>
    </view>
  </view>
index.wxss
/* 区域3 视频列表 */
.videoList{
  width:100%;
  min-height: 400rpx;
}
.videoBar{
  width:95%;
  display:flex;
  flex-direction: row;
  border-bottom: 1rpx solid #987938;
  margin:10rpx;
}
image{
  width:70rpx;
  height:70rpx;
  margin:20rpx;
}
text{
  font-size: 45rpx;
  color:#987938;
  margin:20rpx;
  flex-grow: 1;
}
3.index.js中的主要代码:
//播放视频
  playVideo:function(e){
    //停止之前正在播放的视频
    this.videoCtx.stop()
    //更新视频地址
    this.setData({
      src:e.currentTarget.dataset.url
    })
    //播放新的视频
    this.videoCtx.play()
  },

   //生成随机颜色
   getRandomColor(){
    let rgb=[]
    for(let i=0;i<3;++i){
      let color=Math.floor(Math.random()*256).toString(16)
      color=color.length==1 ? '0'+color:color
      rgb.push(color)
    }
    return '#'+rgb.join('')
  },

  //更新弹幕内容
  getDanmu:function(e){
    this.setData({
      danmuTxt:e.detail.value
    })
  },
  // 发送弹幕
  sendDanmu:function(e){
    let text=this.data.danmuTxt;
    this.videoCtx.sendDanmu({
      text:text,
      color:this.getRandomColor()
    })
  },


  /**
   * 生命周期函数--监听页面加载
   */
  onLoad: function (options) {
    this.videoCtx=wx.createVideoContext('myVideo')
  },
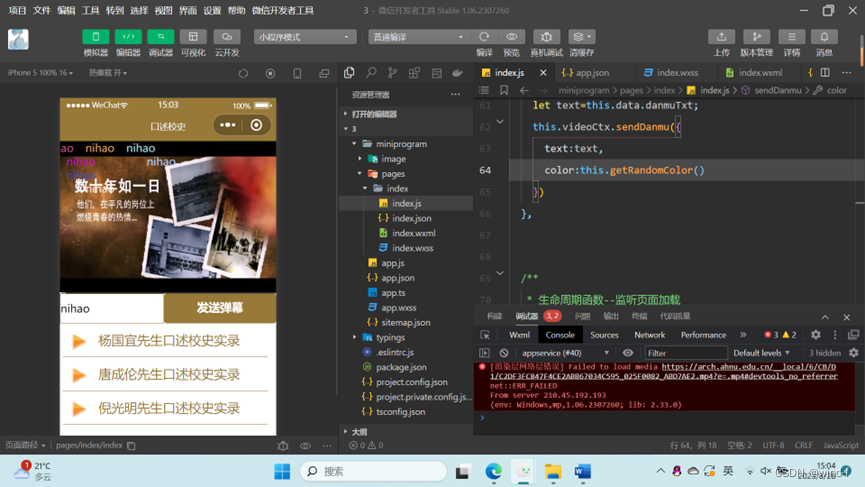
三、程序运行结果
初始界面:
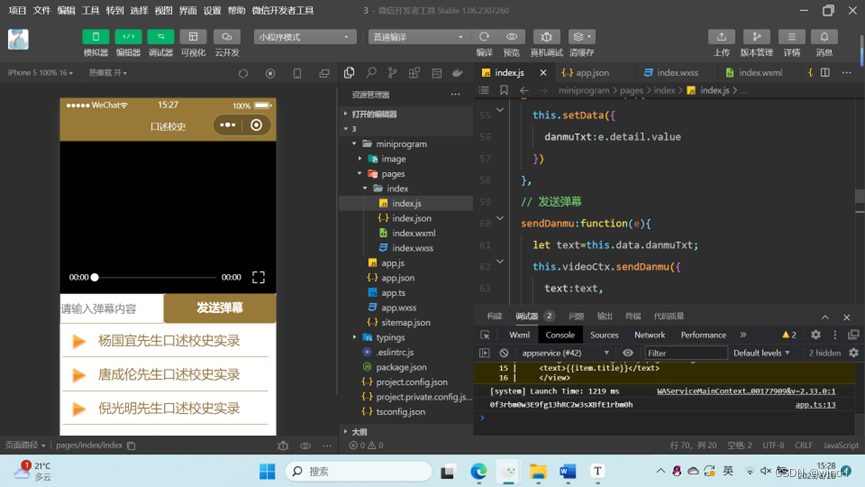
实现效果:播放、暂停、彩色弹幕
四、问题总结与体会
遇到的问题:js文件内函数调用函数时报错:“函数” is not defined
解决方法:调用getRandomColor()函数时,必须使用this.getRandomColor()的方式调用。
感悟:通过此次实验,我学会了视频API的操作方法以及如何发送随机颜色的弹幕。对小程序开发的整体框架有了更深入的了解。


 141
141


 被折叠的 条评论
为什么被折叠?
被折叠的 条评论
为什么被折叠?
 到【灌水乐园】发言


