


引言:喜欢自学的新手们,在学习Swagger生成API文档的时候经常会遇到问题,而目前市面上大部分技术分享者的SpringBoot版本并没和我们的同步,导致一些一模一样的代码,在我们的项目上却无法使用,这是一个经常性的问题,本文章就旨在和大家列举几种常用的项目搭配,来解决访问网址:http://localhost:8080/swagger-ui/index.html 报错“Error Page”的问题。
首先声明一下使用 Spring Boot 2.7 及以上版本时,Swagger 2.9.2会有一些兼容性问题,很有可能在项目运行前我们就饮恨于此了。
比较常见的几个错误:
1、“org.springframework.context.ApplicationContextException: Failed to start bean 'documentationPluginsBootstrapper'; nested exception is java.lang.NullPointerException”
2、“Failed to start bean 'documentationPluginsBootstrapper'
3、“Caused by: java.lang.NullPointerException: null”。
简单的解决办法:
- 版本对应(Maven官方仓库:https://mvnrepository.com/)
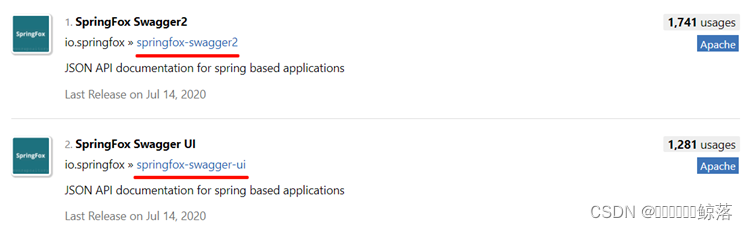
①SPB(SpringBoot) 2.7 以下 + Swagger-ui 和Swagger2 2.9.2
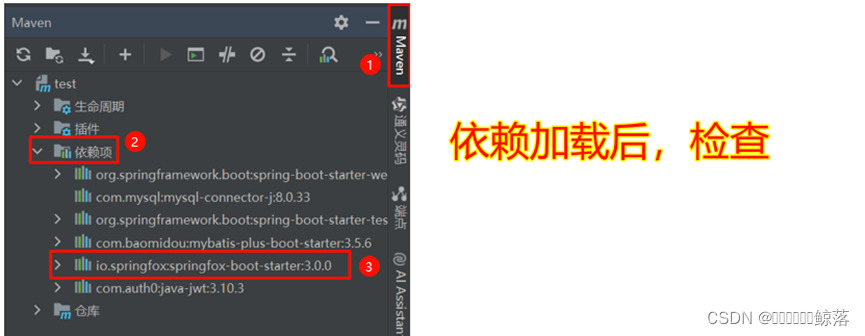
②SPB(SpringBoot) 2.7 往上 + springfox-boot-starter(3.0.0包括Swagger-ui 和Swagger2 3.0.0)

- 直接改用Springdoc OpenAPI

补充性说明

一、低版本过程性搭建
1、依赖展示
<properties>

//……省略
    <spring-boot.version>2.5.3</spring-boot.version>
</properties>
  //……省略

<dependency>
    <groupId>org.springframework.boot</groupId>
    <artifactId>spring-boot-dependencies</artifactId>
    <version>${spring-boot.version}</version>
    <type>pom</type>
    <scope>import</scope>
</dependency>

<dependency>
    <groupId>io.springfox</groupId>
    <artifactId>springfox-swagger2</artifactId>
    <version>2.9.2</version>
</dependency>

<dependency>
    <groupId>io.springfox</groupId>
    <artifactId>springfox-swagger-ui</artifactId>
    <version>2.9.2</version>
</dependency>
2、配置Swagger
(1)最小环境搭建
*注意低版本url:http://localhost:8080/swagger-ui.html
*注意高版本url:http://localhost:8080/swagger-ui/index.html
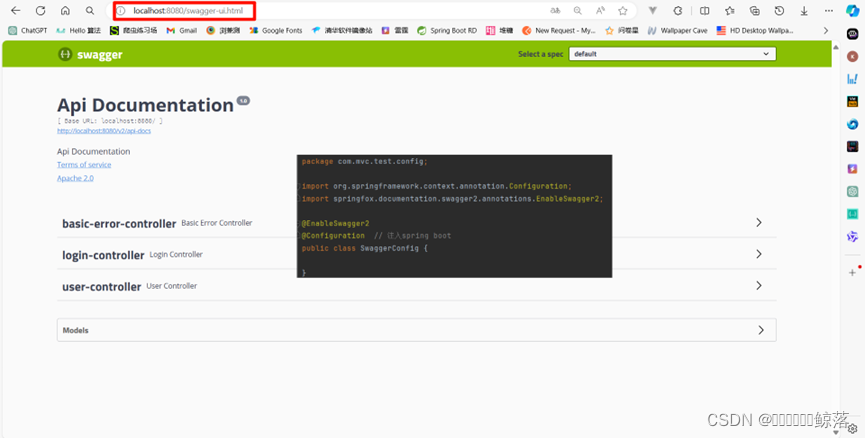
import org.springframework.context.annotation.Configuration;
import springfox.documentation.swagger2.annotations.EnableSwagger2;
@EnableSwagger2
@Configuration // 注入spring boot
public class SwaggerConfig {
} // 只用这几行代码就可以运行二、高版本过程性搭建
1、依赖展示
//……省略
<spring-boot.version>2.7.6</spring-boot.version>
// ……省略
<dependency>
    <groupId>io.springfox</groupId>
    <artifactId>springfox-boot-starter</artifactId>
    <version>3.0.0</version>
</dependency>
2、配置Swagger
(1)最小环境搭建
重要:修改配置文件!修改配置文件!修改配置文件!重要的事说三遍!!!
# application.properties写法

# Spring Boot 2.6.X版本引入了新的路径匹配策略,这导致了与Springfox的不兼容。
# Spring Boot使用PathPatternMatcher作为默认的路径匹配策略,而Springfox依赖于
# AntPathMatcher。所以做以下修改:
spring.mvc.pathmatch.matching-strategy=ANT_PATH_MATCHER
*注意低版本url:http://localhost:8080/swagger-ui.html
*注意高版本url:http://localhost:8080/swagger-ui/index.html
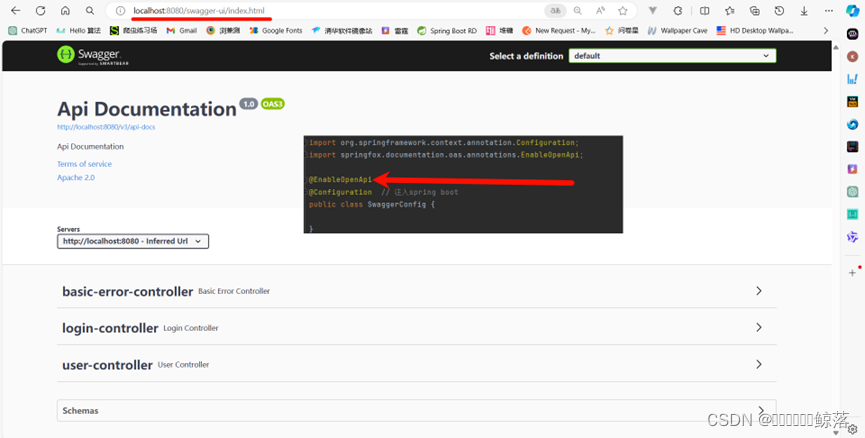
import org.springframework.context.annotation.Configuration;
import springfox.documentation.oas.annotations.EnableOpenApi;

@EnableOpenApi	// config文件只改变了这里哦
@Configuration  // 注入spring boot
public class SwaggerConfig {

}
三、Springdoc OpenAPI高低环境搭建
得多皮才非得高配低、低配高啊?我可没这闲工夫再写了,上面两种解决方法自己排列组合试去吧
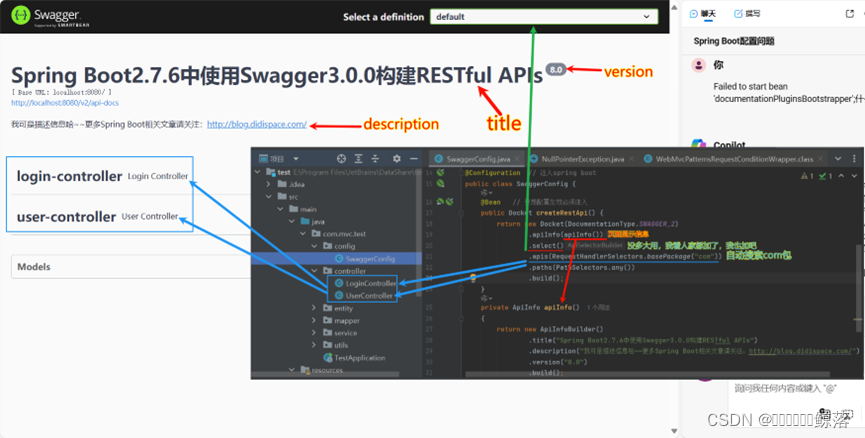
四、配置Swagger
以上所有SwaggerConfig配置类都是默认情况,下面简单分享一下自定义配置项。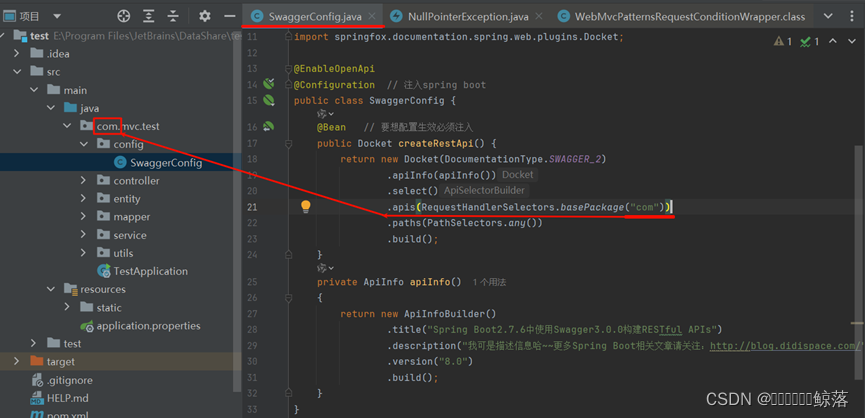
@EnableOpenApi
@Configuration  // 注入spring boot
public class SwaggerConfig {
    @Bean   // 要想配置生效必须注入
    public Docket createRestApi() {
        return new Docket(DocumentationType.SWAGGER_2)
                .apiInfo(apiInfo())
                .select()
                .apis(RequestHandlerSelectors.basePackage("com"))
                .paths(PathSelectors.any())
                .build();
    }
    private ApiInfo apiInfo()
    {
        return new ApiInfoBuilder()
                .title("Spring Boot2.7.6中使用Swagger3.0.0构建RESTful APIs")
                .description("我可是描述信息哈~~更多Spring Boot相关文章请关注:http://blog.didispace.com/")
                .version("8.0")
                .build();
    }
}


 1160
1160

 被折叠的 条评论
为什么被折叠?
被折叠的 条评论
为什么被折叠?
 到【灌水乐园】发言


