


系统概况
这段代码是一个完整的车牌识别系统,主要使用了OpenCV和SVM(支持向量机)来实现。下面我将对代码进行详细分析:
主要功能模块
-
图像预处理
-
读取图像并进行大小调整
-
高斯模糊去噪
-
灰度转换
-
形态学操作(开运算、闭运算)
-
边缘检测(Canny算子)
-
-
车牌定位
-
使用轮廓检测找到可能的车牌区域
-
根据长宽比筛选候选区域
-
使用颜色信息(HSV空间)精确定位车牌
-
-
字符分割
-
二值化处理
-
水平/垂直投影分析找到字符边界
-
波峰检测分割单个字符
-
-
字符识别
-
使用预训练的SVM模型识别字符
-
中文省份字符和数字/字母分别使用不同模型
-
关键类和方法
CardPredictor 主类
-
train_svm(): 训练SVM模型-
使用
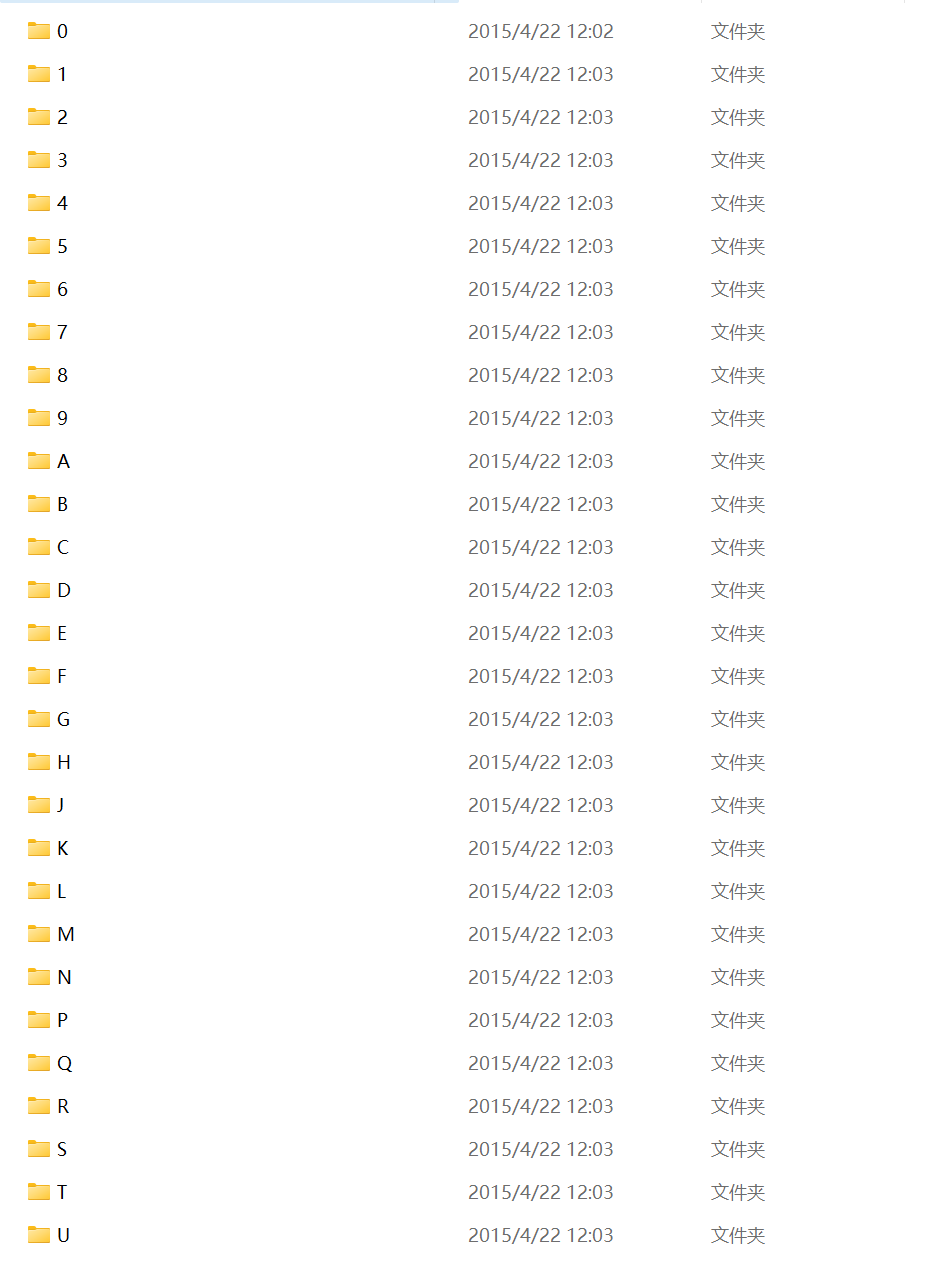
chars2目录下的数据训练数字/字母识别模型 -
使用
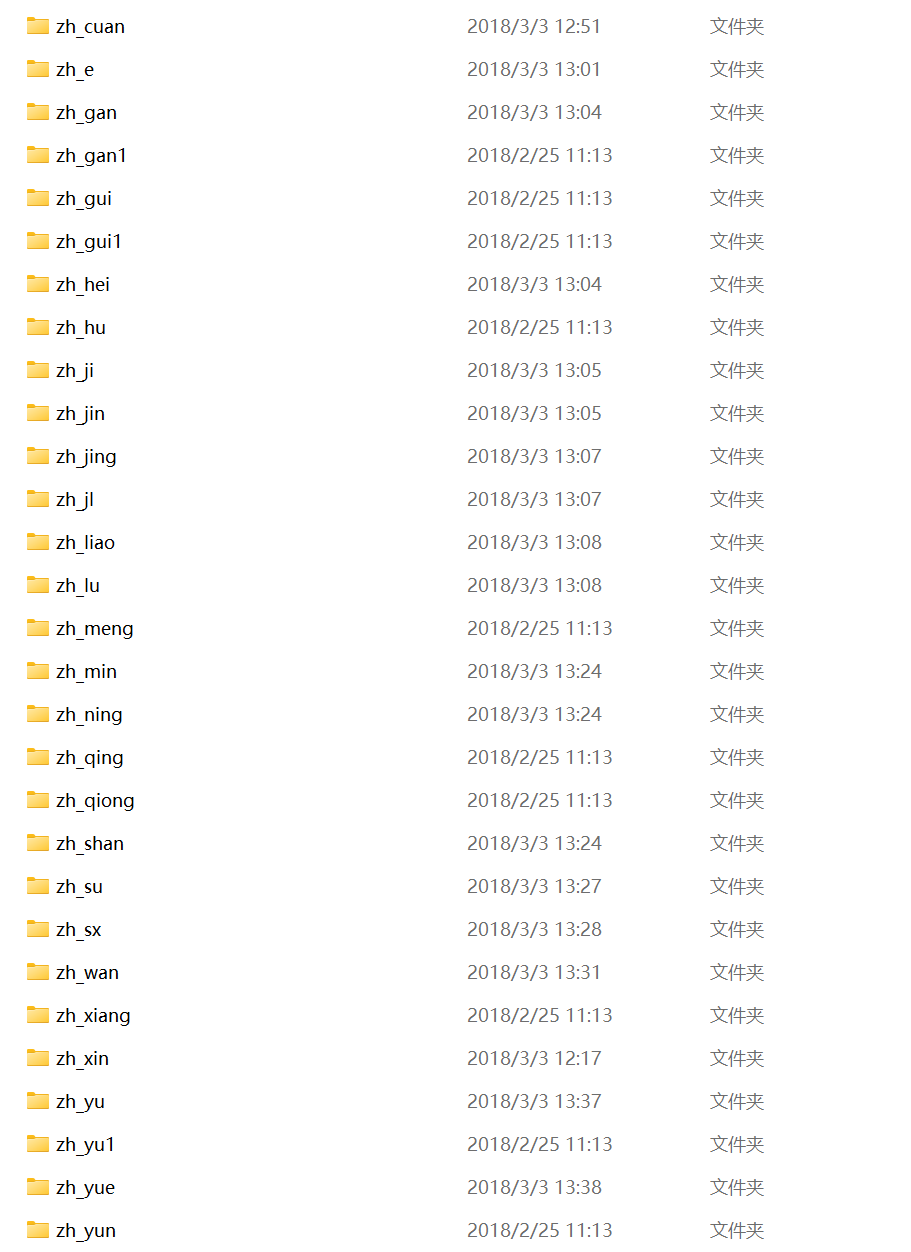
charsChinese目录下的数据训练中文省份识别模型
-
-
predict(): 主识别流程-
图像预处理
-
车牌定位
-
字符分割
-
字符识别
-
辅助函数
-
imreadex(): 读取图像文件(支持中文路径) -
find_waves(): 通过阈值和直方图找波峰(用于字符分割) -
seperate_card(): 根据波峰位置分割字符 -
deskew(): 校正倾斜的字符图像 -
preprocess_hog(): 计算HOG特征用于SVM分类
工作流程
-
初始化时加载配置文件(
config.js) -
训练或加载SVM模型
-
对输入图像进行处理:
-
调整大小
-
去噪
-
边缘检测
-
查找轮廓
-
-
筛选可能的车牌区域(基于形状和颜色)
-
对候选车牌区域进行字符分割
-
使用SVM模型识别每个字符
-
返回识别结果
数据集
测试集

训练集

代码展示
这段 Python 代码实现了一个车牌识别系统,主要包括车牌定位、字符分割和字符识别三个部分。以下是对代码的详细分析:
- 导入库:
python
运行
import cv2
import numpy as np
from numpy.linalg import norm
import sys
import os
import json
导入了 OpenCV、NumPy、数学计算、系统、文件操作和 JSON 处理的库。
- 常量定义:
python
运行
SZ = 20  # 训练图片长宽
MAX_WIDTH = 1000  # 原始图片最大宽度
Min_Area = 2000  # 车牌区域允许最大面积
PROVINCE_START = 1000
定义了训练图片的大小、原始图片的最大宽度、车牌区域的最小面积以及省份索引的起始值。
- 读取图片文件:
python
运行
def imreadex(filename):
    return cv2.imdecode(np.fromfile(filename, dtype=np.uint8), cv2.IMREAD_COLOR)
使用cv2.imdecode函数从文件中读取图片,解决了中文路径的问题。
- 点坐标限制:
python
运行
def point_limit(point):
    if point[0] < 0:
        point[0] = 0
    if point[1] < 0:
        point[1] = 0
确保点坐标不小于 0。
- 寻找波峰:
python
运行
def find_waves(threshold, histogram):
    up_point = -1  # 上升点
    is_peak = False
    if histogram[0] > threshold:
        up_point = 0
        is_peak = True
    wave_peaks = []
    for i, x in enumerate(histogram):
        if is_peak and x < threshold:
            if i - up_point > 2:
                is_peak = False
                wave_peaks.append((up_point, i))
        elif not is_peak and x >= threshold:
            is_peak = True
            up_point = i
    if is_peak and up_point != -1 and i - up_point > 4:
        wave_peaks.append((up_point, i))
    return wave_peaks
根据设定的阈值和直方图,找出波峰。
- 分割字符:
python
运行
def seperate_card(img, waves):
    part_cards = []
    for wave in waves:
        part_cards.append(img[:, wave[0]:wave[1]])
    return part_cards
根据波峰,将图片分割成单个字符。
- 倾斜校正:
python
运行
def deskew(img):
    m = cv2.moments(img)
    if abs(m['mu02']) < 1e-2:
        return img.copy()
    skew = m['mu11'] / m['mu02']
    M = np.float32([[1, skew, -0.5 * SZ * skew], [0, 1, 0]])
    img = cv2.warpAffine(img, M, (SZ, SZ), flags=cv2.WARP_INVERSE_MAP | cv2.INTER_LINEAR)
    return img
使用仿射变换对字符进行倾斜校正。
- HOG 特征提取:
python
运行
def preprocess_hog(digits):
    samples = []
    for img in digits:
        gx = cv2.Sobel(img, cv2.CV_32F, 1, 0)
        gy = cv2.Sobel(img, cv2.CV_32F, 0, 1)
        mag, ang = cv2.cartToPolar(gx, gy)
        bin_n = 16
        bin = np.int32(bin_n * ang / (2 * np.pi))
        bin_cells = bin[:10, :10], bin[10:, :10], bin[:10, 10:], bin[10:, 10:]
        mag_cells = mag[:10, :10], mag[10:, :10], mag[:10, 10:], mag[10:, 10:]
        hists = [np.bincount(b.ravel(), m.ravel(), bin_n) for b, m in zip(bin_cells, mag_cells)]
        hist = np.hstack(hists)

        # transform to Hellinger kernel
        eps = 1e-7
        hist /= hist.sum() + eps
        hist = np.sqrt(hist)
        hist /= norm(hist) + eps

        samples.append(hist)
    return np.float32(samples)
使用 HOG(Histogram of Oriented Gradients)算法提取字符的特征。
- 省份列表:
python
运行
provinces = [
    "zh_cuan", "川",
    "zh_e", "鄂",
    "zh_gan", "赣",
    "zh_gan1", "甘",
    "zh_gui", "贵",
    "zh_gui1", "桂",
    "zh_hei", "黑",
    "zh_hu", "沪",
    "zh_ji", "冀",
    "zh_jin", "津",
    "zh_jing", "京",
    "zh_jl", "吉",
    "zh_liao", "辽",
    "zh_lu", "鲁",
    "zh_meng", "蒙",
    "zh_min", "闽",
    "zh_ning", "宁",
    "zh_qing", "靑",
    "zh_qiong", "琼",
    "zh_shan", "陕",
    "zh_su", "苏",
    "zh_sx", "晋",
    "zh_wan", "皖",
    "zh_xiang", "湘",
    "zh_xin", "新",
    "zh_yu", "豫",
    "zh_yu1", "渝",
    "zh_yue", "粤",
    "zh_yun", "云",
    "zh_zang", "藏",
    "zh_zhe", "浙"
]
定义了省份的拼音和汉字列表。
- 统计模型类:
python
运行
class StatModel(object):
    def load(self, fn):
        self.model = self.model.load(fn)

    def save(self, fn):
        self.model.save(fn)
定义了一个统计模型类,包含加载和保存模型的方法。
- SVM 类:
python
运行
class SVM(StatModel):
    def __init__(self, C=1, gamma=0.5):
        self.model = cv2.ml.SVM_create()
        self.model.setGamma(gamma)
        self.model.setC(C)
        self.model.setKernel(cv2.ml.SVM_RBF)
        self.model.setType(cv2.ml.SVM_C_SVC)

    def train(self, samples, responses):
        self.model.train(samples, cv2.ml.ROW_SAMPLE, responses)

    def predict(self, samples):
        r = self.model.predict(samples)
        return r[1].ravel()
定义了一个 SVM(Support Vector Machine)类,继承自StatModel类,包含训练和预测的方法。
车牌预测器类:
-
__init__方法:- 打开名为
config.js的文件,并加载其中的 JSON 数据。 - 遍历 JSON 数据中的
config数组,找到open字段为True的配置,并将其复制到self.cfg中。 - 如果没有找到有效的配置参数,则抛出
RuntimeError异常。
- 打开名为
-
__del__方法:- 在对象被销毁时,调用
save_traindata方法保存训练数据。
- 在对象被销毁时,调用
-
train_svm方法:- 创建两个
SVM对象,分别用于识别英文字母和数字以及中文。 - 检查
svm.dat和svmchinese.dat文件是否存在,如果存在则加载模型。 - 如果文件不存在,则进行训练:
- 遍历
train\chars2目录,读取其中的字符图像,将其转换为灰度图,并添加到chars_train列表中,同时将字符的 ASCII 码添加到chars_label列表中。 - 对
chars_train中的图像进行倾斜校正和 HOG 特征提取。 - 使用提取的特征和标签训练用于识别英文字母和数字的
SVM模型。 - 遍历
train\charsChinese目录,读取其中的字符图像,将其转换为灰度图,并添加到chars_train列表中,同时将字符在provinces列表中的索引添加到chars_label列表中。 - 对
chars_train中的图像进行倾斜校正和 HOG 特征提取。 - 使用提取的特征和标签训练用于识别中文的
SVM模型。
- 遍历
- 创建两个
-
save_traindata方法:- 保存训练好的
SVM模型到svm.dat和svmchinese.dat文件中。
- 保存训练好的
-
accurate_place方法:- 根据车牌图像的 HSV 颜色空间和给定的颜色限制,确定车牌的位置。
- 遍历图像的行和列,统计符合颜色条件的像素数量。
- 根据统计结果,确定车牌的上下左右边界。
-
predict方法:- 如果输入是字符串,则调用
imreadex方法读取图像;否则直接使用输入的图像。 - 如果图像宽度大于
MAX_WIDTH,则调整图像大小。 - 对图像进行高斯去噪、灰度转换、形态学操作、边缘检测和开闭运算。
- 查找图像中的轮廓,并筛选出长宽比在 2 到 5.5 之间的轮廓,认为这些轮廓可能是车牌。
- 对每个可能的车牌轮廓进行倾斜校正和颜色定位,确定车牌的颜色和位置。
- 根据车牌颜色,对车牌图像进行二值化处理,查找水平和垂直直方图的波峰,分割出字符。
- 对每个字符进行预处理,使用训练好的
SVM模型进行预测,将预测结果添加到predict_result列表中。 - 返回识别到的字符、定位的车牌图像和车牌颜色。
- 如果输入是字符串,则调用
在if __name__ == '__main__':部分,创建CardPredictor对象,调用train_svm方法训练模型,然后使用predict方法对指定的图像进行车牌识别,并打印识别结果。
python
运行
class CardPredictor:
def __init__(self):
# 车牌识别的部分参数保存在js中,便于根据图片分辨率做调整
f = open('config.js')
j = json.load(f)
for c in j["config"]:
if c["open"]:
self.cfg = c.copy()
break
else:
raise RuntimeError('没有设置有效配置参数')
def __del__(self):
self.save_traindata()
def train_svm(self):
# 识别英文字母和数字
self.model = SVM(C=1, gamma=0.5)
# 识别中文
self.modelchinese = SVM(C=1, gamma=0.5)
if os.path.exists("svm.dat"):
self.model.load("svm.dat")
else:
chars_train = []
chars_label = []
for root, dirs, files in os.walk("train\\chars2"):
if len(os.path.basename(root)) > 1:
continue
root_int = ord(os.path.basename(root))
for filename in files:
filepath = os.path.join(root, filename)
digit_img = cv2.imread(filepath)
digit_img = cv2.cvtColor(digit_img, cv2.COLOR_BGR2GRAY)
chars_train.append(digit_img)
# chars_label.append(1)
chars_label.append(root_int)
chars_train = list(map(deskew, chars_train))
chars_train = preprocess_hog(chars_train)
# chars_train = chars_train.reshape(-1, 20, 20).astype(np.float32)
chars_label = np.array(chars_label)
print(chars_train.shape)
self.model.train(chars_train, chars_label)
if os.path.exists("svmchinese.dat"):
self.modelchinese.load("svmchinese.dat")
else:
chars_train = []
chars_label = []
for root, dirs, files in os.walk("train\\charsChinese"):
if not os.path.basename(root).startswith("zh_"):
continue
pinyin = os.path.basename(root)
index = provinces.index(pinyin) + PROVINCE_START + 1 # 1是拼音对应的汉字
for filename in files:
filepath = os.path.join(root, filename)
digit_img = cv2.imread(filepath)
digit_img = cv2.cvtColor(digit_img, cv2.COLOR_BGR2GRAY)
chars_train.append(digit_img)
# chars_label.append(1)
chars_label.append(index)
chars_train = list(map(deskew, chars_train))
chars_train = preprocess_hog(chars_train)
# chars_train = chars_train.reshape(-1, 20, 20).astype(np.float32)
chars_label = np.array(chars_label)
print(chars_train.shape)
self.modelchinese.train(chars_train, chars_label)
def save_traindata(self):
if not os.path.exists("svm.dat"):
self.model.save("svm.dat")
if not os.path.exists("svmchinese.dat"):
self.modelchinese.save("svmchinese.dat")
def accurate_place(self, card_img_hsv, limit1, limit2, color):
row_num, col_num = card_img_hsv.shape[:2]
xl = col_num
xr = 0
yh = 0
yl = row_num
# col_num_limit = self.cfg["col_num_limit"]
row_num_limit = self.cfg["row_num_limit"]
col_num_limit = col_num * 0.8 if color != "green" else col_num * 0.5 # 绿色有渐变
for i in range(row_num):
count = 0
for j in range(col_num):
H = card_img_hsv.item(i, j, 0)
S = card_img_hsv.item(i, j, 1)
V = card_img_hsv.item(i, j, 2)
if limit1 < H <= limit2 and 34 < S and 46 < V:
count += 1
if count > col_num_limit:
if yl > i:
yl = i
if yh < i:
yh = i
for j in range(col_num):
count = 0
for i in range(row_num):
H = card_img_hsv.item(i, j, 0)
S = card_img_hsv.item(i, j, 1)
V = card_img_hsv.item(i, j, 2)
if limit1 < H <= limit2 and 34 < S and 46 < V:
count += 1
if count > row_num - row_num_limit:
if xl > j:
xl = j
if xr < j:
xr = j
return xl, xr, yh, yl
def predict(self, car_pic):
if type(car_pic) == type(""):
img = imreadex(car_pic)
else:
img = car_pic
pic_hight, pic_width = img.shape[:2]
if pic_width > MAX_WIDTH:
resize_rate = MAX_WIDTH / pic_width
img = cv2.resize(img, (MAX_WIDTH, int(pic_hight * resize_rate)), interpolation=cv2.INTER_AREA)
blur = self.cfg["blur"]
# 高斯去噪
if blur > 0:
img = cv2.GaussianBlur(img, (blur, blur), 0) # 图片分辨率调整
oldimg = img
img = cv2.cvtColor(img, cv2.COLOR_BGR2GRAY)
# equ = cv2.equalizeHist(原始图片)
# 原始图片 = np.hstack((原始图片, equ))
# 去掉图像中不会是车牌的区域
kernel = np.ones((20, 20), np.uint8)
img_opening = cv2.morphologyEx(img, cv2.MORPH_OPEN, kernel)
img_opening = cv2.addWeighted(img, 1, img_opening, -1, 0);
# 找到图像边缘
ret, img_thresh = cv2.threshold(img_opening, 0, 255, cv2.THRESH_BINARY + cv2.THRESH_OTSU)
img_edge = cv2.Canny(img_thresh, 100, 200)
# 使用开运算和闭运算让图像边缘成为一个整体
kernel = np.ones((self.cfg["morphologyr"], self.cfg["morphologyc"]), np.uint8)
img_edge1 = cv2.morphologyEx(img_edge, cv2.MORPH_CLOSE, kernel)
img_edge2 = cv2.morphologyEx(img_edge1, cv2.MORPH_OPEN, kernel)
# 查找图像边缘整体形成的矩形区域,可能有很多,车牌就在其中一个矩形区域中
try:
contours, hierarchy = cv2.findContours(img_edge2, cv2.RETR_TREE, cv2.CHAIN_APPROX_SIMPLE)
except ValueError:
image, contours, hierarchy = cv2.findContours(img_edge2, cv2.RETR_TREE, cv2.CHAIN_APPROX_SIMPLE)
contours = [cnt for cnt in contours if cv2.contourArea(cnt) > Min_Area]
print('len(contours)', len(contours))
# 一一排除不是车牌的矩形区域
car_contours = []
for cnt in contours:
rect = cv2.minAreaRect(cnt)
area_width, area_height = rect[1]
if area_width < area_height:
area_width, area_height = area_height, area_width
wh_ratio = area_width / area_height
# print(wh_ratio)
# 要求矩形区域长宽比在2到5.5之间,2到5.5是车牌的长宽比,其余的矩形排除
if wh_ratio > 2 and wh_ratio < 5.5:
car_contours.append(rect)
box = cv2.boxPoints(rect)
box = np.intp(box)
# oldimg = cv2.drawContours(oldimg, [box], 0, (0, 0, 255), 2)
# cv2.imshow("edge4", oldimg)
# print(rect)
print(len(car_contours))
print("精确定位")
card_imgs = []
# 矩形区域可能是倾斜的矩形,需要矫正,以便使用颜色定位
for rect in car_contours:
if rect[2] > -1 and rect[2] < 1: # 创造角度,使得左、高、右、低拿到正确的值
angle = 1
else:
angle = rect[2]
rect = (rect[0], (rect[1][0] + 5, rect[1][1] + 5), angle) # 扩大范围,避免车牌边缘被排除
box = cv2.boxPoints(rect)
heigth_point = right_point = [0, 0]
left_point = low_point = [pic_width, pic_hight]
for point in box:
if left_point[0] > point[0]:
left_point = point
if low_point[1] > point[1]:
low_point = point
if heigth_point[1] < point[1]:
heigth_point = point
if right_point[0] < point[0]:
right_point = point
if left_point[1] <= right_point[1]: # 正角度
new_right_point = [right_point[0], heigth_point[1]]
pts2 = np.float32([left_point, heigth_point, new_right_point]) # 字符只是高度需要改变
pts1 = np.float32([left_point, heigth_point, right_point])
M = cv2.getAffineTransform(pts1, pts2)
dst = cv2.warpAffine(oldimg, M, (pic_width, pic_hight))
point_limit(new_right_point)
point_limit(heigth_point)
point_limit(left_point)
card_img = dst[int(left_point[1]):int(heigth_point[1]), int(left_point[0]):int(new_right_point[0])]
card_imgs.append(card_img)
# cv2.imshow("card", card_img)
# cv2.waitKey(0)
elif left_point[1] > right_point[1]: # 负角度
new_left_point = [left_point[0], heigth_point[1]]
pts2 = np.float32([new_left_point, heigth_point, right_point]) # 字符只是高度需要改变
pts1 = np.float32([left_point, heigth_point, right_point])
M = cv2.getAffineTransform(pts1, pts2)
dst = cv2.warpAffine(oldimg, M, (pic_width, pic_hight))
point_limit(right_point)
point_limit(heigth_point)
point_limit(new_left_point)
card_img = dst[int(right_point[1]):int(heigth_point[1]), int(new_left_point[0]):int(right_point[0])]
card_imgs.append(card_img)
# cv2.imshow("card", card_img)
# cv2.waitKey(0)
# 开始使用颜色定位,排除不是车牌的矩形,目前只识别蓝、绿、黄车牌
colors = []
for card_index, card_img in enumerate(card_imgs):
green = yello = blue = black = white = 0
card_img_hsv = cv2.cvtColor(card_img, cv2.COLOR_BGR2HSV)
# 有转换失败的可能,原因来自于上面矫正矩形出错
if card_img_hsv is None:
continue
row_num, col_num = card_img_hsv.shape[:2]
card_img_count = row_num * col_num
for i in range(row_num):
for j in range(col_num):
H = card_img_hsv.item(i, j, 0)
S = card_img_hsv.item(i, j, 1)
V = card_img_hsv.item(i, j, 2)
if 11 < H <= 34 and S > 34: # 图片分辨率调整
yello += 1
elif 35 < H <= 99 and S > 34: # 图片分辨率调整
green += 1
elif 99 < H <= 124 and S > 34: # 图片分辨率调整
blue += 1
if 0 < H < 180 and 0 < S < 255 and 0 < V < 46:
black += 1
elif 0 < H < 180 and 0 < S < 43 and 221 < V < 225:
white += 1
color = "no"
limit1 = limit2 = 0
if yello * 2 >= card_img_count:
color = "yello"
limit1 = 11
limit2 = 34 # 有的图片有色偏偏绿
elif green * 2 >= card_img_count:
color = "green"
limit1 = 35
limit2 = 99
elif blue * 2 >= card_img_count:
color = "blue"
limit1 = 100
limit2 = 124 # 有的图片有色偏偏紫
elif black + white >= card_img_count * 0.7: # TODO
color = "bw"
print(color)
colors.append(color)
print(blue, green, yello, black, white, card_img_count)
# cv2.imshow("color", card_img)
# cv2.waitKey(0)
if limit1 == 0:
continue
# 以上为确定车牌颜色
# 以下为根据车牌颜色再定位,缩小边缘非车牌边界
xl, xr, yh, yl = self.accurate_place(card_img_hsv, limit1, limit2, color)
if yl == yh and xl == xr:
continue
need_accurate = False
if yl >= yh:
yl = 0
yh = row_num
need_accurate = True
if xl >= xr:
xl = 0
xr = col_num
need_accurate = True
card_imgs[card_index] = card_img[yl:yh, xl:xr] if color != "green" or yl < (yh - yl) // 4 else card_img[
yl - (
yh - yl) // 4:yh,
xl:xr]
if need_accurate: # 可能x或y方向未缩小,需要再试一次
card_img = card_imgs[card_index]
card_img_hsv = cv2.cvtColor(card_img, cv2.COLOR_BGR2HSV)
xl, xr, yh, yl = self.accurate_place(card_img_hsv, limit1, limit2, color)
if yl == yh and xl == xr:
continue
if yl >= yh:
yl = 0
yh = row_num
if xl >= xr:
xl = 0
xr = col_num
card_imgs[card_index] = card_img[yl:yh, xl:xr] if color != "green" or yl < (yh - yl) // 4 else card_img[
yl - (
yh - yl) // 4:yh,
xl:xr]
# 以上为车牌定位
# 以下为识别车牌中的字符
predict_result = []
roi = None
card_color = None
for i, color in enumerate(colors):
if color in ("blue", "yello", "green"):
card_img = card_imgs[i]
gray_img = cv2.cvtColor(card_img, cv2.COLOR_BGR2GRAY)
# 黄、绿车牌字符比背景暗、与蓝车牌刚好相反,所以黄、绿车牌需要反向
if color == "green" or color == "yello":
gray_img = cv2.bitwise_not(gray_img)
ret, gray_img = cv2.threshold(gray_img, 0, 255, cv2.THRESH_BINARY + cv2.THRESH_OTSU)
# 查找水平直方图波峰
x_histogram = np.sum(gray_img, axis=1)
x_min = np.min(x_histogram)
x_average = np.sum(x_histogram) / x_histogram.shape[0]
x_threshold = (x_min + x_average) / 2
wave_peaks = find_waves(x_threshold, x_histogram)
if len(wave_peaks) == 0:
print("peak less 0:")
continue
# 认为水平方向,最大的波峰为车牌区域
wave = max(wave_peaks, key=lambda x: x[1] - x[0])
gray_img = gray_img[wave[0]:wave[1]]
# 查找垂直直方图波峰
row_num, col_num = gray_img.shape[:2]
# 去掉车牌上下边缘1个像素,避免白边影响阈值判断
gray_img = gray_img[1:row_num - 1]
y_histogram = np.sum(gray_img, axis=0)
y_min = np.min(y_histogram)
y_average = np.sum(y_histogram) / y_histogram.shape[0]
y_threshold = (y_min + y_average) / 5 # U和0要求阈值偏小,否则U和0会被分成两半
wave_peaks = find_waves(y_threshold, y_histogram)
# for wave in wave_peaks:
# cv2.line(card_img, pt1=(wave[0], 5), pt2=(wave[1], 5), color=(0, 0, 255), thickness=2)
# 车牌字符数应大于6
if len(wave_peaks) <= 6:
print("peak less 1:", len(wave_peaks))
continue
wave = max(wave_peaks, key=lambda x: x[1] - x[0])
max_wave_dis = wave[1] - wave[0]
# 判断是否是左侧车牌边缘
if wave_peaks[0][1] - wave_peaks[0][0] < max_wave_dis / 3 and wave_peaks[0][0] == 0:
wave_peaks.pop(0)
# 组合分离汉字
cur_dis = 0
for i, wave in enumerate(wave_peaks):
if wave[1] - wave[0] + cur_dis > max_wave_dis * 0.6:
break
else:
cur_dis += wave[1] - wave[0]
if i > 0:
wave = (wave_peaks[0][0], wave_peaks[i][1])
wave_peaks = wave_peaks[i + 1:]
wave_peaks.insert(0, wave)
# 去除车牌上的分隔点
point = wave_peaks[2]
if point[1] - point[0] < max_wave_dis / 3:
point_img = gray_img[:, point[0]:point[1]]
if np.mean(point_img) < 255 / 5:
wave_peaks.pop(2)
if len(wave_peaks) <= 6:
print("peak less 2:", len(wave_peaks))
continue
part_cards = seperate_card(gray_img, wave_peaks)
for i, part_card in enumerate(part_cards):
# 可能是固定车牌的铆钉
if np.mean(part_card) < 255 / 5:
print("a point")
continue
part_card_old = part_card
w = abs(part_card.shape[1] - SZ) // 2
part_card = cv2.copyMakeBorder(part_card, 0, 0, w, w, cv2.BORDER_CONSTANT, value=[0, 0, 0])
part_card = cv2.resize(part_card, (SZ, SZ), interpolation=cv2.INTER_AREA)
# part_card = deskew(part_card)
part_card = preprocess_hog([part_card])
if i == 0:
resp = self.modelchinese.predict(part_card)
charactor = provinces[int(resp[0]) - PROVINCE_START]
else:
resp = self.model.predict(part_card)
charactor = float(resp[0])
# 判断最后一个数是否是车牌边缘,假设车牌边缘被认为是1
if charactor == "1" and i == len(part_cards) - 1:
if part_card_old.shape[0] / part_card_old.shape[1] >= 7: # 1太细,认为是边缘
continue
predict_result.append(charactor)
roi = card_img
card_color = color
break
return predict_result, roi, card_color # 识别到的字符、定位的车牌图像、车牌颜色
if __name__ == '__main__':
c = CardPredictor()
c.train_svm()
r, roi, color = c.predict(r"C:\Users\zjl15\Desktop\车牌识别系统\Car\2.jpg")
print(r)
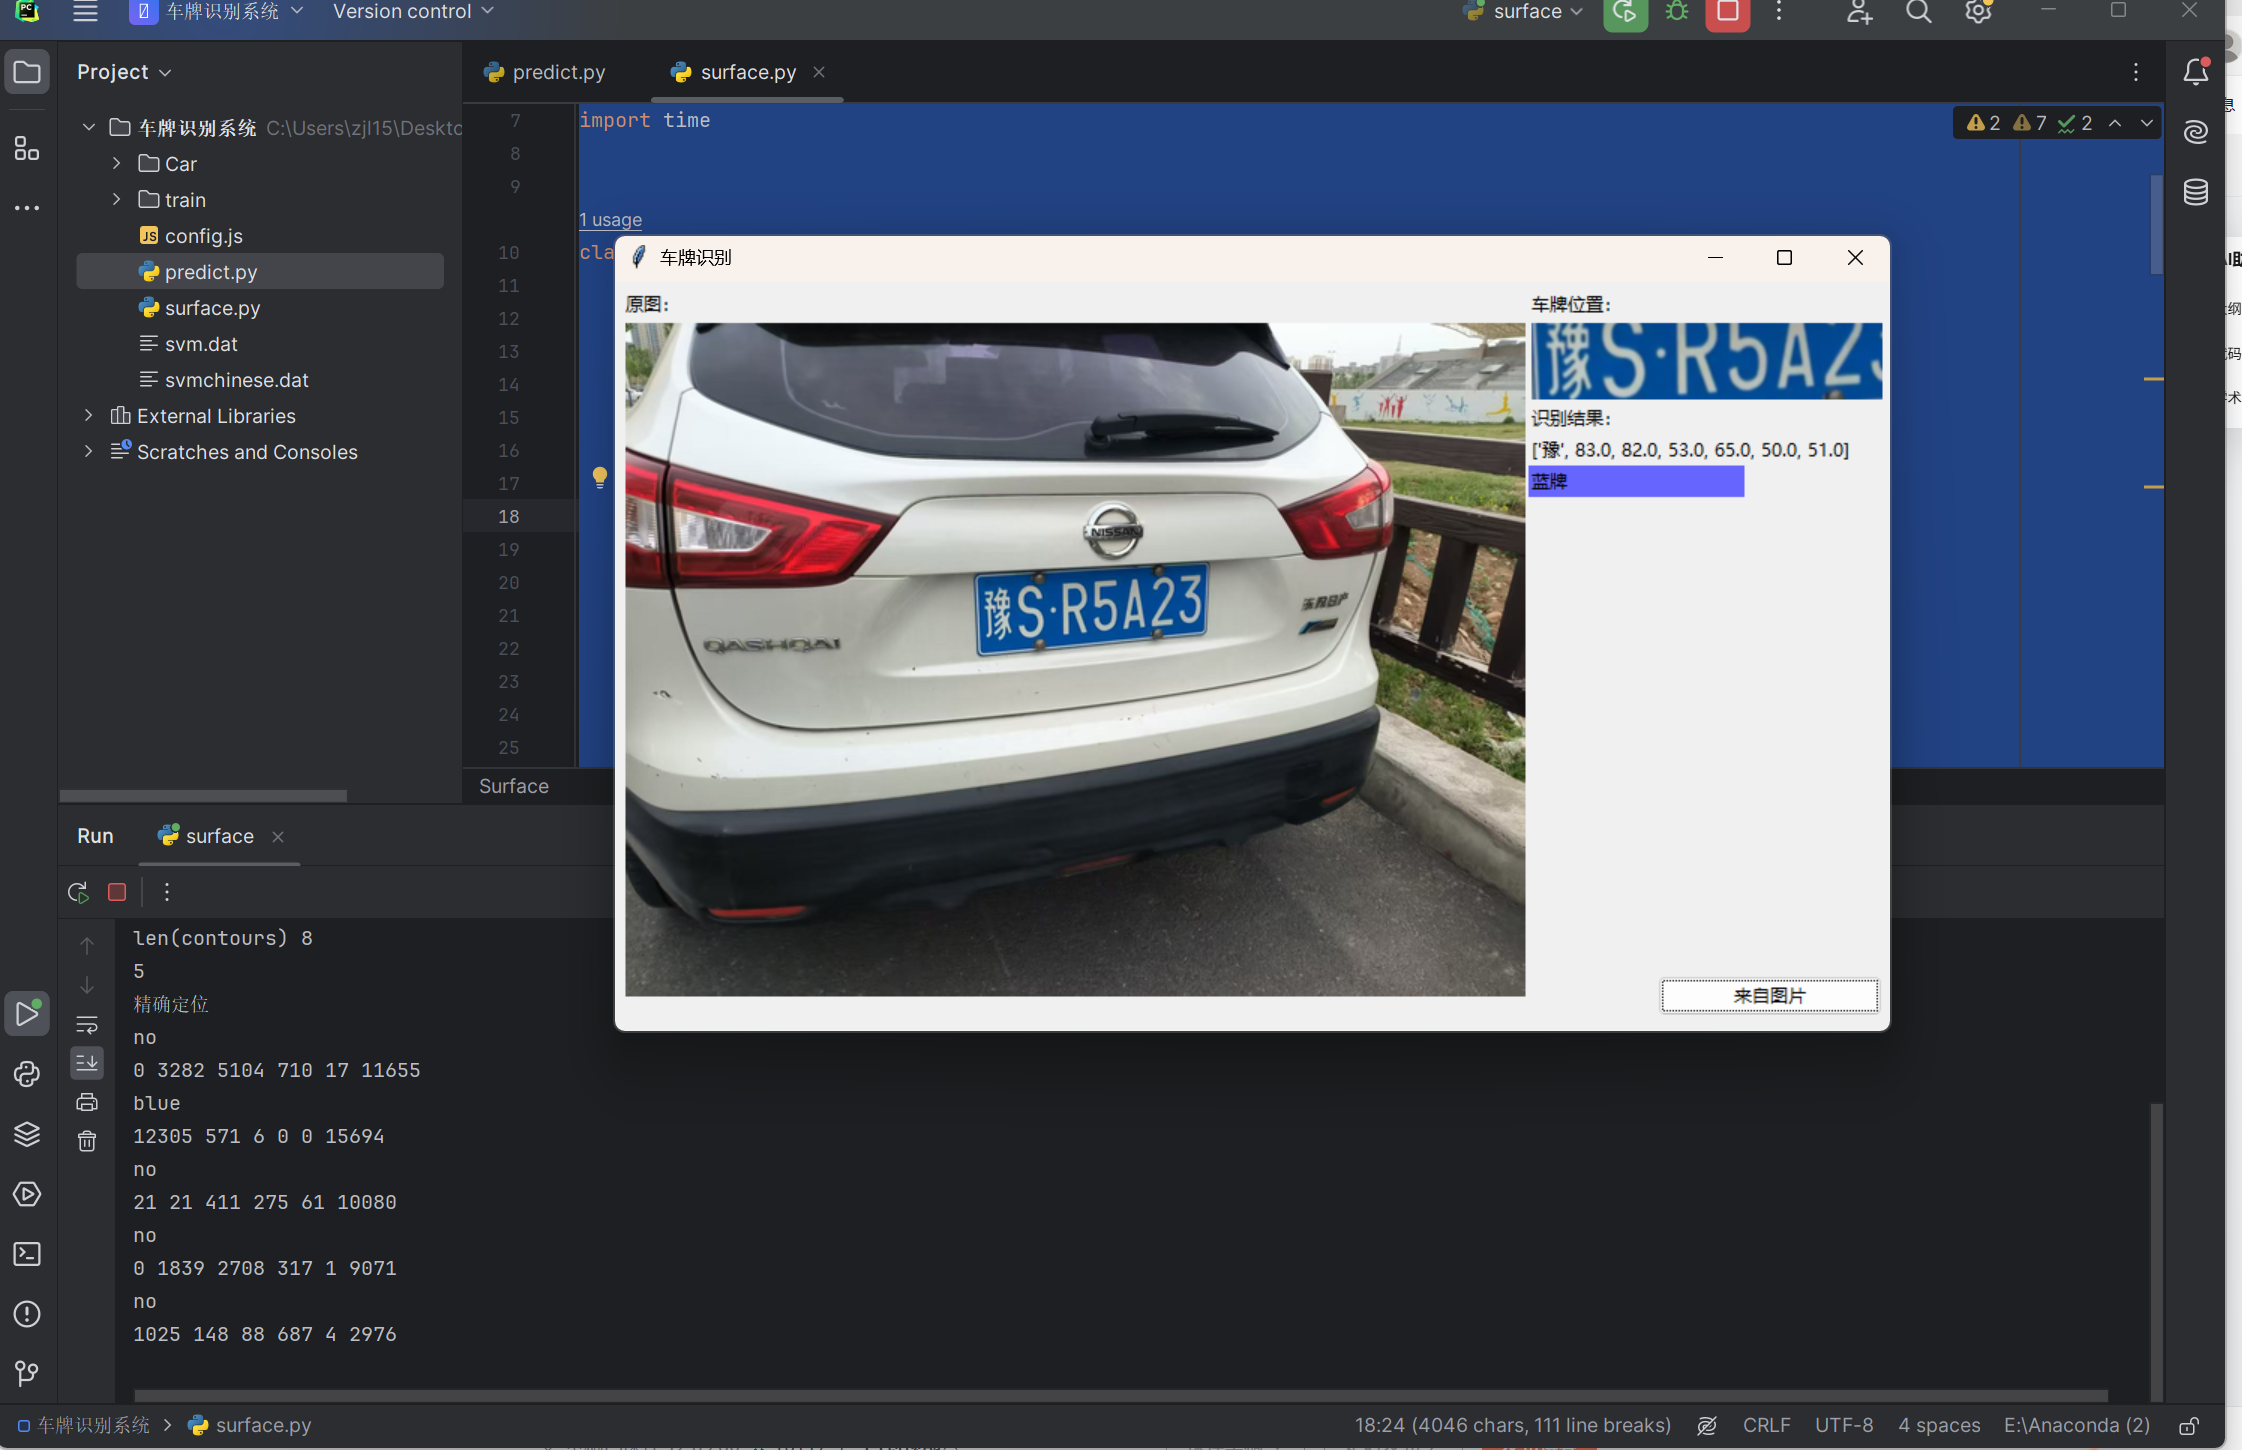
效果展示

pyQT5页面
代码展示:
代码功能概述
这段代码实现了一个基于 Tkinter 的车牌识别系统图形界面,主要功能包括:
- 界面布局:分为左侧原图显示区和右侧功能区,功能区包含车牌位置显示、识别结果展示和操作按钮
- 图片选择:通过 "来自图片" 按钮选择本地图片进行识别
- 车牌识别:调用
predict模块中的CardPredictor类进行车牌定位、字符分割和识别 - 结果展示:显示识别出的车牌号码、车牌颜色(蓝牌 / 黄牌 / 绿牌)以及定位后的车牌图像
代码结构分析
类定义与初始化
python
运行
class Surface(ttk.Frame):
    def __init__(self, win):
        # 初始化界面组件
        frame_left = ttk.Frame(self)  # 左侧原图区域
        frame_right1 = ttk.Frame(self)  # 右侧上部结果区域
        frame_right2 = ttk.Frame(self)  # 右侧下部按钮区域

        # 布局界面
        self.pack(fill=tk.BOTH, expand=tk.YES, padx="5", pady="5")
        frame_left.pack(side=LEFT, expand=1, fill=BOTH)
        frame_right1.pack(side=TOP, expand=1, fill=tk.Y)
        frame_right2.pack(side=RIGHT, expand=0)

        # 创建控件
        ttk.Label(frame_left, text='原图:').pack(anchor="nw")
        self.image_ctl = ttk.Label(frame_left)  # 原图显示控件
        self.image_ctl.pack(anchor="nw")

        # 车牌位置和识别结果控件
        self.roi_ctl = ttk.Label(frame_right1)  # 车牌区域显示
        self.r_ctl = ttk.Label(frame_right1, text="")  # 识别结果文本
        self.color_ctl = ttk.Label(frame_right1, text="", width="20")  # 车牌颜色显示

        # 按钮控件
        from_pic_ctl = ttk.Button(frame_right2, text="来自图片", command=self.from_pic)

        # 初始化车牌识别器
        self.predictor = predict.CardPredictor()
        self.predictor.train_svm()
核心功能方法
- 图像显示处理:
python
运行
def get_imgtk(self, img_bgr):
    # 将OpenCV的BGR格式图像转换为Tkinter可显示的格式
    img = cv2.cvtColor(img_bgr, cv2.COLOR_BGR2RGB)
    im = Image.fromarray(img)
    imgtk = ImageTk.PhotoImage(image=im)

    # 图像尺寸适配
    wide = imgtk.width()
    high = imgtk.height()
    if wide > self.viewwide or high > self.viewhigh:
        factor = min(self.viewwide/wide, self.viewhigh/high)
        im = im.resize((int(wide*factor), int(high*factor)), Image.ANTIALIAS)
        imgtk = ImageTk.PhotoImage(image=im)
    return imgtk
- 车牌识别结果展示:
python
运行
def show_roi(self, r, roi, color):
    if r:  # 如果识别成功
        # 显示车牌区域图像
        roi = cv2.cvtColor(roi, cv2.COLOR_BGR2RGB)
        roi = Image.fromarray(roi)
        self.imgtk_roi = ImageTk.PhotoImage(image=roi)
        self.roi_ctl.configure(image=self.imgtk_roi, state='enable')

        # 显示识别结果和车牌颜色
        self.r_ctl.configure(text=str(r))
        try:
            c = self.color_transform[color]
            self.color_ctl.configure(text=c[0], background=c[1], state='enable')
        except:
            self.color_ctl.configure(state='disabled')
    elif self.update_time + 8 < time.time():
        # 识别失败,8秒后清除显示
        self.roi_ctl.configure(state='disabled')
        self.r_ctl.configure(text="")
        self.color_ctl.configure(state='disabled')
- 图片选择与识别:
python
运行
def from_pic(self):
    self.thread_run = False  # 停止可能正在运行的线程
    self.pic_path = askopenfilename(title="选择识别图片", filetypes=[("jpg图片", "*.jpg")])
    if self.pic_path:
        # 读取并显示原图
        img_bgr = predict.imreadex(self.pic_path)
        self.imgtk = self.get_imgtk(img_bgr)
        self.image_ctl.configure(image=self.imgtk)

        # 调用车牌识别器进行识别
        r, roi, color = self.predictor.predict(img_bgr)
        self.show_roi(r, roi, color)
程序入口
python
运行
if __name__ == '__main__':
    win = tk.Tk()
    surface = Surface(win)
    win.protocol('WM_DELETE_WINDOW', close_window)  # 窗口关闭处理
    win.mainloop()
效果展示:


 2738
2738

 被折叠的 条评论
为什么被折叠?
被折叠的 条评论
为什么被折叠?
 到【灌水乐园】发言


