


第一种,适合数据量少的情况
import React, {useRef, useState} from 'react';
import {View, Text, SectionList, StyleSheet, PanResponder} from 'react-native';

const ContactList = () => {
  const sectionListRef = useRef(null);
  const alphabetRefs = useRef({});
  const alphabet = 'ABCDEFGHIJKLMNOPQRSTUVWXYZ'.split('');
  const [currentIndex, setCurrentIndex] = useState('');

  const sections = [
    {
      title: 'A',
      data: ['Alice', 'Amy', 'Alice', 'Amy', 'Alice', 'Amy', 'Alice', 'Amy'],
    },
    {title: 'B', data: ['Bob', 'Bill']},
    {title: 'C', data: ['Charlie', 'Chris']},
    {title: 'D', data: ['David']},
    {
      title: 'E',
      data: [
        'Emma',
        'Ella',
        'Emma',
        'Ella',
        'Emma',
        'Ella',
        'Emma',
        'Ella',
        'Emma',
        'Ella',
        'Emma',
        'Ella',
      ],
    },
    {
      title: 'F',
      data: [
        'Fmma',
        'Flla',
        'Fmma',
        'Flla',
        'Fmma',
        'Flla',
        'Fmma',
        'Flla',
        'Fmma',
        'Flla',
        'Fmma',
        'Flla',
      ],
    },
    {
      title: 'G',
      data: [
        'Gmma',
        'Glla',
        'Gmma',
        'Glla',
        'Gmma',
        'Glla',
        'Emma',
        'Glla',
        'Gmma',
        'Ella',
        'Gmma',
        'Glla',
      ],
    },
    {
      title: 'H',
      data: [
        'Hmma',
        'Hlla',
        'Hmma',
        'Hlla',
        'Hmma',
        'Hlla',
        'Hmma',
        'Hlla',
        'Hmma',
        'Hlla',
        'Hmma',
        'Hlla',
      ],
    },
    {
      title: 'I',
      data: [
        'Imma',
        'Illa',
        'Imma',
        'Illa',
        'Imma',
        'Illa',
        'Imma',
        'Illa',
        'Imma',
        'Illa',
        'Imma',
        'Illa',
      ],
    },
    {
      title: 'J',
      data: [
        'Jmma',
        'Jlla',
        'Jmma',
        'Jlla',
        'Jmma',
        'Jlla',
        'Jmma',
        'Jlla',
        'Jmma',
        'Jlla',
        'Jmma',
        'Jlla',
      ],
    },
  ];

  const renderItem = ({item}) => (
    <View style={styles.contactItem}>
      <Text>{item}</Text>
    </View>
  );

  const renderSectionHeader = ({section: {title}}) => (
    <Text style={styles.sectionHeader}>{title}</Text>
  );

  const handlePanResponderMove = (event, gestureState) => {
    let currentLetter = '';
    for (let letter in alphabetRefs.current) {
      if (
        gestureState.moveY >= alphabetRefs.current[letter].start &&
        gestureState.moveY < alphabetRefs.current[letter].end
      ) {
        currentLetter = letter;
        break;
      }
    }
    setCurrentIndex(currentLetter);
    handleScrollToSection(currentLetter);
  };

  const handleScrollToSection = index => {
    const sectionIndex = sections.findIndex(section => section.title === index);
    if (sectionIndex !== -1 && sectionListRef.current) {
      sectionListRef.current.scrollToLocation({
        sectionIndex,
        itemIndex: 0,
        animated: false,
      });
    }
  };

  const panResponder = PanResponder.create({
    onStartShouldSetPanResponder: () => true,
    onPanResponderMove: handlePanResponderMove,
  });

  return (
    <View style={styles.container}>
      {/* Index Navigation */}
      <View {...panResponder.panHandlers} style={styles.indexNav}>
        {alphabet.map(letter => (
          <View
            key={letter}
            onLayout={event => {
              const layout = event.nativeEvent.layout;
              alphabetRefs.current[letter] = {
                start: layout.y,
                end: layout.y + layout.height,
              };
            }}>
            <Text
              style={[
                styles.indexLetter,
                currentIndex === letter && {fontWeight: 'bold'},
              ]}>
              {letter}
            </Text>
          </View>
        ))}
      </View>

      {/* Contact List */}
      <SectionList
        ref={sectionListRef}
        sections={sections}
        renderItem={renderItem}
        renderSectionHeader={renderSectionHeader}
        keyExtractor={(item, index) => item + index}
        scrollEnabled={true} // 是否支持列表滑动
      />
    </View>
  );
};

const styles = StyleSheet.create({
  container: {
    flex: 1,
    flexDirection: 'row',
  },
  indexNav: {
    width: 30,
    backgroundColor: '#f0f0f0',
  },
  indexLetter: {
    textAlign: 'center',
    marginVertical: 5,
  },
  contactItem: {
    padding: 20,
    borderBottomWidth: 1,
    borderBottomColor: '#ccc',
  },
  sectionHeader: {
    padding: 10,
    backgroundColor: '#eee',
    fontWeight: 'bold',
  },
});

export default ContactList;
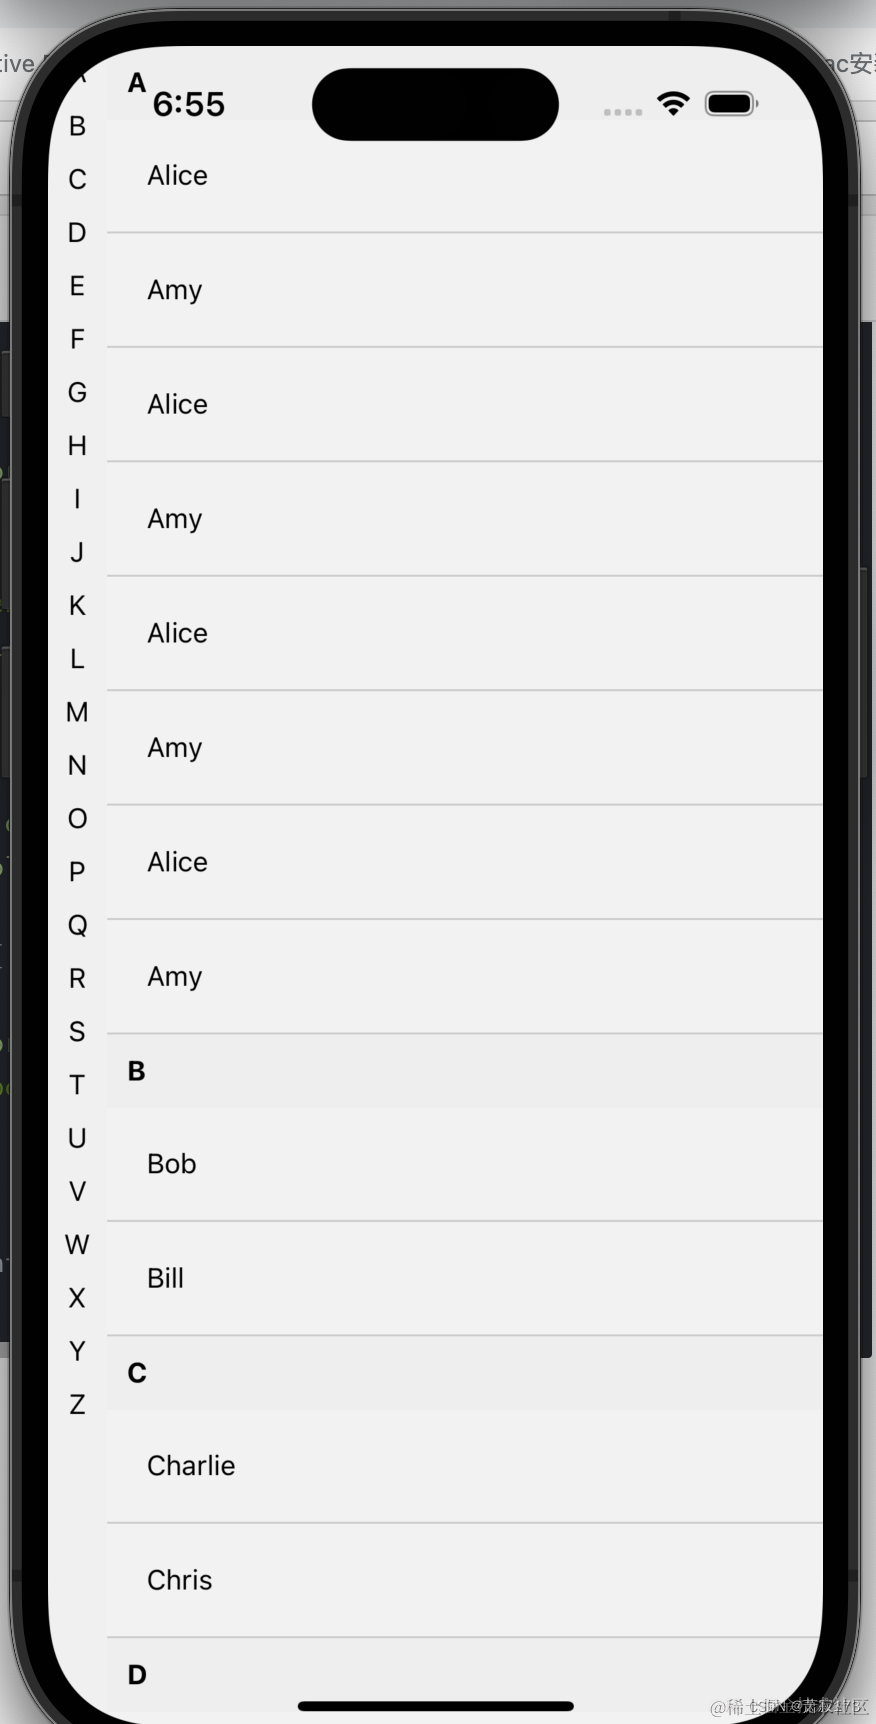
上面代码直接运行的效果图(支持滑动导航,或者自行手动滑动)
第二种,适合数据量大的情况
提供一个数据结构给大家(原本是个json文件,里面大概有五千条数据,下面这种方法适用于数据量过多情况下使用,这个插件就是可以实现长列表渲染可以极高的提升性能)
[
  [
    {
      nickname: 'Adaline Weimann',
      avator: 'resource/image/adminapi/default/default_avatar.png',
    },
  ],
  [
    {
      nickname: 'Robin Powlowski',
      avator: 'resource/image/adminapi/default/default_avatar.png',
    },
  ],
  [
    {
      nickname: 'Carmel Rice',
      avator: 'resource/image/adminapi/default/default_avatar.png',
    },
  ],
  [
    {
      nickname: 'Angelita Thiel',
      avator: 'resource/image/adminapi/default/default_avatar.png',
    },
  ],
  [
    {
      nickname: 'Enrico Murray MD',
      avator: 'resource/image/adminapi/default/default_avatar.png',
    },
  ],
  [
    {
      nickname: 'Filomena Lind DDS',
      avator: 'resource/image/adminapi/default/default_avatar.png',
    },
  ],
];
实现代码如下(这里没有做侧滑,其他的都正常,功能是划到每个分区会把当前字母置顶,就这样,渲染速度极快(可能开头会卡0.5-1秒左右,后面完全不会有卡顿了):
import React, {useRef, useState, useEffect} from 'react';
import {
  View,
  Text,
  StyleSheet,
  PanResponder,
  Animated,
  SafeAreaView,
} from 'react-native';
import BigList from 'react-native-big-list'; // yarn add react-native-big-list
import {groupDataByFirstLetter} from './data.json'; // 这个就是那个五千条数据,格式就是我上面的那种格式
const AlphabetSidebar = () => {
  // 这个是列表的js逻辑代码
  const data = groupDataByFirstLetter();
  const aaa = useRef(null);
  console.log('groupDataByFirstLetter()', groupDataByFirstLetter());
  const [letter, setLetter] = useState([
    'A',
    'B',
    'C',
    'D',
    'E',
    'F',
    'G',
    'H',
    'I',
    'J',
    'K',
    'L',
    'M',
    'N',
    'O',
    'P',
    'Q',
    'R',
    'S',
    'T',
    'U',
    'V',
    'W',
    'X',
    'Y',
    'Z',
  ]);
  console.log('data', data);

  const renderItem = ({item, index}) => {
    // console.log('index', index);
    return (
      <>
        <Text style={styles.item}>{item.nickname}</Text>
      </>
    );
  };

  const renderSectionHeader = props => {
    // console.log('item3', props);
    return (
      <>
        <Text style={styles.item}>{letter[props]}</Text>
      </>
    );
  };

  const renderSectionFooter = props => {
    // console.log('item4', props);
    return (
      <>
        <Text style={styles.item}>{55}</Text>
      </>
    );
  };

  const send = () => {
    // 跳转到第几个字母的位置(索引号为字母的索引号)
    aaa.current.scrollToSection({section: 25, animated: true});
  };

  return (
    <SafeAreaView style={styles.container}>
      {/* 中间列表的代码 */}
      <BigList
        ref={aaa}
        sections={data}
        renderItem={renderItem}
        renderSectionHeader={renderSectionHeader}
        renderSectionFooter={renderSectionFooter}
        itemHeight={50}
        sectionHeaderHeight={50} // Required to show section header
        sectionFooterHeight={10} // Required to show section footer
      />
    </SafeAreaView>
  );
};

const styles = StyleSheet.create({
  container: {
    flex: 1,
  },
  item: {
    padding: 15,
    fontSize: 18
  },
});

export default AlphabetSidebar;
import React, {useRef, useEffect, useState} from 'react';
import {Dimensions, StyleSheet, View, Text, SafeAreaView} from 'react-native';
import BigList from 'react-native-big-list';
import {groupDataByFirstLetter} from './data.json'; // 这个就是那个五千条数据,格式就是我上面的那种格式
// 获取屏幕宽高
let ScreenWidth = Dimensions.get('window').width;
let ScreenHeight = Dimensions.get('window').height;
// 始终返回true的函数,用于设置触摸响应
const returnTrue = () => true;
const TestScreen = () => {
  // 这个是列表的js逻辑代码
  const data = groupDataByFirstLetter();
  const aaa = useRef(null);
  console.log('groupDataByFirstLetter()', groupDataByFirstLetter());
  const [letter, setLetter] = useState([
    'A',
    'B',
    'C',
    'D',
    'E',
    'F',
    'G',
    'H',
    'I',
    'J',
    'K',
    'L',
    'M',
    'N',
    'O',
    'P',
    'Q',
    'R',
    'S',
    'T',
    'U',
    'V',
    'W',
    'X',
    'Y',
    'Z',
  ]);
  console.log('data', data);

  const renderItem = ({item, index}) => {
    // console.log('index', index);
    return (
      <>
        <Text style={styles.item}>{item.nickname}</Text>
      </>
    );
  };

  const renderSectionHeader = props => {
    // console.log('item3', props);
    return (
      <>
        <Text style={styles.item}>{letter[props]}</Text>
      </>
    );
  };

  const renderSectionFooter = props => {
    // console.log('item4', props);
    return (
      <>
      </>
    );
  };

  const alphabet = [
    'A',
    'B',
    'C',
    'D',
    'E',
    'F',
    'G',
    'H',
    'I',
    'J',
    'K',
    'L',
    'M',
    'N',
    'O',
    'P',
    'Q',
    'R',
    'S',
    'T',
    'U',
    'V',
    'W',
    'X',
    'Y',
    'Z',
  ];
  // 创建ref来存储select_null和measure的值
  const selectNull = useRef(null);
  const measure = useRef({});
  // 创建ref来引用sectionItem的view
  const sectionItemRef = useRef(null);
  // 修复sectionItem的尺寸测量
  const fixSectionItemMeasure = () => {
    const sectionItem = sectionItemRef.current;
    if (!sectionItem) {
      return;
    }
    setTimeout(() => {
      sectionItem.measure((x, y, width, height, pageX, pageY) => {
        // 存储测量的数据
        measure.current = {
          y: pageY,
          width,
          height,
        };
      });
    }, 0);
  };

  // 根据触摸点定位字母
  const getZM = (topHeight, currentHeight) => {
    const navItemHeight = 26; // 字母栏的高度(要在样式里面也设置高度,这里的高度是根据样式动态改变的,字母栏样式的高是多少,这里就写多少)
    // 计算触摸点在导航中的索引
    const indexNav = Math.ceil((currentHeight - topHeight) / navItemHeight) - 1; // ((当前距离屏幕距离-父容器距离屏幕距离) / 元素高度) - 1 = (当前的索引元素距离父容器顶部距离 / 元素高度) - 1 = 第n个字母 - 1 = 当前字母的索引值
    if (alphabet[indexNav]) {
      console.log(alphabet[indexNav]); // 在当前触摸点上面
      // 滚动到当前位置
      aaa.current.scrollToSection({section: indexNav, animated: true});
    } else {
      console.log('null'); // 不在触摸点打印下null
    }
  };

  // 处理触摸事件,该事件在用户触摸屏幕时调用
  const selectNav = e => {
    const ev = e.nativeEvent.touches[0]; // 获取多个触摸事件的第一个。比如你放了三根手指在屏幕上,他只算第一个放到屏幕上的
    const targetY = ev.pageY; // 动态获取屏幕上触摸点垂直方向的距离
    const localY = ev.locationY; // 第一次触摸到屏幕上距离顶部的距离
    const {y, width, height} = measure.current; // 获取当前的容器距离顶部的距离(这里因为父容器是top:20,所以这里获取的是20)
    console.log('y', y, targetY);
    // 调用getZM函数进行字母定位
    getZM(y, targetY); // 定位字母,并且触发相应的事件
  };

  // 在组件挂载时修复尺寸,该方法在组件第一次渲染后执行
  useEffect(() => {
    fixSectionItemMeasure();
  }, []);

  // 在组件更新时也修复尺寸,该方法在组件更新后执行
  useEffect(() => {
    fixSectionItemMeasure();
  });

  // 渲染函数组件
  return (
    <SafeAreaView style={styles.container2}>
      {/* 中间列表的代码 */}
      <BigList
        ref={aaa}
        sections={data}
        renderItem={renderItem}
        renderSectionHeader={renderSectionHeader}
        renderSectionFooter={renderSectionFooter}
        itemHeight={50}
        sectionHeaderHeight={50} // Required to show section header
        sectionFooterHeight={10} // Required to show section footer
      />

      <View
        ref={sectionItemRef} // 将当前 View 的引用存储到 sectionItemRef 中,以便后续可以通过 ref 访问它
        style={styles.container} // 设置 View 的样式,使用前面定义的 styles.container 样式
        onStartShouldSetResponder={returnTrue} // 定义当用户开始触摸屏幕时是否应该成为响应者的条件
        onMoveShouldSetResponder={returnTrue} // 定义当用户移动手指时是否应该成为响应者的条件
        onResponderGrant={selectNav} // 当响应器被激活时(即用户开始触摸屏幕)调用的函数
        onResponderMove={selectNav} // 当响应器在激活状态下移动时调用的函数
        onResponderRelease={selectNull.current} // 当响应器被释放(即用户停止触摸屏幕)时调用的函数
      >
        {alphabet.map((item, index) => {
          return (
            <View style={styles.oit} key={index}>
              <Text style={{lineHeight: 25, textAlign: 'center'}}>{item}</Text>
            </View>
          );
        })}
      </View>
    </SafeAreaView>
  );
};

// 样式定义
const styles = StyleSheet.create({
  container: {
    position: 'absolute',
    top: 40,
    right: 0,
    width: 80,
    height: 676, // 26*26
    backgroundColor: 'pink',
    zIndex: 100,
  },
  container2: {
    flex: 1,
    width: Dimensions.get('window').width,
    height: Dimensions.get('window').height,
    position: 'relative',
  },
  item: {
    padding: 15,
    fontSize: 18,
  },
  oit: {
    flexShrink: 0,
    height: 26, // 高度自己慢慢调整
    width: '100%',
  },
});

export default TestScreen;
效果图
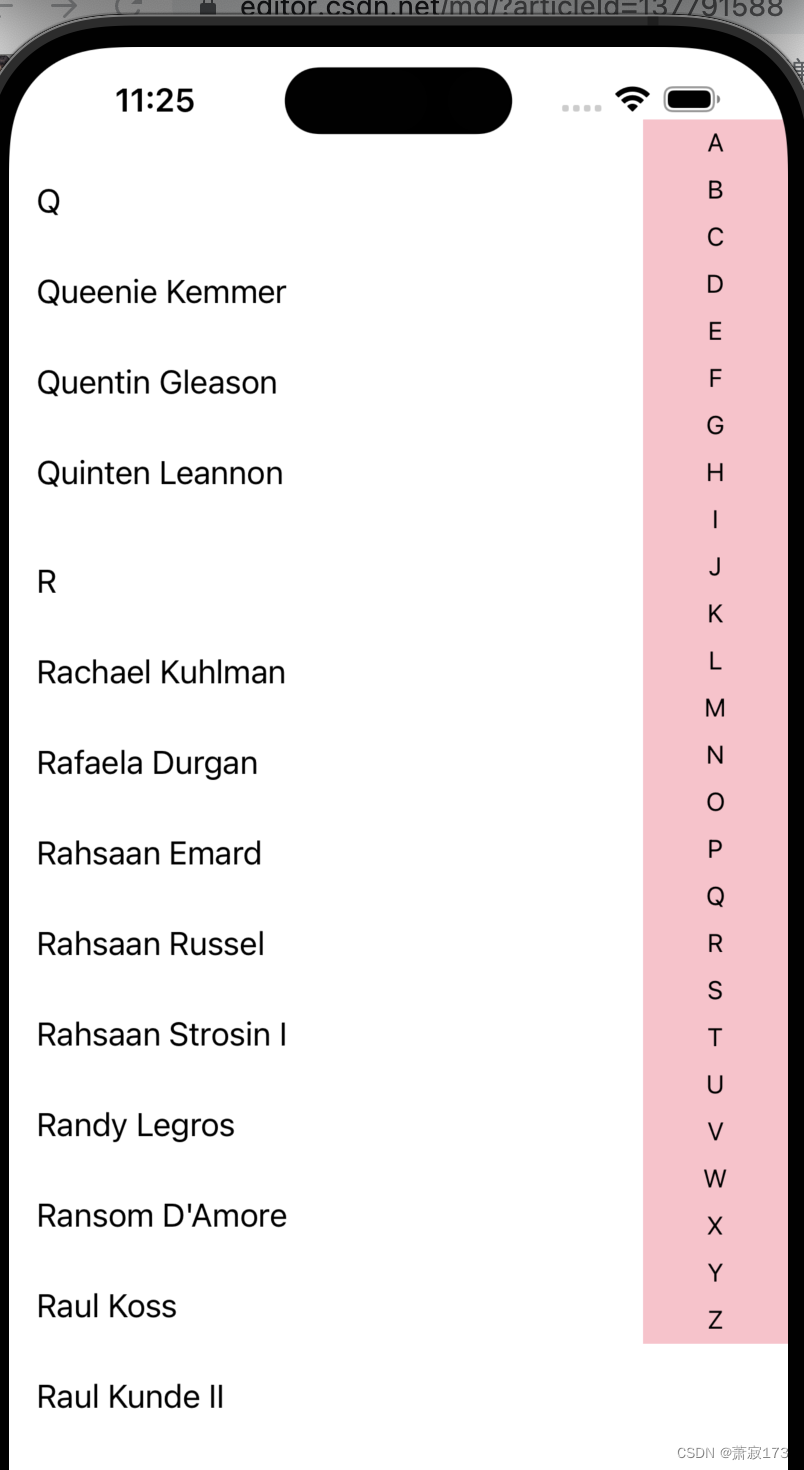
支持点击索引和滑动选择索引
附赠一个方法
该方法可以在数组内部按照title的首字母进行匹配,按照a-z的顺序,结果会有26个小数组,如果匹配到了数据则放入数据中,否则不放入,这样处理的数据结构[[…],[…],[…]] 适用于第二种方式大列表渲染
代码如下:
let arr = [
  {
    "id": 9999,
    "title": "Geneva Barton I",
    "description": "Amet quia sit corrupti incidunt et voluptas."
  },
  {
    "id": 10000,
    "title": "Rickey Gislason",
    "description": "Recusandae sunt maxime autem culpa aliquid."
  }
];

function groupByFirstLetter(arr) {
  let result = {};

  arr.forEach(item => {
    let firstLetter = item.title[0].toLowerCase();
    if (!result[firstLetter]) {
      result[firstLetter] = [];
    }
    result[firstLetter].push(item);
  });

  // 创建包含所有字母的数组,即使没有匹配到的字母也要包含
  let allLetters = 'abcdefghijklmnopqrstuvwxyz'.split('');
  let groupedArray = allLetters.map(letter => result[letter] || []);

  return groupedArray;
}

console.log(groupByFirstLetter(arr));
再加一个方法,该方法可以将特殊字符和表情等首位非字母的放到第二十七个数组内,即是微信通讯录的#键
function groupByFirstLetter(arr) {
  let result = {};
  let specialChars = '!@#$%^&*()_+{}|:"<>?`~-=[]\;\',./';

  arr.forEach(item => {
    let firstChar = item.title[0];
    let firstLetter = firstChar.toLowerCase();

    if (/[a-z]/i.test(firstLetter)) {
      if (!result[firstLetter]) {
        result[firstLetter] = [];
      }
      result[firstLetter].push(item);
    } else {
      if (!result['specialChars']) {
        result['specialChars'] = [];
      }
      result['specialChars'].push(item);
    }
  });

  // 创建包含所有字母的数组,即使没有匹配到的字母也要包含
  let allLetters = 'abcdefghijklmnopqrstuvwxyz'.split('');
  let groupedArray = allLetters.map(letter => result[letter] || []);

  // 添加特殊字符组
  groupedArray.push(result['specialChars'] || []);

  return groupedArray;
}

// 模拟数据
let arr = [
  {
    "id": 9999,
    "title": "Geneva Barton I",
    "description": "Amet quia sit corrupti incidunt et voluptas."
  },
  {
    "id": 10000,
    "title": "Rickey Gislason",
    "description": "Recusandae sunt maxime autem culpa aliquid."
  },
  {
    "id": 10001,
    "title": "12345",
    "description": "Special Character"
  },
  {
    "id": 10002,
    "title": "!@#$%",
    "description": "Special Characters"
  }
];

console.log(groupByFirstLetter(arr));


 316
316

 被折叠的 条评论
为什么被折叠?
被折叠的 条评论
为什么被折叠?
 到【灌水乐园】发言


