


一、准备环境:
(一)设置主机名:
[root@zabbix_server ~]#hostnamectl set-hostname zabbix_server
(二)关闭防火墙:
[root@zabbix_server ~]#systemctl stop firewalld.service
[root@zabbix_server ~]#systemctl disable firewalld.service
(三)关闭selinux:
[root@zabbix_server ~]#setenforce 0 临时关闭
永久关闭:执行“vim /etc/selinux/config”打开config文件,将“SELINUX”项的值改为“disabled”,保存退出 。
二、安装zabbix服务器
(一)使用阿里提供的zabbix YUM源:
1.[root@zabbix-server ~]# vim /etc/yum.repos.d/zabbix.repo
[zabbix]
name=alibaba zabbix
baseurl=https://mirrors.aliyun.com/zabbix/zabbix/5.0/rhel/7/x86_64/
gpgcheck=0
enabled=1
[zabbix2]
name=alibaba zabbix frontend
baseurl=https://mirrors.aliyun.com/zabbix/zabbix/5.0/rhel/7/x86_64/frontend/
gpgcheck=0
enabled=1
2.[root@zabbix_server ~]#yum clean all
3.[root@zabbix_server ~]#yum -y install zabbix-server-mysql zabbix-agent
(1)zabbix-server-mysql:数据库
(2)zabbix-agent:代理程序(上报信息的程序)
4.[root@zabbix_server ~]#yum install -y centos-release-scl
5.[root@zabbix_server ~]#yum install -y zabbix-web-mysql-scl zabbix-apache-conf-scl
三、创建初始数据库
(一)安装数据库:
[root@zabbix_server ~]#yum -y install mariadb mariadb-server
(二)启动数据库:
1.[root@zabbix_server ~]# systemctl start mariadb
2. [root@zabbix_server ~]#systemctl enable mariadb
(三)授权zabbix账号:
1.[root@zabbix-server ~]#mysql
MariaDB [(none)]> create database zabbix character set utf8 collate utf8_bin;
MariaDB [(none)]>create user zabbix@localhost identified by 'Daidai@123';
MariaDB [(none)]>grant all privileges on zabbix.* to zabbix@localhost;
MariaDB [(none)]>flush privileges;
MariaDB [(none)]> quiet;
(四)初始化zabbix:
查看自己版本:
1.[root@zabbix-server ~]# ls /usr/share/doc/zabbix-server-mysql-*
AUTHORS ChangeLog COPYING create.sql.gz double.sql NEWS README
2.[root@zabbix_server ~]#zcat /usr/share/doc/zabbix-server-mysql-5.0.8/create.sql.gz | mysql -uzabbix -p'Daidai@123' zabbix
四、启动Zabbix服务器进程
(一)配置sql账号密码:
[root@zabbix_server ~]#vim /etc/zabbix/zabbix_server.conf
1.DBHost=localhost
2.DBName=zabbix
3.DBUser=zabbix
4.DBPassword=Daidai@123
(二)启动zabbix:
1.[root@zabbix_server ~]#systemctl start zabbix-server.service
2.[root@zabbix_server ~]#systemctl enable zabbix-server.service
五、编辑Zabbix前端的 php 配置
(一)配置时区:
[root@zabbix_server ~]#vim /etc/opt/rh/rh-php72/php-fpm.d/zabbix.conf
1.php_value date.timezone Asia/Shanghai
(二)启动zabbix服务:
1. [root@zabbix_server ~]#systemctl restart zabbix-server zabbix-agent httpd rh-php72-php-fpm
2.[root@zabbix_server ~]#systemctl enable zabbix-server zabbix-agent httpd rh-php72-php-fpm
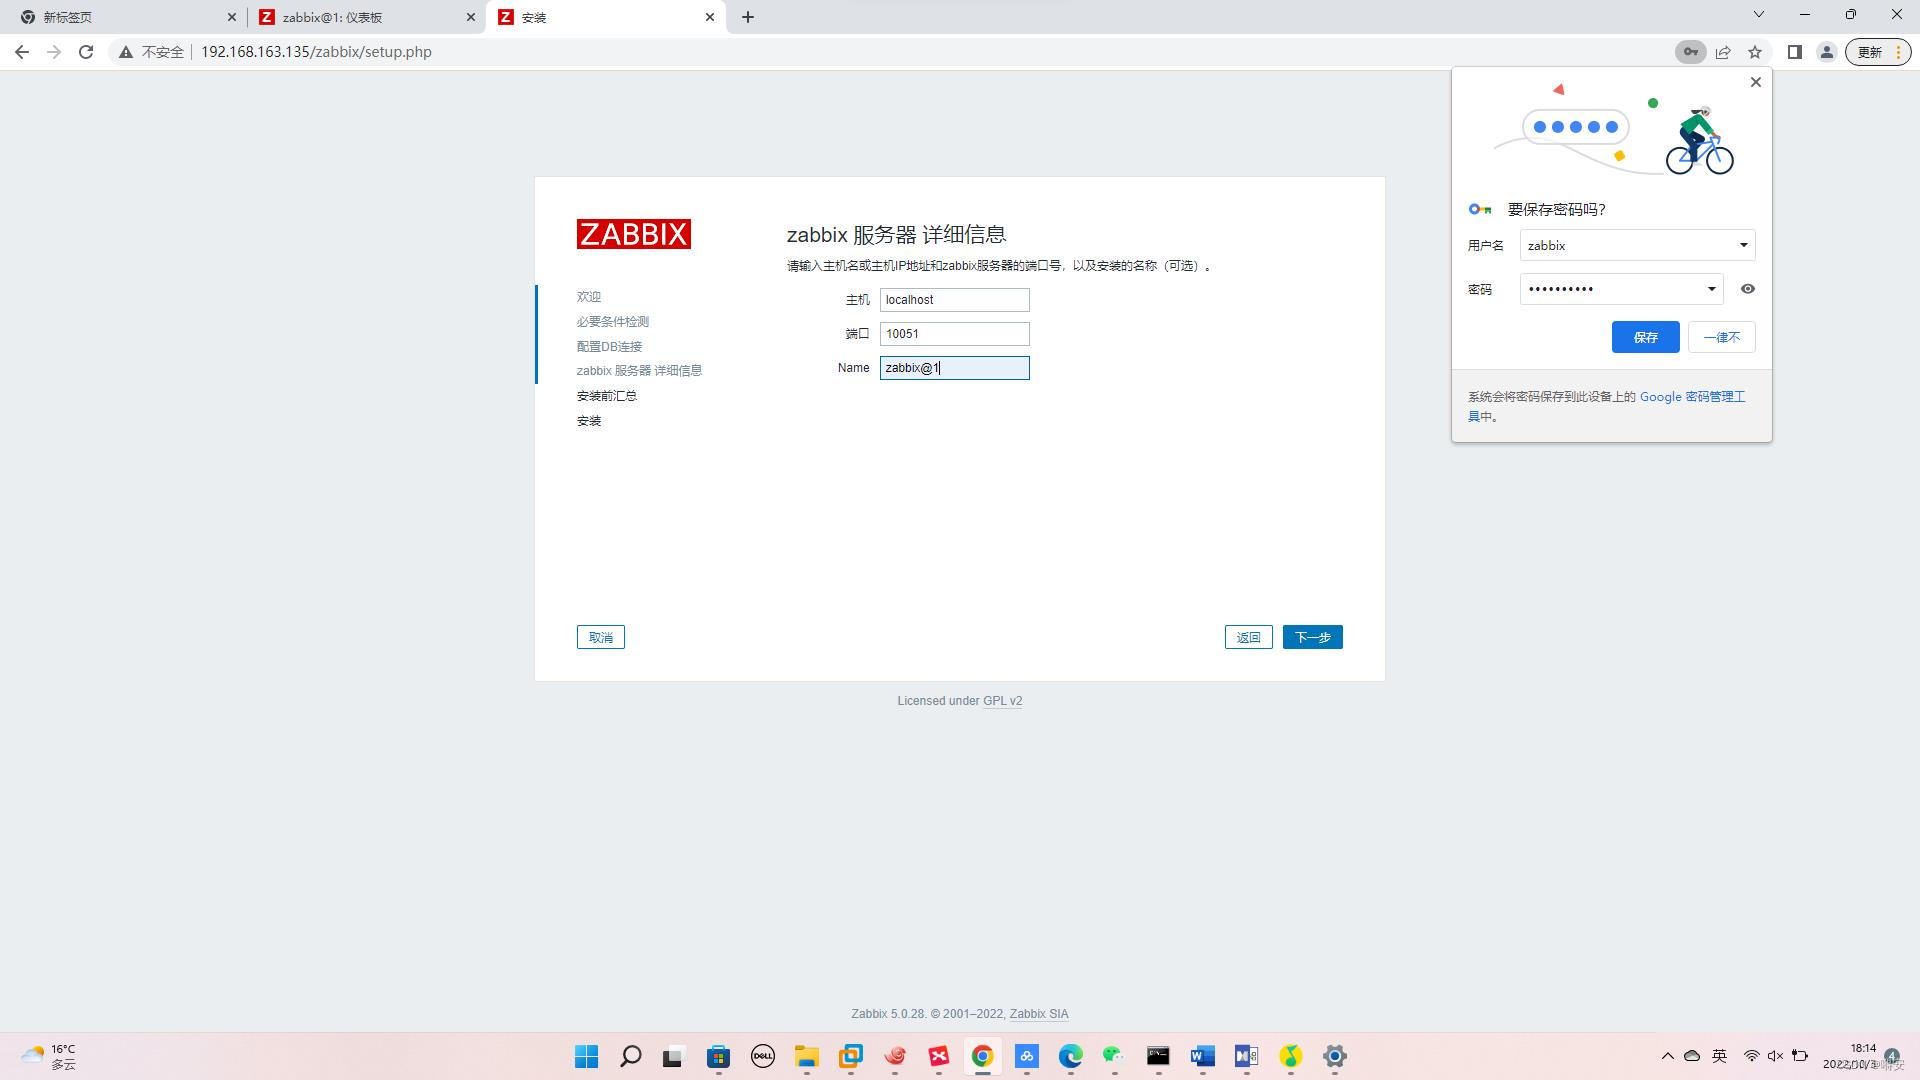
(三)浏览器输入:192.168.163.135/zabbix/setup.php (注意:自己的ip哦)


六、安装Zabbix客户端
(一)设置主机名:
[root@web1 ~]#hostnamectl set-hostname web1
(二)关闭防火墙:
[root@web1 ~]#systemctl stop firewalld.service
[root@web1 ~]# systemctl disable firewalld.service
(三)关闭selinux:
[root@web1 ~]# setenforce 0 临时关闭
(四)拷贝另一台服务端zabbix.repo文件:
[root@web1 ~]#scp 主机ip:/etc/yum.repos.d/zabbix.repo /etc/yum.repos.d
(五)安装zabbix-agent:
[root@web1 ~]#yum install -y zabbix-agent
(六)配置主服务器地址:
[root@web1 ~]#vim /etc/zabbix/zabbix_agentd.conf
1.Server=主机ip 被动模式 zabbix-server-ip
2.ServerActive=主机ip 主动模式 zabbix-server-ip
3.Hostname=web1
(七)启动zabbix-agent:10050
1.[root@web1 ~]#systemctl start zabbix-agent
2.[root@web1 ~]#systemctl enable zabbix-agent
3.查看端口:[root@web1 ~]#ss -anlp |grep :10050
七、命令行测试
(一)在服务端zabbix-server上安装:zabbix-get
通过zabbix-get 收集客户端数据 <key>:
1.[root@zabbix_server ~]#yum install -y zabbix-get
2.[root@zabbix_server ~]#zabbix_get -s 客户端主机ip -k system.uname
Linux web1 3.10.0-1160.76.1.el7.x86_64 #1 SMP Wed Aug 10 16:21:17 UTC 2022 x86_64
3.[root@zabbix_server ~]#zabbix_get -s 192.168.100.20 -k system.cpu.load[all,avg15]
0.050000
这样,我们就完成了zabbix服务器和zabbix客户端之间的部署。


 3625
3625


 被折叠的 条评论
为什么被折叠?
被折叠的 条评论
为什么被折叠?
 到【灌水乐园】发言


