


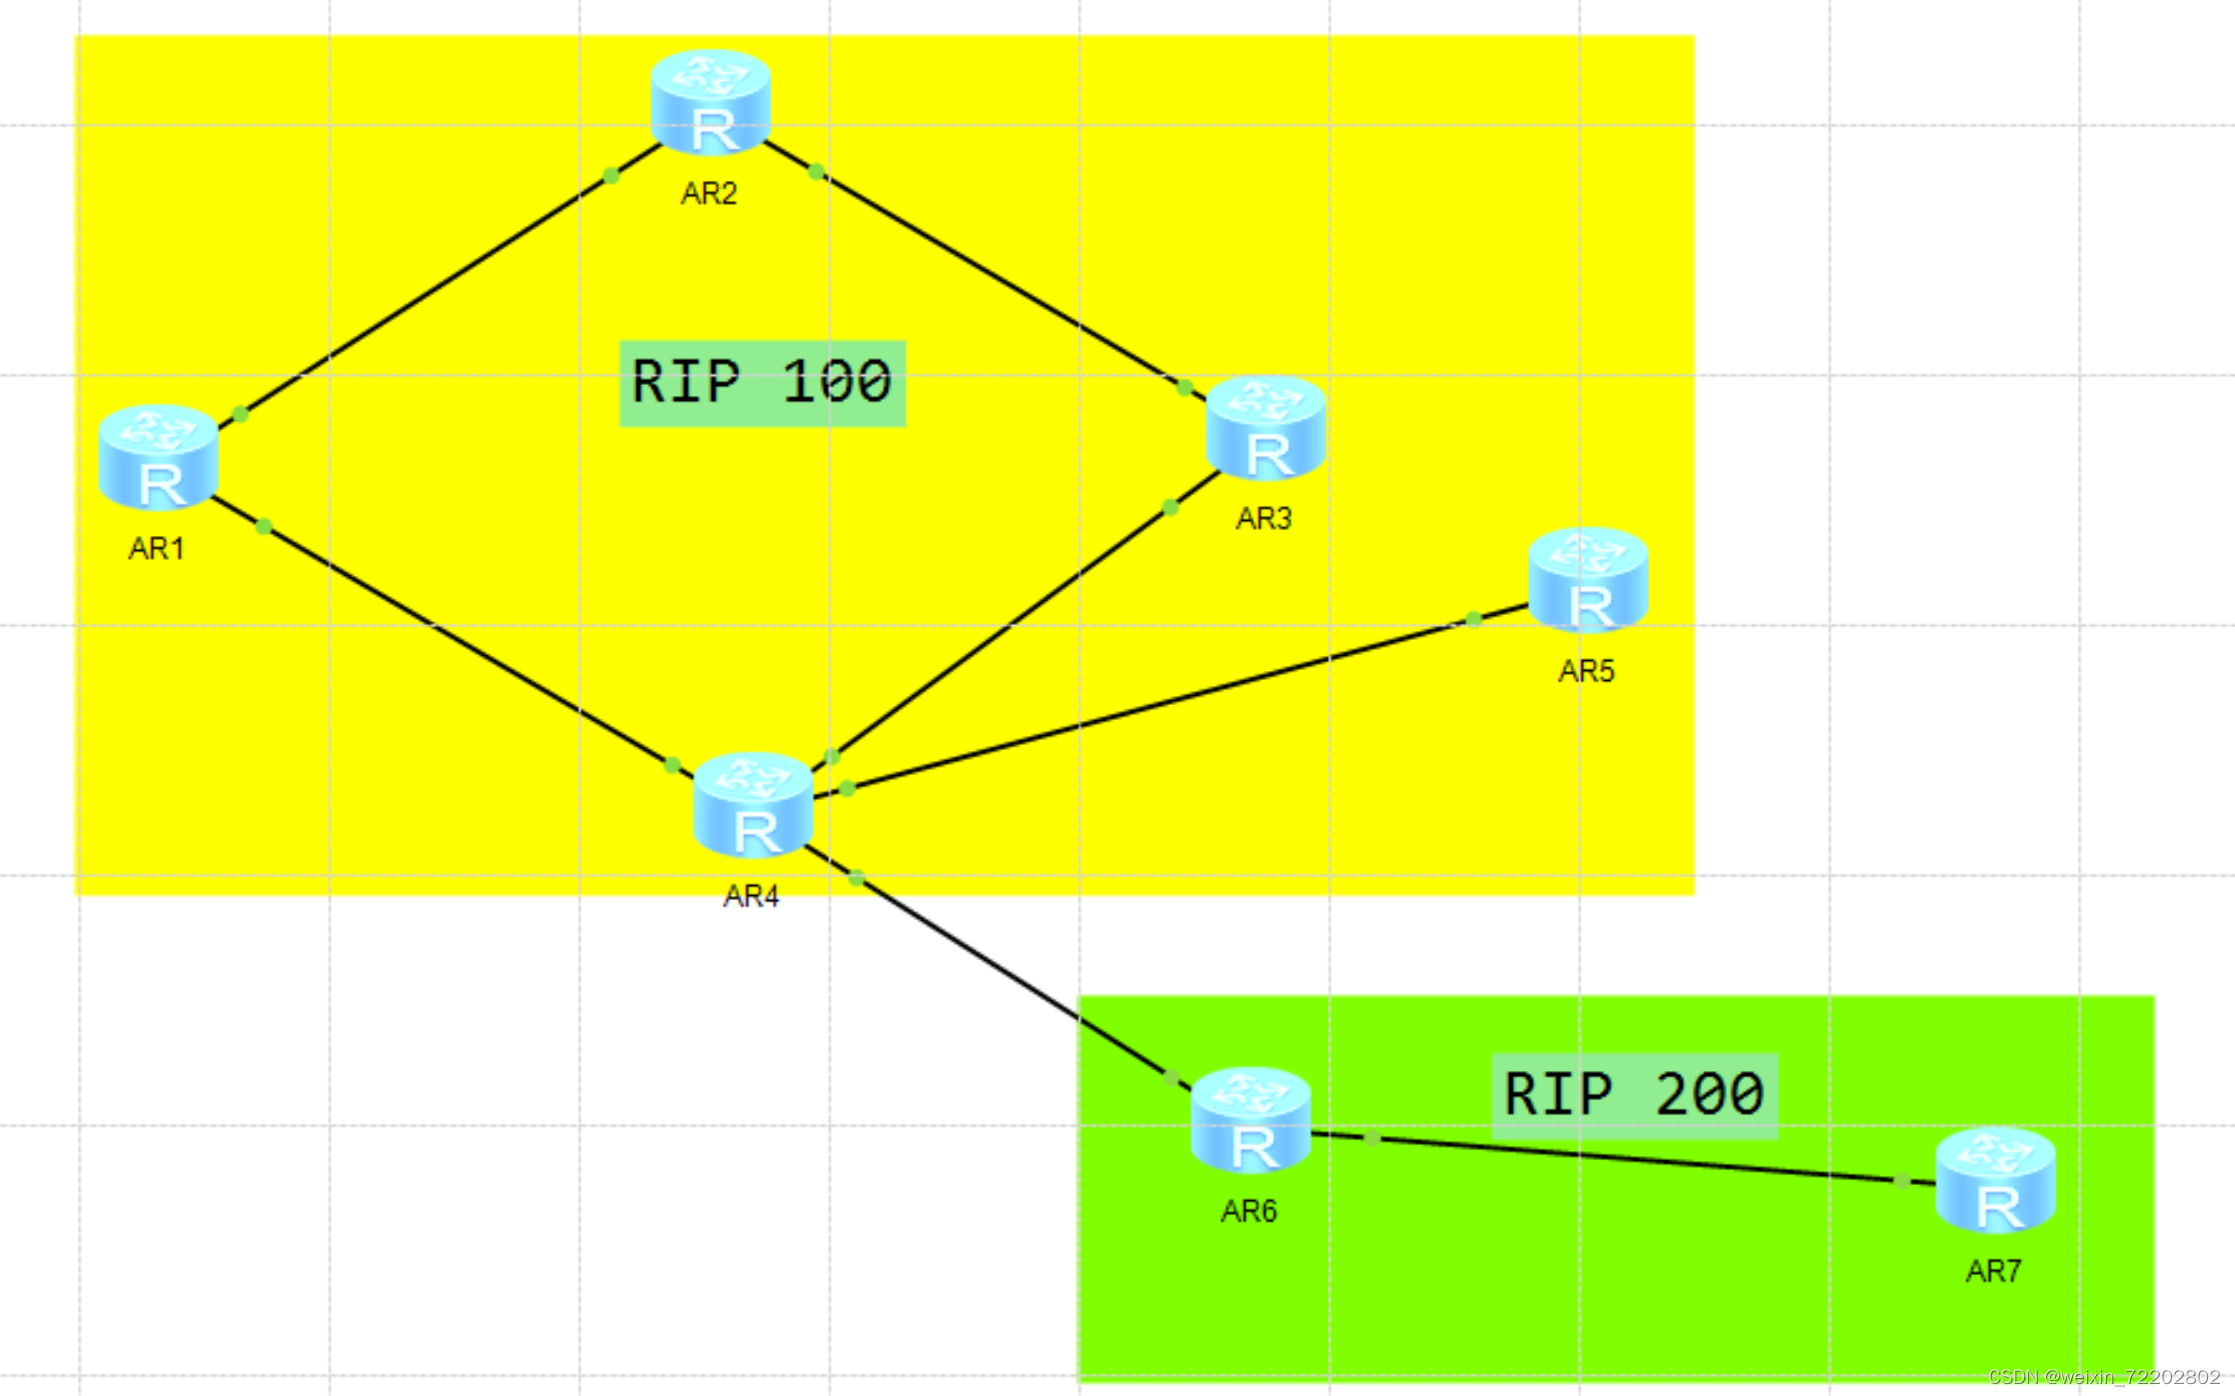
要求:R1-R2-R3-R4-R5 RIP 100运行版本2
R6-R7 RIP 200 运行版本1
1.使用合理IP地址规划网络,各自创建环回接口
2.R1创建环回 172.16.1.1/24 172.16.2.1/24 172.16.3.1/24
3.要求R3使用R2访问R1环回
4.减少路由条目数量,R1-R2之间增加路由传递安全性
5.R5创建一个环回模拟运营商,不能通告
6.R1 telnet R2环回实际telnet 到R7上
7.R6-R7路由器不能学习到达R1环回路由
下面是详细的步骤:
1. 使用合理IP地址规划网络,各自创建环回接口:
R1:
- Loopback0: 172.16.1.1/24
- Loopback1: 172.16.2.1/24
- Loopback2: 172.16.3.1/24
R2:
- Loopback0: 172.16.4.1/24
R3:
- Loopback0: 172.16.5.1/24
R5:
- Loopback0: 172.16.6.1/24 (用于模拟运营商,不进行路由通告)
R6:
- Loopback0: 172.16.7.1/24
R7:
- Loopback0: 172.16.8.1/24
2. R1创建环回 172.16.1.1/24 172.16.2.1/24 172.16.3.1/24
在R1上执行以下配置:
```
R1(config)# interface loopback0
R1(config-if)# ip address 172.16.1.1 255.255.255.0
R1(config)# interface loopback1
R1(config-if)# ip address 172.16.2.1 255.255.255.0
R1(config)# interface loopback2
R1(config-if)# ip address 172.16.3.1 255.255.255.0
```
3. 要求R3使用R2访问R1环回
在R3上配置以下静态路由:
```
R3(config)# ip route 172.16.1.0 255.255.255.0 192.168.12.1
R3(config)# ip route 172.16.2.0 255.255.255.0 192.168.12.1
R3(config)# ip route 172.16.3.0 255.255.255.0 192.168.12.1
```
4. 减少路由条目数量,R1-R2之间增加路由传递安全性
在R2上执行以下配置:
```
R2(config)# access-list 1 permit 172.16.0.0 0.0.255.255
R2(config)# route-map NAT permit 10
R2(config-route-map)# match ip address 1
R2(config-route-map)# route-set ip next-hop 192.168.12.2
```
5. R5创建一个环回模拟运营商,不能通告
在R5上执行以下配置:
```
R5(config)# interface loopback0
R5(config-if)# ip address 172.16.6.1 255.255.255.0
R5(config-if)# no ip route-cache
R5(config-if)# no ip route-cache belongs-to aigp
R5(config-if)# no ip route-cache cef
R5(config-if)# no ip route-cache flow
```
6. R1 telnet R2环回实际telnet 到R7上
在R1上telnet到R2的环回接口:
```
R1# telnet 172.16.4.1
```
在R2上telnet到R7的环回接口:
```
R2# telnet 172.16.8.1
```
现在,你将能够通过R2从R1 telnet到R7。
7. R6-R7路由器不能学习到达R1环回路由
在R6和R7上执行以下配置:
```
R6(config)# router rip
R6(config-router)# passive-interface loopback 0
R7(config)# router rip
R7(config-router)# passive-interface loopback 0
```
这样,R6和R7将不再学习到R1的环回接口路由。


 634
634


 被折叠的 条评论
为什么被折叠?
被折叠的 条评论
为什么被折叠?
 到【灌水乐园】发言


