


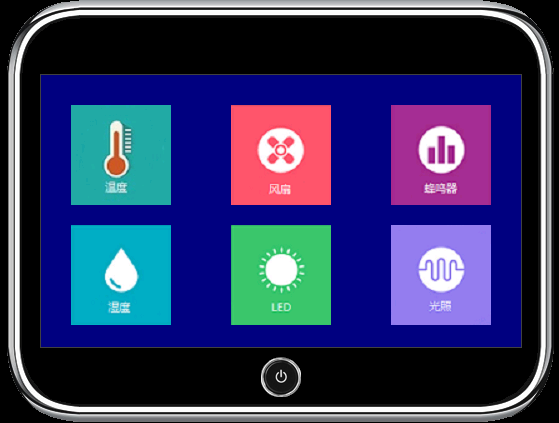
1.主界面设计
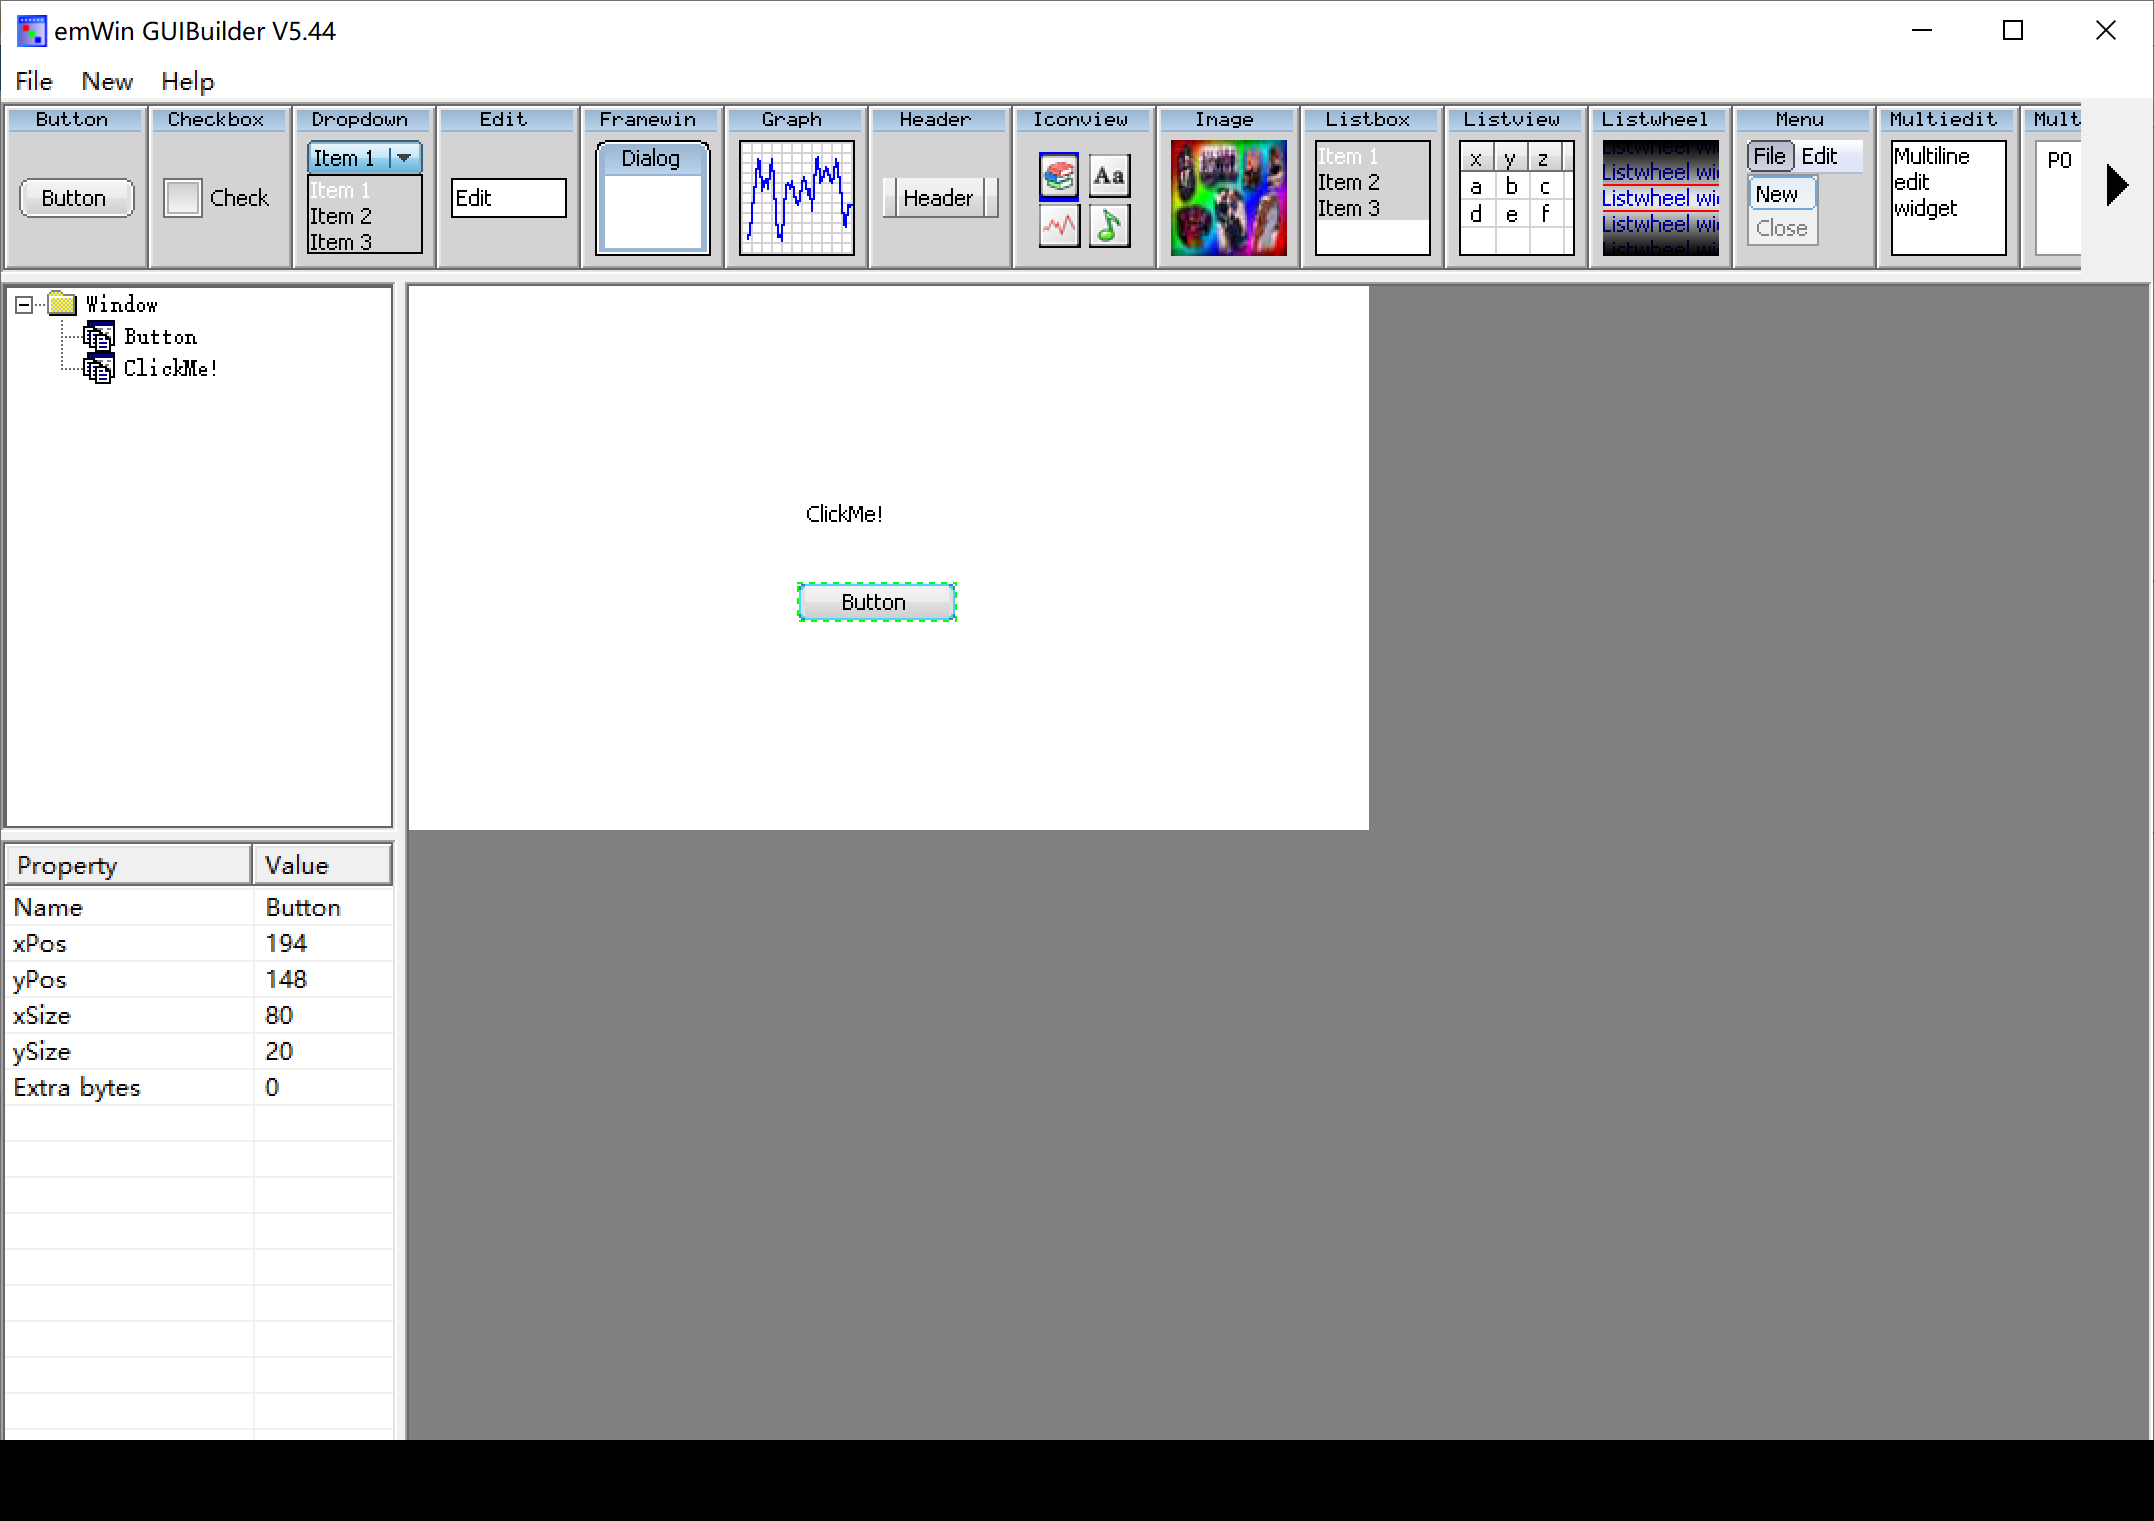
GUI builder 设计
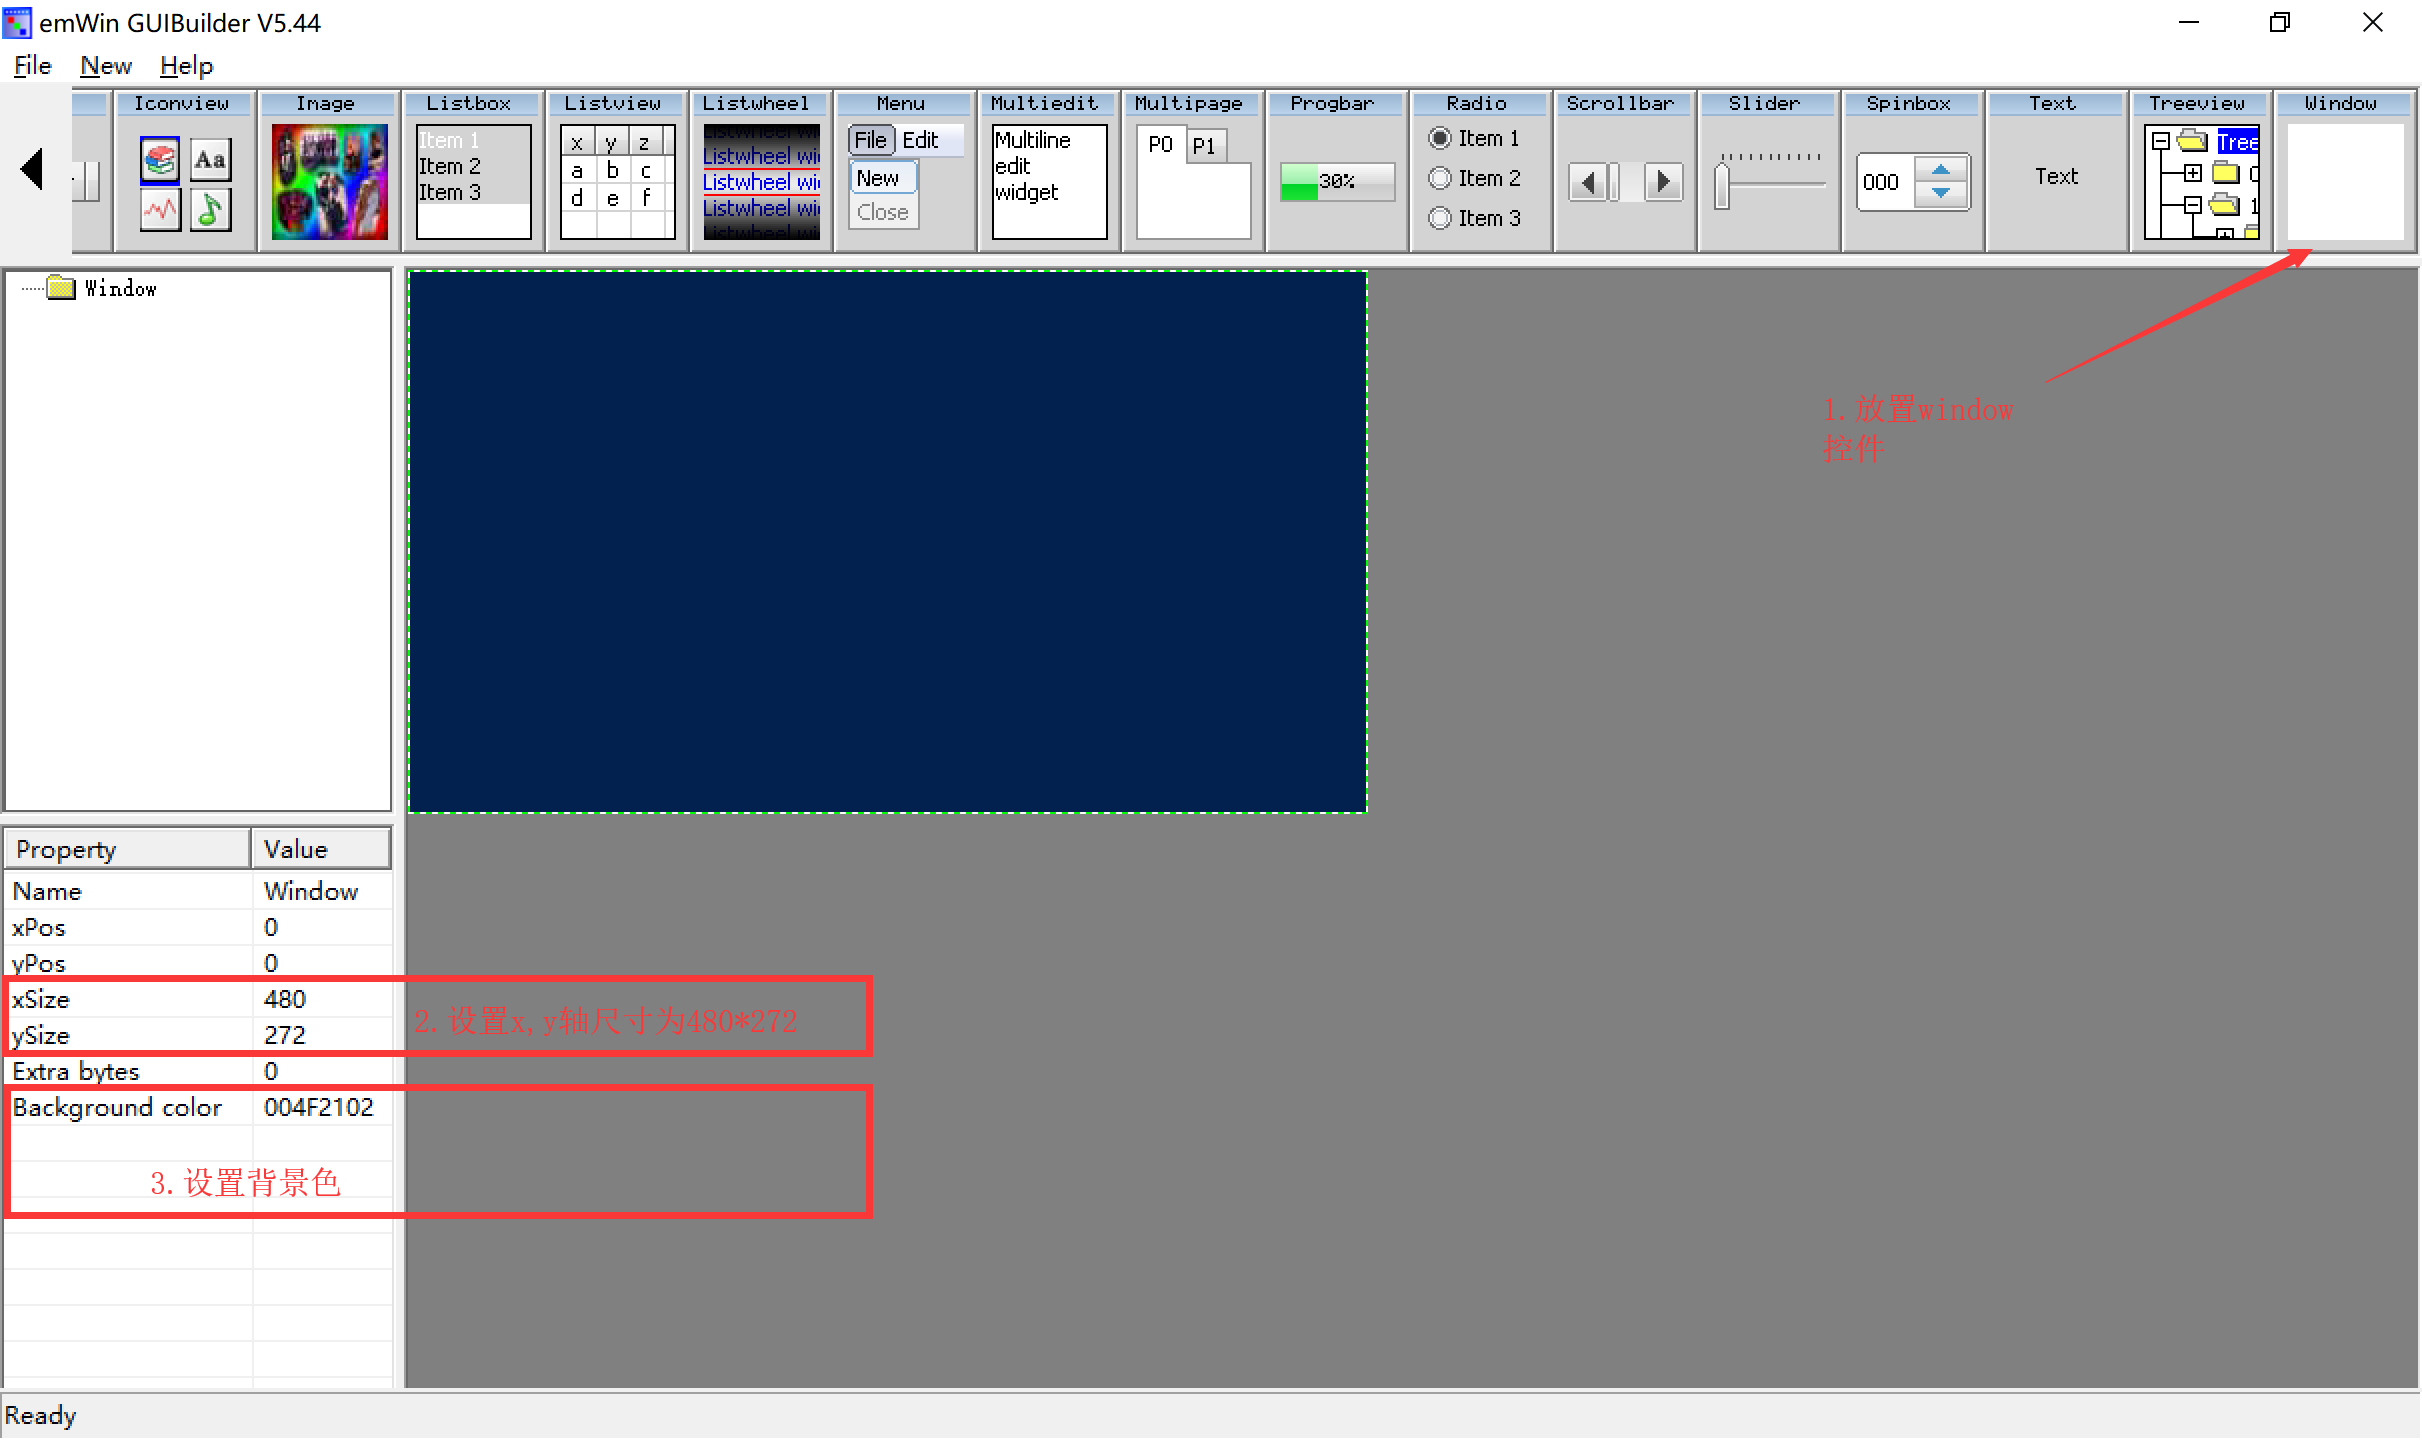
- 放置window控件
- 放置window控件
- 调整window控件尺寸为480*272
- 设置背景色
-
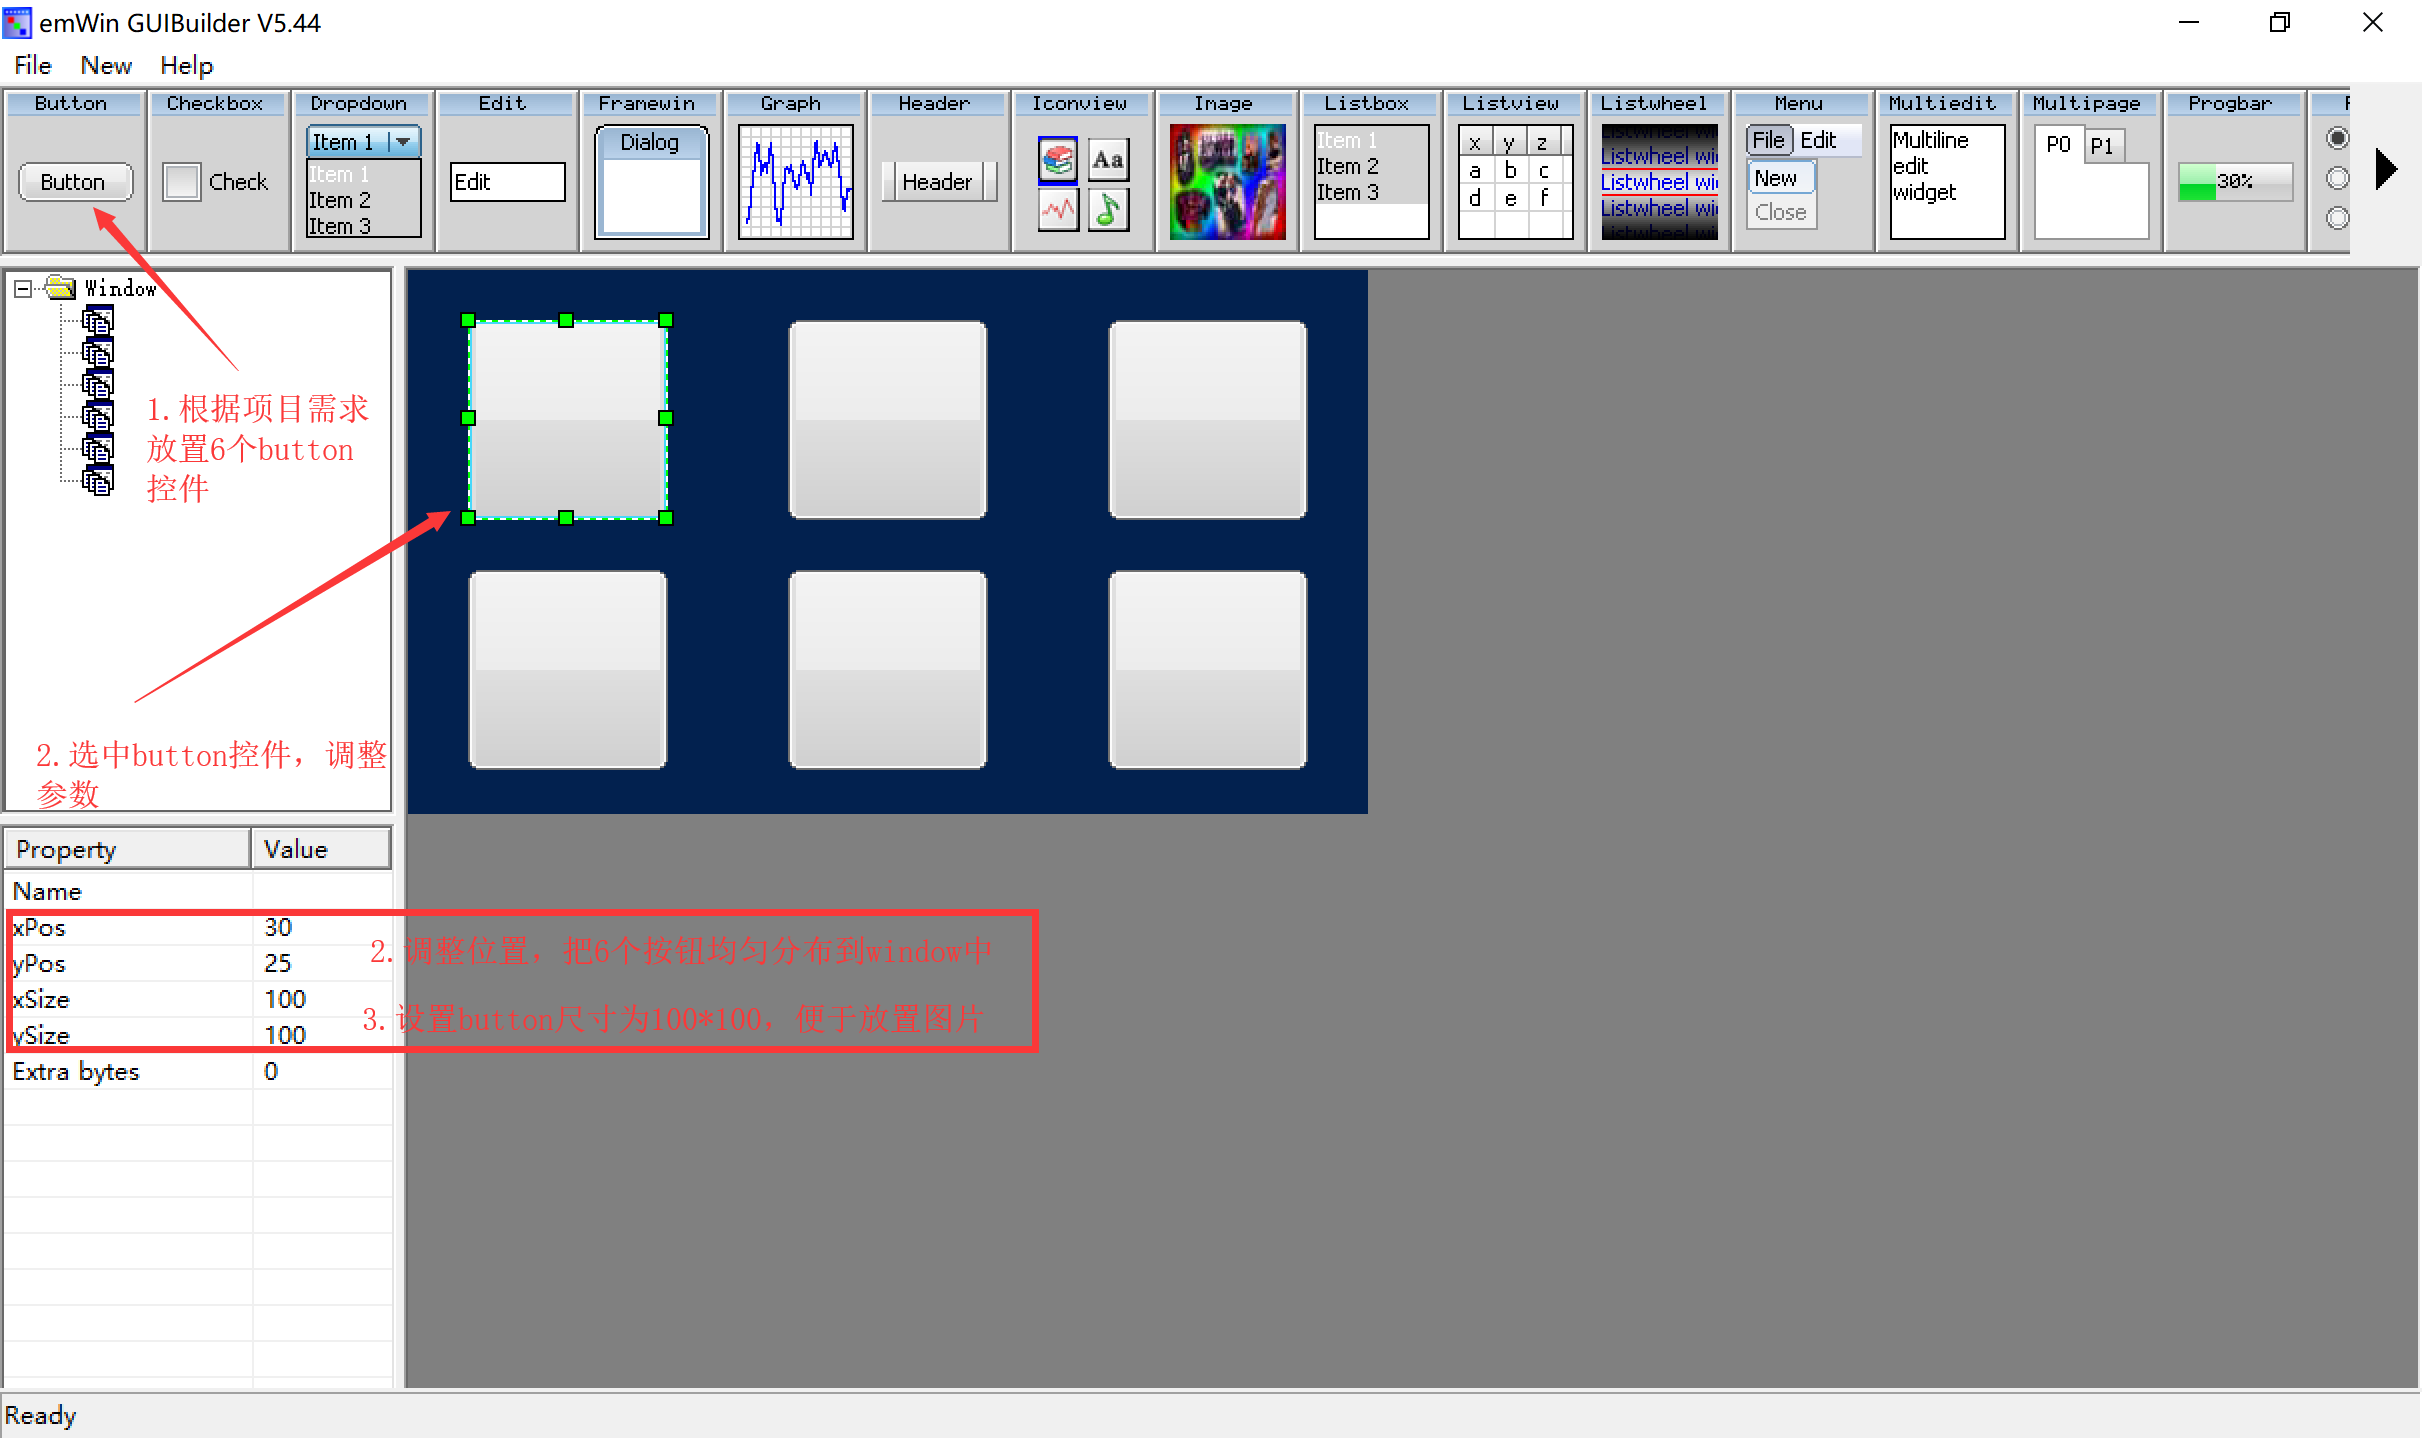
放置button控件
-
根据项目需求放置6个button控件
-
选中其中一个button控件,调整参数
- 调整button位置,把6个button均匀分布到window中
- 设置button尺寸为80*80,便于放置图片
-
-
生成C代码
- 点击file/save,保存文件
- C代码分析
// USER START (Optionally insert additional includes)
// USER END

#include "DIALOG.h"

/*********************************************************************
*
*       Defines   emwin为每一个控件分配一个ID号,之后针对控件的操作,都是针对这个		           ID进行操作!
*
**********************************************************************
*/
#define ID_WINDOW_0             (GUI_ID_USER + 0x00)
#define ID_BUTTON_0             (GUI_ID_USER + 0x07)
#define ID_BUTTON_1             (GUI_ID_USER + 0x08)
#define ID_BUTTON_2             (GUI_ID_USER + 0x09)
#define ID_BUTTON_3             (GUI_ID_USER + 0x0A)
#define ID_BUTTON_4             (GUI_ID_USER + 0x0B)
#define ID_BUTTON_5             (GUI_ID_USER + 0x0C)
/*********************************************************************
*
*       窗口控件列表
*/
/* 控件描述结构体
struct GUI_WIDGET_CREATE_INFO_struct {
  GUI_WIDGET_CREATE_FUNC * pfCreateIndirect;	//控件创建类型句柄
  const char             * pName;            // 控件名称,会显示到控件上
  I16                      Id;               // 控件ID号
  I16                      x0;               // 控件X轴位置
  I16                      y0;               // 控件Y轴位置
  I16                      xSize;            // 控件X长度
  I16                      ySize;            // 控件y长度
  U16                      Flags;            // 指定空间标志
  I32                      Para;             // 指定控件参数
  U32                      NumExtraBytes;    // 扩展字节数
};
一般都由gui builder 自动创建,特殊情况下,自行修改
*/
static const GUI_WIDGET_CREATE_INFO _aDialogCreate[] = {
  { WINDOW_CreateIndirect, "Window", ID_WINDOW_0, 0, 0, 480, 272, 0, 0x0, 0 },
  { BUTTON_CreateIndirect, "", ID_BUTTON_0, 30, 25, 100, 100, 0, 0x0, 0 },
  { BUTTON_CreateIndirect, "", ID_BUTTON_1, 190, 25, 100, 100, 0, 0x0, 0 },
  { BUTTON_CreateIndirect, "", ID_BUTTON_2, 350, 25, 100, 100, 0, 0x0, 0 },
  { BUTTON_CreateIndirect, "", ID_BUTTON_3, 30, 150, 100, 100, 0, 0x0, 0 },
  { BUTTON_CreateIndirect, "", ID_BUTTON_4, 190, 150, 100, 100, 0, 0x0, 0 },
  { BUTTON_CreateIndirect, "", ID_BUTTON_5, 350, 150, 100, 100, 0, 0x0, 0 },
};
/*********************************************************************
*
*       _cbDialog
*/
static void _cbDialog(WM_MESSAGE * pMsg) {
  WM_HWIN hItem;
  int     NCode;
  int     Id;
  switch (pMsg->MsgId) {
  case WM_INIT_DIALOG://初始化对话框事件
    //
    // 初始化窗口
    //
    hItem = pMsg->hWin;
    //设置窗口背景色
    WINDOW_SetBkColor(hItem, GUI_MAKE_COLOR(0x004F2102));
    break;
  case WM_NOTIFY_PARENT://子窗口变化事件
    Id    = WM_GetId(pMsg->hWinSrc);//获取子窗口ID
    NCode = pMsg->Data.v;//获取事件消息
    switch(Id) {//遍历窗口ID
    case ID_BUTTON_0: // Notifications sent by ''
      switch(NCode) {
      case WM_NOTIFICATION_CLICKED://按键按下
        break;
      case WM_NOTIFICATION_RELEASED://按键释放
        break;
      }
      break;
    case ID_BUTTON_1: // Notifications sent by ''
      switch(NCode) {
      case WM_NOTIFICATION_CLICKED:
        break;
      case WM_NOTIFICATION_RELEASED:
        break;
      }
      break;
    case ID_BUTTON_2: // Notifications sent by ''
      switch(NCode) {
      case WM_NOTIFICATION_CLICKED:
        break;
      case WM_NOTIFICATION_RELEASED:
        break;
      }
      break;
    case ID_BUTTON_3: // Notifications sent by ''
      switch(NCode) {
      case WM_NOTIFICATION_CLICKED:
        // USER START (Optionally insert code for reacting on notification message)
        // USER END
        break;
      case WM_NOTIFICATION_RELEASED:
        // USER START (Optionally insert code for reacting on notification message)
        // USER END
        break;
      // USER START (Optionally insert additional code for further notification handling)
      // USER END
      }
      break;
    case ID_BUTTON_4: // Notifications sent by ''
      switch(NCode) {
      case WM_NOTIFICATION_CLICKED:
        // USER START (Optionally insert code for reacting on notification message)
        // USER END
        break;
      case WM_NOTIFICATION_RELEASED:
        // USER START (Optionally insert code for reacting on notification message)
        // USER END
        break;
      // USER START (Optionally insert additional code for further notification handling)
      // USER END
      }
      break;
    case ID_BUTTON_5: // Notifications sent by ''
      switch(NCode) {
      case WM_NOTIFICATION_CLICKED:
        // USER START (Optionally insert code for reacting on notification message)
        // USER END
        break;
      case WM_NOTIFICATION_RELEASED:
        // USER START (Optionally insert code for reacting on notification message)
        // USER END
        break;
      // USER START (Optionally insert additional code for further notification handling)
      // USER END
      }
      break;
    // USER START (Optionally insert additional code for further Ids)
    // USER END
    }
    break;
  // USER START (Optionally insert additional message handling)
  // USER END
  default:
    WM_DefaultProc(pMsg);
    break;
  }
}

/*********************************************************************
*
*       Public code
*
**********************************************************************
*/
/*********************************************************************
*
*       创建窗口
*/
WM_HWIN CreateWindow(void);
WM_HWIN CreateWindow(void) {
  WM_HWIN hWin;
  /*
    创建对话框
  	参数
  	1:定义对话框中所要包含的小工具的资源表的指针
    2:对话框中所包含的小工具的总数
    3:应用程序特定回调函数 (对话框过程函数)的指针。
    4:父窗口的句柄 ( 0 表示没有父窗口)。
    5:对话框相对于父窗口的 X 轴位置。
    6:对话框相对于父窗口的 Y 轴位置
  */
  hWin = GUI_CreateDialogBox(_aDialogCreate, GUI_COUNTOF(_aDialogCreate), _cbDialog, WM_HBKWIN, 0, 0);
  return hWin;
}

// USER START (Optionally insert additional public code)
// USER END

/*************************** End of file ****************************/
功能实现-window环境
下载emwin仿真和模拟器
仿真模拟器是在window开发环境下的C工程,可以通过VC6或者codeblockd IDE环境下进行开发仿真
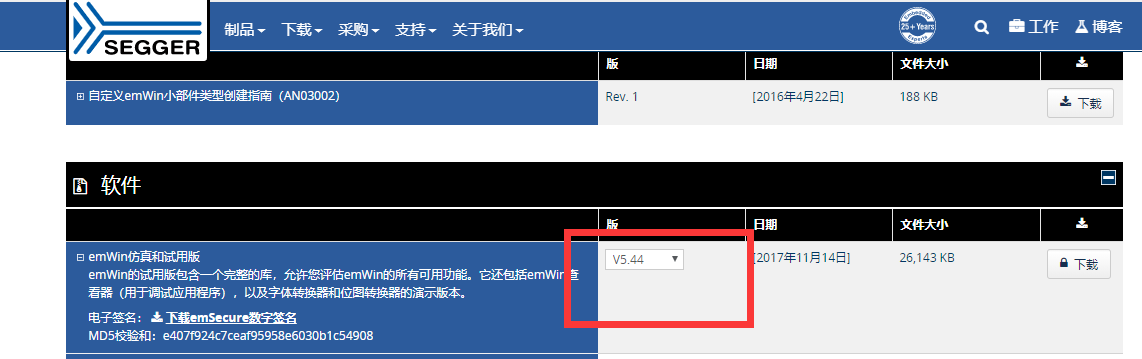
- 下载地址
https://www.segger.com/downloads/emwin/
根据自己使用的STemwin库,进行下载,我们采用V5.44版本
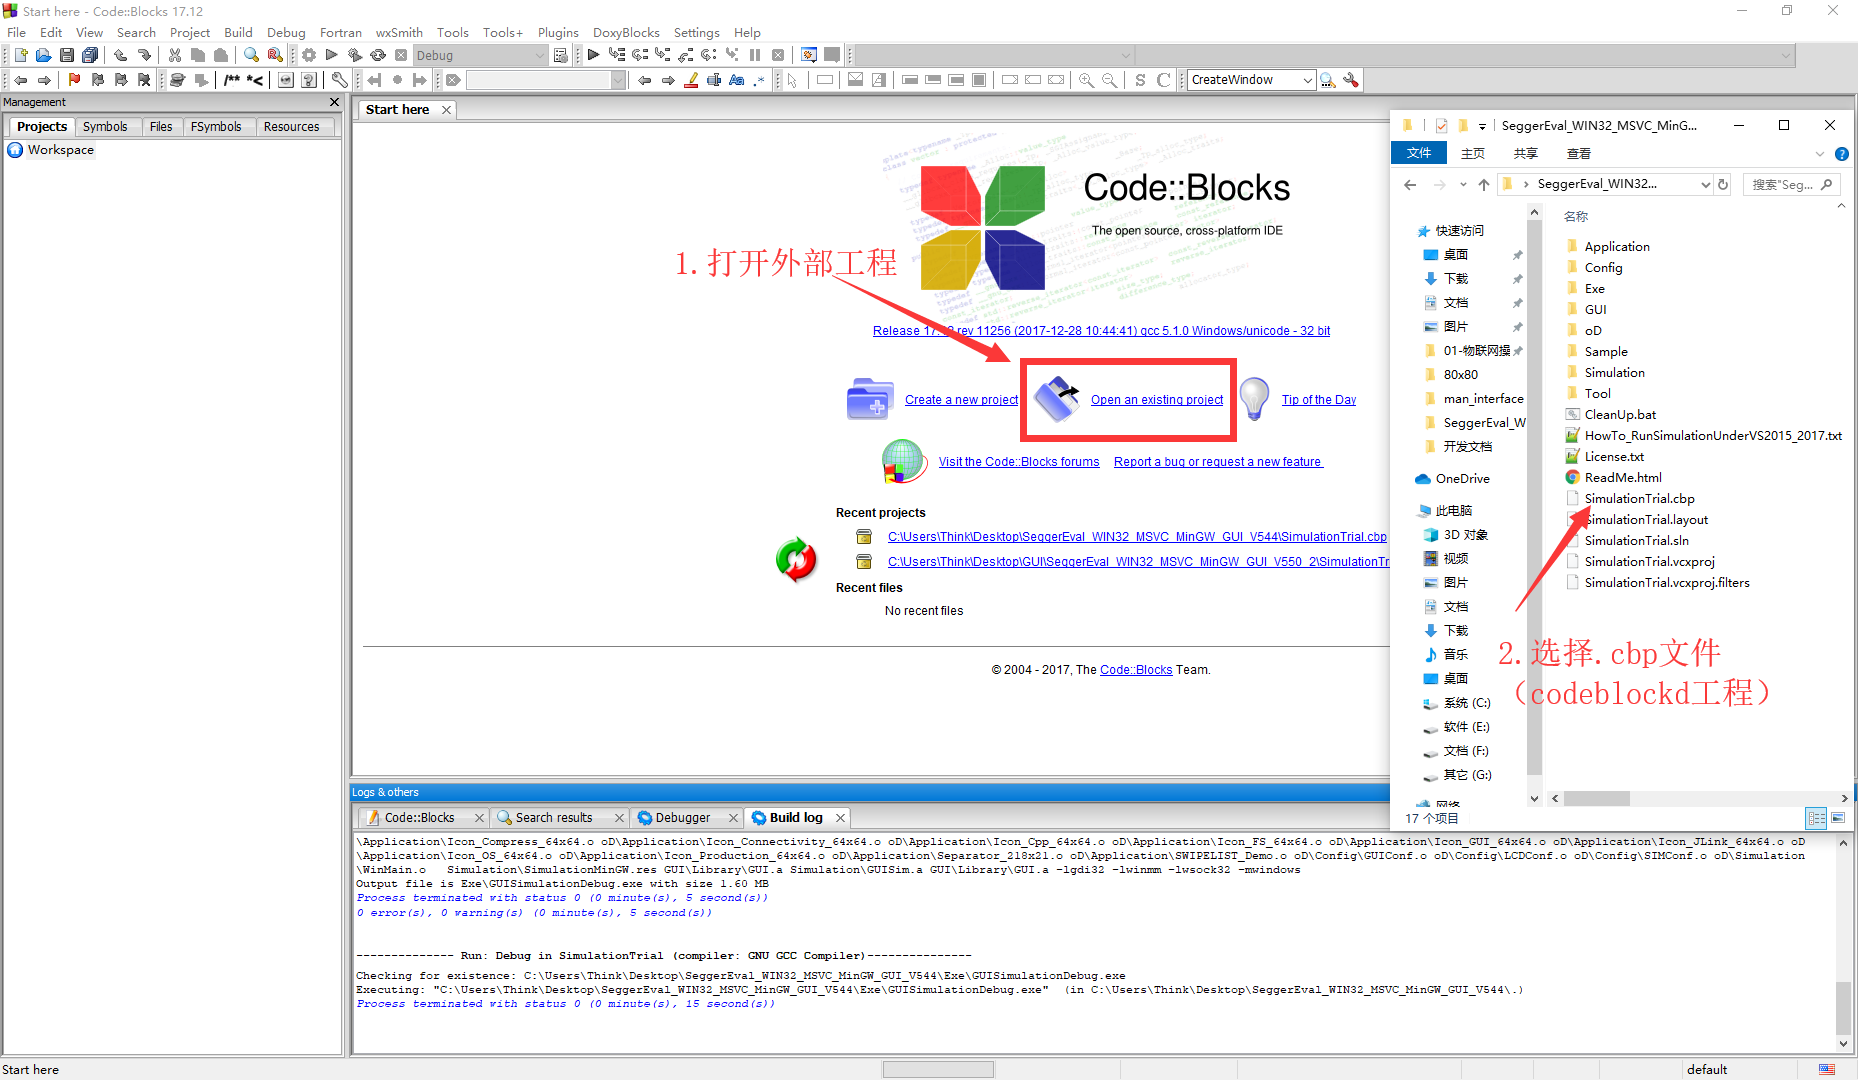
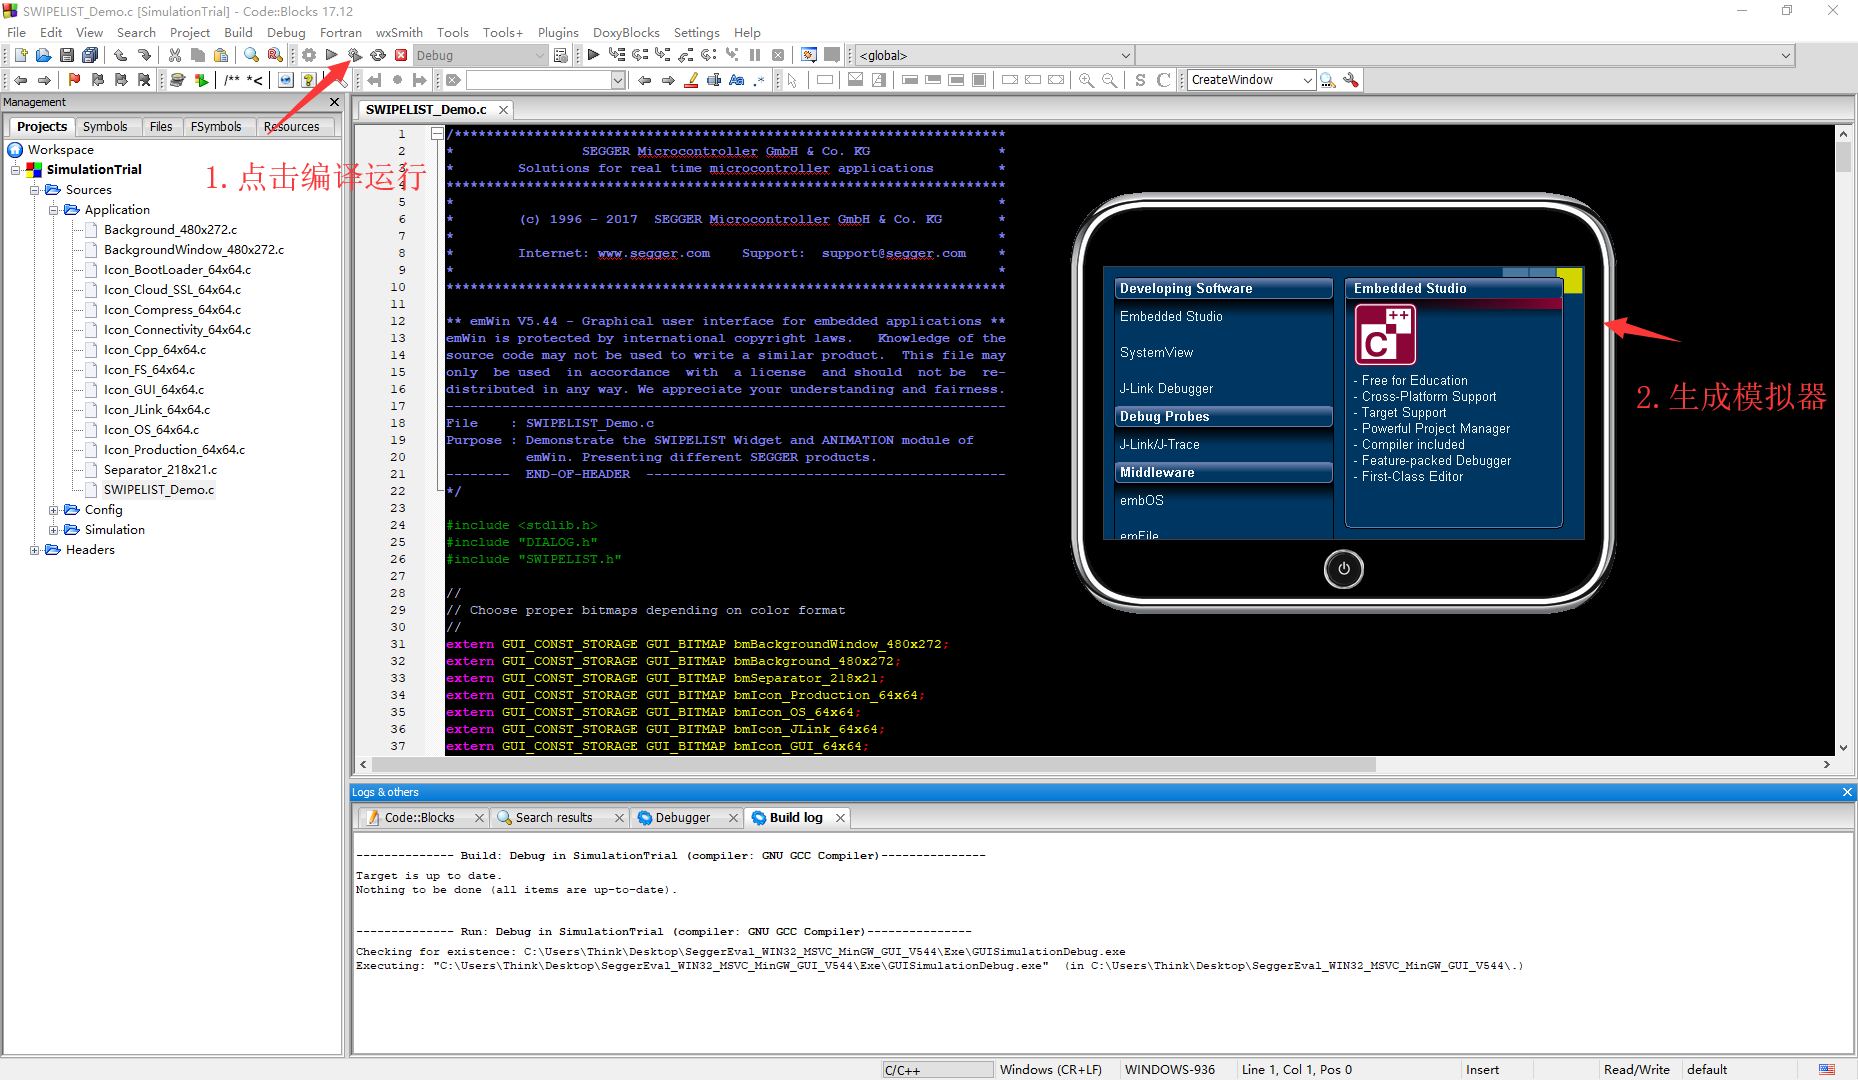
- 添加工程到codeblockd
- 打开外部工程
- 选择.cbp文件
- 添加工程到codeblockd
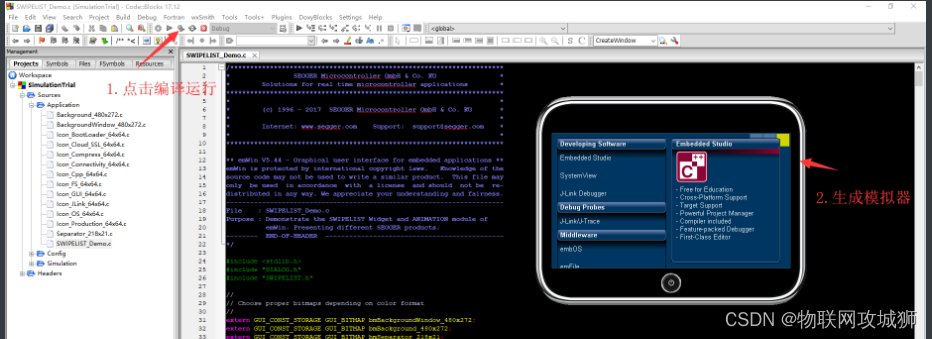
- 点击编译运行按钮
- 生成模拟器
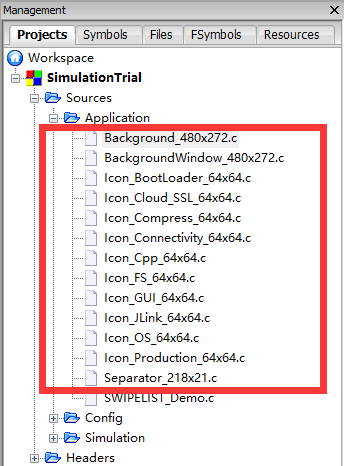
修改模拟器原始工程
- 把无用的代码移除工程
- 添加WindowDLG.c到工程中
-
首先复制WindowDLG.c到SeggerEval_WIN32_MSVC_MinGW_GUI_V544\Application目录下
-
添加WindowDLG.c到工程中
-
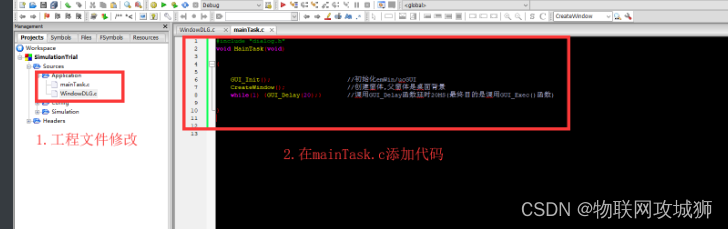
选择Application工程目录,新建mainTask.c
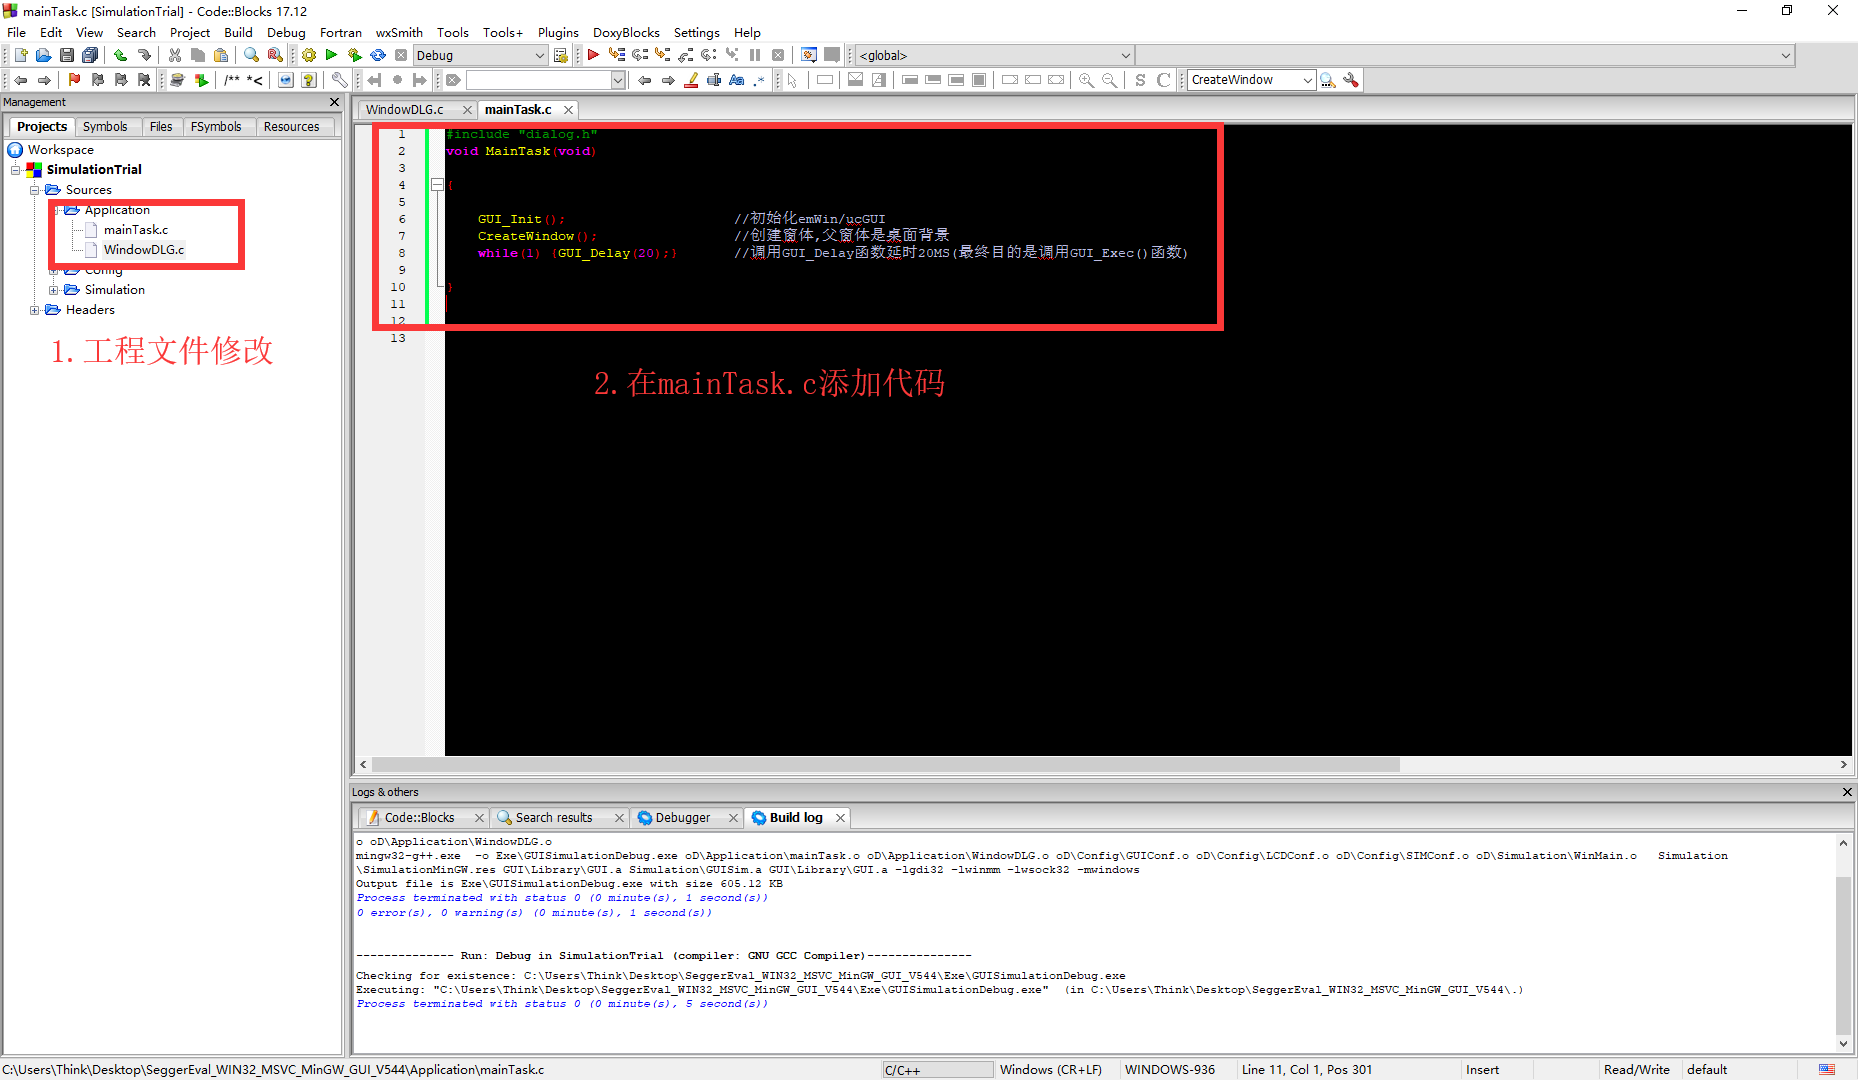
-
在mainTask.c添加代码
-
#include "dialog.h"//包含window对话框 头文件
void MainTask(void)

{

    GUI_Init();                     //初始化emWin/ucGUI
    CreateWindow();                 //创建窗体,父窗体是桌面背景
    while(1) {GUI_Delay(20);}       //调用GUI_Delay函数延时20MS(最终目的是调用GUI_Exec()函数)

}
- 点击编译运行
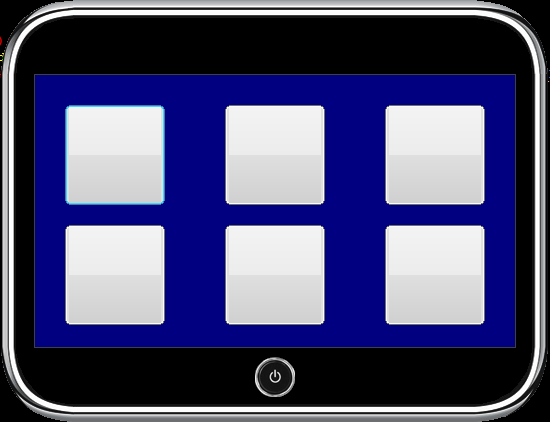
按钮添加效果图
搜索像素100x100图片,尽量为png格式
- 搜索温度、湿度、风扇、LED、光照、蜂鸣器图片
- 统一把图片修改为100x100像素
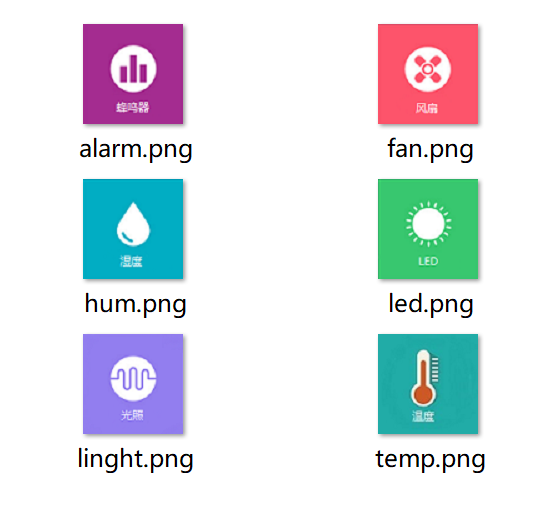
把图片修改为位图格式
- 选择位图生成工具

-
进行位图生成
- File->Open 打开图片
- Image->Convert to-> 16Bit color 565 把图片转换为RGB565格式(跟开发板LCD屏幕匹配)
- File->Save as 保存文件


- 把生成的位图代码添加到工程中
- 复制位图文件到工程文件中
- 添加位图文件到工程里
功能代码修改
- 在WindowDLG.c里声明位图全局变量(每一幅图片都生成了一个位图结构体)
/*********************************************************************
*
*       Static data
*
**********************************************************************
*/

// USER START (Optionally insert additional static data)

extern GUI_CONST_STORAGE GUI_BITMAP bmalarm;
extern GUI_CONST_STORAGE GUI_BITMAP bmfan;
extern GUI_CONST_STORAGE GUI_BITMAP bmhum;
extern GUI_CONST_STORAGE GUI_BITMAP bmled;
extern GUI_CONST_STORAGE GUI_BITMAP bmlinght;
extern GUI_CONST_STORAGE GUI_BITMAP bmtemp;
// USER END
- 在对话框初始化中添加按钮位图转换
// USER START (Optionally insert additional code for further widget initialization)
	//根据空间ID,获取空间句柄
    hItem = WM_GetDialogItem(pMsg->hWin, ID_BUTTON_0);
    //设置按钮未按下时,显示温度图片
    BUTTON_SetBitmap(hItem, BUTTON_BI_UNPRESSED, &bmtemp);
    //
    // Initialization of 'Button_fan'
    //
    hItem = WM_GetDialogItem(pMsg->hWin, ID_BUTTON_1);
    BUTTON_SetBitmap(hItem, BUTTON_BI_UNPRESSED, &bmfan);
    //
    // Initialization of 'Button_hum'
    //
    hItem = WM_GetDialogItem(pMsg->hWin, ID_BUTTON_2);
    BUTTON_SetBitmap(hItem, BUTTON_BI_UNPRESSED, &bmhum);
    //
    // Initialization of 'Button_led'
    //
    hItem = WM_GetDialogItem(pMsg->hWin, ID_BUTTON_3);
    BUTTON_SetBitmap(hItem, BUTTON_BI_UNPRESSED, &bmled);
    //
    // Initialization of 'Button_alarm'
    //
    hItem = WM_GetDialogItem(pMsg->hWin, ID_BUTTON_4);
    BUTTON_SetBitmap(hItem, BUTTON_BI_UNPRESSED, &bmalarm);
    //
    // Initialization of 'Button_light'
    //
    hItem = WM_GetDialogItem(pMsg->hWin, ID_BUTTON_5);
    BUTTON_SetBitmap(hItem, BUTTON_BI_UNPRESSED, &bmlinght);

    // USER END
- 点击编译运行
为按钮添加点击效果
- 生成颜色为蓝色的位图文件 blue.c
- 在对话框初始化中添加按钮位图转换
BUTTON_SetBitmap(hItem, BUTTON_BI_PRESSED, &bmblue);
功能实现开发板环境
代码移植
- 复制Application文件夹到SmartClassRoom\Middlewares\Third_Party\STemWin目录下
2.图形界面(GUI)编程介绍
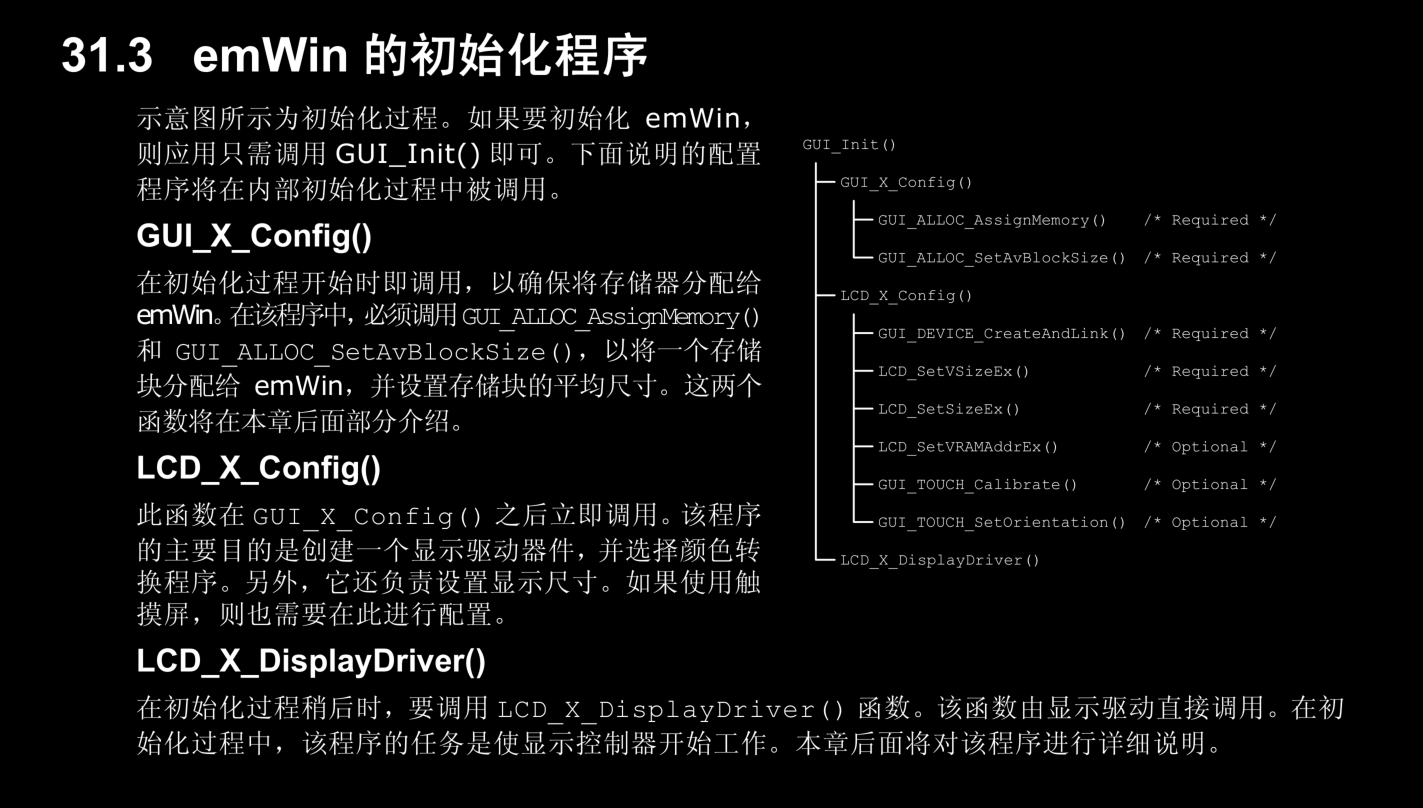
GUI开发流程
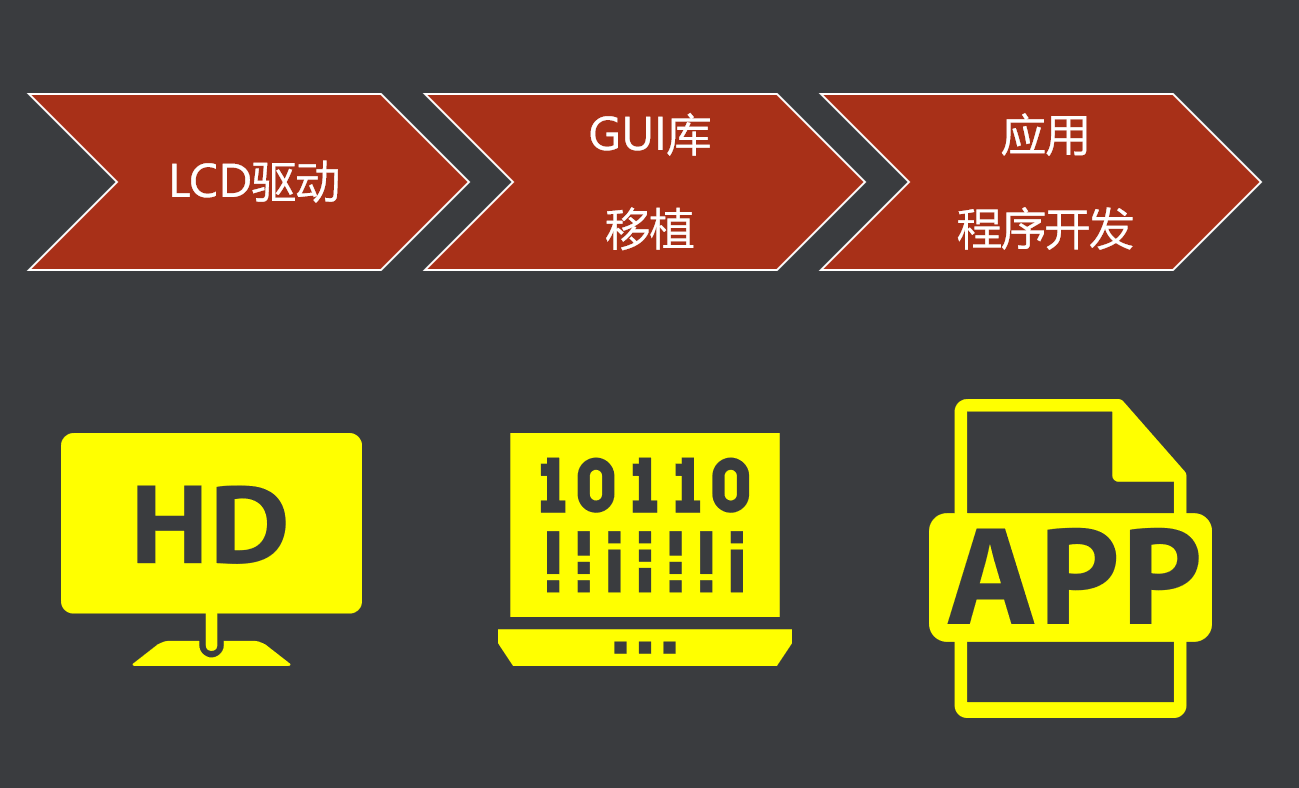
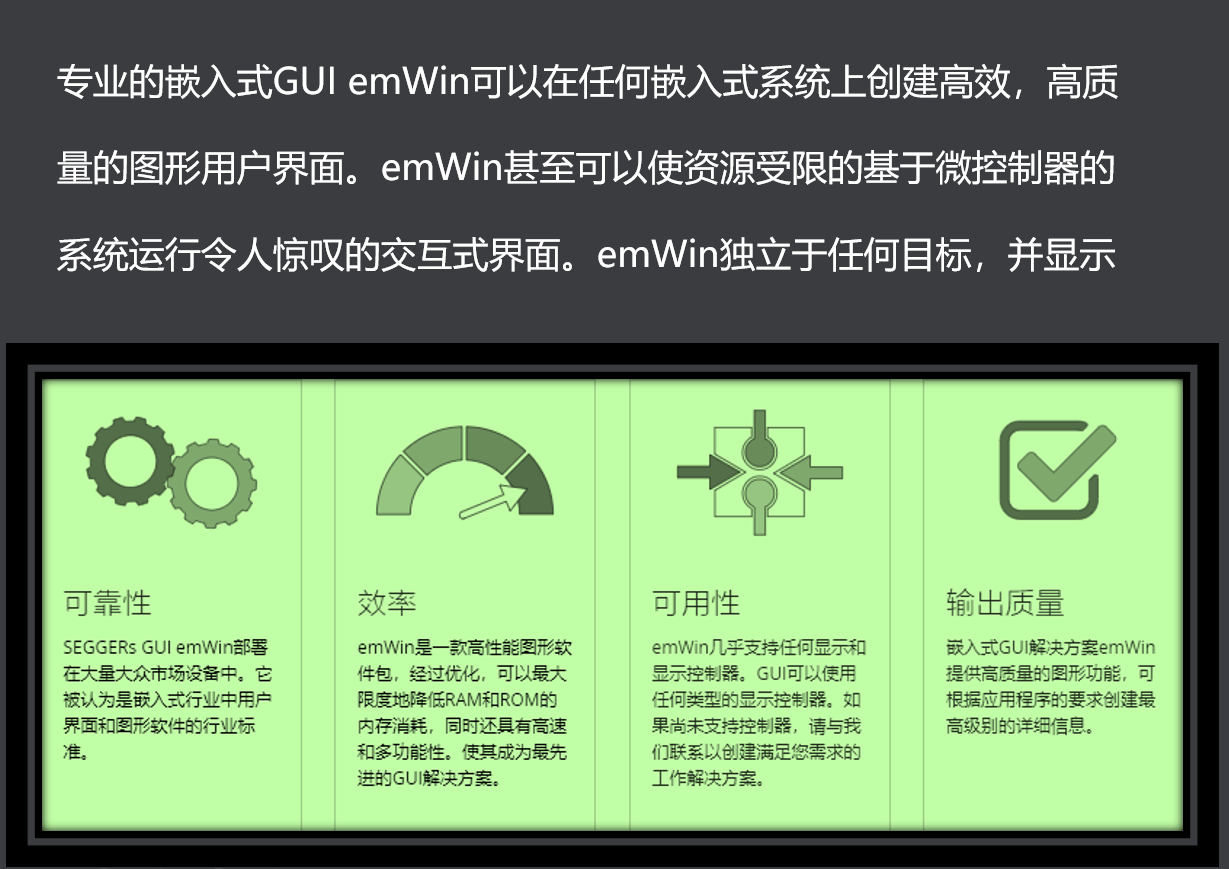
emWin-GUI库
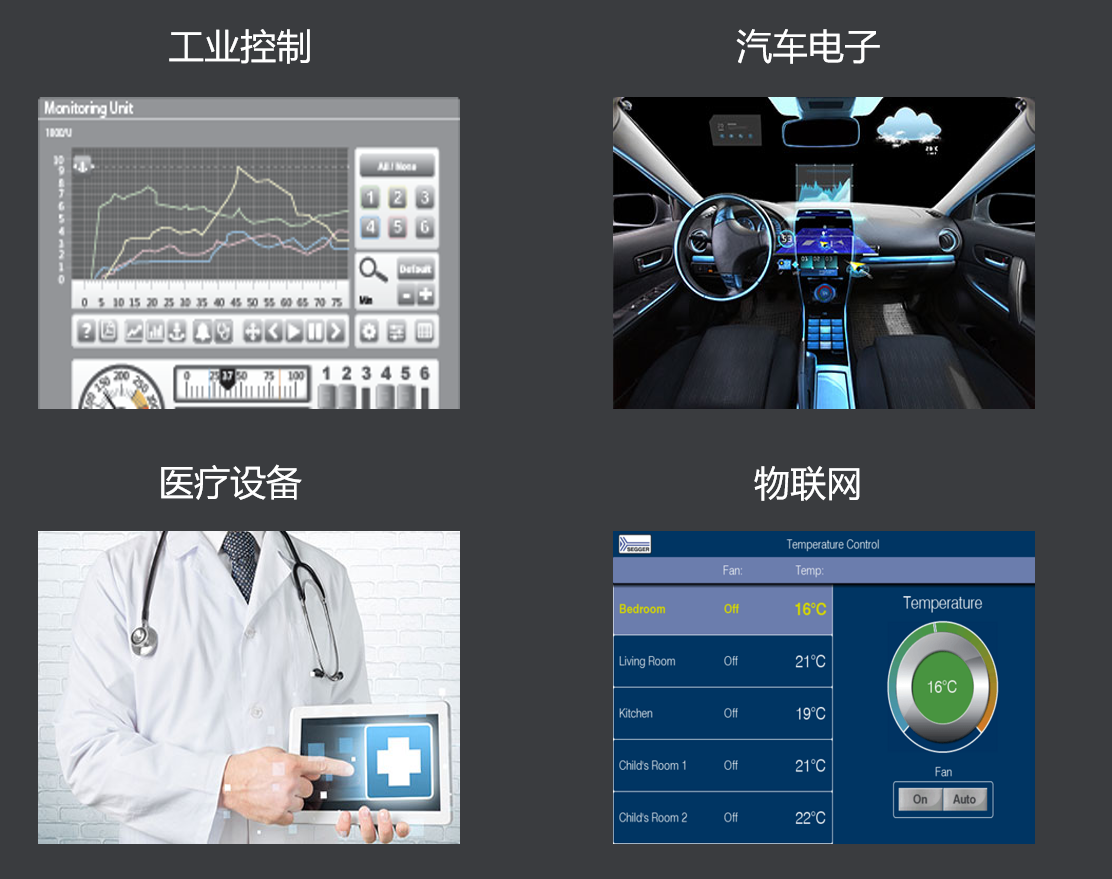
emWin应用场景
emWin介绍
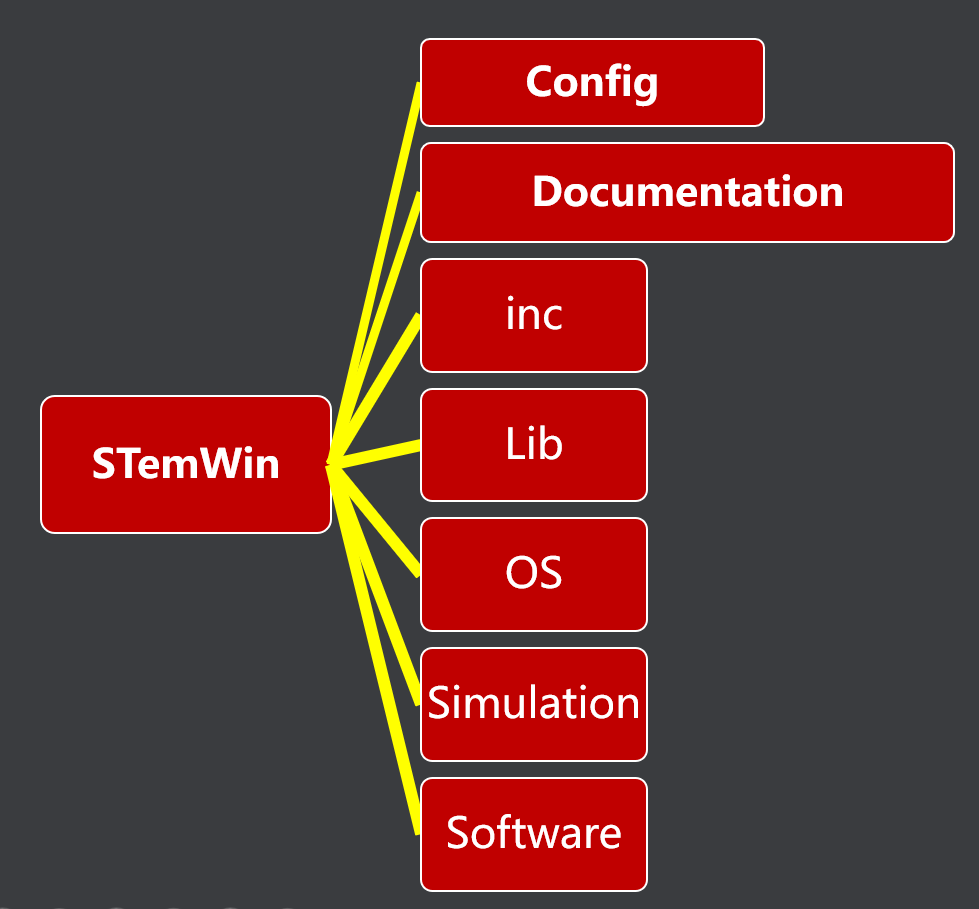
STemWin
emWin开发流程
LCD怎么驱动
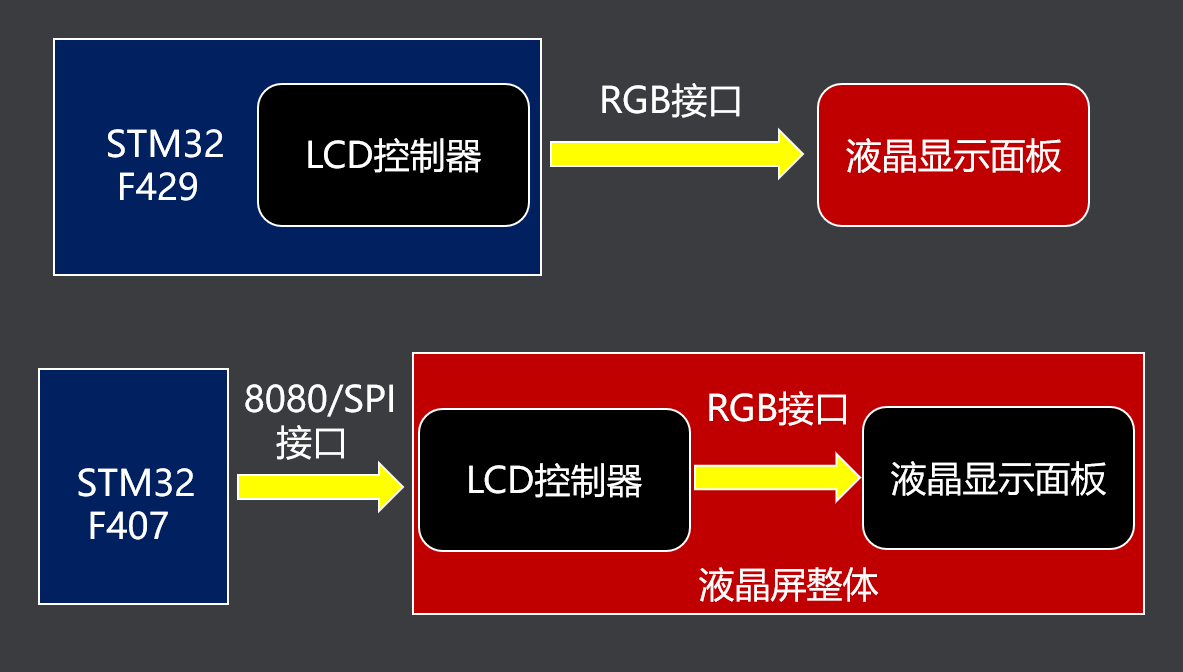
常见的TFT-LCD屏
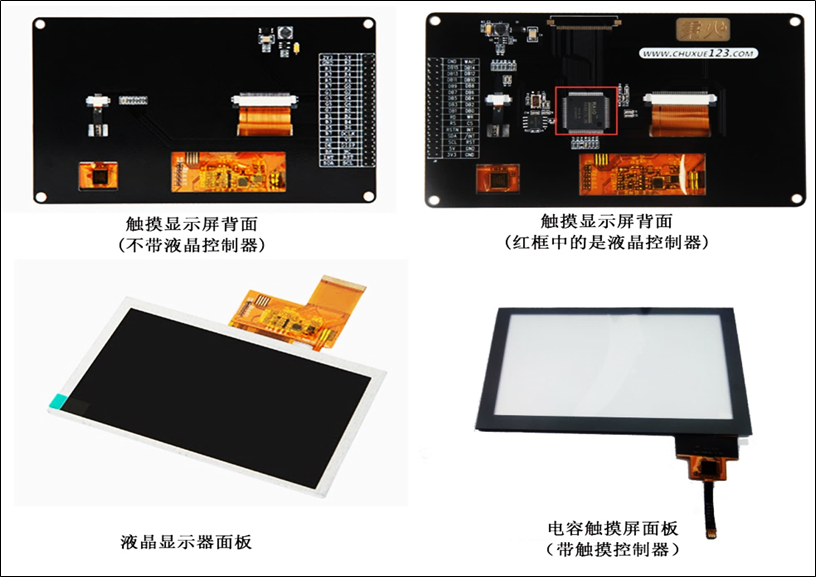
两种TFT-LCD驱动接口
LCD驱动程序
#ifndef __LCD_H__
#define __LCD_H__
#include "stm32f4xx_hal.h"
void lcd_clear(uint16_t Color);
void lcd_init(void);
void write_data_Prepare(void);
unsigned short lcd_read_gram(unsigned int x,unsigned int y);
void LCD_DrawPoint(uint16_t xsta, uint16_t ysta, uint16_t color);
void LCD_ShowString(uint16_t x0, uint16_t y0, uint8_t *pcStr, uint16_t PenColor, uint16_t BackColor);
void LCD_Fill(uint16_t xsta, uint16_t ysta, uint16_t xend, uint16_t yend, uint16_t colour);
#endif
3.emWin移植上
STemWin结构框架
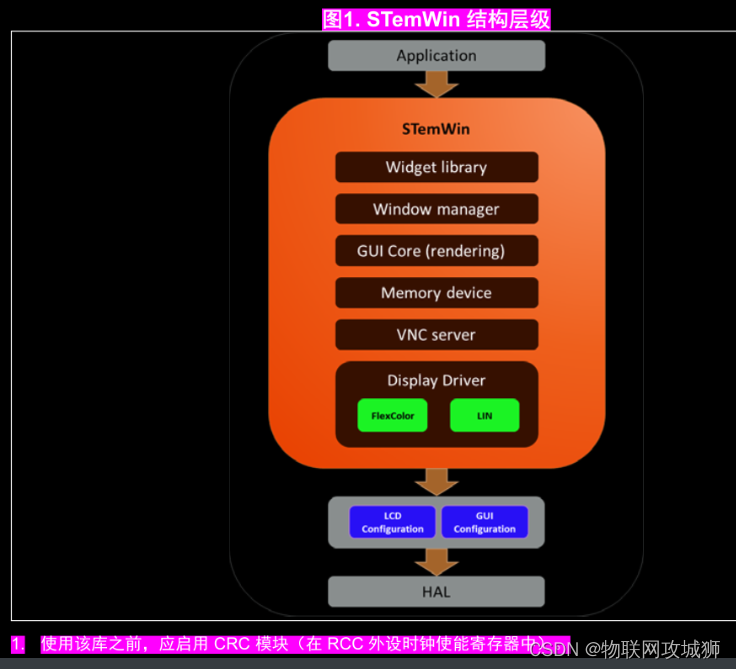
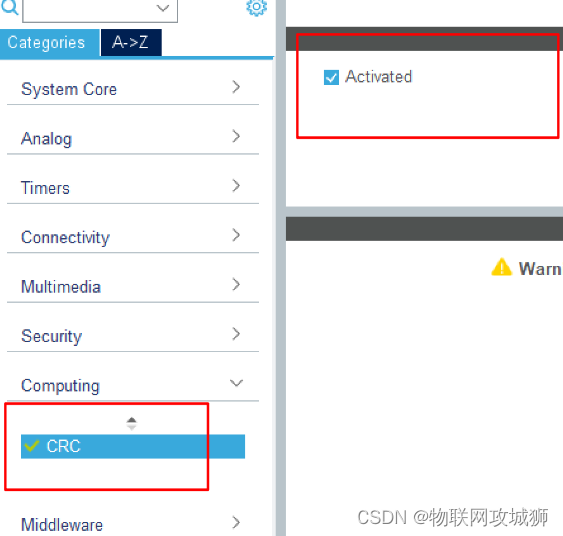
CRC开启
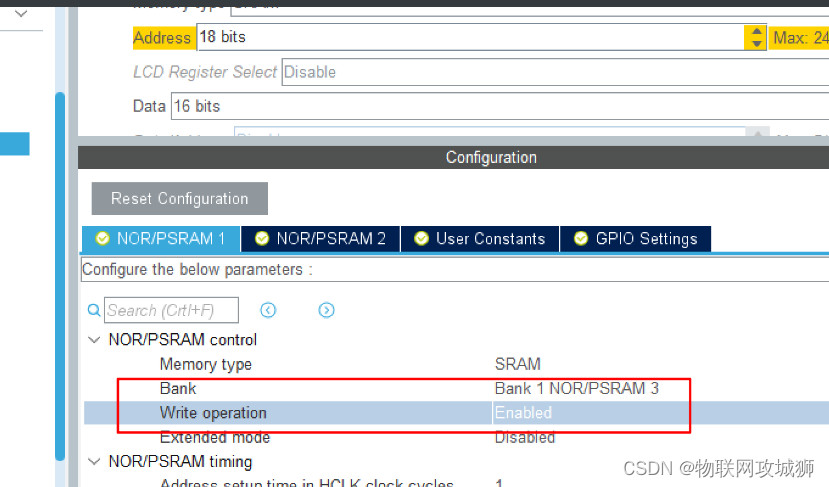
SRAM 写操作要使能
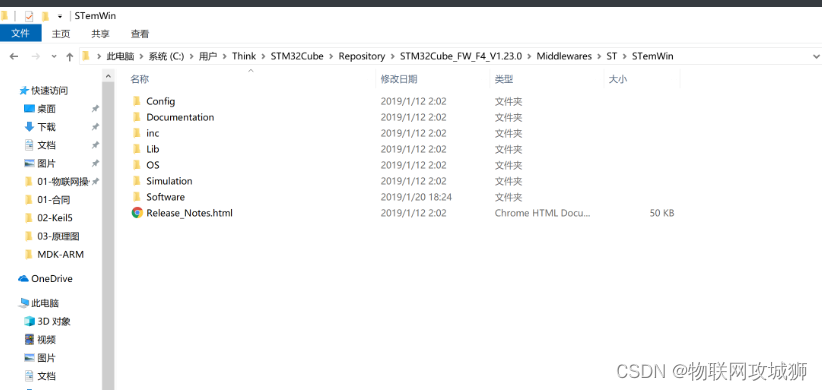
获取STemWin源码文件
STemWin默认在STM32CUBEMX文档下
例如C:\Users\Think\STM32Cube\Repository\STM32Cube_FW_F4_V1.24.1\Middlewares\ST\STemWin
emWin移植到项目工程
-
复制STemWin源码到项目工程中
工程目录:SmartClassRoom\Middlewares\Third_Party\STemWin -
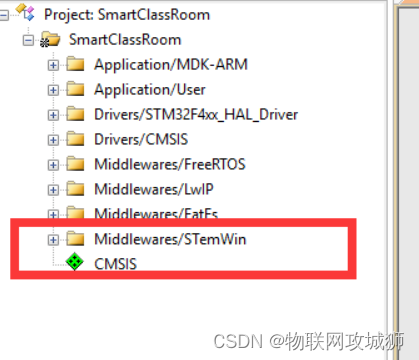
在keil工程中添加相关文件
-
新建工作组:Middlewares/STemWin
-
添加需要编译的C和库文件
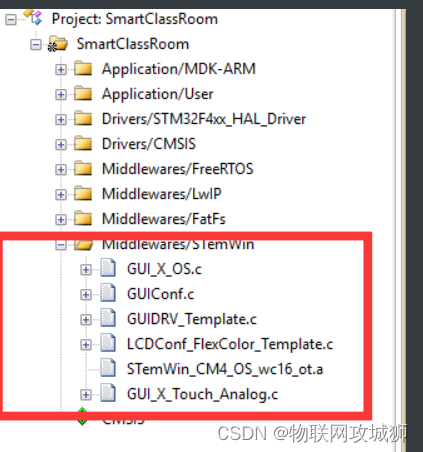
-
| 文件名称 | 文件描述 |
|---|---|
| GUI_X_OS.c | OS支持文件,不需要修改 |
| GUIConf.c | GUI配置文件,主要用于GUI内存块初始化 |
| GUIDRV_Template.c | GUI驱动模块,主要针对LCD操作接口 |
| LCDConf_FlexColor_Template.c | GUI显示配置文件,主要用于LCD参数配置,初始化 |
| GUI_X_Touch_Analog.c | 需要自己单独定义,用于触摸笔驱动 |
| STemWin_CM4_OS_wc16_ot.a | 基于Cortex-M4驱动库,STemWin源码不开放 |
- 修改库文件格式(keil默认不识别.a文件格式,需要我们手动配置)

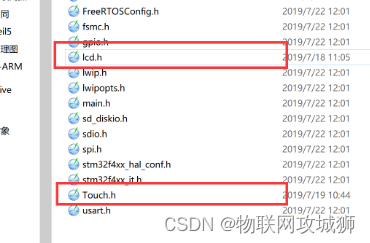
移植lcd和touch驱动文件
- 添加lcd.c和Touch.c到Src目录下
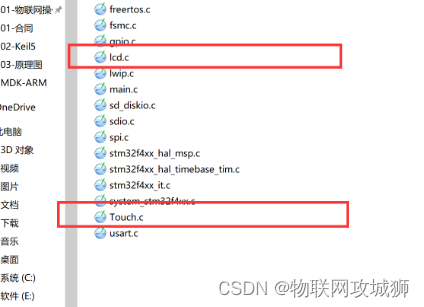
- 添加lcd.h和Touch.h到Inc目录下
4.emWin移植下
emWin LCD驱动适配
修改GUIConf.c
#include "GUI.h"

/*********************************************************************
*
*       Defines
*
**********************************************************************
*/
//
// Define the available number of bytes available for the GUI
//
#define GUI_NUMBYTES    (512*1024)		 //定义外部存储器大小
#define GUI_BLOCKSUZE   (0X80)			//定义最小内存库操作大小
#define SRAM_BANK_ADDR  ((U32)0x68000000)	//定义外部存储器首地址

/*********************************************************************
*
*       Public code
*
**********************************************************************
*/
/*********************************************************************
*
*       GUI_X_Config
*
* Purpose:
*   Called during the initialization process in order to set up the
*   available memory for the GUI.
*/
void GUI_X_Config(void) {
  //
  // 32 bit aligned memory area
  //
	volatile U32* aMemory = (volatile U32*)(SRAM_BANK_ADDR);
  //
  // Assign memory to emWin
  //分配GUI存储器首地址及最小操作内存块大小
  GUI_ALLOC_AssignMemory((void *)aMemory, GUI_NUMBYTES);
  GUI_ALLOC_SetAvBlockSize(GUI_BLOCKSUZE);
  //
  // Set default font
  //
  GUI_SetDefaultFont(GUI_FONT_32_1);
}
修改GUIDRV_Template.c
只需要完成画点和读取点操作即可
/*********************************************************************
*
*       _SetPixelIndex
*
* Purpose:
*   Sets the index of the given pixel. The upper layers
*   calling this routine make sure that the coordinates are in range, so
*   that no check on the parameters needs to be performed.
*/
static void _SetPixelIndex(GUI_DEVICE * pDevice, int x, int y, int PixelIndex) {
    //
    // Convert logical into physical coordinates (Dep. on LCDConf.h)
    //
    #if (LCD_MIRROR_X == 1) || (LCD_MIRROR_Y == 1) || (LCD_SWAP_XY == 1)
      int xPhys, yPhys;

      xPhys = LOG2PHYS_X(x, y);
      yPhys = LOG2PHYS_Y(x, y);
    #else
      #define xPhys x
      #define yPhys y
    #endif
    GUI_USE_PARA(pDevice);
    GUI_USE_PARA(x);
    GUI_USE_PARA(y);
    GUI_USE_PARA(PixelIndex);
    {
      //
      // Write into hardware ... Adapt to your system
      //添加lcd画点接口
      LCD_DrawPoint(x,y,PixelIndex);
      // TBD by customer...
      //
    }
    #if (LCD_MIRROR_X == 0) && (LCD_MIRROR_Y == 0) && (LCD_SWAP_XY == 0)
      #undef xPhys
      #undef yPhys
    #endif
}
/*********************************************************************
*
*       _GetPixelIndex
*
* Purpose:
*   Returns the index of the given pixel. The upper layers
*   calling this routine make sure that the coordinates are in range, so
*   that no check on the parameters needs to be performed.
*/
static unsigned int _GetPixelIndex(GUI_DEVICE * pDevice, int x, int y) {
  unsigned int PixelIndex;
    //
    // Convert logical into physical coordinates (Dep. on LCDConf.h)
    //
    #if (LCD_MIRROR_X == 1) || (LCD_MIRROR_Y == 1) || (LCD_SWAP_XY == 1)
      int xPhys, yPhys;

      xPhys = LOG2PHYS_X(x, y);
      yPhys = LOG2PHYS_Y(x, y);
    #else
      #define xPhys x
      #define yPhys y
    #endif
    GUI_USE_PARA(pDevice);
    GUI_USE_PARA(x);
    GUI_USE_PARA(y);
    {
      //
      // Write into hardware ... Adapt to your system
      //添加lcd读取点接口
      PixelIndex = lcd_read_gram(x,y);

      // TBD by customer...
      //
      PixelIndex = 0;
    }
    #if (LCD_MIRROR_X == 0) && (LCD_MIRROR_Y == 0) && (LCD_SWAP_XY == 0)
      #undef xPhys
      #undef yPhys
    #endif
  return PixelIndex;
}
修改LCDConf_FlexColor_Template.c
- 定义显示尺寸 480*272
- 定义触摸笔X,Y AD测量值(需要自己测量获得)
- 添加触摸笔校准函数
- 添加lcd初始化函数
#include "GUI.h"
#include "GUIDRV_FlexColor.h"
#include "lcd.h"

/*********************************************************************
*
*       Layer configuration (to be modified)
*
**********************************************************************
*/

//
// Physical display size
//
#define XSIZE_PHYS  480 //  屏幕X坐标长度
#define YSIZE_PHYS  272 //  屏幕Y坐标长度


#define GUI_TOUCH_AD_Y_TOP 170		// 屏幕X0点坐标AD值
#define GUI_TOUCH_AD_Y_BOTTOM 1900	// 屏幕X480点坐标AD值
#define GUI_TOUCH_AD_X_LEFT 100		// 屏幕Y0点坐标AD值
#define GUI_TOUCH_AD_X_RIGHT 1930	// 屏幕Y272点坐标AD值

/*********************************************************************
*
*       Configuration checking
*
**********************************************************************
*/
#ifndef   VXSIZE_PHYS
  #define VXSIZE_PHYS XSIZE_PHYS
#endif
#ifndef   VYSIZE_PHYS
  #define VYSIZE_PHYS YSIZE_PHYS
#endif
#ifndef   XSIZE_PHYS
  #error Physical X size of display is not defined!
#endif
#ifndef   YSIZE_PHYS
  #error Physical Y size of display is not defined!
#endif
#ifndef   GUICC_565
  #error Color conversion not defined!
#endif
#ifndef   GUIDRV_FLEXCOLOR
  #error No display driver defined!
#endif

/*********************************************************************
*
*       Public functions
*
**********************************************************************
*/
/*********************************************************************
*
*       LCD_X_Config
*
* Function description:
*   Called during the initialization process in order to set up the
*   display driver configuration.
*
*/
void LCD_X_Config(void) {
  //
  // 配置GUI LCD驱动以及颜色显示方式
  //
  GUI_DEVICE_CreateAndLink(&GUIDRV_Template_API, GUICC_M565, 0, 0);
  //
  // 显示尺寸配置
  //
  LCD_SetSizeEx (0, XSIZE_PHYS , YSIZE_PHYS);
  LCD_SetVSizeEx(0, VXSIZE_PHYS, VYSIZE_PHYS);

  //触摸笔校准
  GUI_TOUCH_Calibrate(GUI_COORD_X, 0, 480, GUI_TOUCH_AD_X_LEFT , GUI_TOUCH_AD_X_RIGHT);
  GUI_TOUCH_Calibrate(GUI_COORD_Y, 0, 272, GUI_TOUCH_AD_Y_TOP, GUI_TOUCH_AD_Y_BOTTOM);
  //
  // Orientation
  //
  //
  // Set controller and operation mode
  //
}

/*********************************************************************
*
*       LCD_X_DisplayDriver
*
* Function description:
*   This function is called by the display driver for several purposes.
*   To support the according task the routine needs to be adapted to
*   the display controller. Please note that the commands marked with
*   'optional' are not cogently required and should only be adapted if
*   the display controller supports these features.
*
* Parameter:
*   LayerIndex - Index of layer to be configured
*   Cmd        - Please refer to the details in the switch statement below
*   pData      - Pointer to a LCD_X_DATA structure
*
* Return Value:
*   < -1 - Error
*     -1 - Command not handled
*      0 - Ok
*/
int LCD_X_DisplayDriver(unsigned LayerIndex, unsigned Cmd, void * pData) {
  int r;
  (void) LayerIndex;
  (void) pData;

  switch (Cmd) {
  case LCD_X_INITCONTROLLER: {
    //
    // Called during the initialization process in order to set up the
    // display controller and put it into operation. If the display
    // controller is not initialized by any external routine this needs
    // to be adapted by the customer...
    //
    // ...
		//添加lcd初始化
		lcd_init();
    return 0;
  }
  default:
    r = -1;
  }
  return r;
}
添加GUI_X_Touch_Analog.c
#include "GUI.h"
#include "Touch.h"


void GUI_TOUCH_X_ActivateX(void)
{

}

void GUI_TOUCH_X_ActivateY(void)
{

}

//获取X坐标AD值
int  GUI_TOUCH_X_MeasureX(void)
{
	return XPT_Read_XY(CMD_RDX);
}

//获取Y坐标AD值
int  GUI_TOUCH_X_MeasureY(void)
{
	return XPT_Read_XY(CMD_RDY);
}
emWin测试程序编写
测试程序编写
/* USER CODE BEGIN Header_Touch_Task */
/**
  * @brief  Function implementing the TouchTask thread.
  * @param  argument: Not used
  * @retval None
  */
/* USER CODE END Header_Touch_Task */
void Touch_Task(void const * argument)
{

	GUI_PID_STATE State;

//  /* init code for FATFS */
//  MX_FATFS_Init();

//  /* init code for LWIP */
//  MX_LWIP_Init();


  GUI_Init();
  GUI_SetBkColor(GUI_BLUE);
  GUI_SetFont(GUI_FONT_32_1);
  GUI_SetColor(GUI_YELLOW);
  GUI_Clear();
  /* Infinite loop */
  for(;;)
  {
  		//执行触摸笔检测
		GUI_TOUCH_Exec();
        //获取触摸笔状态值
		GUI_TOUCH_GetState(&State);
		//是否按下
		if(State.Pressed){
			//打印触摸笔坐标信息
			GUI_DispStringAt("X:",0,0);
			GUI_DispDecAt(State.x,32,0,4);
			GUI_DispStringAt("Y:",0,24);
			GUI_DispDecAt(State.y,32,24,4);
		}
		osDelay(10);
	}
  /* USER CODE END Touch_Task */
}
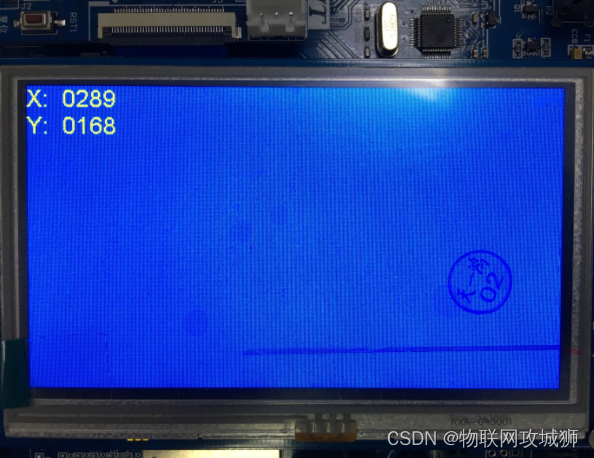
测试结果
当触摸笔按下时,显示X(0-480)和Y(0-272)坐标信息
5.emWin开发环境搭建
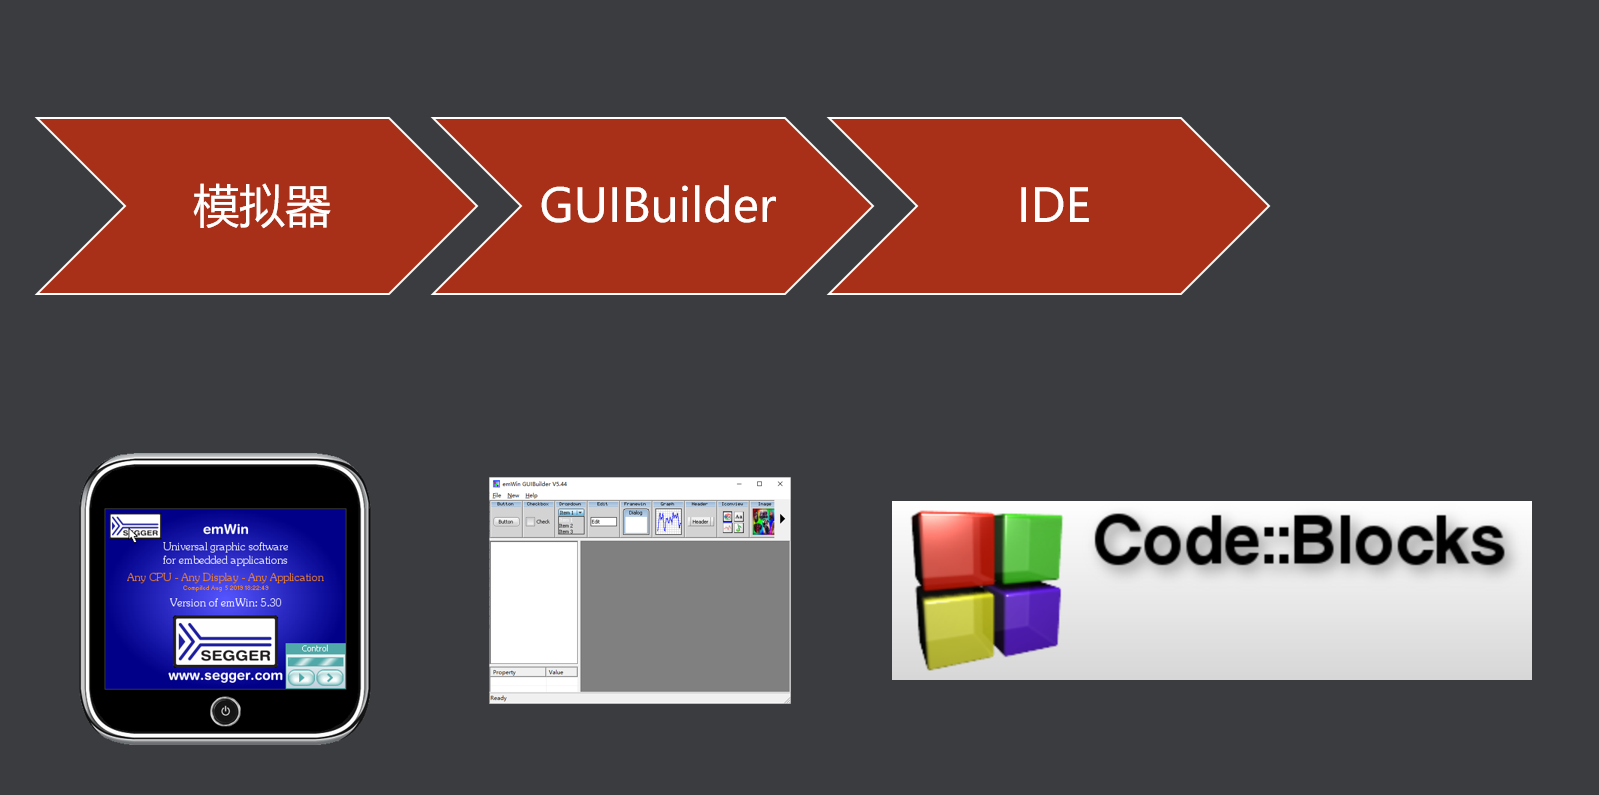
开发环境介绍
CodeBlocks

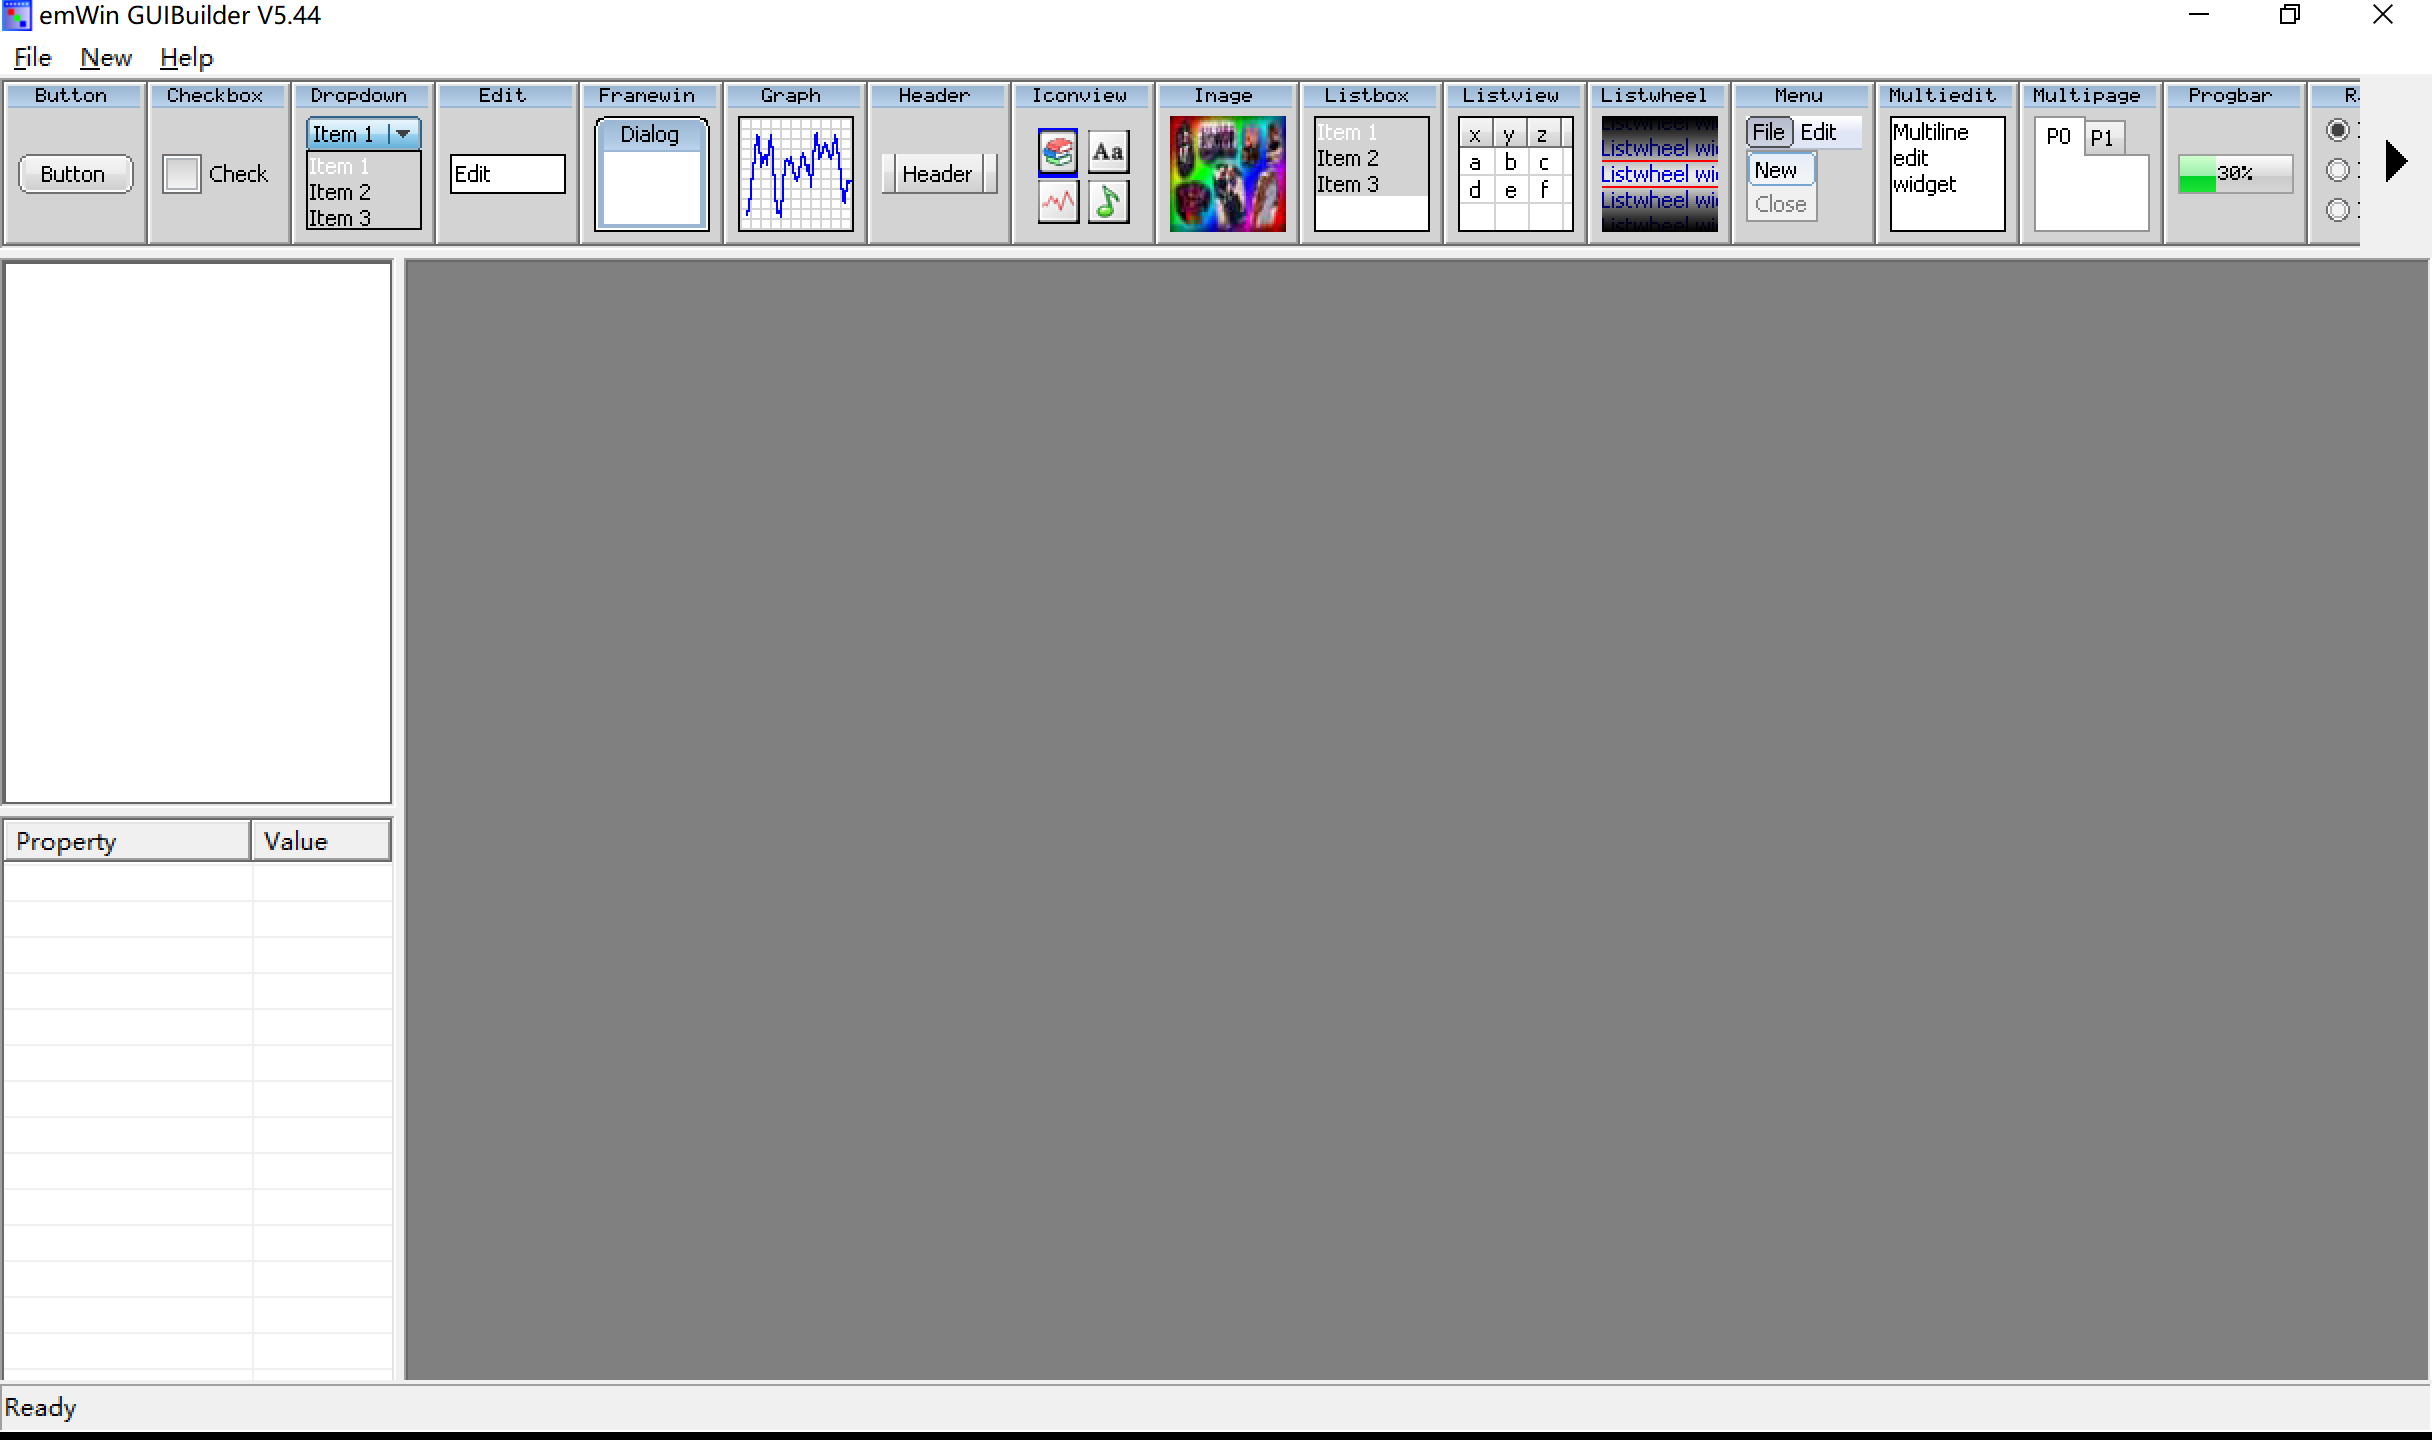
GUIBuilder
Simulation(模拟器)
emwin Simulation (模拟器)
仿真模拟器是在window开发环境下的C工程,可以通过VC6或者codeblockd IDE环境下进行开发仿真
- 下载地址
https://www.segger.com/downloads/emwin/
根据自己使用的STemwin库,进行下载,我们采用V5.44版本

- 添加工程到codeblockd
- 打开外部工程
- 选择.cbp文件
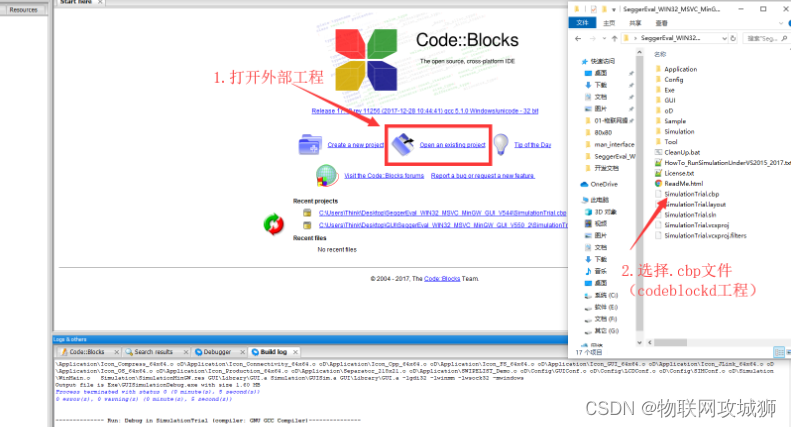
- 添加工程到codeblockd
- 点击编译运行按钮
- 生成模拟器
GUIBuilder 制作界面
界面添加到模拟器
修改模拟器原始工程
- 把无用的代码移除工程
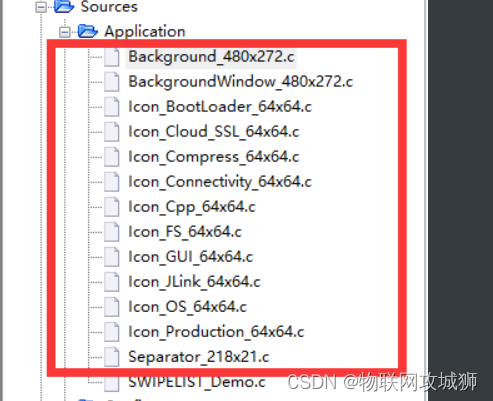
- 添加WindowDLG.c到工程中
-
首先复制WindowDLG.c到SeggerEval_WIN32_MSVC_MinGW_GUI_V544\Application目录下
-
添加WindowDLG.c到工程中
-
选择Application工程目录,新建mainTask.c
-
在mainTask.c添加代码
-
#include "dialog.h"//包含window对话框 头文件
void MainTask(void)

{

    GUI_Init();                     //初始化emWin
    CreateWindow();                 //创建窗体,父窗体是桌面背景
    while(1) {GUI_Delay(20);}       //调用GUI_Delay函数延时20MS(最终目的是调用GUI_Exec()函数)

}
6.emWin运行原理分析
emWin使用说明书
emWin初始化
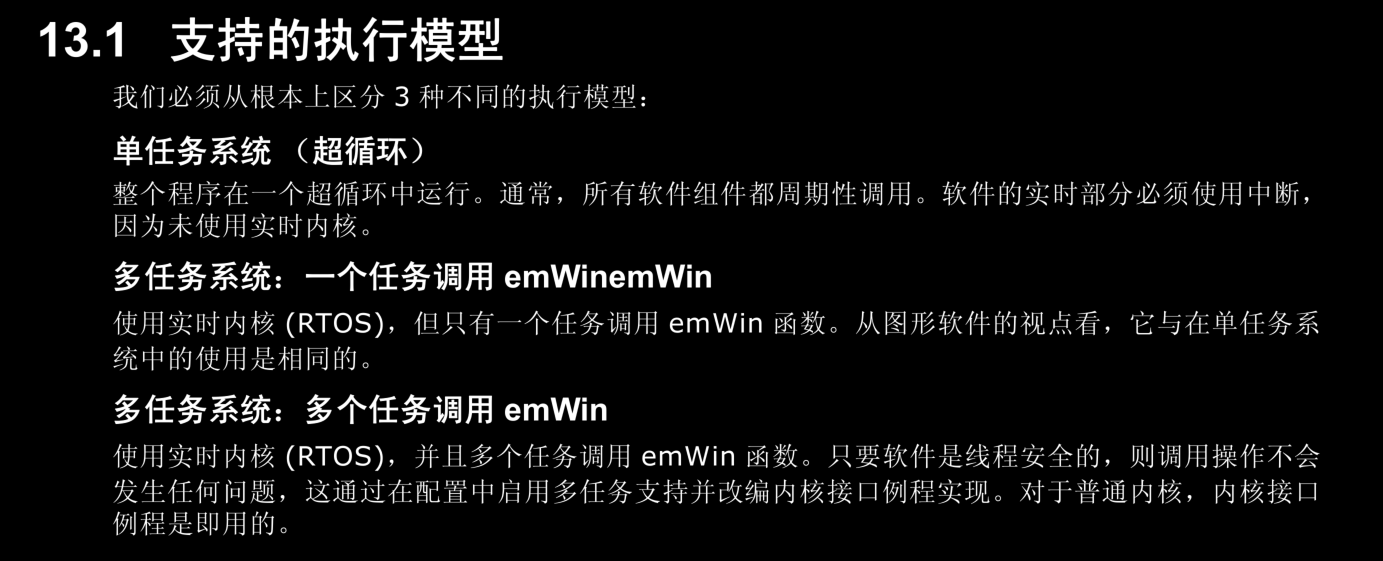
执行模型
单任务使用注意事项
我们在操作系统下使用emwin,必须要创建一个任务,用来调用emWin函数,并且官方说,此任务的优先级配置为最低

 emWin函数指的是什么???

时间调度
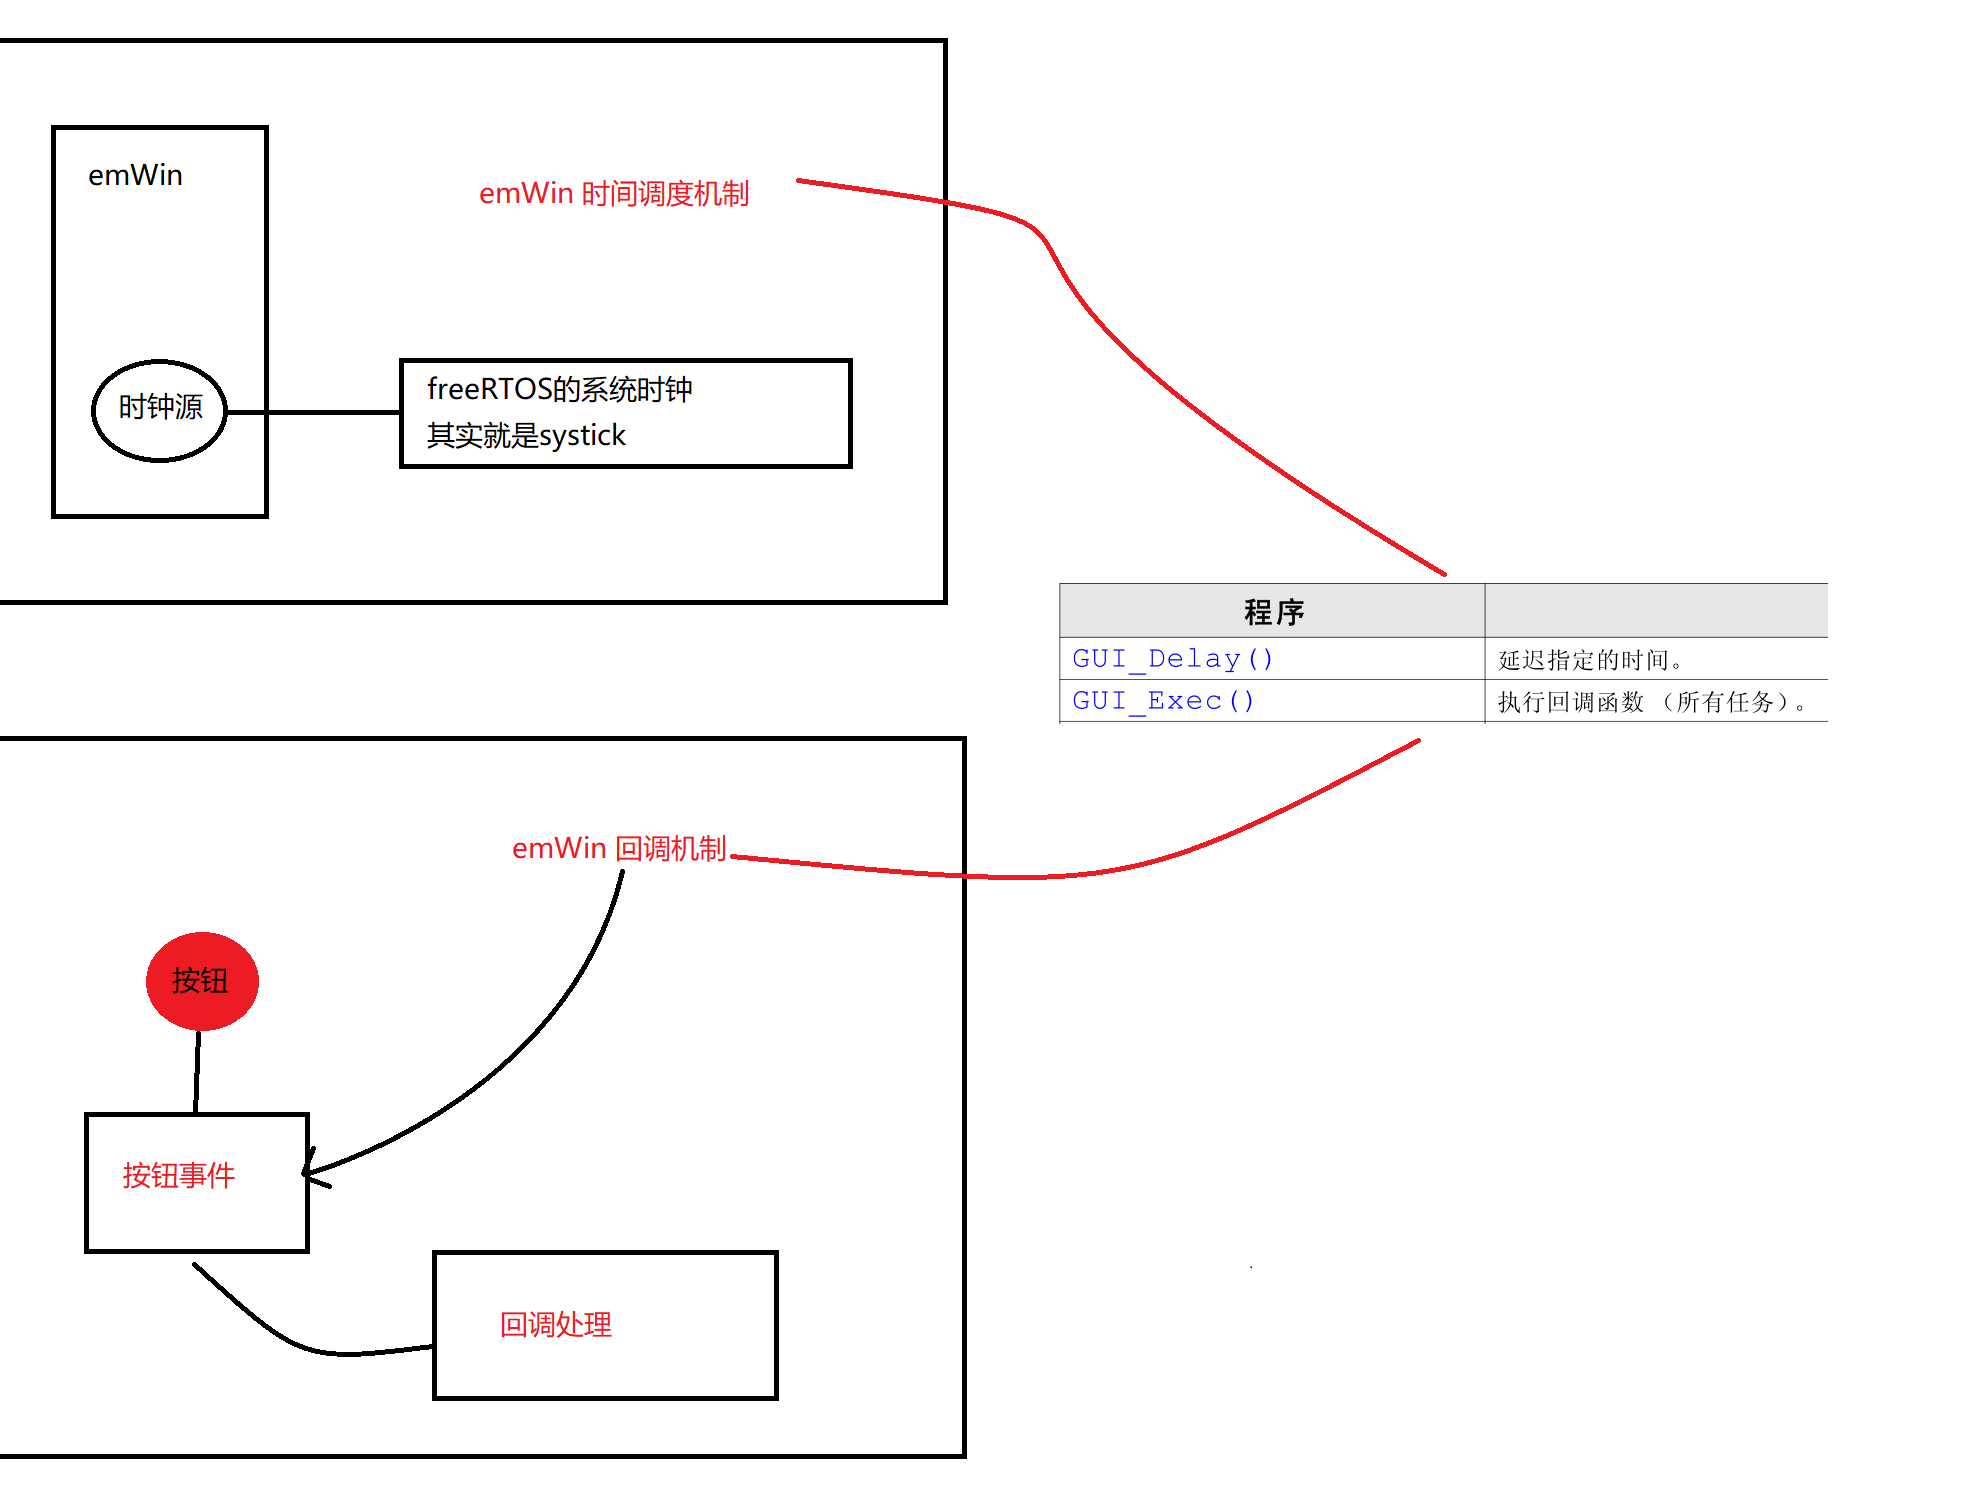

指针输入设备
7.emWin应用编程方法
GUIBuilder
对话框
资源表
资源:我们这个对话框内部的小工具(小窗口)------- window 按钮 文本 图片

窗口管理器
窗口消息
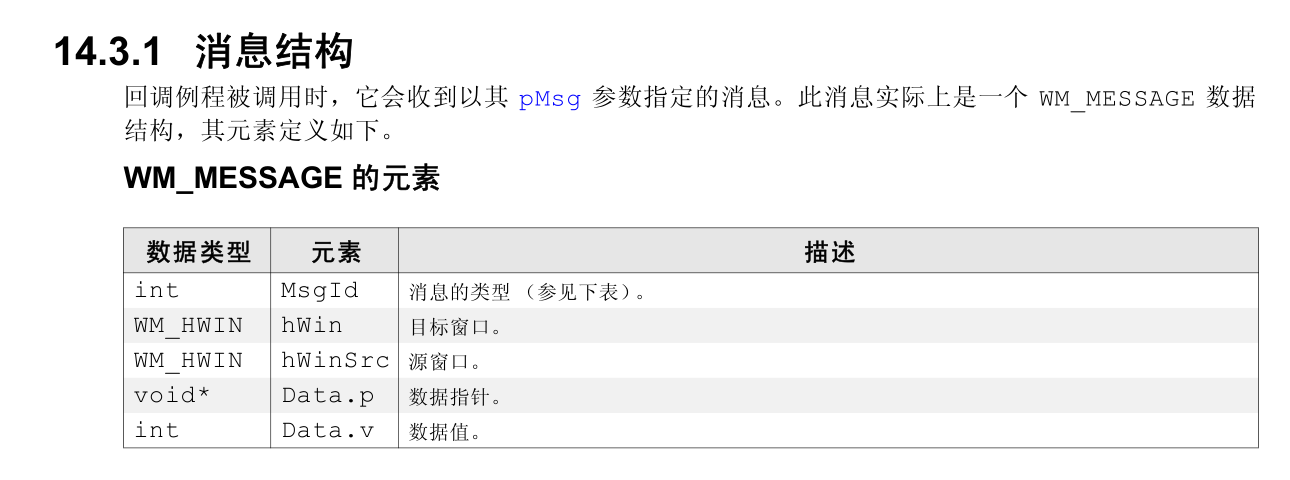
窗口对象


 749
749


 被折叠的 条评论
为什么被折叠?
被折叠的 条评论
为什么被折叠?
 到【灌水乐园】发言


