


前言
前几天因为个人需求,想减少一些重复工作的负担,找起了资源。
试了好几个
易语言(太旧,找不到下载的途径)
按键精灵(之前为了敲代码,把电脑设置改了,下载后乱码)
还有好多其他的精灵
轻巧一点的tinytask 个人感觉坐标查找的效果好差,乱点
查了好久之后,得到的结论就是python最好使
最后看到了b站up主“不高兴就喝水”的自动化工具,感觉很符合我的需求,并且还有人帮完善了。当即就开始入手
用了之后,感觉还是有些地方需要完善一下
使用体验
图像查找确实准确
等待时间有点长
滚动距离难把握
没有界面
因为我对于自动化工具的需求比较高,实在没有适合我的,就想着自己动手丰衣足食,搞来了源代码,就开始改造了
成果
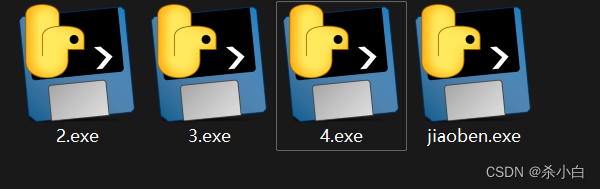
在历时几天的改造(小白,主要靠ai)中,由于总是突然冒出新想法,最后弄出了四个版本
效果
最新的版本与原始代码的主要区别为
1.起码有个界面了
2.屏幕上找不到图片时,不会报错,中断程序,而是输出查找失败
3.去除了人为确定等待时间(等待图片加载),查找失败后,循环查找一定次数(有时候图像加载比较慢,查找多几次就好了)
4.添加了截屏并多次标记当前鼠标坐标功能,方便确定滚动距离(小白真的伤不起,对于坐标啥的概念不太了解)
5.可以在界面上确定任务循环次数
6.为了避免滚动距离带来的使用难度,可自定义每次滚屏的距离,循环滚动,每滚一次,查找一次图片,如果查找成功,结束循环
注意事项
要想准确点击,阈值就要调高一点(我调的是0.9),太低的话容易点错
使用时请避免屏幕内有过多相似的图案,会导致识别失败,无法达到阈值
等待时间要长一点,不然查找失败会报错,需要重新开始(最新版本已解决,无需输入等待时间)
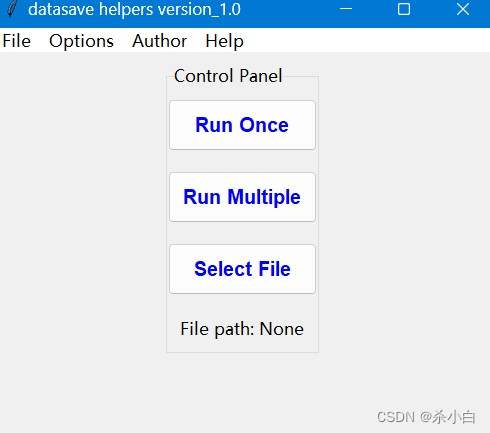
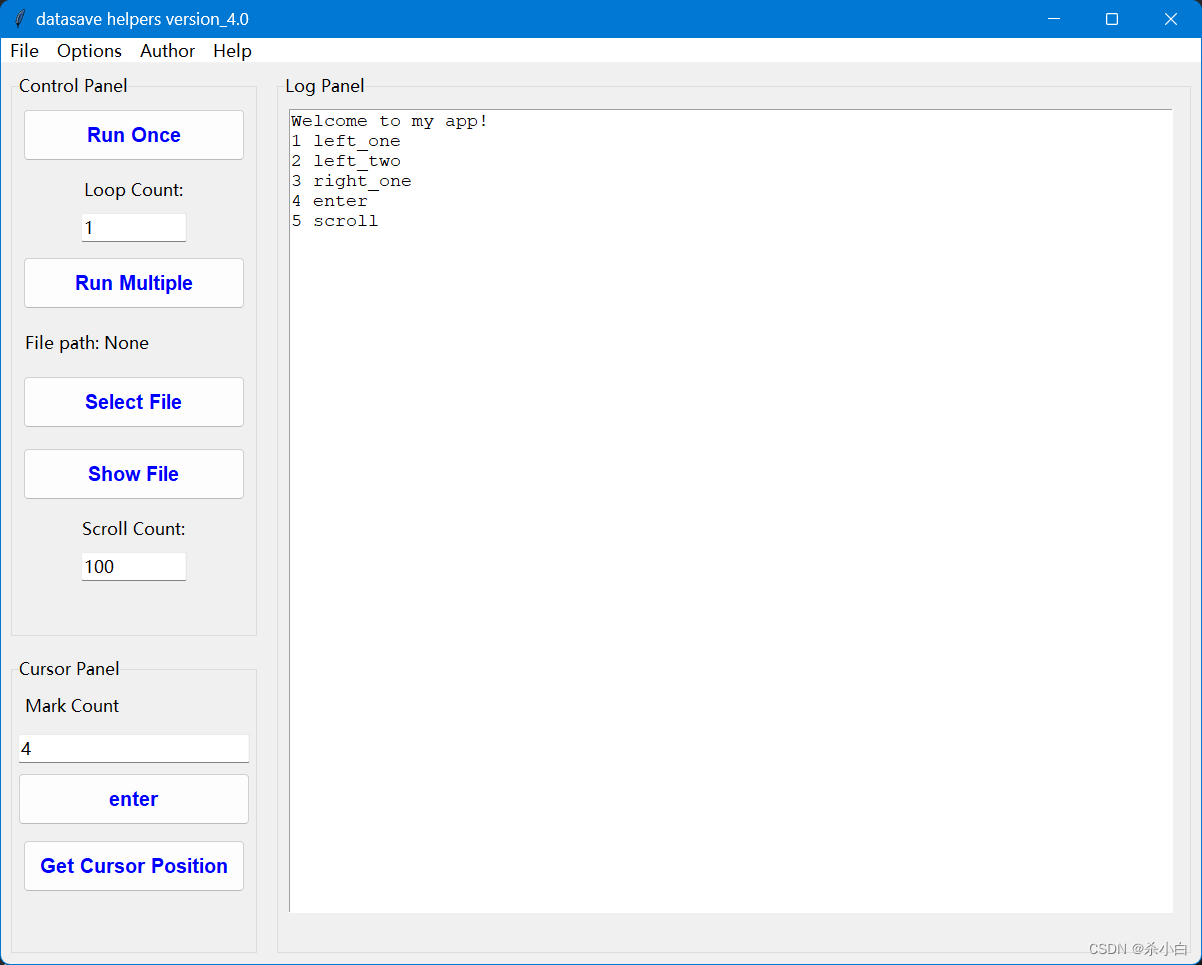
界面展示
version_1
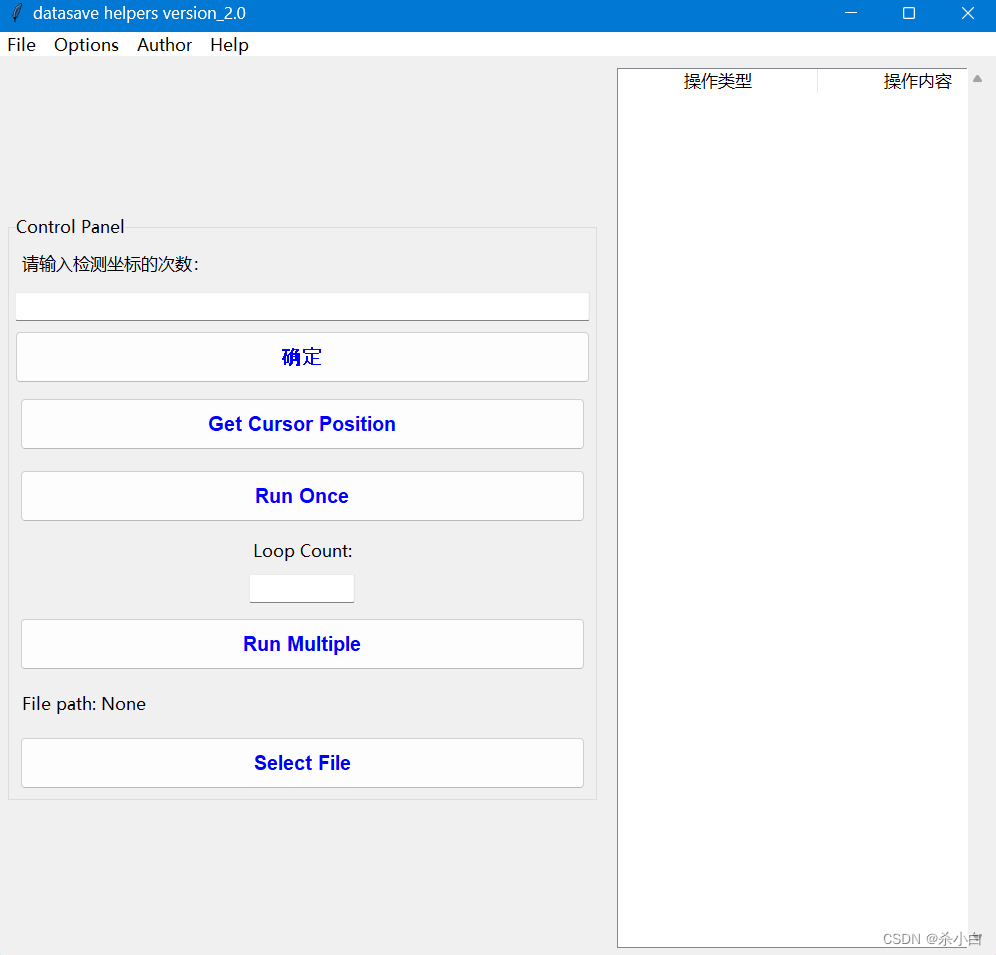
version_2
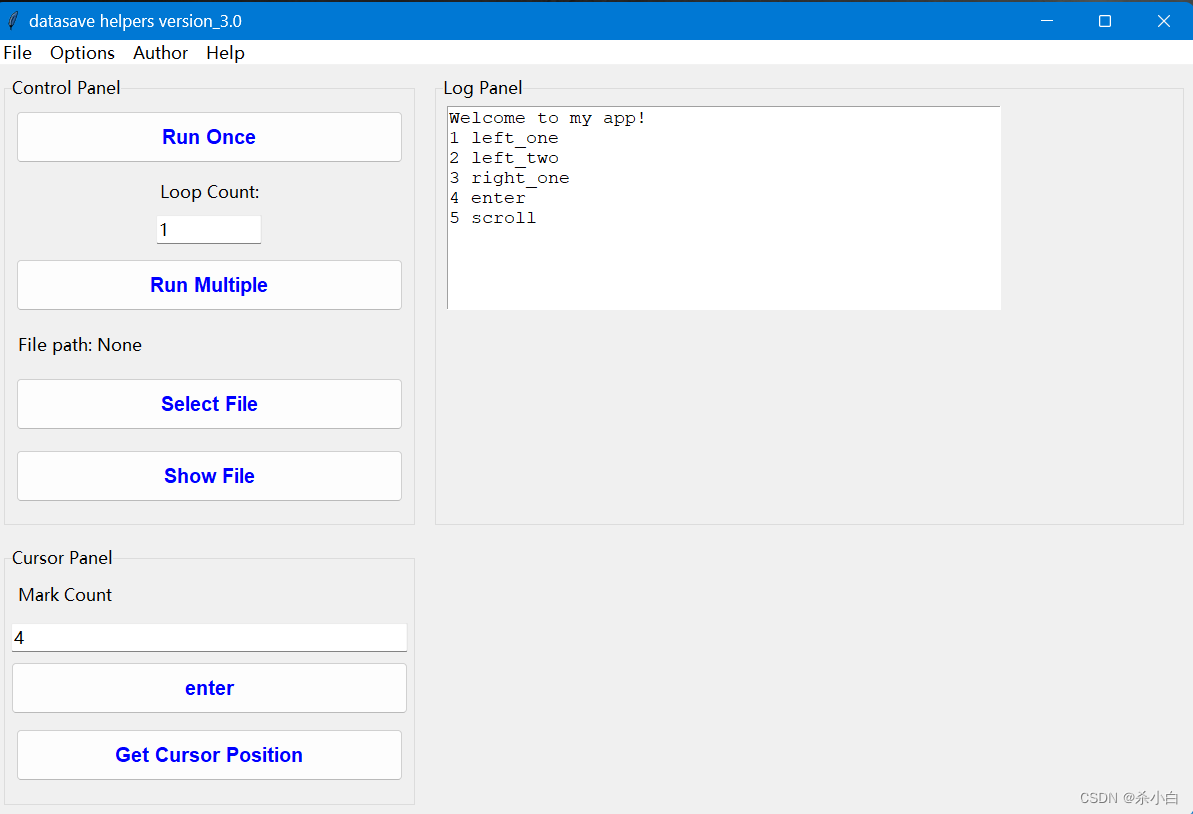
version_3
version_4
源码
import cv2
import numpy as np
import pyautogui
import os
import time
import sys
from PIL import Image
import pyperclip
import tkinter
from tkinter import Text, Tk, TkVersion, filedialog
import tkinter as tk
from tkinter import ttk
from PIL import Image, ImageDraw,ImageFont


#全局变量,根据输入赋值
file_path=None

#经验
#1.图片加载要几秒时间
#所以每点一下停几秒
#2.桌面上不能有太多相同图片
#会导致找不到


class ScriptRunnerApp(tk.Tk):
    def __init__(self):
        super().__init__()

        # 设置窗口标题
        self.title("DataSave Helpers Version_4.0")

        # 设置窗口大小
        self.geometry("1200x900")

        self.MAX_POSITION = 4
        self.file_path = " "
        self.scroll=100

        # 设置菜单
        self.create_menu()

        # 创建控制面板
        self.create_control_panel()

        self.create_cursor_panel()

        self.create_log_panel()

        # 使用 grid_columnconfigure 和 grid_rowconfigure 方法
        # 将它们的行列权重设置为 1,以便它们可以自动调整大小以
        # 适应窗口的大小。
        self.grid_columnconfigure(0, weight=1)
        self.grid_columnconfigure(1, weight=1)
        self.grid_rowconfigure(0, weight=1)
        self.grid_rowconfigure(1, weight=1)


    def create_menu(self):
        # 创建菜单栏
        menu_bar = tk.Menu(self)

        # 创建"File"菜单
        file_menu = tk.Menu(menu_bar, tearoff=0)
        file_menu.add_command(label="Run Once", command=self.run_once)
        file_menu.add_command(label="Run Multiple", command=self.run_multiple)
        file_menu.add_separator()
        file_menu.add_command(label="Select", command=self.read_file)
        file_menu.add_separator()
        file_menu.add_command(label="Exit", command=self.quit)
        menu_bar.add_cascade(label="File", menu=file_menu)

        # 创建"Options"菜单
        options_menu = tk.Menu(menu_bar, tearoff=0)
        options_menu.add_command(label="Run Once", command=self.run_once)
        options_menu.add_command(label="Run Multiple", command=self.run_multiple)
        menu_bar.add_cascade(label="Options", menu=options_menu)

        # 创建"Author"菜单
        author_menu = tk.Menu(menu_bar, tearoff=0)
        author_menu.add_command(label="About the Author", command=self.show_author_info)
        menu_bar.add_cascade(label="Author", menu=author_menu)

        # 创建"Help"菜单
        help_menu = tk.Menu(menu_bar, tearoff=0)
        help_menu.add_command(label="error", command=self.show_error_info)
        help_menu.add_command(label="warning", command=self.show_warning_info)
        help_menu.add_command(label="info", command=self.show_info_info)
        help_menu.add_command(label="table_info", command=self.show_table_info)
        menu_bar.add_cascade(label="Help", menu=help_menu)

        # 应用菜单栏
        self.config(menu=menu_bar)


    def create_control_panel(self):
        # 创建控制面板
        control_panel = ttk.LabelFrame(self, text="Control Panel")

        #为了将三个面板分别放在左上、左下和右边的布局中,您可以使用grid布局管理器
        control_panel.grid(row=0, column=0, padx=10, pady=10, sticky="nsew")

        # 按钮样式
        style = ttk.Style()
        style.configure("TButton", font=("Arial", 12, "bold"), padding=10, relief="groove", borderwidth=2, foreground="blue")

        # 按钮
        self.once_button = ttk.Button(control_panel, text="Run Once", command=self.run_once, style="TButton")
        self.once_button.pack(padx=10, pady=10,fill=tk.X)


        # 创建标签
        self.loop_label = ttk.Label(control_panel, text="Loop Count:")
        self.loop_label.pack(padx=5, pady=5)

        # 创建输入框
        self.loop_entry = ttk.Entry(control_panel, width=10)
        self.loop_entry.insert(0, "1")
        self.loop_entry.pack(padx=5, pady=5)


        self.multiple_button = ttk.Button(control_panel, text="Run Multiple", command=self.run_multiple, style="TButton")
        self.multiple_button.pack(padx=10, pady=10,fill=tk.X)


        # 显示文件路径
        self.file_path_label = ttk.Label(control_panel, text="File path: None")
        self.file_path_label.pack(padx=10, pady=10,fill=tk.X)

        # 创建文件选择器
        file_selector = ttk.Button(control_panel, text="Select File", command=self.read_file)
        file_selector.pack(padx=10, pady=10,fill=tk.X)

        table_show = ttk.Button(control_panel, text="Show File", command=self.show_table_info)
        table_show.pack(padx=10, pady=10,fill=tk.X)


         # 创建标签
        self.scroll_label = ttk.Label(control_panel, text="Scroll Count:")
        self.scroll_label.pack(padx=5, pady=5)

        # 创建输入框
        self.scroll_entry = ttk.Entry(control_panel, width=10)
        self.scroll_entry.insert(0,self.scroll)
        self.scroll_entry.pack(padx=5, pady=5)


    def create_cursor_panel(self):
        # 坐标面板
        cursor_panel = ttk.LabelFrame(self, text="Cursor Panel")
        cursor_panel.grid(row=1, column=0, padx=10, pady=10, sticky="nsew")

        self.label = ttk.Label(cursor_panel, text="Mark Count")
        self.label.pack(padx=10, pady=10,fill=tk.X)

        self.entry = ttk.Entry(cursor_panel, width=10)
        self.entry.insert(0, "4")
        self.entry.pack(padx=5, pady=5,fill=tk.X)

        self.button = ttk.Button(cursor_panel, text="enter", command=self.get_value)
        self.button.pack(padx=5, pady=5,fill=tk.X)


        #检测鼠标坐标
        self.cursor_button=ttk.Button(cursor_panel,text="Get Cursor Position",command=self.get_cursor_position,style="TButton")
        self.cursor_button.pack(padx=10, pady=10,fill=tk.X)


    def show_table_info(self):
        # 显示表格信息
        table_info = tk.Toplevel(self)
        table_info.title(f"{self.file_path}")
        table_info.geometry("750x500")
        self.create_table(table_info)

        table_info.grid_columnconfigure(0, weight=1)
        table_info.grid_rowconfigure(0, weight=1)

        self.fill_table(table_info)
        return table_info


    def create_log_panel(self):
        # 日志面板
        log_panel = ttk.LabelFrame(self, text="Log Panel")
        log_panel.grid(row=0, column=1,rowspan=10,columnspan=10,padx=10,pady=10, sticky="nsew")

        # 创建文本框
        self.log_text = tk.Text(log_panel, width=50, height=10)
        # 设置日志文本框的默认值
        self.log_text.insert("1.0", "Welcome to my app!\n"
                             "1 left_one\n"
                             "2 left_two\n"
                             "3 right_one\n"
                             "4 enter\n"
                             "5 scroll\n")


        # 设置文本框的宽度和高度,很好用
        #注意 宽度或高度太大 会导致 显示不全 无法滚动
        self.log_text.config(width=80, height=40)

         # 调整文本框的大小
        self.log_text.grid(row=0, column=0,rowspan=10,columnspan=10,padx=10, pady=10, sticky="nsew")


    def create_table(self,table_info):
        table_frame = ttk.LabelFrame(table_info, text="Table")
        table_frame.grid(row=0, column=0, padx=10, pady=10, sticky="nsew")

        canvas = tk.Canvas(table_frame, width=1000, height=1000)
        canvas.grid(row=0, column=1, padx=10, pady=10, sticky="nsew")

        scrollbar = ttk.Scrollbar(table_frame, orient="vertical", command=canvas.yview)
        scrollbar.grid(row=0, column=2, rowspan=10, padx=10, pady=10, sticky="nsew")

        canvas.configure(yscrollcommand=scrollbar.set)


        #table_info.header_frame = tk.Frame(canvas)

        table_info.data_frame = tk.Frame(canvas)

        canvas.create_window((0, 30), window=table_info.data_frame, anchor="nw")

        canvas.configure(scrollregion=(0, 0, 1000,1000))

    def read_file(self):
        # 打开文件选择器
        self.file_path = tk.filedialog.askopenfilename()

        self.file_path_label.config(text=f"File path: {self.file_path}")

        #table_info=self.show_table_info()

        #self.fill_table(table_info)

        self.display_file_content(self.file_path)


    def display_file_content(self, file_path):
        try:
            with open(file_path, "r", encoding="utf-8") as file:
                file_content = file.read()
        except Exception as e:
            print("read false:", e)
        if file_content:
            self.log_text.insert("1.0", file_content)

    def fill_table(self, table_info):
        if self.file_path==" ":
            return
        with open(self.file_path, 'r') as file:
            data = file.readlines()

        for i, line in enumerate(data):
            elements = line.strip().split()
            for j, element in enumerate(elements):
                label = tk.Label(table_info.data_frame, text=element)
                #label.config(font=("Arial", 12), bg="lightblue", fg="black")
                label.grid(row=i, column=j, padx=5, pady=5, sticky="nsew")


    def get_value(self):
        self.MAX_POSITION = int(self.entry.get())

    def get_cursor_position(self):


        save_path = os.path.join(os.path.dirname(__file__), "screenshot")
        #编译成exe文件前改成以下代码
        #save_path = os.path.join(os.path.dirname(sys.executable), "screenshot")


        if not os.path.exists(save_path):
            os.makedirs(save_path)

        position_history = []
        count = 0

        while True:
            x, y = pyautogui.position()
            print(f"当前鼠标坐标: ({x}, {y})")
            self.log_text.insert("end", f"当前鼠标坐标: ({x}, {y})")

            # 将坐标添加到列表中
            position_history.append((x, y))

            # 检测到五个坐标后截屏并标记
            count += 1
            if count == self.MAX_POSITION:
                print("开始截屏并标记...")
                self.log_text.insert("end", "开始截屏并标记...")


                # 截屏
                screenshot = pyautogui.screenshot()

                coordinates=position_history
                # 标记坐标
                draw = ImageDraw.Draw(screenshot)
                for i, (x, y) in enumerate(position_history):
                    draw.ellipse((x - 5, y - 5, x + 5, y + 5), fill=(255, 0, 0))
                    draw.text((x + 10, y - 10), str(coordinates[i]), font=ImageFont.truetype("arial.ttf", 20), fill=(0, 0, 0))  # 在标记点附近添加坐标

                #screenshot.show()

                # 保存标记后的图片 时间格式为"年月日时分"
                screenshot.save(os.path.join(save_path, f"screenshot_{time.strftime('%Y_%m_%d_%H_%M')}.png"))

                save_path =os.path.join(save_path, f"screenshot_{time.strftime('%Y_%m_%d_%H_%M')}.png")
                # 打开图像文件
                image = Image.open(save_path)

                # 显示图像
                image.show()

                # 清空坐标列表
                position_history = []
                count = 0


                #去除这个可实现套娃哦
                break;

            time.sleep(2)


    def mouseClick(self,clickTimes,lOrR,img,reTry):
        #尝试次数
        if reTry == 1:
            while True:
                location=pyautogui.locateCenterOnScreen(img,confidence=0.9)
                if location is not None:
                    pyautogui.click(location.x,location.y,clicks=clickTimes,interval=0.2,duration=0.2,button=lOrR)
                    break
                print("未找到匹配图片,0.1秒后重试")
                self.log_text.insert("end","未找到匹配图片,0.1秒后重试")
                time.sleep(0.1)
        #死循环
        elif reTry == -1:
            while True:
                location=pyautogui.locateCenterOnScreen(img,confidence=0.9)
                if location is not None:
                    pyautogui.click(location.x,location.y,clicks=clickTimes,interval=0.2,duration=0.2,button=lOrR)
                time.sleep(0.1)
        elif reTry > 1:
            i = 1
            while i < reTry + 1:
                location=pyautogui.locateCenterOnScreen(img,confidence=0.9)
                if location is not None:
                    pyautogui.click(location.x,location.y,clicks=clickTimes,interval=0.2,duration=0.2,button=lOrR)
                    print("重复")
                    i += 1
                time.sleep(0.1)

    def take_screenshot(self,count):
        screenshot = pyautogui.screenshot()
        if(count%10==0&count!=0):
            screenshot.show()
        screenshot = cv2.cvtColor(np.array(screenshot), cv2.COLOR_RGB2BGR)
        return screenshot


    def find_image(self,image_to_find, screenshot):

         #确保image_to_find和screenshot具有相同数量的通道(例如3通道的BGR图像或1通道的灰度图像
        if len(image_to_find.shape) == 2:
                image_to_find = cv2.cvtColor(image_to_find, cv2.COLOR_GRAY2BGR)

        if len(screenshot.shape) == 2:
                screenshot = cv2.cvtColor(screenshot, cv2.COLOR_GRAY2BGR)

        result = cv2.matchTemplate(screenshot, image_to_find, cv2.TM_CCOEFF_NORMED)
        min_val, max_val, min_loc, max_loc = cv2.minMaxLoc(result)
        if max_val > 0.9:  # 设置匹配阈值,可根据实际情况调整
            return True
        else:
            return False


    # 定义一个函数work,参数为img
    def work(self,instructions):
    # 在此处添加针对图片的键鼠操作代码

        instruction=instructions.split(" ")
        # 获取指令类型
        instruction_type = int(instruction[0])
        # 获取指令内容
        content = instruction[1]
        count=0
        # 根据指令类型进行相应的操作
        if instruction_type == 1:
            retry=int(instruction[2])
            while True:
                image_to_find=cv2.imread(content,0)
                screenshot=self.take_screenshot(count)
                exist=self.find_image(image_to_find,screenshot)
                if exist:
                    self.mouseClick(1, "left", content, retry)
                    print("单击左键",content)
                    break
                else:
                    count+=1
                    print("未找到图像,继续截屏",content)
                    time.sleep(1)  # 设置等待时间,可根据实际情况调整
        elif instruction_type == 2:
            retry=int(instruction[2])
            while True:
                image_to_find=cv2.imread(content,0)
                screenshot=self.take_screenshot(count)
                exist=self.find_image(image_to_find,screenshot)
                if exist:
                    self.mouseClick(2, "left", content, retry)
                    print("双击左键" ,content)
                    break
                else:
                    count+=1
                    print("未找到图像,继续截屏...")
                    time.sleep(1)  # 设置等待时间,可根据实际情况调整
        elif instruction_type == 3:
             retry=int(instruction[2])
             while True:
                image_to_find=cv2.imread(content,0)
                screenshot=self.take_screenshot(count)
                exist=self.find_image(image_to_find,screenshot)
                if exist:
                    self.mouseClick(1, "right", content, retry)
                    print("单击右键" ,content)
                    break
                else:
                    count+=1
                    print("未找到图像,继续截屏...")
                    time.sleep(1)  # 设置等待时间,可根据实际情况调整
        elif instruction_type == 4:
            # 输入内容
            input_content = str(content)
            pyperclip.copy(input_content)
            pyautogui.hotkey('ctrl','v')
            time.sleep(0.5)
            print("输入:",input_content)
        elif instruction_type == 5:
                #只点击一次
                retry=1
                #标准滚动距离
                self.scroll= int(self.scroll_entry.get())

                # 滚屏操作 "1"向上滚动 "0"向下滚动"
                type=int(instruction[2])
                if type==1:
                    scroll=self.scroll
                else :
                    scroll=-self.scroll
                while True:
                    if count %3==0:
                        pyautogui.scroll(scroll)
                        print("滚轮滑动",scroll,"距离")
                    image_to_find=cv2.imread(content,0)
                    screenshot=self.take_screenshot(count)
                    exist=self.find_image(image_to_find,screenshot)
                    if exist:
                        self.mouseClick(1, "left", content,retry)
                        print("单击左键",content)
                        self.log_text.insert("end", "单击左键",content)
                        break
                    else:
                        count+=1
                        print("未找到图像,继续截屏",content)
                        self.log_text.insert("end", "未找到图像,继续截屏",content)
                        time.sleep(1)  # 设置等待时间,可根据实际情况调整


    def main(self):
        with open(self.file_path, "r") as f:
            cmds = f.readlines()

        cmd = [path.strip() for path in cmds]

        for instruction in cmds:
            self.work(instruction)

    def run_once(self):
        self.main()


    def run_multiple(self):
        # 获取循环次数
        loop_count = int(self.loop_entry.get())

        # 循环运行
        for i in range(loop_count):
            # 运行一次
            self.run_once()

            # 更新表格
            self.table.delete(*self.table.get_children())
            with open(self.file_path, "r") as file:
                lines = file.readlines()
                for line in lines:
                    values = line.strip().split()
                    self.table.insert("", "end", values=values)


    def show_author_info(self):
        # 显示作者信息
        author_info = tk.Toplevel(self)
        author_info.title("About the Author")
        author_info.geometry("400x300")
        author_info_label = ttk.Label(author_info, text="This application was developed by the author.")
        author_info_label.pack(pady=10)

    def show_error_info(self):
        # 显示错误信息
        error_info = tk.Toplevel(self)
        error_info.title("Report an Error")
        error_info.geometry("400x300")
        error_info_label = ttk.Label(error_info, text="#1.图片加载要几秒时间,所以每点一下停几秒\n\n"
                                     "2.桌面上不能有太多相同图片,会导致找不到")
        error_info_label.pack(pady=10)

    def show_warning_info(self):
        # 显示警告信息
        warning = tk.Toplevel(self)
        warning.title("Warning")
        warning.geometry("400x300")
        warning_label = ttk.Label(warning, text="This application is still in development.")
        warning_label.pack(pady=10)

    def show_info_info(self):
        # 显示信息
        info = tk.Toplevel(self)
        info.title("Information")
        info.geometry("500x400")
        info_label = ttk.Label(info, text="This application is used to automatically click the screen.\n\n"
                               "The correct txt file should contain the following content:\n\n"
                                        "1 D:\adesktop\vscode\jiaoben_python\txt_auto\img\1.png 1\n\n"
                                        "5 3\n\n"
                                        "1 D:\adesktop\vscode\jiaoben_python\txt_auto\img\2.png 1\n\n"
                                        "5 10\n\n"
                                        "1 D:\adesktop\vscode\jiaoben_python\txt_auto\img\3.png 1\n\n"
                                        "5 3")
        info_label.pack(pady=10)


if __name__ == "__main__":
    #改为在界面上选择文件
    app = ScriptRunnerApp()
    app.mainloop()
获取方法
1 直接复制(乐,皮一下)
2 下载exe
等我学会向github上传大文件先(exe文件有点大啊,哈哈哈)
无语,上传时不小心把exe文件全删了,还要重新打包
试了好久,不行,还是要用到恶心人的百度网盘啊
链接:https://pan.baidu.com/s/1yuZ3KL0GkD_JppASaOspYw?pwd=3344
提取码:3344
下载exe(适合没配好python环境的人)
我的github仓库
总结
因为个人只是用于一些高强度的重复性简单工作,步骤较少,调试次数也较少(反正能用),并不会用于游戏等较复杂的途径,因此应该是不会再更新了。感觉这几天的改造收获很多,也很快乐,很有成就感。可惜,最终还是要面对期末考的黑暗时刻。
最后,即使我知道数学是至高无上的真神,但我还是想在期末这一刻说一句:“数学,我讨厌你!!!”… 真的不想记公式了


 494
494

 被折叠的 条评论
为什么被折叠?
被折叠的 条评论
为什么被折叠?
 到【灌水乐园】发言


