


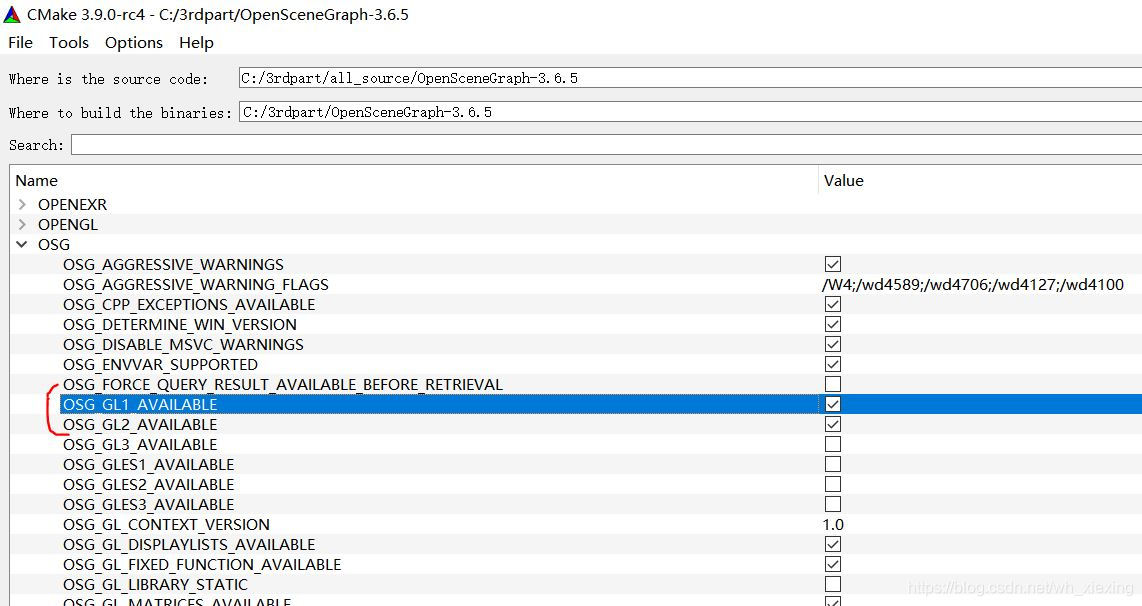
osg 的编译颇费周折,需要关注CMake的安装选项和一些第三方库的配置,OSG大量的代码是基于固定管线实现的,如果用GL3的选项编译,很多的例子无法正常运行,因此我们在学习阶段还是使用GL2编译选项。
GL 2 编译
|
|
|
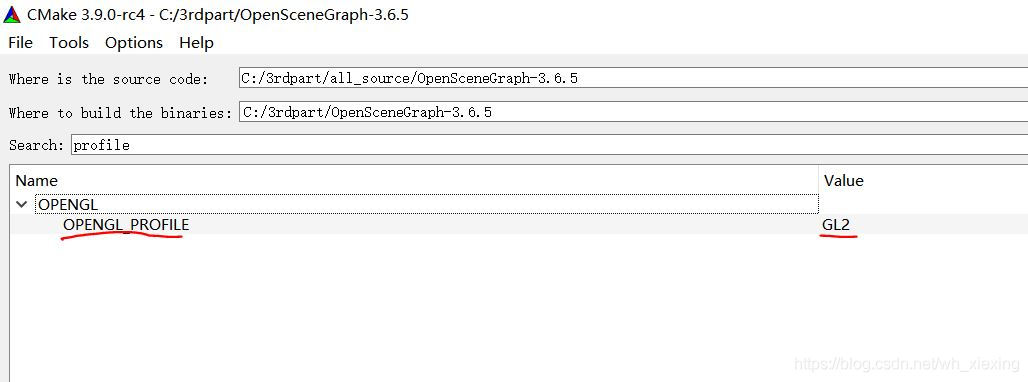
不熟悉什么是 profile的同学,可以参考我的另一篇博文 《opengl版本发展史及各种概念的厘清》
GL3编译
Here are the steps for building OSG in the OpenGL CORE Profile once you have configured CMake as usual.
1. Download the GL CORE include folder from Khronos: https://www.khronos.org/registry/OpenGL/api/GL/
2. Put it in a folder somewhere. You can put it in a folder called glcore, or you can make a "GL" folder in the include folder of the OSG repository and
put it there.
3. In CMake, set the OPENGL_PROFILE property to GLCORE.4. Set the GLCORE_GLCOREARB_HEADER property to the location of your new "GL" folder containing the CORE ARB include files. For example if your include file is at "C:/devel/glcore/GL/glcorearb.h", set this variable to C:/devel/glcore.
5. Set the following variables ON:
- OSG_GL3_AVAILABLE
6. Set the following variables OFF:
- OSG_GL1_AVAILABLE
- OSG_GL2_AVAILABLE
- OSG_GLES1_AVAILABLE
- OSG_GLES2_AVAILABLE
- OSG_GL_DISPLAYLISTS_AVAILABLE
- OSG_GL_FIXED_FUNCTION_AVAILABLE
- OSG_GL_MATRICES_AVAILABLE
- OSG_GL_VERTEX_ARRAY_FUNCS_AVAILABLE
- OSG_GL_VERTEX_FUNCS_AVAILABLE
7. Configure and build OSG.
8. If you want to disable the CORE profile, set the environment variable OSG_GL_CONTEXT_PROFILE_MASK to 2. This requests a compatibility mode context.
Enjoy!
如果要编译GL3版本的osg, 参照上面的指示,给英文不好的同学翻译一下, 大意就是从www.khronos.org网站下载头文件,放到osg的incude 目录下,按要求设置CMAKE的编译变量。
不过编译后的版本,许多例子无法运行,希望OSG的开源社区能快速跟上OPENGL标准的推出进度。下面是我提供编译好的G2版本的链接,方便大家下载
vs2015-osg3.6.5-GL2 链接:https://pan.baidu.com/s/1G4m-O-5QW6ebAdztUPwx7Q


 1649
1649


 被折叠的 条评论
为什么被折叠?
被折叠的 条评论
为什么被折叠?
 到【灌水乐园】发言


