


package com.cusview;
import com.example.customeview.R;
import android.content.Context;
import android.content.res.TypedArray;
import android.util.AttributeSet;
import android.view.View;
import android.widget.Button;
import android.widget.RelativeLayout;
import android.widget.TextView;
/**
*
* 1 创建一个类继承ViewGroup(RelativeLayout、LinearLayout……)
* 2 添加指定功能的控件 、指定属性
* 3 在xml文件中定义属性
* 4 TypedArray取xml文件配置的属性
* 5 在布局文件的命名控件引入自定义属性,在布局文件中指定自定义属性的属性值
* 引入命名控件两种格式:
* A: xmlns:topbar="http://schemas.android.com/apk/res/应用包名"
* B: xmlns:topbar="http://schemas.android.com/apk/res-auto"
*
* 6 设置自定义View里面排列控件
* 至此自定义View完成,需要给自定义View添加动作等等属性视实际业务逻辑而定
*/
public class TopBar extends RelativeLayout {
private Button leftButton,rightButton;//按钮
private TextView title;//标题
private LayoutParams leftButtonParams,rightButtonParams,titleParams;
/*
* 自定义控件属性
*/
//左按钮属性
private int leftButtonColor;//按钮的颜色
private int leftTextColor;//按钮文字颜色
private String leftText;//按钮文字内容
//右按钮属性
private int rightButtonColor;//按钮的颜色
private int rightTextColor;//按钮文字颜色
private String rightText;//按钮文字
//标题属性
private String titleText;//标题文字
private int titleTextColor;//标题文字颜色
public TopBar(Context context, AttributeSet attrs) {
super(context, attrs);
TypedArray ta=context.obtainStyledAttributes(attrs, R.styleable.MyTopBar);
leftButtonColor=ta.getColor(R.styleable.MyTopBar_leftButtonColor, 0);
leftTextColor=ta.getColor(R.styleable.MyTopBar_leftTextColor, 0);
leftText=ta.getString(R.styleable.MyTopBar_leftText);
rightButtonColor=ta.getColor(R.styleable.MyTopBar_rightButtonColor, 0);
rightTextColor=ta.getColor(R.styleable.MyTopBar_rightTextColor, 0);
rightText=ta.getString(R.styleable.MyTopBar_rightText);
titleText=ta.getString(R.styleable.MyTopBar_titleText);
titleTextColor=ta.getColor(R.styleable.MyTopBar_titleTextColor, 0);
//调用ta.recycle();回收资源,下次重新创建就不会出错
ta.recycle();
//实例化控件
leftButton=new Button(context);
rightButton=new Button(context);
title=new TextView(context);
//设置控件属性值
leftButton.setText(leftText);
leftButton.setBackgroundColor(leftButtonColor);
leftButton.setTextColor(leftTextColor);
rightButton.setBackgroundColor(rightButtonColor);
rightButton.setText(rightText);
rightButton.setTextColor(rightTextColor);
title.setText(titleText);
title.setTextColor(titleTextColor);
//设置控件布局属性参数
leftButtonParams=new LayoutParams(LayoutParams.WRAP_CONTENT, LayoutParams.WRAP_CONTENT);
leftButtonParams.addRule(RelativeLayout.ALIGN_PARENT_LEFT, TRUE);
addView(leftButton,leftButtonParams);
rightButtonParams=new LayoutParams(LayoutParams.WRAP_CONTENT, LayoutParams.WRAP_CONTENT);
rightButtonParams.addRule(RelativeLayout.ALIGN_PARENT_RIGHT, TRUE);
addView(rightButton,rightButtonParams);
titleParams=new LayoutParams(LayoutParams.WRAP_CONTENT, LayoutParams.MATCH_PARENT);
titleParams.addRule(RelativeLayout.CENTER_IN_PARENT, TRUE);
addView(title, titleParams);
/**
* 添加动作
*/
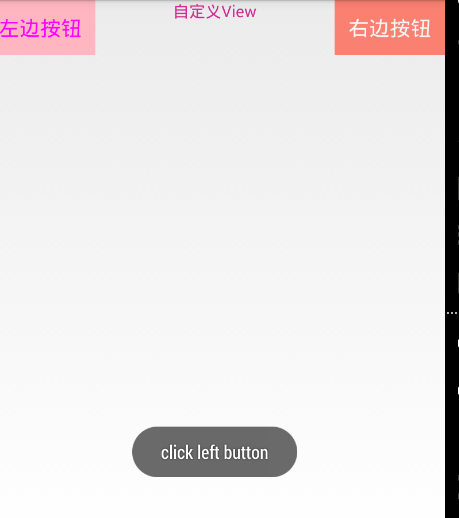
//监听左边按钮事件
leftButton.setOnClickListener(new OnClickListener() {
@Override
public void onClick(View v) {
listener.leftClick();
}
});
//监听右边按钮事件
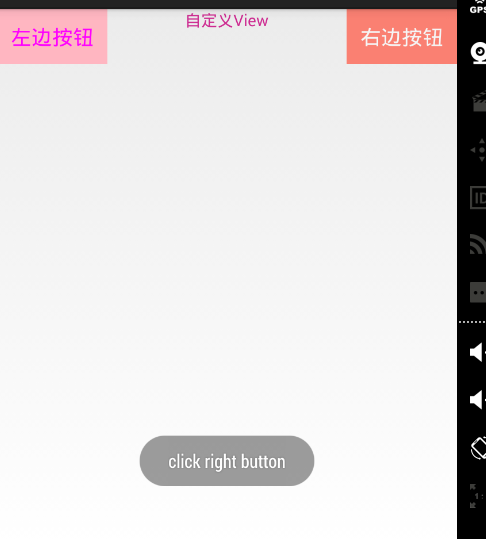
rightButton.setOnClickListener(new OnClickListener() {
@Override
public void onClick(View v) {
listener.rightClick();
}
});
}
//提供一个接口给调用者回调
public interface onTopbarClickListener{
void leftClick();//左边按钮点击事件回调
void rightClick();//右边按钮点击事件回调
}
private onTopbarClickListener listener;
//暴露一个注册接口的方法给调用者用以处理回调方法
public void setOnTopBarClickListener(onTopbarClickListener listener){
this.listener=listener;
}
}
<?xml version="1.0" encoding="utf-8"?>
<resources>
<declare-styleable name="MyTopBar">
<!--
string:字符串类型
color:颜色类型
reference:引用类型
-->
<attr name="leftButtonColor" format="color|reference" />
<attr name="leftText" format="string" />
<attr name="leftTextColor" format="color|reference" />
<attr name="rightButtonColor" format="color|reference" />
<attr name="rightText" format="string" />
<attr name="rightTextColor" format="color|reference" />
<attr name="titleText" format="string" />
<attr name="titleTextColor" format="color|reference" />
</declare-styleable>
</resources>
<RelativeLayout xmlns:android="http://schemas.android.com/apk/res/android"
xmlns:tools="http://schemas.android.com/tools"
xmlns:topbar="http://schemas.android.com/apk/res/com.example.customeview"
android:layout_width="match_parent"
android:layout_height="match_parent" >
<com.cusview.TopBar
topbar:leftButtonColor="#FFB6C1"
topbar:leftText="左边按钮"
topbar:leftTextColor="#FF00FF"
topbar:rightButtonColor="#FA8072"
topbar:rightText="右边按钮"
topbar:rightTextColor="#F5F5F5"
topbar:titleText="自定义View"
topbar:titleTextColor="#CD2990"
android:layout_width="match_parent"
android:layout_height="wrap_content"
android:id="@+id/myTopBar" >
</com.cusview.TopBar>
</RelativeLayout>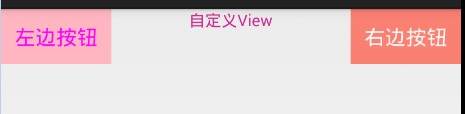


 1134
1134

 被折叠的 条评论
为什么被折叠?
被折叠的 条评论
为什么被折叠?
 到【灌水乐园】发言


