


在这个项目中,我们将在带有Fargate的AWS无服务器容器中部署一个使用OpenCV和Flask的应用程序。
无论是因为你有使用OpenCV和Flask处理项目的经验,还是因为你已经有一个应用程序在使用该堆栈运行,并且你只想将其迁移到带有容器的服务中,使用AWS都可能非常方便。
AWS提供了使用云服务器部署容器的选项,或使用AWS Fargate部署无服务器选项。因此,在这篇文章中,我们将在带有AWS Fargate的无服务器容器中部署在OpenCV和Flask中创建的简单图像识别模型。
为此,我们将把工作分为以下步骤,首先部署网络资源和存储库,将容器中的图像加载到其中。随后,我们将创建Flask项目并测试我们的OpenCV应用程序。一旦应用程序整合,我们将把图像上传到存储库。
我们最终将使用AWS Fargate部署该项目。
部署网络资源
对于第一部分,我们将回收我们在以前的CDK项目中部署的网络资源,在Fargate上创建一个Laravel应用程序的帖子中,你可以在这里找到它:https://medium.com/@JugueDev/despliega-laravel-usando-containers-serverless-con-aws-fargate-%EF%B8%8F-%EF%B8%8F-f4fdcb6c170f
这些网络资源除其他外,包括一个VPC、2个子网、一个安全组、ECR中的图像存储库和一个与这些资源相关的集群。
import { Stack, StackProps, RemovalPolicy, CfnOutput } from 'aws-cdk-lib';
import { Construct } from 'constructs';
import * as ec2 from 'aws-cdk-lib/aws-ec2';
import * as ecs from 'aws-cdk-lib/aws-ecs';
import * as ecr from 'aws-cdk-lib/aws-ecr';
import * as iam from 'aws-cdk-lib/aws-iam';


export interface NetworkStackProps extends StackProps {
    env: { region: string; app: string; version: string; environment: string };
}

export class NetworkStack extends Stack {
    public readonly ecs_app: ecs.ICluster;
    public readonly ecr_repository: ecr.Repository;

    constructor(scope: Construct, id: string, props: NetworkStackProps) {
        super(scope, id, props);

        const vpc = new ec2.Vpc(this, "vpc-test", {
            maxAzs: 2,
            vpcName: "vpc-name"
        });

        const appSG = new ec2.SecurityGroup(this, 'app-sg', {
            vpc: vpc,
            securityGroupName: "app-sg",
        });

        const cluster = new ecs.Cluster(this, "cluster-test", {
            clusterName: "cluster-name",
            enableFargateCapacityProviders: true,
            vpc: vpc,
        });

        this.ecr_repository = new ecr.Repository(this, "test-repo", {
            repositoryName: "repository-name",
            autoDeleteImages: true,
            removalPolicy: RemovalPolicy.DESTROY
        });

        this.ecs_app = ecs.Cluster.fromClusterAttributes(this, 'ecs-cluster', {
            clusterName: "cluster-name",
            vpc: vpc,
            securityGroups: [appSG]
        });

        new CfnOutput(this, 'repositoryUri', {
            value: this.ecr_repository.repositoryUri,
          });

    }
}
在 Flask 中创建项目
现在让我们研究 Flask 应用程序,为此,我们将在Flask中创建一个超级基础的应用程序,创建一个hello_app.py文件,其中包含以下内容:
from flask import Flask

app = Flask(__name__)

@app.route('/')
def hello_world():
 return 'Hello World!'

if __name__ == "__main__":
 app.run()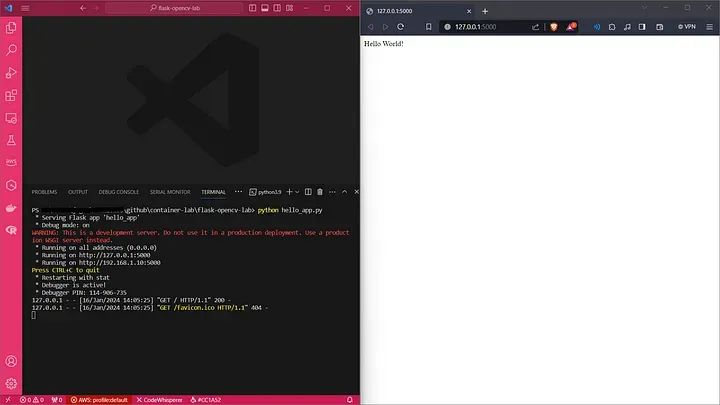
我们创建了一个文件,在该文件中定义了我们的requirements.txt项目的依赖关系:
Flask==2.0.2现在我们使用Docker容器应用程序创建一个DockerFile:
# Dockerfile
FROM python:3.9.10-slim
WORKDIR /server
COPY . /server

# Install python dependencies
RUN pip3 install --upgrade pip setuptools wheel
RUN pip3 install --no-cache-dir -r requirements.txt  --no-build-isolation

ENV FLASK_APP=app
CMD ["python","hello_app.py"]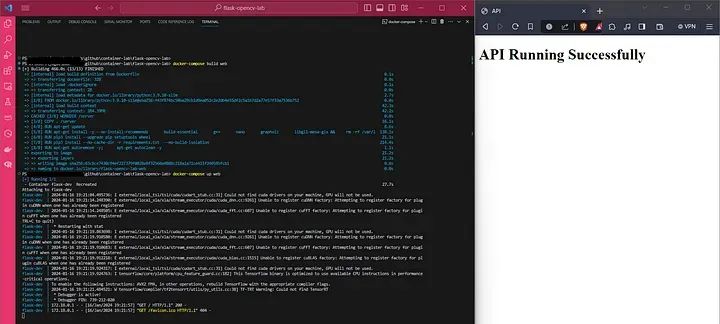
openCV 集成应用
现在,我们将把我们的OpenCV应用程序连接到我们的Flask项目,为此,我们需要在requirement.txt文件中添加几个依赖项
click==8.0.3
Flask==2.0.2
itsdangerous==2.0.1
Jinja2==3.0.2
MarkupSafe==2.0.1
Werkzeug==2.0.2
numpy
keras
cmake==3.20.5
scikit-build==0.13.1
setuptools==50.3.2
wheel==0.30.0
tensorflow
opencv-python==4.4.0.46
我们还将创建一个文件夹,将以前以M5格式存储的模型保存在一个名为Model的文件夹中:
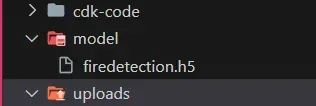
我们将使用Load_Model模块从Flask应用程序代码中引用该模型:
def FireOrNot(image):
 '''Determines if the image contains a Fire or Not'''
 model = construct_v1(224, 224, training=False)
 model.load(os.path.join("model", "firedetection"),weights_only=True)

 image = cv2.resize(image, (224,224), interpolation = cv2.INTER_AREA)
 image = image.reshape(1,224,224,3)
 res = float(model.predict(image)[0][0])
 K.clear_session()
 return res
Flask API方法的后端:
@app.route('/', methods=['GET', 'POST'])
def upload_file():
 if request.method == 'POST':
  # check if the post request has the file part
  if 'file' not in request.files:
   flash('No file part')
   return redirect(request.url)
  file = request.files['file']
  # if user does not select file, browser also
  # submit an empty part without filename
  if file.filename == '':
   flash('No selected file')
   return redirect(request.url)
  if file and allowed_file(file.filename):
   filename = secure_filename(file.filename)
   file.save(os.path.join(app.config['UPLOAD_FOLDER'], filename))
   image = cv2.imread(os.path.dirname(os.path.realpath(__file__))+"/uploads/"+filename)
   # color_result = getDominantColor(image)
   res = FireOrNot(image)
   if res >= 0.9:
    NotFireOrFire = "Fire"
   else:
    NotFireOrFire = "NotFire"
   #return redirect(url_for('upload_file',filename=filename)), jsonify({"key":
   return jsonify({"Result": res, "FireOrNot": NotFireOrFire} )
 return '''
 <!doctype html>
 <title>API</title>
 <h1>API Running Successfully</h1>'''
本地环境中的尝试:
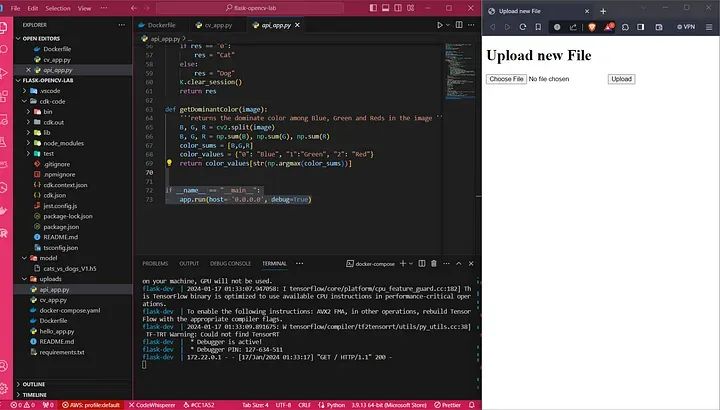
脚本 cv_app.py 的内容如下:
import os
from flask import Flask, flash, request, redirect, url_for, jsonify
from werkzeug.utils import secure_filename
import cv2
import numpy as np
import keras
from keras.models import load_model
from keras import backend as K
from model import construct_v1
import os


UPLOAD_FOLDER = './uploads/'
ALLOWED_EXTENSIONS = set(['png', 'jpg', 'jpeg'])
DEBUG = True
app = Flask(__name__)
app.config.from_object(__name__)
app.config['UPLOAD_FOLDER'] = UPLOAD_FOLDER

def allowed_file(filename):
 return '.' in filename and \
     filename.rsplit('.', 1)[1].lower() in ALLOWED_EXTENSIONS

@app.route('/', methods=['GET', 'POST'])
def upload_file():
 if request.method == 'POST':
  # check if the post request has the file part
  if 'file' not in request.files:
   flash('No file part')
   return redirect(request.url)
  file = request.files['file']
  # if user does not select file, browser also
  # submit an empty part without filename
  if file.filename == '':
   flash('No selected file')
   return redirect(request.url)
  if file and allowed_file(file.filename):
   filename = secure_filename(file.filename)
   file.save(os.path.join(app.config['UPLOAD_FOLDER'], filename))
   image = cv2.imread(os.path.dirname(os.path.realpath(__file__))+"/uploads/"+filename)
   # color_result = getDominantColor(image)
   res = FireOrNot(image)
   if res >= 0.9:
    NotFireOrFire = "Fire"
   else:
    NotFireOrFire = "NotFire"
   #return redirect(url_for('upload_file',filename=filename)), jsonify({"key":
   return jsonify({"Result": res, "FireOrNot": NotFireOrFire} )
 return '''
 <!doctype html>
 <title>API</title>
 <h1>API Running Successfully</h1>'''

def FireOrNot(image):
 '''Determines if the image contains a Fire or Not'''
 model = construct_v1(224, 224, training=False)
 model.load(os.path.join("model/SP-InceptionV1-OnFire", "sp-inceptiononv1onfire"),weights_only=True)

 image = cv2.resize(image, (224,224), interpolation = cv2.INTER_AREA)
 image = image.reshape(1,224,224,3)
 res = float(model.predict(image)[0][0])
 K.clear_session()
 return res

def getDominantColor(image):
 '''returns the dominate color among Blue, Green and Reds in the image '''
 B, G, R = cv2.split(image)
 B, G, R = np.sum(B), np.sum(G), np.sum(R)
 color_sums = [B,G,R]
 color_values = {"0": "Blue", "1":"Green", "2": "Red"}
 return color_values[str(np.argmax(color_sums))]


if __name__ == "__main__":
 app.run(host= '0.0.0.0', debug=True)
Dockerfile 文件的修改:
# Dockerfile
FROM python:3.9.10-slim
WORKDIR /server
COPY . /server

# Install python dependencies
RUN pip3 install --upgrade pip setuptools wheel
RUN pip3 install --no-cache-dir -r requirements.txt  --no-build-isolation

ENV FLASK_APP=app
CMD ["python","cv_app.py"]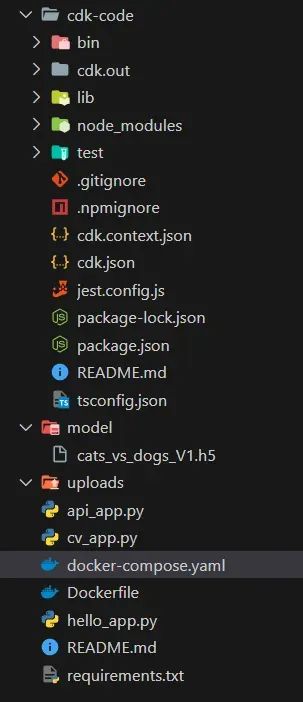
最终构建图像。
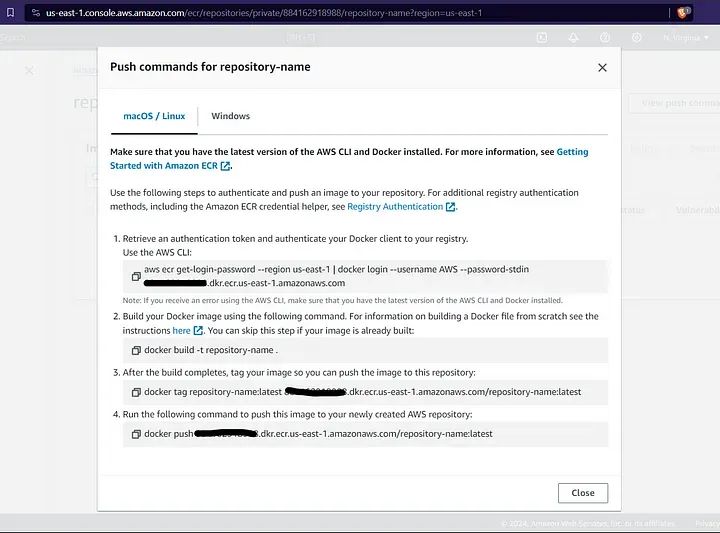
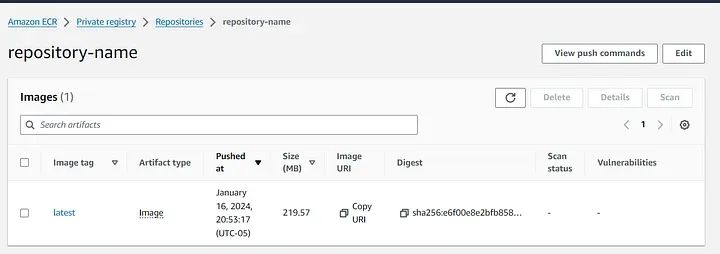
将图像上载到存储库
一旦图像被构建,我们就可以继续将其上传到我们的存储库中,为此,我们可以遵循AWS ECR本身推荐的步骤。
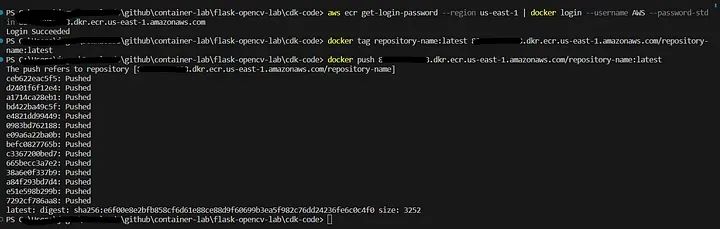
执行:
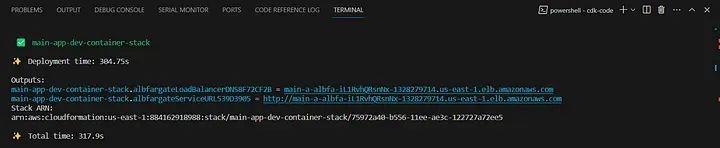
在AWS Fargate中部署图像
最后,通过存储库中保存的图像,我们可以将我们的图像部署到AWS Fargate的无服务器服务中,为此,我们部署CDK容器堆栈:
import { Construct } from 'constructs';
import * as ecr from 'aws-cdk-lib/aws-ecr';
import * as ecs from 'aws-cdk-lib/aws-ecs';
import * as ecs_patterns from 'aws-cdk-lib/aws-ecs-patterns';
import * as ec2 from 'aws-cdk-lib/aws-ec2';
import * as iam from 'aws-cdk-lib/aws-iam';
import { RemovalPolicy, Stack, StackProps } from 'aws-cdk-lib';

export interface ContainerStackProps extends StackProps {
    env: { region: string; app: string; version: string; environment: string },
    ecs_app: ecs.ICluster,
    ecr_repository: ecr.Repository
}

export class ContainerStack extends Stack {

    constructor(scope: Construct, id: string, props: ContainerStackProps) {
        super(scope, id, props);

        // Creamos un rol para asignarlo al ALB
        const executionECSRole = new iam.Role(this, "ecs-execution-role-id", {
            assumedBy: new iam.ServicePrincipal("ecs-tasks.amazonaws.com"),
            roleName: "evs-execution-role",
            description: "Rol de IAM para ejecutar Tasks de ECS.",
        });

        executionECSRole.addManagedPolicy(
            iam.ManagedPolicy.fromAwsManagedPolicyName(
                'service-role/AmazonECSTaskExecutionRolePolicy',
            ));

        const first_image = ecs.EcrImage.fromRegistry(props.ecr_repository.repositoryUri + ":latest");
        const alb_fargate = new ecs_patterns.ApplicationLoadBalancedFargateService(this, 'alb-fargate', {
            cluster: props.ecs_app,
            taskImageOptions: {
                image: first_image,
                containerName: "container-name",
                executionRole: executionECSRole,
                containerPort: 5000
            },
            memoryLimitMiB: 2048,
            cpu: 1024,
            desiredCount: 2,
            listenerPort: 80,
            serviceName: "my-test-service",
            publicLoadBalancer: true,
        });

        const fargate_service = alb_fargate.service
    }
}
记住用新创建的repo的url替换图像repo的url。
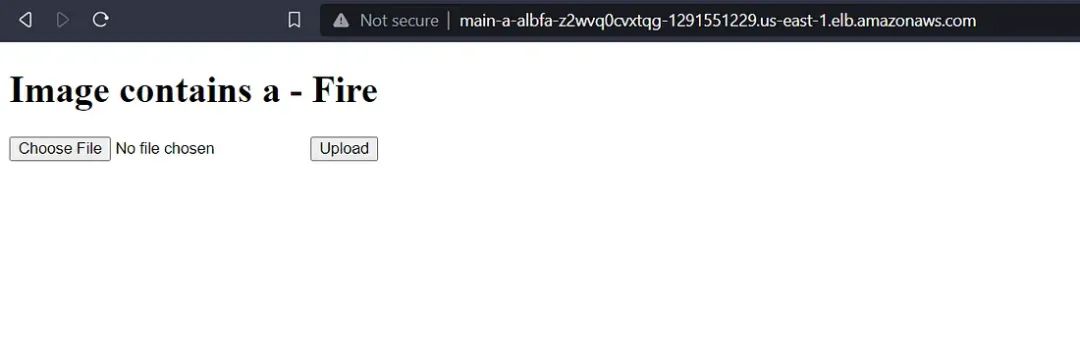
现在,我们已经在AWS的无容器服务器上运行了我们的OpenCV应用程序:

参考文献
https://medium.com/@rajeev_ratan/deploying-a-deep-learning-keras-computer-vision-model-to-aws-using-an-aws-ec2-instance-as-a-web-3d00b09da082?source=post_page-----ab1db7aba53a
https://shipyard.build/blog/first-flask-docker-compose-app/?source=post_page-----ab1db7aba53a
☆ END ☆
如果看到这里,说明你喜欢这篇文章,请转发、点赞。微信搜索「uncle_pn」,欢迎添加小编微信「 woshicver」,每日朋友圈更新一篇高质量博文。
↓扫描二维码添加小编↓


 1207
1207


 被折叠的 条评论
为什么被折叠?
被折叠的 条评论
为什么被折叠?
 到【灌水乐园】发言


