


1. 公众号标签的概念
用户关注我们的公众号后,我们可以给该用户赋予一个或者多个标签,便于区分用户群体。
这样的好处是,我们在群发消息的时候,指定发送用户的标签,这样消息就能群发给指定群体了。
2. 相关接口
我们封装了以下接口,可以实现标签的创建、获取、更新。
同时也封装了跟用户相关的接口,可以为用户添加、移除标签,或者查询用户已有的标签信息。

3. 代码编写
通过控制器开发API接口即可,相关功能均可直接调用WxMpService封装的方法实现。
/**
 * 标签控制器(标签管理、用户标签管理)
 */
@Api(tags = "标签管理API")
@RestController
public class TagController {
	@Autowired
	private WxMpService wxMpService;

	@ApiOperation(value = "获取标签")
	@PostMapping("/tagGet")
	public List<WxUserTag> tagGet() throws WxErrorException {
		List<WxUserTag> res = wxMpService.getUserTagService().tagGet();
		return res;
	}

	@ApiOperation(value = "创建标签")
	@PostMapping("/tagCreate")
	public WxUserTag tagCreate(@RequestParam("tagName") String tagName) throws WxErrorException {
		WxUserTag res = wxMpService.getUserTagService().tagCreate(tagName);
		return res;
	}

	@ApiOperation(value = "更新标签")
	@PostMapping("/tagUpdate")
	public boolean tagUpdate(@RequestParam("tagId") Long tagId, @RequestParam("tagName") String tagName) throws WxErrorException {
		Boolean res = wxMpService.getUserTagService().tagUpdate(tagId, tagName);
		return res;
	}

	@ApiOperation(value = "查询用户标签列表")
	@PostMapping("/userTagList")
	public List<Long> userTagList(@RequestParam("openid") String openid) throws WxErrorException {
		List<Long> tags = wxMpService.getUserTagService().userTagList(openid);
		return tags;
	}

	@ApiOperation(value = "批量为用户添加标签")
	@PostMapping("/batchTagging")
	public boolean batchTagging(@RequestParam("openids") String[] openids, @RequestParam("tagid") Long tagid) throws WxErrorException {
		return wxMpService.getUserTagService().batchTagging(tagid, openids);
	}

	@ApiOperation(value = "批量给用户移除标签")
	@PostMapping("/batchUntagging")
	public boolean batchUntagging(@RequestParam("openids") String[] openids, @RequestParam("tagid") Long tagid) throws WxErrorException {
		return wxMpService.getUserTagService().batchUntagging(tagid, openids);
	}
}
4. 测试
4.1 获取标签
首先我们调用/tagGet获取下标签信息,返回如下,说明我们的公众号有两个标签了,每个标签相关的人数也显示出来。
[
  {
    "id": 2,
    "name": "星标组",
    "count": 1
  },
  {
    "id": 100,
    "name": "杀马特",
    "count": 0
  }
]
4.2 获取用户列表
然后我们通过/userList获取用户列表,以便得到用户的openid,结果如下:
{
  "total": 1,
  "count": 1,
  "openids": [
    "oINiq6UqTiKqfXN3H6RmeKvvRnmw"
  ],
  "nextOpenid": "oINiq6UqTiKqfXN3H6RmeKvvRnmw"
}
4.3 为用户添加标签
再然后,我们为该用户添加杀马特这个标签,对应id为100,所以调用/batchTagging为该用户添加标签,如下图我们输入参数:
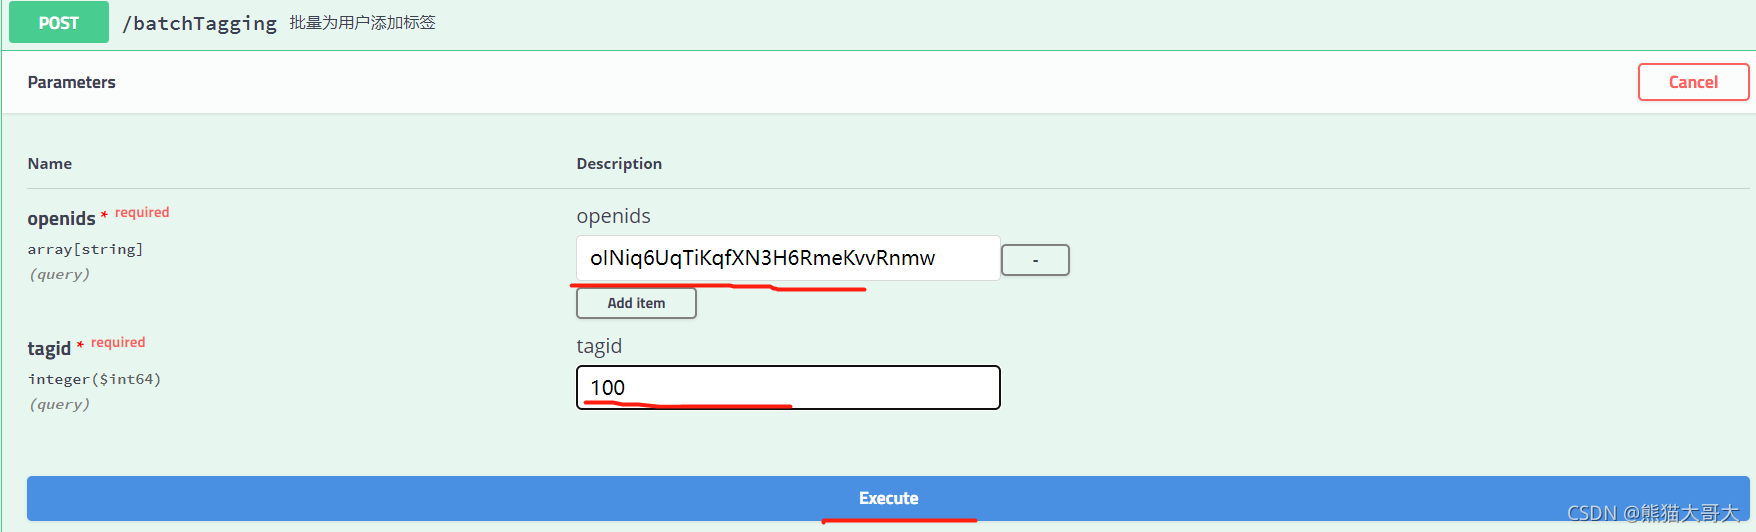
执行后返回结果如下,返回true说明我们的接口调用成功了。

4.4 查询标签
接下来我们查询下该用户已有的标签,调用/userTagList,返回值如下,可见用户已经成功跟id=100的标签关联上了。
[
  2,
  100
]
5. 小结
本篇介绍了如何管理标签,同时介绍了如何管理用户的标签。


 1239
1239

 被折叠的 条评论
为什么被折叠?
被折叠的 条评论
为什么被折叠?
 到【灌水乐园】发言


