


Qt学习:QLineEdit的程序示例
学习了上一篇博客关于QLineEdit的一些重要的成员函数和信号的用法之后,我们写一个小程序来熟练下这些函数.
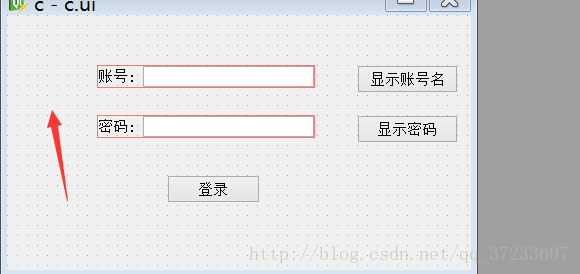
这里是程序完成后的图片.

首先,我们现在ui设计师里拖拽出以下的布局:
注意箭头处还有个QLabel部件.
以下是”c.cpp”下的代码:
//连接信号与槽.
connect(ui.showAccountButton, SIGNAL(clicked()), this, SLOT(showAccountNameSlot()));
connect(ui.showPasswordButton, SIGNAL(clicked()), this, SLOT(showPasswordSlot()));
connect(ui.pushButton, SIGNAL(clicked()), this, SLOT(showEntryDialogSlot()));
connect(ui.passwordLineEdit, SIGNAL(returnPressed()), ui.pushButton, SIGNAL(clicked()));
}
c::~c()
{
}void c::showAccountNameSlot()
{
QMessageBox::information(this, QString::fromLocal8Bit(“账号:”), ui.accountLineEdit->text());
}void c::showPasswordSlot()
{ //注意text()返回的是本身的文本,而displayText()返回的是显示的文本.
QMessageBox::information(this, QString::fromLocal8Bit(“密码:”), ui.passwordLineEdit->text());
}void c::showEntryDialogSlot()
{ //这里只是为了演示QLineEdit的用法,就没有实现注册,登录等功能.所以这是简单的登陆下.
if ((ui.accountLineEdit->text() “123456”) && (ui.passwordLineEdit->text() “qw123456”))
{
QMessageBox::information(this, QString::fromLocal8Bit(“登录”), QString::fromLocal8Bit(“登录成功”));
} else
{
QMessageBox::warning(this, QString::fromLocal8Bit(“登录”), QString::fromLocal8Bit(“登录失败”));
}
}12345678910111213141516171819202122232425262728293031323334353637383940414243444546474849505152535455565758596061626364656667686970717273747576777879
以下是”c.h”内的代码:
最后是”main.cpp”内的代码:


 3641
3641

 被折叠的 条评论
为什么被折叠?
被折叠的 条评论
为什么被折叠?
 到【灌水乐园】发言


