


参考视频教程:B站 刘铁猛 028 接口 依赖反转 单元测试
接口是一种供方和需求方都遵守的契约 — 即规则。
文章目录
接口在代码中有什么优化作用?
接口提供解决代码重复的问题:
下述代码展示计算整形数组和ArrayList集合的 和 与 平均值。由于两个的类型不同,需要分别写出就算和与平均值的函数,即函数重载的实现方式。通过观察 int[] 和 ArrayList ,两者的求和和求平均值,均是迭代操作,并且两者的基类都是Array。---- 那么Array如果继承了某个可以迭代的接口,那么是不是就可以利用这个接口解决函数重载的多余代码了呢?
原始代码
using System;
using System.Collections;

namespace InterfaceAppl
{
    class Executer
    {
        static void Main(string[] args)
        {
            int[] nums1 = new int[] { 1, 2, 3, 4, 5 };
            ArrayList nums2 = new ArrayList() { 1, 2, 3, 4, 5};
            Console.WriteLine(Sum(nums1));
            Console.WriteLine(Avg(nums1));
            Console.WriteLine(Sum(nums2));
            Console.WriteLine(Avg(nums2));
        }

        static int Sum(int[] nums)
        {
            int sum = 0;
            foreach(var a in nums)
            {
                sum += a;
            }
            return sum;
        }
        static double Avg(int[] nums)
        {
            int sum = 0;double count = 0;
            foreach (var a in nums)
            {
                sum += a; count++;
            }
            return sum/count;
        }

        static int Sum(ArrayList nums)
        {
            int sum = 0;
            foreach (var a in nums)
            {
                sum += (int)a;
            }
            return sum;
        }
        static double Avg(ArrayList nums)
        {
            int sum = 0; double count = 0;
            foreach (var a in nums)
            {
                sum += (int)a; count++;
            }
            return sum / count;
        }

    }
}
ArrayList转到定义,可以看到实现了可以迭代的IEnumrable接口
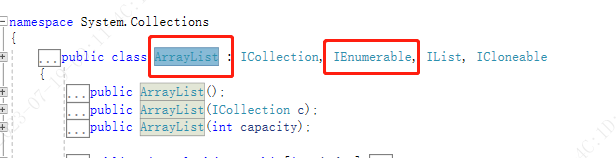](https://img-blog.csdnimg.cn/91262f96249a46edbcc0dedf6515dcc2.png)
利用用接口简化函数重载
using System;
using System.Collections;

namespace InterfaceAppl
{
    class Executer
    {
        static void Main(string[] args)
        {
            int[] nums1 = new int[] { 1, 2, 3, 4, 5 };
            ArrayList nums2 = new ArrayList() { 1, 2, 3, 4, 5};
            Console.WriteLine(Sum(nums1));
            Console.WriteLine(Avg(nums1));
            Console.WriteLine(Sum(nums2));
            Console.WriteLine(Avg(nums2));

        }

        static int Sum(IEnumerable nums)
        {
            int sum = 0;
            foreach (var a in nums)
            {
                sum += (int)a;
            }
            return sum;
        }
        static double Avg(IEnumerable nums)
        {
            int sum = 0; double count = 0;
            foreach (var a in nums)
            {
                sum += (int)a; count++;
            }
            return sum / count;
        }

    }
}
紧耦合程序实体
具体观察Car的运行,是非常依赖 Engine 中 RPM 属性的值的,当Car 运行不起来的时候,不仅要检查 Car类 的程序实体,还要检查依赖的Engine类的程序实体。
using System;

namespace InterfaceAppl
{
    class Executer
    {
        static void Main(string[] args)
        {
            var engine = new Engine();
            var car = new Car(engine);
            car.Run(30); // 加油门
            Console.WriteLine(car.Speed);
        }
    }

    class Engine
    {
        public double RPM { get;private set; } // 属性 注意 set是private的
        public void Work(double gas)
        {
            this.RPM = 1000 * gas;
        }
    }

    class Car
    {
        private Engine _engine;
        public Car(Engine engine)
        {
            _engine = engine;
        }
        public double Speed { get;private set; }
        public void Run(int gas)
        {
            this._engine.Work(gas); // 加油门
            this.Speed = this._engine.RPM / 100; // 跑起来的速度
        }
    }
}
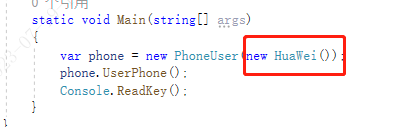
松耦合代码实体
更换手机,只需要考虑到手机的型号,不需要考虑到解决手机的内部功能,将 new HuaWei() 换成 new XiaoMi()即可。(后续更厉害的其他知识点 – 反射,可以解决不要更改手机型号名,通过读取配置文件的形式解决)
using System;

namespace InterfaceAppl
{
    class Executer
    {
        static void Main(string[] args)
        {
            var phone = new PhoneUser(new HuaWei());
            phone.UserPhone();
            Console.ReadKey();
        }
    }

    class PhoneUser
    {
        private IPhone _phone; // 定义一个接口类型的成员
        public PhoneUser(IPhone phone)
        {
            _phone = phone;
        }
        public void UserPhone()
        {
            _phone.Dail();
            _phone.PickUp();
            _phone.Send();
            _phone.Recive();
        }
    }

    interface IPhone
    {
        void Dail();
        void PickUp();
        void Send();
        void Recive();
    }
    class XiaoMi : IPhone
    {
        public void Dail()
        {
            Console.WriteLine("Xiao mi is Dail");
        }

        public void PickUp()
        {
            Console.WriteLine("Xiao mi is PickUP");
        }

        public void Recive()
        {
            Console.WriteLine("Xiao mi is Recive");
        }

        public void Send()
        {
            Console.WriteLine("Xiao mi is Send");
        }
    }

    class HuaWei : IPhone
    {
        public void Dail()
        {
            Console.WriteLine("huaWei is Dail");
        }

        public void PickUp()
        {
            Console.WriteLine("HuaWei is PickUP");
        }

        public void Recive()
        {
            Console.WriteLine("HuaWei is Recive");
        }

        public void Send()
        {
            Console.WriteLine("HuaWei is Send");
        }
    }
}

设计一个紧耦合 – 接口松耦合 – 单元测试
紧耦合程序实例
DeskFan的运行依赖PowerSupply中对电源的设置的值,当需要对DeakFan的运行状态进行测试的时候,需要对PowerSupply进行修改,这样的操作的不合理之处:破坏的程序的封闭性,并且直接修改很不方便;若有其他的类从Deskfan继承,则会影响其他类的对象的运行情况。
using System;

namespace InterfaceAppl
{
    public class Executer
    {
        static void Main(string[] args)
        {
            var fan = new DeskFan(new PowerSupply());
            Console.WriteLine(fan.Work());
        }
    }

    class PowerSupply
    {
        public int getPower()
        {
            return 100;
        }
    }

    class DeskFan
    {
        private PowerSupply _powersupply;
        public DeskFan(PowerSupply powersupply)
        {
            _powersupply = powersupply;
        }
        public string Work()
        {
            int power = _powersupply.getPower();
            if(power < 0)
            {
                return "Won't Work";
            }else if(power < 100)
            {
                return "Slow";
            }else if(power < 200)
            {
                return "Work Fine";
            }
            else
            {
                return "Warining!";
            }
        }
    }
}

松耦合程序实体 – 引入接口
抽象出 IPowerSupply接口,将PowerSupply类实现IPowerSupply,紧耦合实体中的代码中的PowerSupply改为IPowerSupply。不同的代码如下图所示,完整代码见图下的代码实体。
(注意看:PowerSupply类的引用次数从3次,变成了一次,原本对类的这3处引用,被接口替代— 下图代码中显示几次引用,需要在 VS 的编辑区才可以看到,点开引用,可以看到具体在哪一行的什么代码进行了引用)

using System;

namespace InterfaceAppl
{
    public class Executer
    {
        static void Main(string[] args)
        {
            var fan = new DeskFan(new PowerSupply());
            Console.WriteLine(fan.Work());
        }
    }

    interface IPowerSupply
    {
        int getPower();
    }

    class PowerSupply:IPowerSupply
    {
        public int getPower()
        {
            return 100;
        }
    }

    class DeskFan
    {
        private IPowerSupply _powersupply;
        public DeskFan(IPowerSupply powersupply)
        {
            _powersupply = powersupply;
        }
        public string Work()
        {
            int power = _powersupply.getPower();
            if(power < 0)
            {
                return "Won't Work";
            }else if(power < 100)
            {
                return "Slow";
            }else if(power < 200)
            {
                return "Work Fine";
            }
            else
            {
                return "Warining!";
            }
        }
    }
}
单元测试
测试不应该在Main函数中完成,应该在单元测试中完成。
新建测试单元之后,在测试单元中对待测试程序实体的逻辑进行测试,以下的实例是为了进行 电源的电压的值对风扇的运行状态进行测试。需要有一个风扇测试类,其中可以包含多个测试实例,即对if else 的多个状态进行测试。
测试流程:新建单元测试 – 新建一个实现IPowerSupply接口的类,类似PowerSupply的类中的实现,就是电源的值的设定不同 — 测试函数的函数体书写([Fact]下面的函数),即测试用例的书写 — 运行测试。
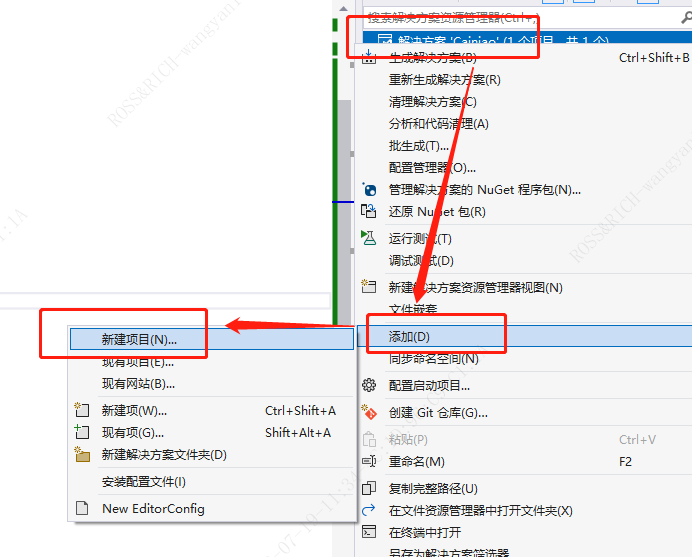
新建单元测试步骤;
在解决方案上右击,然后选择添加 – 新建项目
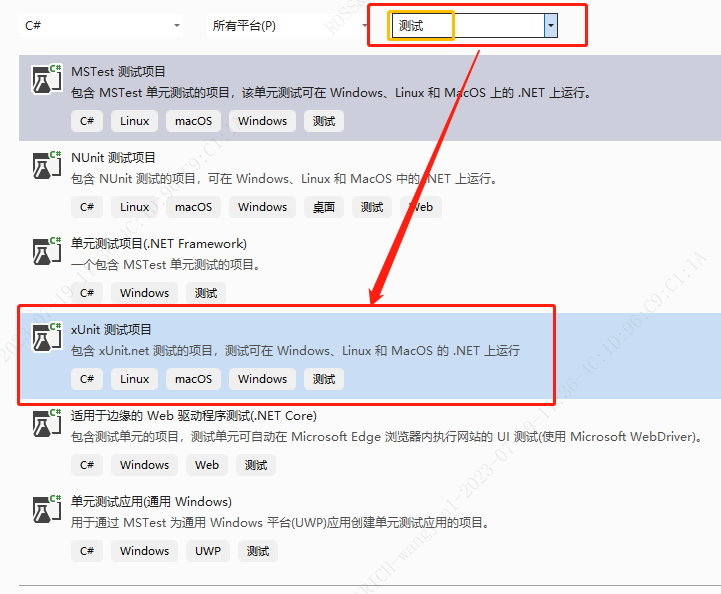
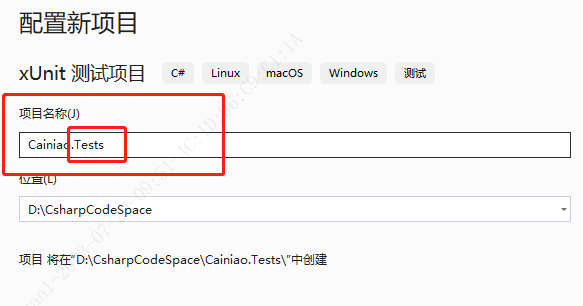
选择测试选项,然后选择 xUnit测试项目:
然后测试项目的命名,待测试项目名 + “.Tests”
生成的界面如下:
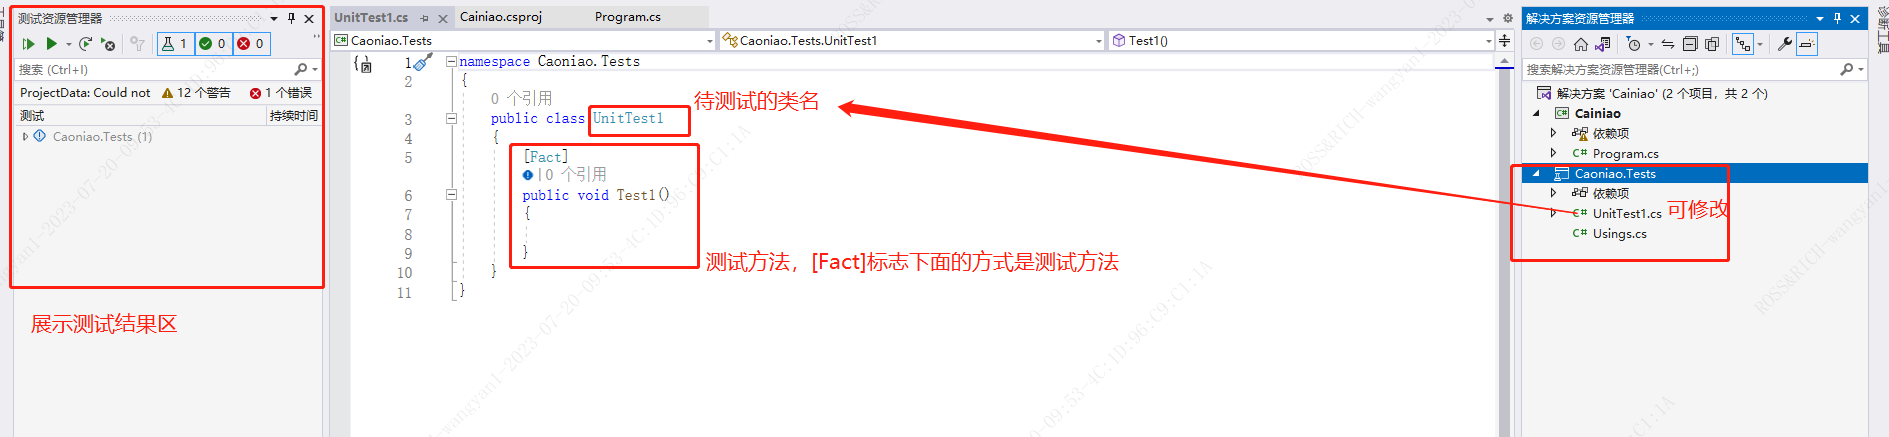
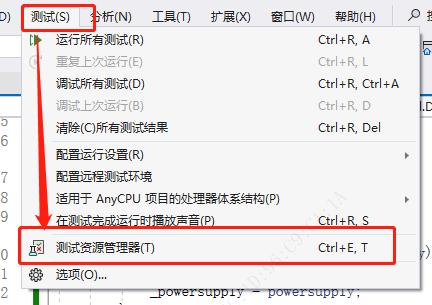
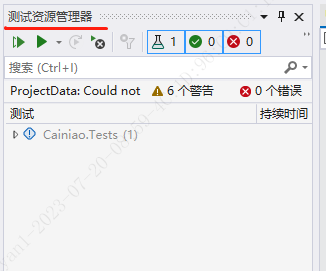
其中最左侧展示测试的结果,打开方式:测试 – 测试资源管理器(然后通过拖拽,可以将窗口固定在最左侧的位置)
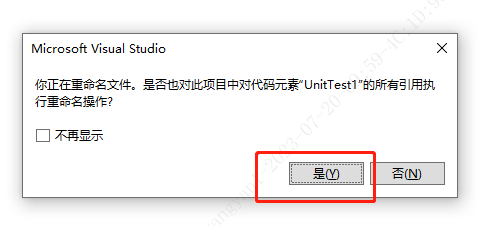
然后将UnitTest.cs 的名称修改为 DeskFanTests.cs。选择是
代码编辑区更新为:
namespace Caoniao.Tests
{
    public class DeskFanTest
    {
        [Fact]
        public void Test1()
        {

        }
    }
}
针对项目进行相关的测试引用,右击依赖项,然后添加项目引用。
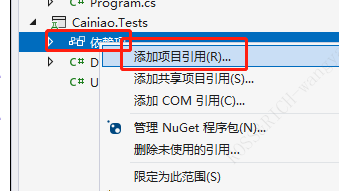
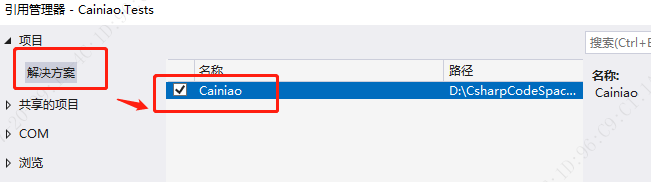
引用需要测试的项目。
待测试的代码:
将接口和类设置为 public 的访问属性。
using System;

namespace InterfaceAppl
{
    public class Executer
    {
        static void Main(string[] args)
        {
            var fan = new DeskFan(new PowerSupply());
            Console.WriteLine(fan.Work());
        }
    }

    public interface IPowerSupply
    {
        int getPower();
    }

    public class PowerSupply : IPowerSupply
    {
        public int getPower()
        {
            return 110;
        }
    }

    public class DeskFan
    {
        private IPowerSupply _powersupply;
        public DeskFan(IPowerSupply powersupply)
        {
            _powersupply = powersupply;
        }
        public string Work()
        {
            int power = _powersupply.getPower();
            if (power <= 0)
            {
                return "Won't Work";
            }
            else if (power < 100)
            {
                return "Slow";
            }
            else if (power < 200)
            {
                return "Work Fine";
            }
            else
            {
                return "Warining!";
            }
        }
    }
}
第一个测试案例的书写:
using InterfaceAppl;

namespace Caoniao.Tests
{
    public class DeskFanTest
    {
        [Fact]
        public void PowerLowerThanZero_OK()
        {
            var fan = new DeskFan(new PowerSupplyLowerThanZero());
            var expected = "Won't Work";
            var actual = fan.Work();
            Assert.Equal(expected, actual);
        }
    }

    class PowerSupplyLowerThanZero : IPowerSupply
    {
        public int getPower()
        {
            return 0;
        }
    }
}

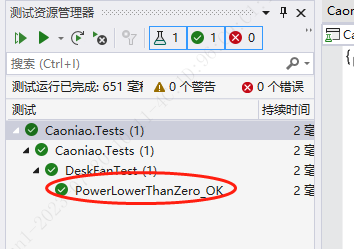
点击测试,第一个测试案例展示,全绿则通过;
第二个测试案例,
将 原代码,return “Warining!”; 修改为 return “Explosion!”;
添加测试用例:
增加的代码:
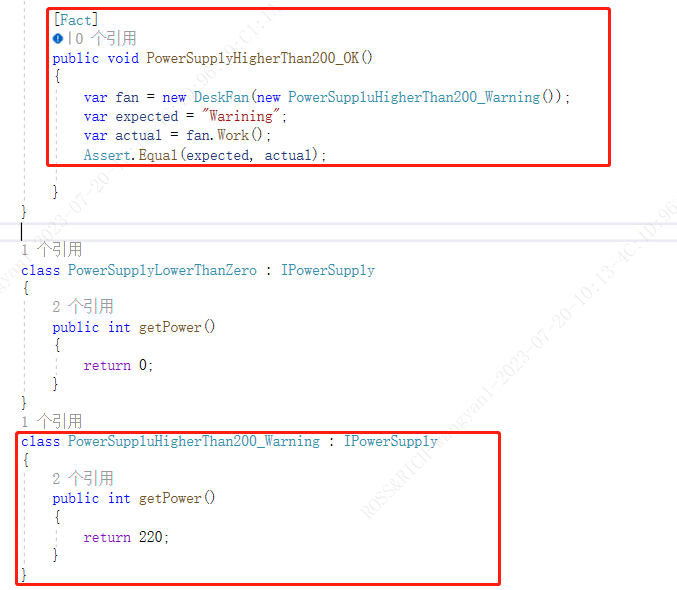
包含两个测试用例的完整代码:
using InterfaceAppl;

namespace Caoniao.Tests
{
    public class DeskFanTest
    {
        [Fact]
        public void PowerLowerThanZero_OK()
        {
            var fan = new DeskFan(new PowerSupplyLowerThanZero());
            var expected = "Won't Work";
            var actual = fan.Work();
            Assert.Equal(expected, actual);
        }

        [Fact]
        public void PowerSupplyHigherThan200_OK()
        {
            var fan = new DeskFan(new PowerSuppluHigherThan200_Warning());
            var expected = "Warining";
            var actual = fan.Work();
            Assert.Equal(expected, actual);

        }
    }

    class PowerSupplyLowerThanZero : IPowerSupply
    {
        public int getPower()
        {
            return 0;
        }
    }
    class PowerSuppluHigherThan200_Warning : IPowerSupply
    {
        public int getPower()
        {
            return 220;
        }
    }
}
第二个测试案例失败:
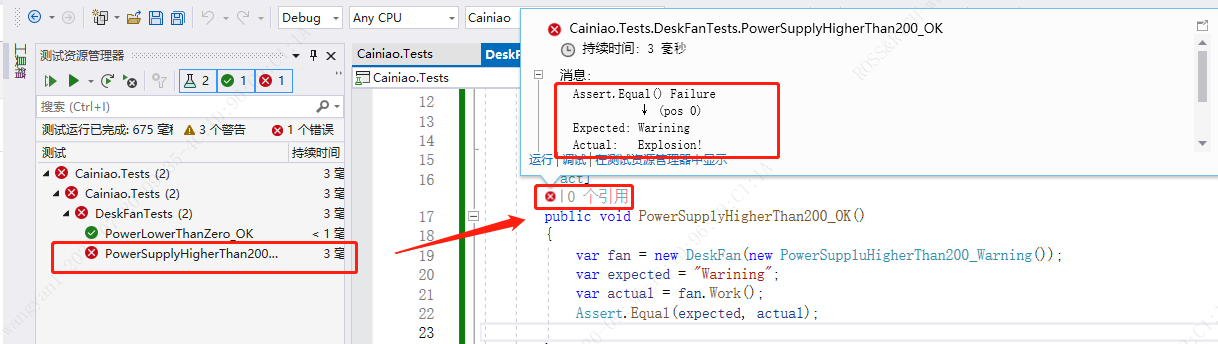
这个时候,如何查看被测试代码的问题呢?
在测试用例的代码上打断点,然后右击测试用例进行调试。按住F11,查看代码的实际运行情况,代码会跳到待测试程序的实体中。

测试用例升级版
上述在测试的时候,每次测试一个功能,都需要写一个类,功能繁杂的时候,会需要书写大量为了测试的类,工作量大切代码丑。 — 利用包Moq进行改进。
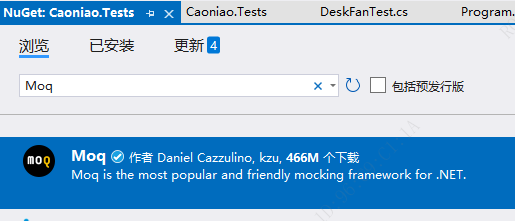
NuGet 包管理器,添加Moq包
利用Moq写的测试用例代码:
var mock = new Mock<IPowerSupply>();
mock.Setup(ps => ps.getPower()).Returns(()=>0);
var fan = new DeskFan(mock.Object);
完整的两个测试用例的修改后的代码,引用命名空间 Moq.
using InterfaceAppl;
using Moq;

namespace Caoniao.Tests
{
    public class DeskFanTest
    {
        [Fact]
        public void PowerLowerThanZero_OK()
        {
            var mock = new Mock<IPowerSupply>();
            mock.Setup(ps => ps.getPower()).Returns(()=>0);
            var fan = new DeskFan(mock.Object);
            var expected = "Won't Work";
            var actual = fan.Work();
            Assert.Equal(expected, actual);
        }

        [Fact]
        public void PowerSupplyHigherThan200_OK()
        {
            var mock = new Mock<IPowerSupply>();
            mock.Setup(ps => ps.getPower()).Returns(() => 220);
            var fan = new DeskFan(mock.Object);
            var expected = "Warnning!";
            var actual = fan.Work();
            Assert.Equal(expected, actual);

        }
    }
}


 9628
9628


 被折叠的 条评论
为什么被折叠?
被折叠的 条评论
为什么被折叠?
 到【灌水乐园】发言


