


c#联合c++编程
c++ 导出.dll的通用方法,以及c++中调用(注意导出与导入的平台要一致)
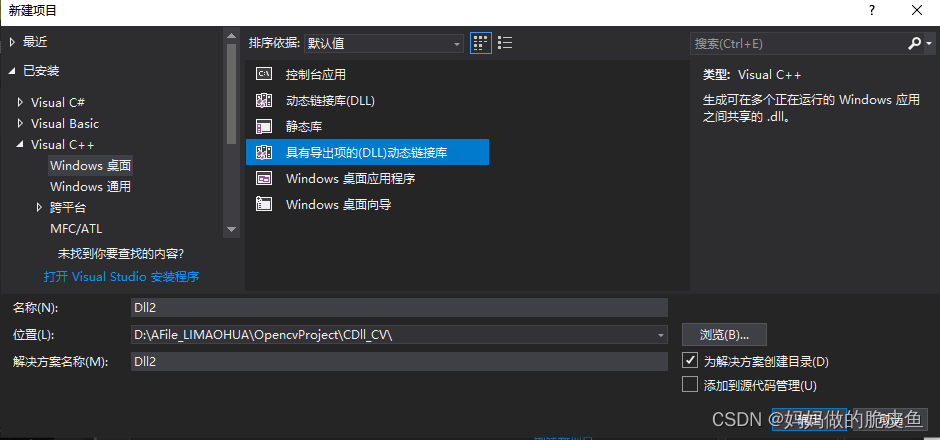
直接创建vs的具有导出项的DLL动态链接库
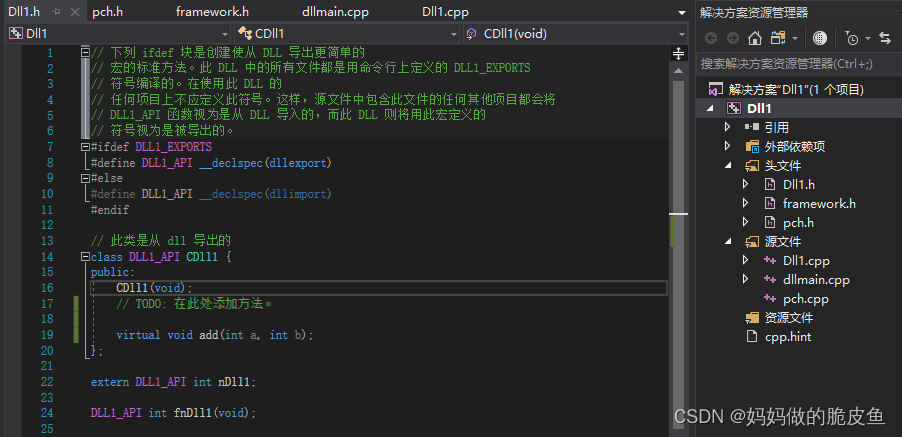
之后会得到一个导出模板,可以导出变量、导出函数、导出类,添加了add成员方法

点击生成,会创建,这里需要将Dll1.dll和Dll1.ib复制到新创建的c++项目目录下,

还需要将在.dll工程中创建的所有.h文件复制到调用.dll的工程目录下(如Dll1.h,以及其他创建的.h文件)

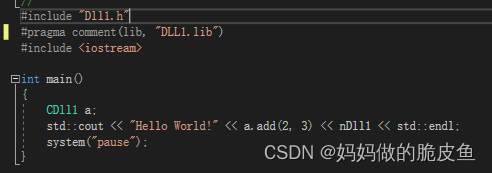
最后是调用.dll:
c # 调用c++编译的.dll库(方法1调用非类方法)
生成.dll动态链接库
- 创建一个空的DLL项目
- 添加头文件Test.h,并添加如下代码
// MathLibrary.h - Contains declarations of math functions
#pragma once

#ifdef MATHLIBRARY_EXPORTS
#define MATHLIBRARY_API __declspec(dllexport)
#else
#define MATHLIBRARY_API __declspec(dllimport)
#endif

extern "C" MATHLIBRARY_API int fibonacci_init(int a, int b);
extern "C" MATHLIBRARY_API int fibonacci_next(int a , int b);
extern "C" MATHLIBRARY_API int fibonacci_current(float a, float b);
extern "C" MATHLIBRARY_API int fibonacci_index(int a, float b);
- 添加cpp文件Test.cpp
// Test.cpp : Defines the exported functions for the DLL.
#include "pch.h" // use stdafx.h in Visual Studio 2017 and earlier
#include "Test.h"

 int fibonacci_init(int a, int b)
 {
	//添加函数
}
int fibonacci_next(int a, int b)
{
   //添加函数
}
int fibonacci_current(float a, float b)
{
   //添加函数
}
int fibonacci_index(int a, float b)
{
    //添加函数
}
- 生成.dll
- 在c#中调用.dll(将生成的Test.dll拷贝至c#工程目录,并使用[DLLImport(@“”)],引入.dll函数接口)
using System;
using System.Collections.Generic;
using System.Threading.Tasks;
using System.Windows.Forms;
using System.Runtime.InteropServices;

namespace text_DLL_CV
{
    public partial class Form1 : Form
    {
        [DllImport(@"D:\AFile_LIMAOHUA\OpencvProject\NEW_CSHARP\text_DLL_CV\text_DLL_CV\bin\Debug\Dll_CV.dll")]
        public extern static int fibonacci_init(int a, int b);
        [DllImport(@"D:\AFile_LIMAOHUA\OpencvProject\NEW_CSHARP\text_DLL_CV\text_DLL_CV\bin\Debug\Dll_CV.dll")]
        public extern static int fibonacci_next(int a, int b);
        [DllImport(@"D:\AFile_LIMAOHUA\OpencvProject\NEW_CSHARP\text_DLL_CV\text_DLL_CV\bin\Debug\Dll_CV.dll")]
        public extern static int fibonacci_index(int a, int b);

	// 下面就是具体的调用方法

	}
}
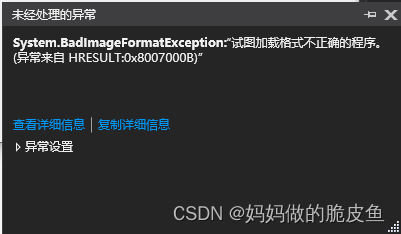
- 注意点: 如果在调用.dll时,出现“试图调用不正确的程序格式”的问题,引起该问题的最可能原因是,你导出.dll时适配的平台和你调用.dll时使用的平台不一致造成的。例如导出使用x64而调用使用x86。
c # 调用c++编译的.dll库(使用CLR方法2调用非类方法)
- 创建c++的.dll工程CppDll(.h和Cpp如下)
#pragma once
#include <stdio.h>
#include <stdlib.h>

#ifdef CPPDLL_EXPORTS
#define CPP_EXPORTS __declspec(dllexport)
#else
#define CPP_EXPORTS __declspec(dllimport)
#endif

extern "C" CPP_EXPORTS int Add(int a, int b);
extern "C" CPP_EXPORTS int Sub(int a, int b);
extern "C" CPP_EXPORTS int Mul(int a, int b);
extern "C" CPP_EXPORTS  int Div(int a, int b);
#include "pch.h"
#include "CppDll.h"

int Add(int a, int b){return a+b;}
int Sub(int a, int b){return a - b;}
int Mul(int a, int b){return a*b;}
int Div(int a, int b){return a/b;}
- 创建CLR工程CliDll,并将步骤1中生成的CppDll.h以及CppDll.lib文件复制到该工程目录下(头文件和Cpp代码如下所示,相当于对上面的方法进行重新封装,这样就避免了,每个方法的调用都需要使用[importDLL]方法)。
// 头文件
#pragma once
#include "CppDll.h"
#include <iostream>
using namespace System;
// 需要建立CppDll.h与lib的链接
#pragma comment(lib, "CppDll.lib")
#pragma managed    // 代码托管命令
namespace CliDll {
	public ref class Class1
	{
		// TODO: 在此处为此类添加方法。
	public:
		Class1();
		~Class1();
		int AddCli(int a, int b);
		int SubCli(int a, int b);
		int MulCli(int a, int b);
		int DivCli(int a, int b);
	};
}
这里CLR相当于起到了粘和c#与c++的作用
#include "pch.h"
#include "CliDll.h"

CliDll::Class1::Class1(){}
CliDll::Class1::~Class1(){}

int CliDll::Class1::AddCli(int a, int b){return Add(a, b);}  //可以直接调用c++。dll中的方法
int CliDll::Class1::SubCli(int a, int b){return Sub(a,b);}
int CliDll::Class1::MulCli(int a, int b){return Mul(a, b);}
int CliDll::Class1::DivCli(int a, int b){return Div(a,b);}
- 将2步中生成的CliDll.dll以及第一步中的CppDll.lib,CppDll.dll文件拷贝至c#项目目录下(text_DLL_CV),并将CliDll.dll引用到工程。
using System.Text;
using System.Threading.Tasks;
using System.Windows.Forms;
using System.Runtime.InteropServices;
using CliDll; // 引入CLR名称空间CliDll
namespace text_DLL_CV
{
public partial class Form1 : Form
{
public Class1 a = new Class1(); // 创建对c++。dll中重新封装的clr Class1类。
public Form1()
{
InitializeComponent();
}
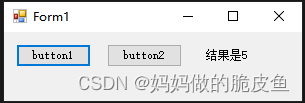
private void button1_Click(object sender, EventArgs e)
{
label1.Text = "结果是" + a.AddCli(2, 3);
}
private void button2_Click(object sender, EventArgs e)
{
label1.Text = "结果是" + a.SubCli(4,2);
}
}
}
同样要注意各个项目的部署平台要保持一致。
c# 调用c++编译的.dll库(类方法的调用)
方法1: 通常c++中类的.dll是无法直接给c#使用的,但是可以通过构建CLR实现将c++类重新进行封装并生成.dll供c#调用。 可以直接参考上面的 ***c # 调用c++编译的.dll库(使用CLR方法2调用非类方法)***进行实现。
方法2: 使用c#直接调用c++.dll,c++.dll可以直接导出全局接口,也可以导出类。
方法1的使用(使用clr封装c++dll库供c#调用)
方法2的使用(使用函数调用的方法去调用c++dll中的类供c#调用)
注释:该方法其实和上面的 c # 调用c++编译的.dll库(方法1调用非类方法) 是一致的,只不过使用了函数方法将类重新进行了封装。(个人感觉这种不太推荐使用,若使用CLR的方法的话,c++中的数据类型可以更好的与c#中的数据类型进行转换。)
- 创建c++的dll工程DLL_CV
- 在DLL_CV中添加Test.h和Test.cpp,并添加如下代码:
// Test.h
#pragma once

class Test
{
public:
	Test(int x, int y);
	~Test();
	int a, b;

public:
	int Add();
};

extern "C" __declspec(dllexport) Test* GetObj(int x, int y) { return new Test(x, y); };
extern "C" __declspec(dllexport) int Test_Add(Test * obj, int x, int y) { return obj->Add(); };
// Test.cpp
#include "pch.h"
#include "Test.h"
Test::Test(int x, int y){
	a = x;
	b = y;
}
Test::~Test(){}
int Test::Add(){return a+b;}
- 将Test.dll文件导入到c#的工程文件目录中
using System;
using System.Collections.Generic;
using System.ComponentModel;
using System.Data;
using System.Drawing;
using System.Linq;
using System.Runtime.InteropServices;
using System.Text;
using System.Threading.Tasks;
using System.Windows.Forms;

namespace WindowsFormsApp1
{
    public partial class Form1 : Form
    {

        public Form1()
        {
            InitializeComponent();
        }

        [DllImport("Dll1.dll", CharSet = CharSet.Ansi, CallingConvention = CallingConvention.Cdecl)]
        public extern static IntPtr GetObj(int x, int y);    // 使用IntPtr替代指针类型

        [DllImport("Dll1.dll", CharSet = CharSet.Ansi, CallingConvention = CallingConvention.Cdecl)]
        public extern static int Test_Add(IntPtr obj, int x, int y);

        private void button1_Click(object sender, EventArgs e)
        {
            // 生成类对象
            IntPtr ObjectClass = GetObj(3,4);
            int b = Test_Add(ObjectClass, 3,4);
            // 调用类对象的方法
            label1.Text = Convert.ToString(b);
        }
    }
}


 1万+
1万+


 被折叠的 条评论
为什么被折叠?
被折叠的 条评论
为什么被折叠?
 到【灌水乐园】发言


