


提示:本篇文章仅介绍如何跑通,有wav2lip的一些训练小技巧,可以私信交流
文章目录
介绍
目前MLU370-M8适配的算法方向百花齐放,大模型适配30+,多模态大模型适配10+,数字人算法【声音克隆,文本生语音,超分】适配10+,以及常规图像识别算法几乎都适配,在保证精度和适配度的同时,也保证了速度对标GPU.
一、wav2lip 96*96模型推理
1.1环境选择
MLU370-M8 5.10.22
pytorch-v1.17_torch1.13.1_ubnutu20.04_py310

有需要的请自己挂载存储卷哦!
1.2代码环境准备
git clone https://githubfast.com/Rudrabha/Wav2Lip.git   #拉取社区代码
python /torch/src/catch/tools/torch_gpu2mlu/torch_gpu2mlu.py -i Wav2Lip/  #转换脚本cuda-mlu

以下环境直接pip install即可
librosa==0.7.0
numpy==1.17.1
opencv-python
tqdm==4.45.0
numba==0.48
apt install ffmpeg
报错解决
No module named ‘numba.decorators’
# from numba.decorators import jit as optional_jit

# __all__ = ['moved', 'deprecated', 'optional_jit']
直接注释即可
1.3准备操作
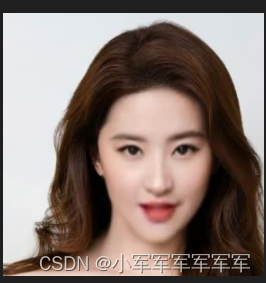
1.准备一张帅气的自拍
2.准备一个语音【wav2lip源模型是英文模型,中文效果差,需要微调】
3.准备wav2lip 96*96的开源模型 【模型在github下面有个link可以下载】
链接:https://pan.baidu.com/s/1prOFee2qW4DMiQxMwXEWig?pwd=8oz8
提取码:8oz8
4.代码修改:
将默认参数改成自己的路径
parser.add_argument('--checkpoint_path', type=str,
					help='Name of saved checkpoint to load weights from',default="/workspace/volume/tts/tmp/Wav2Lip_mlu/checkpoints/wav2lip.pth")

parser.add_argument('--face', type=str,
					help='Filepath of video/image that contains faces to use', default="/workspace/volume/tts2/storage/1/2024020611/8f23a17c-e68e-4d43-a984-0eaa8a15bf9c20240201155306.jpg")
parser.add_argument('--audio', type=str,
					help='Filepath of video/audio file to use as raw audio source', default="/workspace/volume/tts/stb_pic/a.mp3")

checkpoint = torch.load(checkpoint_path)
改成:
checkpoint = torch.load(checkpoint_path,map_location="mlu")
1.4运行代码
python inference.py
直接在results/文件下就有推理结果
二、wav2lip 96*96模型训练
9696只是教学用例,288288,384*384都可以直接训练且方法是一样的
环境和推理全部保持
1.数据集准备
准备若干个MP4,要求人脸正对,吐字清晰,背景不复杂,人头别乱动,嘴唇闭合有度。
视频要求:FPS=25,音频采样率:16000HZ
2.数据预处理
修改 preprocess.py文件
parser.add_argument("--data_root", help="Root folder of the LRS2 dataset", required=True)
parser.add_argument("--preprocessed_root", help="Root folder of the preprocessed dataset", required=True)
–data_root路径改成自己mp4文件存在路径
–preprocessed_root改成处理后的存放路径
运行preprocess.py文件后,会在preprocessed_root路径下生成n个jpg+audio.wav文件
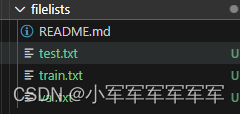
在同等路径下filelists的文件下创建test.txt,train.txt,val.txt文件,将处理后preprocessed_root下的文件相对路径存入这几个txt文档中
3.专家鉴别器训练
修改color_syncnet_train.py文件
parser.add_argument("--data_root", help="Root folder of the preprocessed LRS2 dataset", required=True)

parser.add_argument('--checkpoint_dir', help='Save checkpoints to this directory', required=True, type=str)
parser.add_argument('--checkpoint_path', help='Resumed from this checkpoint', default=None, type=str)
–data_root改成preprocessed_root路径,要求preprocessed_root+txt文件中的路径结合成绝对路径能找到数据
–checkpoint_dir 为保存模型路径
直接运行该文件即可
loss降到0.25以下的专家鉴别器差不多就OK了
4.生成器训练
修改 wav2lip_train.py文件:
parser.add_argument("--data_root", help="Root folder of the preprocessed LRS2 dataset", required=True, type=str)

parser.add_argument('--checkpoint_dir', help='Save checkpoints to this directory', required=True, type=str)
parser.add_argument('--syncnet_checkpoint_path', help='Load the pre-trained Expert discriminator', required=True, type=str)
–data_root改成preprocessed_root路径,要求preprocessed_root+txt文件中的路径结合成绝对路径能找到数据
–checkpoint_dir 为保存模型路径
–syncnet_checkpoint_path为专家鉴别器训练模型
直接运行文件,保存出来的模型,修改推理的模型即可直接替换使用了
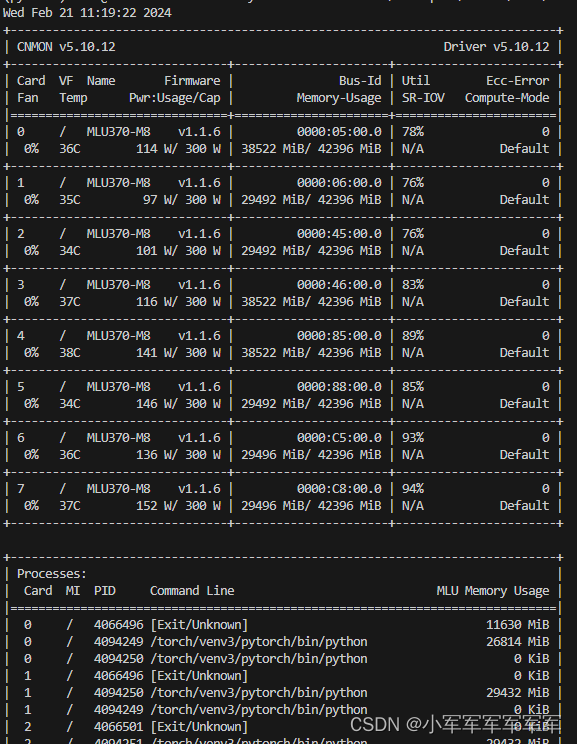
5.单机8卡训练修改方法
1.添加DDP配置
from torch.utils.data.distributed import DistributedSample
rank = int(os.environ["RANK"])
torch.distributed.init_process_group(backend="cncl")
local_rank = torch.distributed.get_rank()
torch.mlu.set_device(local_rank)
device = torch.device("mlu", local_rank)
2.将数据放到DistributedSampler
 sampler=DistributedSampler(train_dataset)
    train_data_loader = data_utils.DataLoader(
        train_dataset, batch_size=hparams.batch_size,pin_memory=False,
        num_workers=hparams.num_workers,sampler=sampler)
    sampler=DistributedSampler(test_dataset)
    test_data_loader = data_utils.DataLoader(
        test_dataset, batch_size=hparams.batch_size,
        num_workers=hparams.num_workers,sampler=sampler)
3.模型放到DistributedDataParallel
model = torch.nn.parallel.DistributedDataParallel(model,
                                                      device_ids=[local_rank],
                                                      output_device=local_rank)
4.脚本启动改代码
export CNCL_MEM_POOL_MULTI_CLIQUE_ENABLE=1
export CNCL_MLU_DIRECT_LEVEL=1
export CNCL_SLICE_SIZE=2097152
export CNCL_MEM_POOL_ENABLE=0
export MLU_VISIBLE_DEVICES=0,1,2,3,4,5,6,7
python -m torch.distributed.run --nproc_per_node 8 --master_port 1233 wloss_hq_ddp.py
到此就可以8卡运行你的数字人训练了
如果你想在上面增加GFPGAN,DINET这些方法,按照刚才的技巧都可以直接运行起来。


 4945
4945


 被折叠的 条评论
为什么被折叠?
被折叠的 条评论
为什么被折叠?
 到【灌水乐园】发言


