


下载最新的Zend2,布置于本机环境中,以下是一个操作实例:
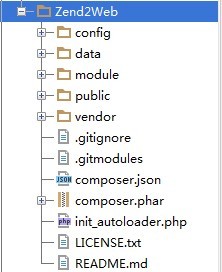
1、下载一份Zend2官方示例代码,示例框架代码如下:
2、下载使用Zend2所需的引用文件(可在线安装或离线下载放到对应目录下./vendor/ZF2/):

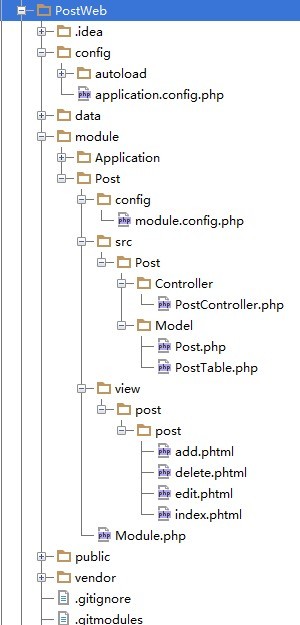
3、创建一个自己的实例(新增了部分文件以下给出说明),结构如下:
4、创建Module文件,本例(Post)
./module/Post/Module.php:
<?php
/**
 * No.1
 * ZF2的模块管理器(ModuleManager),在 /module/Post中查找 Module.php
 * 注意命名空间,目录名就是模块名
 * @xwl
 * 2014-10-21 14:49
 */

// 以模块名为命名空间
namespace Post;

/*
 * 需定义 function getConfig()、function getAutoloaderConfig(),模块管理器(moduleManager)自动调用
 */
class Module
{
	/*
	 * 获取配置信息
	 */
	public function getConfig()
	{
		return include __DIR__ . '/config/module.config.php';
	}

	/*
	 * 返回与 ZF2 AutoloaderFactory 相兼容的数组
	 */
	public function getAutoloaderConfig()
	{
		return array(
			'Zend\Loader\StandardAutoloader' => array(
				'namespaces' => array(
					__NAMESPACE__ => __DIR__ . '/src/' . __NAMESPACE__,
				),
			),
		);
	}

}5、创建module的config文件
./module/Post/config/module.config.php:
本例路由规则,接收/post/[action]/[id]的规则,默认访问/post/index
申明控制器PostController
申明视图view文件的位置
<?php
/**
 * No.2
 * 该文件返回一个配置信息,通过 ServiceManager 传递给相关的组件
 * @xwl
 * 2014-10-21 15:02
 */

return array(

	/*
	 * No.3
	 * 创建路由规则
	 */
	'router' => array(
		'routes' => array(
			'post' => array(
				'type' => 'segment',	// segment 使用占位符
				'options' => array(
					'route' => '/post[/:action][/:id]',	// 匹配 /post 开头的url
					'constraints' => array(
						'action' => '[a-zA-Z][a-zA-Z0-9_-]*',
						'id' => '[0-9]+',
					),
					'defaults' => array(
						'controller' => 'Post\Controller\Post',
						'action' => 'index',
					),
				),
			),
		),
	),

	/*
	 * 模块控制器(controller)
	 */
	'controllers' => array(
		'invokables' => array(
			'Post\Controller\Post' => 'Post\Controller\PostController',
		),
	),

	/*
	 * 指定视图(view)所在目录
	 */
	'view_manager' => array(
		'template_path_stack' => array(
			'post' => __DIR__.'/../view',
		),
	),

);
修改zend2的config文件
./config/application.config.php
<?php
/*
 * No.3
 * 将新模块 Post 添加到 modules 字段中
 */
return array(

    // This should be an array of module namespaces used in the application.
	/*
	 * modules 保存使用到的命名空间
	 */
    'modules' => array(
        'Application',
		'Post',	// add @xwl
    ),

    // These are various options for the listeners attached to the ModuleManager
	/*
	 * 有关模块管理器(ModuleManager)的监听器的选项
	 */
    'module_listener_options' => array(
        // This should be an array of paths in which modules reside.
        // If a string key is provided, the listener will consider that a module
        // namespace, the value of that key the specific path to that module's
        // Module class.
		/*
		 * /module 创建模块的路径
		 * /vendor ZF2 类库的位置
		 */
        'module_paths' => array(
            './module',
            './vendor',
        ),

        // An array of paths from which to glob configuration files after
        // modules are loaded. These effectively override configuration
        // provided by modules themselves. Paths may use GLOB_BRACE notation.
		/*
		 * 全局变量文件所在的位置
		 * /config/autoload/global.php
		 * /config/autoload/local.php
		 */
        'config_glob_paths' => array(
            'config/autoload/{,*.}{global,local}.php',
        ),

        // Whether or not to enable a configuration cache.
        // If enabled, the merged configuration will be cached and used in
        // subsequent requests.
		/*
		 * 是否允许使用缓存,默认不允许
		 */
        //'config_cache_enabled' => $booleanValue,

        // The key used to create the configuration cache file name.
		/*
		 * 若开启缓存,用作创建配置信息缓存文件名
		 */
        //'config_cache_key' => $stringKey,

        // Whether or not to enable a module class map cache.
        // If enabled, creates a module class map cache which will be used
        // by in future requests, to reduce the autoloading process.
		/*
		 * 是否允许模块(module)类地图缓存,目的是减少自动调用(autoloading)的过程,默认不允许
		 */
        //'module_map_cache_enabled' => $booleanValue,

        // The key used to create the class map cache file name.
		/*
		 * 若开启模块类地图缓存,用作创建缓存文件名
		 */
        //'module_map_cache_key' => $stringKey,

        // The path in which to cache merged configuration.
		/*
		 * 配置信息缓存的路径,默认不使用
		 */
        //'cache_dir' => $stringPath,

        // Whether or not to enable modules dependency checking.
        // Enabled by default, prevents usage of modules that depend on other modules
        // that weren't loaded.
		/*
		 * 是否允许模块(module)依赖性检查
		 */
        // 'check_dependencies' => true,
    ),

    // Used to create an own service manager. May contain one or more child arrays.
    //'service_listener_options' => array(
    //     array(
    //         'service_manager' => $stringServiceManagerName,
    //         'config_key'      => $stringConfigKey,
    //         'interface'       => $stringOptionalInterface,
    //         'method'          => $stringRequiredMethodName,
    //     ),
    // )

   // Initial configuration with which to seed the ServiceManager.
   // Should be compatible with Zend\ServiceManager\Config.
   // 'service_manager' => array(),
);
6、创建控制器Controller
./module/Post/src/Post/Controller/PostController.php:
注意namespace的申明
<?php
/**
 * No.4
 * 创建控制器(Controller)
 * @xwl
 * 2014-10-21 15:38
 */

namespace Post\Controller;

/*
 * ZF2 提供了两个常见的抽象类 AbstractActionController、AbstractRestfulController
 * 一般使用标准的 abstract action controller
 */
use Zend\Mvc\Controller\AbstractActionController;

/*
 * 构建视图(view)必须的引用
 */
use Zend\View\Model\ViewModel;

class PostController extends AbstractActionController
{
	public function indexAction()
	{
		return new ViewModel();
	}

	public function addAction()
	{
		return new ViewModel();
	}

	public function editAction()
	{
		return new ViewModel();
	}

	public function deleteAction()
	{
		return new ViewModel();
	}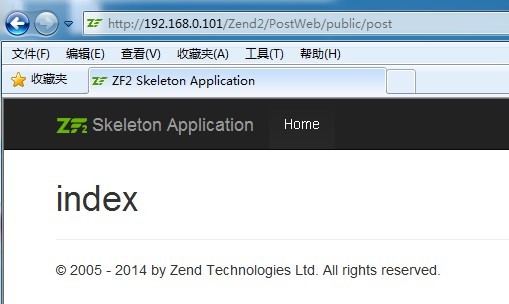
}7、创建对应的视图模板view
./module/Post/view/post/post/index.phtml
<h1>index</h1>8、访问一下,可以看到示例页面:


 864
864

 被折叠的 条评论
为什么被折叠?
被折叠的 条评论
为什么被折叠?
 到【灌水乐园】发言


