


安全框架security完整名称为Spring Security,依赖Spring框架工作。其功能主要是身份认证和授权。
关键词:
Authentiction:认证
Authorization:授权
web服务的身份认证,一般在接口正式调用之前,所以应该在拦截器和过滤器中去实现。security已经内置了很多现成的过滤器,框架应用的主要操作是通过配置去调用这些过滤器。
一、首先我们建立一个springboot服务。服务里面什么也没有,将端口号改为6005。该端口不是必须的,不过在学习的时候,为了不和其他服务冲突,习惯上改一下端口号。
二、添加pom依赖库
        <dependency>
            <groupId>org.springframework.boot</groupId>
            <artifactId>spring-boot-starter-security</artifactId>
        </dependency>

        <dependency>
            <groupId>org.projectlombok</groupId>
            <artifactId>lombok</artifactId>
            <optional>true</optional>
        </dependency>
三、为了测试,我们编写一个简单的接口。
package com.chris.sec.api;

import org.springframework.web.bind.annotation.GetMapping;
import org.springframework.web.bind.annotation.RequestMapping;
import org.springframework.web.bind.annotation.RestController;

/**
 * create by: Chris Chan
 * create on: 2019/10/11 11:20
 * use for:
 */
@RestController
@RequestMapping("/api/test")
public class TestApi {
    @GetMapping("/test")
    public String test() {
        return "Test success.";
    }
}
此时我们启动服务,再启动的过程中我们会发现控制台打印出一行信息:
Using generated security password: 88f73b7f-04fe-47b8-b8e1-0a39fa74b573我们虽然什么也没有做,但是secrity自动配置已然生效。服务已经启动身份认证,而且给我们一个系统计算好的密码,这个密码匹配的用户名是user。
我们在浏览器中输入http://localhost:6006/api/test/test来调用我们的接口,由于身份验证不通过,页面会自动跳转到http://localhost:6006/login,要我们输入用户名和密码:

我们输入:
Username:user
Password:88f73b7f-04fe-47b8-b8e1-0a39fa74b573
我们看到了错误提示
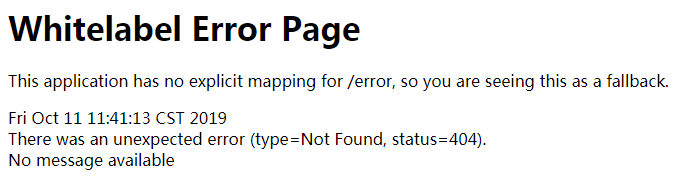
提示出错,猜测可能login请求也被拦截。我们需要配置一下。
四、创建security的配置文件,做简单的配置
package com.chris.sec.config;

import org.springframework.context.annotation.Configuration;
import org.springframework.security.config.annotation.web.builders.HttpSecurity;
import org.springframework.security.config.annotation.web.configuration.EnableWebSecurity;
import org.springframework.security.config.annotation.web.configuration.WebSecurityConfigurerAdapter;

/**
 * create by: Chris Chan
 * create on: 2019/10/11 11:48
 * use for:
 */
@Configuration
@EnableWebSecurity
public class SecurityConfig extends WebSecurityConfigurerAdapter {
    @Override
    protected void configure(HttpSecurity http) throws Exception {
        http
                .httpBasic()
                .and()
                .authorizeRequests()
                .antMatchers("/login").permitAll()//对login放行
                .anyRequest().authenticated()
                .and()
                .csrf().disable();
    }
}
这时候密码已经改变,要注意。
我们再一次请求。
这时候浏览器弹出一个要求输入用户名和密码的对话框。

我们输入用户信息。点击登录。

我们得到了正确的调用结果。
五、上面的测试,使用的是自动配置的用户user,这个用户在业务中是不能使用的,我们需要有自己的用户信息。我们一般在数据库中放置自己的用户信息,然后通过dao去查询。本实例为了方便,不使用数据库,而是选择在内存中放置几个用户来测试。
我们需要在SecurityConfig中重写另外一个configure方法:
    @Override
    protected void configure(AuthenticationManagerBuilder auth) throws Exception {
        auth
                .inMemoryAuthentication()//在内存中存放信息
                .withUser("zhangsan").password("123456").roles("ADMIN","USER").and()
                .withUser("lisi").password("123456").roles("USER");
    }
我们在内存中放置了zhangsan、lisi两个用户,而且设置了密码和权限。
我们重新启动调用一下。会发现控制台打印的密码不见了,现在使用的是我们自己的用户名和密码。
尝试调用一下。会发现依然不能登录。
这是因为内存密码已经被加密过,登录密码没有被加密。我们需要指定一个PasswordEncoder。我们在SecurityConfig中添加一个方法
    @Bean
    public PasswordEncoder passwordEncoder() {
        return new BCryptPasswordEncoder();
    }
并且在刚才添加内存数据的方法中添加一行:
                .and()
                .passwordEncoder(passwordEncoder())
重新调用成功。
这里说明,不管是在内存中还是在数据库中,预设用户信息时,一定要先将密码进行加密。而且和验证时使用的一定要是同一个PasswordEncoder。我们也可以自己实现一个PasswordEncoder.
package com.chris.sec.config;

import org.springframework.security.crypto.password.PasswordEncoder;
import org.springframework.stereotype.Component;

/**
 * create by: Chris Chan
 * create on: 2019/10/11 12:25
 * use for:
 */
@Component
public class MyPasswordEncoder implements PasswordEncoder {
    @Override
    public String encode(CharSequence rawPassword) {
        return rawPassword.toString();
    }

    @Override
    public boolean matches(CharSequence rawPassword, String encodedPassword) {
        return encodedPassword.equals(rawPassword);
    }
}
这个加密器很简单,就是不加密!!具体逻辑可以发挥自己的才智去设计可靠的算法。如果验证的时候需要自己去对比密码,可以使用matches方法,参数分别是明码、密码。
重启调用成功。
六、接下来,我们需要和业务近距离对接。因为上面的仅仅是测试。而我们的用户信息是需要在数据库中去查的。所以我们需要做一些修改。
先添加一个UserDeailtsService的实现.,实际上这个就是service层关于用户的处理,只是需要实现一个方法
package com.chris.sec.service;

import org.springframework.beans.factory.annotation.Autowired;
import org.springframework.security.core.authority.AuthorityUtils;
import org.springframework.security.core.userdetails.User;
import org.springframework.security.core.userdetails.UserDetails;
import org.springframework.security.core.userdetails.UserDetailsService;
import org.springframework.security.core.userdetails.UsernameNotFoundException;
import org.springframework.security.crypto.password.PasswordEncoder;
import org.springframework.stereotype.Service;
import org.springframework.util.StringUtils;

import java.util.HashMap;
import java.util.Map;

/**
 * create by: Chris Chan
 * create on: 2019/10/11 12:31
 * use for:
 */
@Service
public class UserService implements UserDetailsService {
    private static Map<String, String> userMap = new HashMap<>(16);
    @Autowired
    PasswordEncoder passwordEncoder;

    @Override
    public UserDetails loadUserByUsername(String username) throws UsernameNotFoundException {
        if (StringUtils.isEmpty(username)) {
            return null;
        }
        String password = findUser(username);
        if (StringUtils.isEmpty(password)) {
            return null;
        }
        return new User(username, password, AuthorityUtils.createAuthorityList("ROLE_ADMIN", "ROLE_USER"));
    }

    /**
     * 返回密码
     * 这个方法可以假设是从数据库dao层获取到用户信息
     *
     * @param username
     * @return
     */
    private String findUser(String username) {
        if (null == userMap) {
            userMap = new HashMap<>(16);
        }
        //内置几个用户
        if (userMap.size() == 0) {
            userMap.put("zhangsanfeng", passwordEncoder.encode("123123"));
            userMap.put("lisifu", passwordEncoder.encode("123123"));
        }
        return userMap.get(username);
    }
}
而SecurityConfig也需要做一些改变目前应该是这个样子。
package com.chris.sec.config;

import com.chris.sec.service.UserService;
import org.springframework.beans.factory.annotation.Autowired;
import org.springframework.context.annotation.Configuration;
import org.springframework.security.config.annotation.authentication.builders.AuthenticationManagerBuilder;
import org.springframework.security.config.annotation.web.builders.HttpSecurity;
import org.springframework.security.config.annotation.web.configuration.EnableWebSecurity;
import org.springframework.security.config.annotation.web.configuration.WebSecurityConfigurerAdapter;
import org.springframework.security.crypto.password.PasswordEncoder;

/**
 * create by: Chris Chan
 * create on: 2019/10/11 11:48
 * use for:
 */
@Configuration
@EnableWebSecurity
public class SecurityConfig extends WebSecurityConfigurerAdapter {
    @Autowired
    UserService userService;
    @Autowired
    PasswordEncoder passwordEncoder;

    @Override
    protected void configure(HttpSecurity http) throws Exception {
        http
                .httpBasic()
                .and()
                .authorizeRequests()
                .antMatchers("/login").permitAll()//对login放行
                .anyRequest().authenticated()
                .and()
                .csrf().disable();
    }

    @Override
    protected void configure(AuthenticationManagerBuilder auth) throws Exception {
        auth
                .userDetailsService(userService)
                .passwordEncoder(passwordEncoder);
    }

}
可以看出,已经去除了内存中放置的用户,转而使用UserService来提供用户信息,这样就便于和我们自己的具体业务对接了。不过因为没有使用数据库,实际上测试的用户还是在内存中。
重新测试一下,会发现就得用户已经没有用了,新的用户就可以登录。
七、下来我们测试权限验证
我们添加一个接口,并且加上@Secured注解
    @Secured("ROLE_SYS")
    @GetMapping("/test2")
    public String test2() {
        return "Test2 success.";
    }
测试发现,我们内置的两个用户都没有ROLE_SYS权限,但是接口依然可以调用。
我们需要在SecurityConfig类上面添加注解
@EnableGlobalMethodSecurity(securedEnabled = true)为了测试,我们需要设置权限不同的用户,因此我们对UserService做了较大的改动
package com.chris.sec.service;

import org.springframework.beans.factory.annotation.Autowired;
import org.springframework.security.core.GrantedAuthority;
import org.springframework.security.core.authority.AuthorityUtils;
import org.springframework.security.core.userdetails.User;
import org.springframework.security.core.userdetails.UserDetails;
import org.springframework.security.core.userdetails.UserDetailsService;
import org.springframework.security.core.userdetails.UsernameNotFoundException;
import org.springframework.security.crypto.password.PasswordEncoder;
import org.springframework.stereotype.Service;
import org.springframework.util.StringUtils;

import java.util.HashMap;
import java.util.List;
import java.util.Map;

/**
 * create by: Chris Chan
 * create on: 2019/10/11 12:31
 * use for:
 */
@Service
public class UserService implements UserDetailsService {
    private static Map<String, String> userMap = new HashMap<>(16);
    private static Map<String, String> userAuthMap = new HashMap<>(16);
    @Autowired
    PasswordEncoder passwordEncoder;

    @Override
    public UserDetails loadUserByUsername(String username) throws UsernameNotFoundException {
        if (StringUtils.isEmpty(username)) {
            return null;
        }
        String password = findUser(username);
        if (StringUtils.isEmpty(password)) {
            return null;
        }
        return new User(username, password, getAuthorityList(username));
    }

    /**
     * 返回密码
     * 这个方法可以假设是从数据库dao层获取到用户信息
     *
     * @param username
     * @return
     */
    private String findUser(String username) {
        if (null == userMap) {
            userMap = new HashMap<>(16);
        }
        //内置几个用户
        if (userMap.size() == 0) {
            userMap.put("zhangsanfeng", passwordEncoder.encode("123123"));
            userMap.put("lisifu", passwordEncoder.encode("123123"));
            userMap.put("songzihao", passwordEncoder.encode("123123"));
        }
        return userMap.get(username);
    }

    /**
     * 获取用户权限
     * 这个方法也可以在数据库中查询
     *
     * @param username
     * @return
     */
    private List<GrantedAuthority> getAuthorityList(String username) {

        if (null == userAuthMap) {
            userAuthMap = new HashMap<>(16);
        }
        //内置几个用户权限
        if (userAuthMap.size() == 0) {
            userAuthMap.put("zhangsanfeng", "ROLE_ADMIN,ROLE_USER");
            userAuthMap.put("lisifu", "ROLE_ADMIN,ROLE_USER");
            userAuthMap.put("songzihao", "ROLE_SYS,ROLE_ADMIN,ROLE_USER");
        }
        return AuthorityUtils.createAuthorityList(userAuthMap.get(username).split(","));
    }
}
我们增加了一个用户songzihao,具有ROLE_SYS权限,其他两个都不具备。
重新测试,使用原来两个用户去调用test2接口,都会报403错误,这就是没有权限的原因。

而使用songzihao这个用户就能成功调用。
八、补充
在pom中添加依赖
        <dependency>
            <groupId>org.springframework.boot</groupId>
            <artifactId>spring-boot-starter-thymeleaf</artifactId>
        </dependency>
SecurityConfig可以改成以下内容:
package com.chris.sec.config;

import com.chris.sec.service.UserService;
import org.springframework.beans.factory.annotation.Autowired;
import org.springframework.context.annotation.Configuration;
import org.springframework.security.config.annotation.authentication.builders.AuthenticationManagerBuilder;
import org.springframework.security.config.annotation.method.configuration.EnableGlobalMethodSecurity;
import org.springframework.security.config.annotation.web.builders.HttpSecurity;
import org.springframework.security.config.annotation.web.configuration.EnableWebSecurity;
import org.springframework.security.config.annotation.web.configuration.WebSecurityConfigurerAdapter;
import org.springframework.security.crypto.password.PasswordEncoder;

/**
 * create by: Chris Chan
 * create on: 2019/10/11 11:48
 * use for:
 */
@Configuration
@EnableWebSecurity
@EnableGlobalMethodSecurity(securedEnabled = true)
public class SecurityConfig extends WebSecurityConfigurerAdapter {
    @Autowired
    UserService userService;
    @Autowired
    PasswordEncoder passwordEncoder;

    @Override
    protected void configure(HttpSecurity http) throws Exception {
        http
                .cors()
                .and()
                //.httpBasic()
                .formLogin()//form登录 默认/login
                //.loginPage("/login_code_bak.html").permitAll()
                //.loginProcessingUrl("/login").permitAll()
                .and()
                .logout()//退出登录 默认/logout
                .and()
                .authorizeRequests()
                //.antMatchers("/login").permitAll()//对login放行
                .anyRequest().authenticated()
                .and()
                .csrf().disable();
    }

    @Override
    protected void configure(AuthenticationManagerBuilder auth) throws Exception {
        auth
                .userDetailsService(userService)
                .passwordEncoder(passwordEncoder);
    }

}
参考或者忽略掉注释掉的部分,系统将使用form方式处理登录,使用默认的登录页面和退出登录的url。
不过实际业务中不会这么用,登录页面都是web前端写好的页面,他们只是调用接口获得结果,并不需要后端服务提供具体的页面。


 315
315


 被折叠的 条评论
为什么被折叠?
被折叠的 条评论
为什么被折叠?
 到【灌水乐园】发言


