


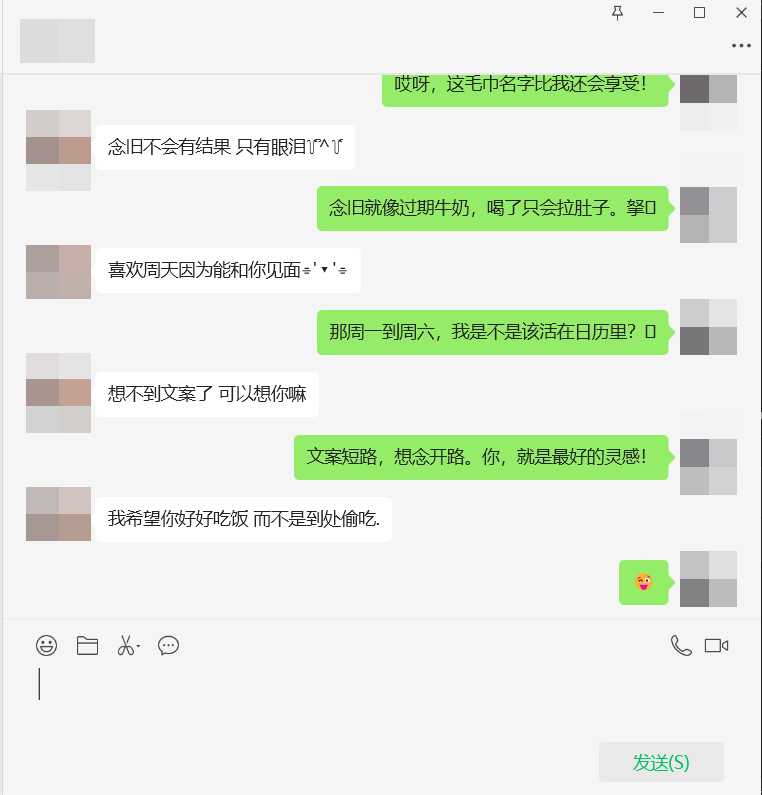
展示
微信与星火
准备
- 讯飞账号
- uiautomation模块
流程
使用uiautomation获取聊天消息(文本),将聊天消息传给星火大模型,得到大模型的输出,最后将大模型的输出作为微信聊天的输入即可
部署
一、下载api
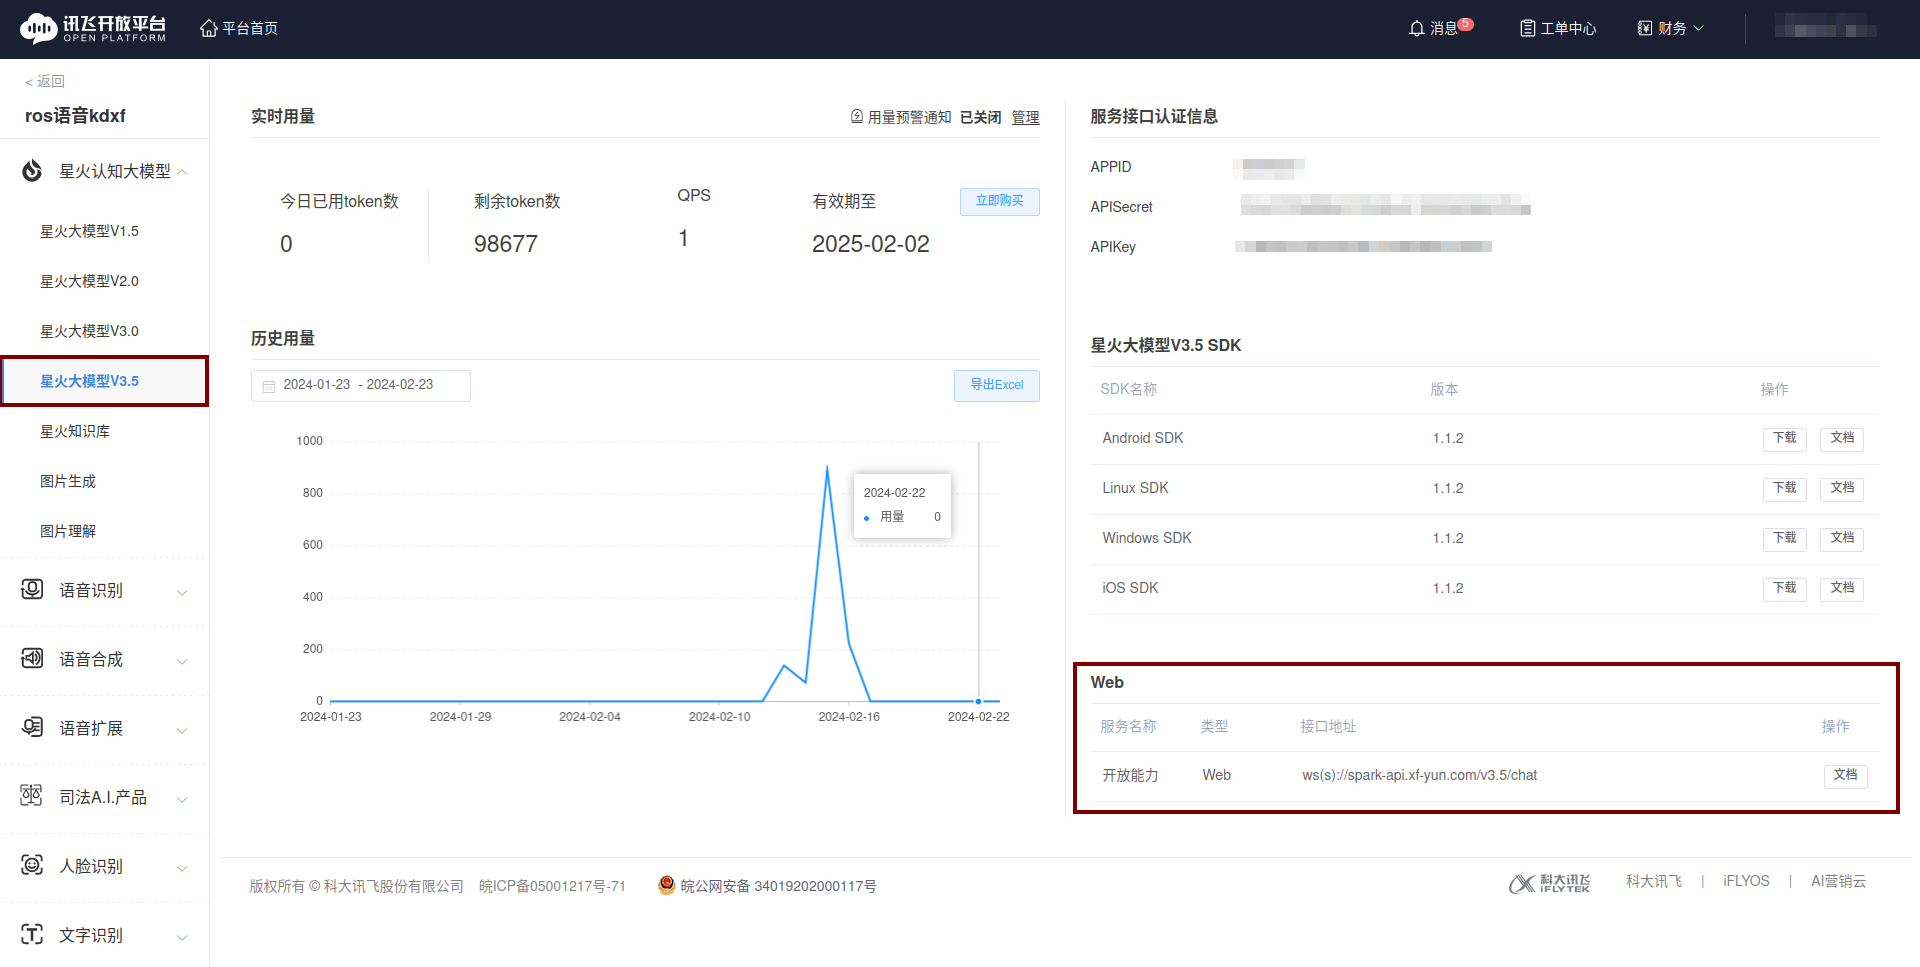
1.进入星火官网(注册)登陆账号,进入以下页面
完成个人认证后可拥有10000的免费token
进入Web文档
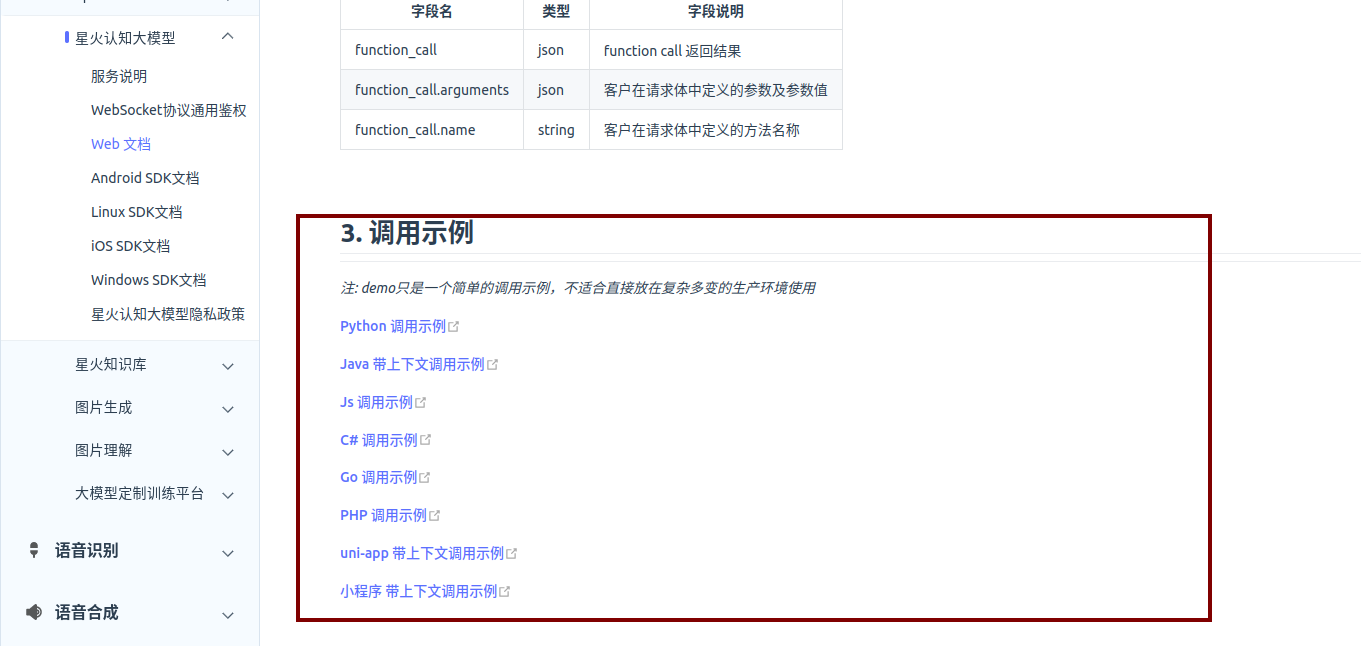
我习惯使用Python,点击Python调用示例,会自动下载一个压缩包
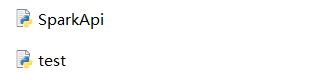
解压后得到两个文件
二、写自动化脚本
创建一个py文件,我给其命名为Ai_chat.py
首先定位到微信窗口
import uiautomation as auto
wx = auto.WindowControl(Name="微信", ClassName='WeChatMainWndForPC')
wx.SwitchToThisWindow()
遍历每一个会话名,是否有新消息在其中,有新消息则点击
for session in sessions_c.GetChildren():
    if '条新消息' in session.Name:
        current_contact = wx.GetLastChildControl().GetFirstChildControl().GetLastChildControl().TextControl().Name
        print('cur:' + current_contact)
        contact = session.GetChildren()[0].GetChildren()[1].GetChildren()[0].GetChildren()[0].Name
        print('cont' + contact)
        # 重复点击会被微信理解为双击动作,双击会弹出到一个新窗口
        # 只有当新消息会话和当前会话不同时才点击切换
        if current_contact != contact:
            session.Click()
获取当前会话里的最后一个文本
messages = wx.ListControl(Name='消息')
message = messages.GetChildren()[-1]
导入上面下载好的SparkApi,并将test.py中定义的函数及前面的密钥信息等,放入我们刚刚写的Ai_chat.py里
# 以下密钥信息从控制台获取
appid = ""
api_secret = ""
api_key = ""
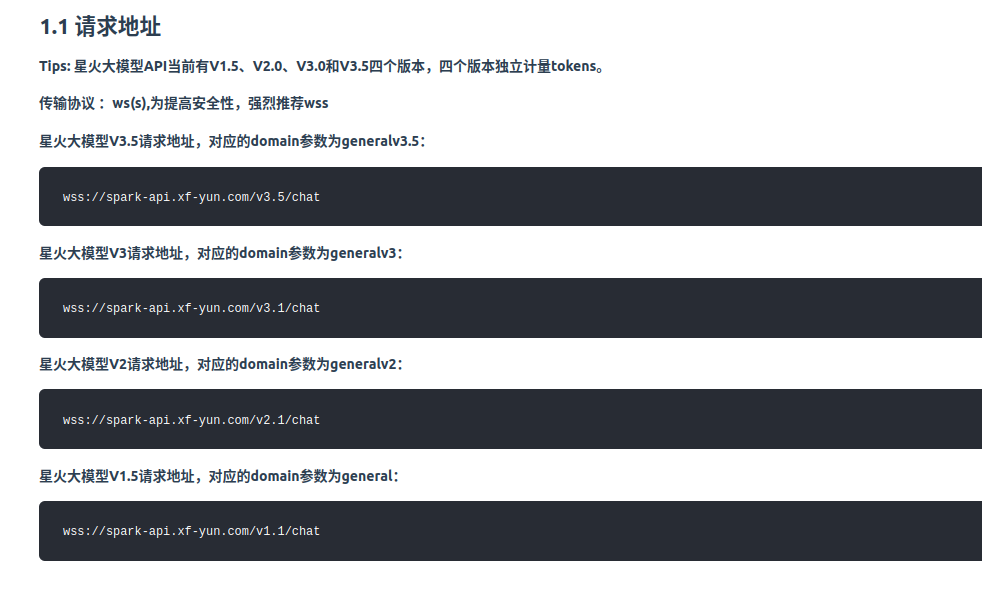
domain = "generalv3.5" # v3.0版本
Spark_url = "wss://spark-api.xf-yun.com/v3.5/chat" # v3.5环境的地址
环境的填写官网有说的
将question传给大模型,大模型生成的回复会以str格式保存到SparkApi.answer中
setting = '用幽默高情商风格回复字数不超15:'
question = checklen(getText("user", setting + Input))
SparkApi.answer = ""
SparkApi.main(appid, api_key, api_secret, Spark_url, domain, question)
最后把回复填到会话中,模拟按下Enter键
# 切换会话时会自动进入编辑,所以可以直接用刚开始定义的wx句柄
wx.SendKeys(SparkApi.answer, waitTime=2)
wx.SendKeys('{Enter}', waitTime=1)
完整代码
import uiautomation as auto
import re
import SparkApi

# 以下密钥信息从控制台获取
appid = ""  # 填写控制台中获取的 APPID 信息
api_secret = ""  # 填写控制台中获取的 APISecret 信息
api_key = ""  # 填写控制台中获取的 APIKey 信息
domain = "generalv3.5"    # v3.0版本
Spark_url = "wss://spark-api.xf-yun.com/v3.5/chat"  # v3.5环境的地址

text = []


def getText(role, content):
    jsoncon = {}
    jsoncon["role"] = role
    jsoncon["content"] = content
    text.append(jsoncon)
    return text


def getlength(text):
    length = 0
    for content in text:
        temp = content["content"]
        leng = len(temp)
        length += leng
    return length


def checklen(text):
    while getlength(text) > 8000:
        del text[0]
    return text


wx = auto.WindowControl(Name="微信", ClassName='WeChatMainWndForPC')
wx.SwitchToThisWindow()

# 消息类型过滤
filter_type = ['[视频]', '[动画表情]', '[图片]', '[链接]', '发出红包,请在手机上查看']
filter_meaningless = ['嗯', '嗯嗯', '好的', '好', '哦', '噢噢', 'ok', 'OK', '欧克']
filter_time = '\d{4}年\d{1,2}月\d{1,2}日 \d{1,2}:\d{2}'
sessions_c = wx.ListControl(Name='会话')


# 当满足一系列条件才开启与大模型的对话
open_answer = False


while True:

    Input = ''
    for session in sessions_c.GetChildren():
        if '条新消息' in session.Name:
            current_contact = wx.GetLastChildControl().GetFirstChildControl().GetLastChildControl().TextControl().Name
            print('cur:' + current_contact)
            contact = session.GetChildren()[0].GetChildren()[1].GetChildren()[0].GetChildren()[0].Name
            print('cont' + contact)
            if current_contact != contact:
                session.Click()

            messages = wx.ListControl(Name='消息')
            message = messages.GetChildren()[-1]
            if message.Name not in filter_type:
                if not re.match(filter_time, message.Name):
                    if message.Name not in filter_meaningless:
                        open_answer = True
                        Input = message.Name

    if open_answer:
        text.clear()
        setting = '用幽默高情商风格回复字数不超15:'
        question = checklen(getText("user", setting + Input))
        SparkApi.answer = ""
        SparkApi.main(appid, api_key, api_secret, Spark_url, domain, question)
        getText("assistant", SparkApi.answer)
        # print(str(text))
        # 切换会话时会自动进入编辑
        wx.SendKeys(SparkApi.answer, waitTime=2)
        wx.SendKeys('{Enter}', waitTime=1)
        open_answer = False
补充:
因为官网的Python调用示例有时会更新,我们写好的自动化脚本会因为SparkApi中的参数调整、变量调整等原因而执行失败,所以这里我将可以成功执行的SparkApi方到这里
import _thread as thread
import base64
import datetime
import hashlib
import hmac
import json
from urllib.parse import urlparse
import ssl
from datetime import datetime
from time import mktime
from urllib.parse import urlencode
from wsgiref.handlers import format_date_time

import websocket  # 使用websocket_client

answer = ""


class Ws_Param(object):
    # 初始化
    def __init__(self, APPID, APIKey, APISecret, Spark_url):
        self.APPID = APPID
        self.APIKey = APIKey
        self.APISecret = APISecret
        self.host = urlparse(Spark_url).netloc
        self.path = urlparse(Spark_url).path
        self.Spark_url = Spark_url

    # 生成url
    def create_url(self):
        # 生成RFC1123格式的时间戳
        now = datetime.now()
        date = format_date_time(mktime(now.timetuple()))

        # 拼接字符串
        signature_origin = "host: " + self.host + "\n"
        signature_origin += "date: " + date + "\n"
        signature_origin += "GET " + self.path + " HTTP/1.1"

        # 进行hmac-sha256进行加密
        signature_sha = hmac.new(self.APISecret.encode('utf-8'), signature_origin.encode('utf-8'),
                                 digestmod=hashlib.sha256).digest()

        signature_sha_base64 = base64.b64encode(signature_sha).decode(encoding='utf-8')

        authorization_origin = f'api_key="{self.APIKey}", algorithm="hmac-sha256", headers="host date request-line", signature="{signature_sha_base64}"'

        authorization = base64.b64encode(authorization_origin.encode('utf-8')).decode(encoding='utf-8')

        # 将请求的鉴权参数组合为字典
        v = {
            "authorization": authorization,
            "date": date,
            "host": self.host
        }
        # 拼接鉴权参数,生成url
        url = self.Spark_url + '?' + urlencode(v)
        # 此处打印出建立连接时候的url,参考本demo的时候可取消上方打印的注释,比对相同参数时生成的url与自己代码生成的url是否一致
        return url


# 收到websocket错误的处理
def on_error(ws, error):
    print("### error:", error)


# 收到websocket关闭的处理
def on_close(ws, one, two):
    print(" ")


# 收到websocket连接建立的处理
def on_open(ws):
    thread.start_new_thread(run, (ws,))


def run(ws, *args):
    data = json.dumps(gen_params(appid=ws.appid, domain=ws.domain, question=ws.question))
    ws.send(data)


# 收到websocket消息的处理
def on_message(ws, message):
    # print(message)
    data = json.loads(message)
    code = data['header']['code']
    if code != 0:
        print(f'请求错误: {code}, {data}')
        ws.close()
    else:
        choices = data["payload"]["choices"]
        status = choices["status"]
        content = choices["text"][0]["content"]
        print(content, end="")
        global answer
        answer += content
        # print(1)
        if status == 2:
            ws.close()


def gen_params(appid, domain, question):
    """
    通过appid和用户的提问来生成请参数
    """
    data = {
        "header": {
            "app_id": appid,
            "uid": "1234"
        },
        "parameter": {
            "chat": {
                "domain": domain,
                "temperature": 0.5,
                "max_tokens": 2048
            }
        },
        "payload": {
            "message": {
                "text": question
            }
        }
    }
    return data


def main(appid, api_key, api_secret, Spark_url, domain, question):
    # print("星火:")
    wsParam = Ws_Param(appid, api_key, api_secret, Spark_url)
    websocket.enableTrace(False)
    wsUrl = wsParam.create_url()
    ws = websocket.WebSocketApp(wsUrl, on_message=on_message, on_error=on_error, on_close=on_close, on_open=on_open)
    ws.appid = appid
    ws.question = question
    ws.domain = domain
    ws.run_forever(sslopt={"cert_reqs": ssl.CERT_NONE})


 3836
3836

 被折叠的 条评论
为什么被折叠?
被折叠的 条评论
为什么被折叠?
 到【灌水乐园】发言


