


上图是待检测的图,主要目标是识别图中填空题的下划线,这样也就找到了试卷中的答案
1.配置OpenCV
环境:Win10+VS2015 + OpenCV3.4.1
1.下载OpenCV,到官网下载相对应的版本:https://opencv.org/
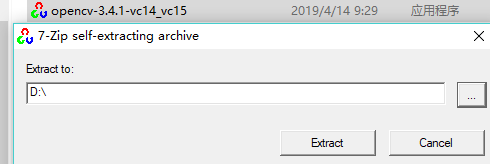
2.下载后直接解压,这里解压到D盘根目录了
3.系统环境变量配置
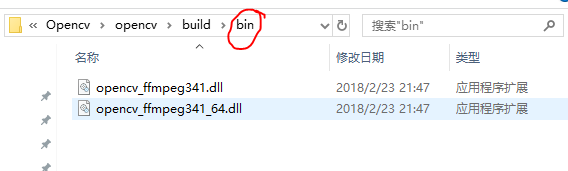
解压后,找到build下的bin目录,复制路径:D:\Opencv\opencv\build\bin
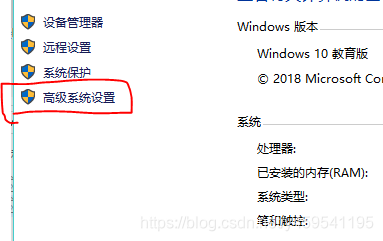
将这个路径添加系统变量里,右键 我的电脑,然后 属性 , 选择 高级系统设置,找到系统变量里的path路径
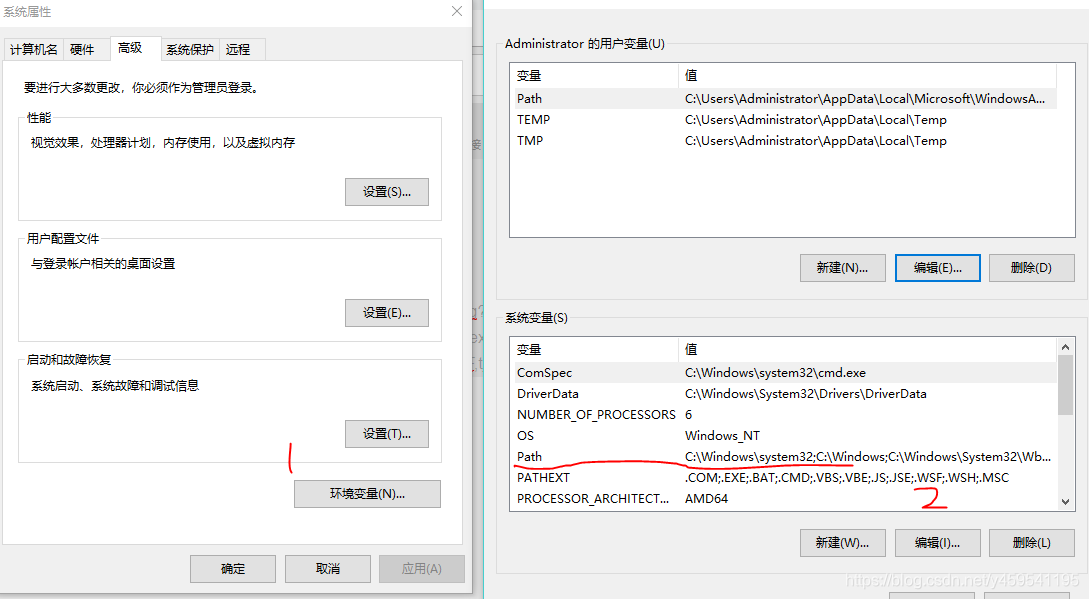
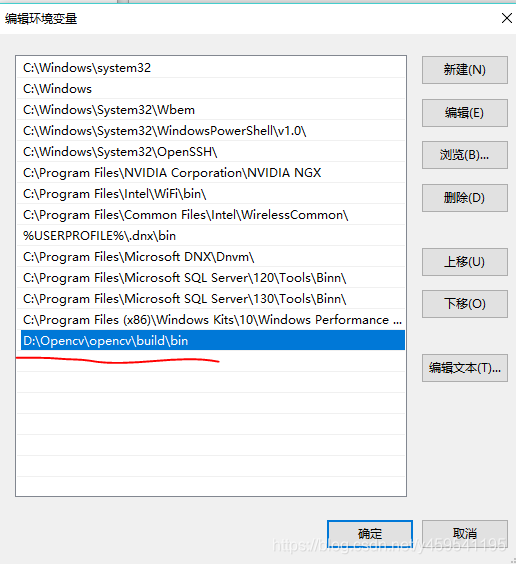
点击确定退出。
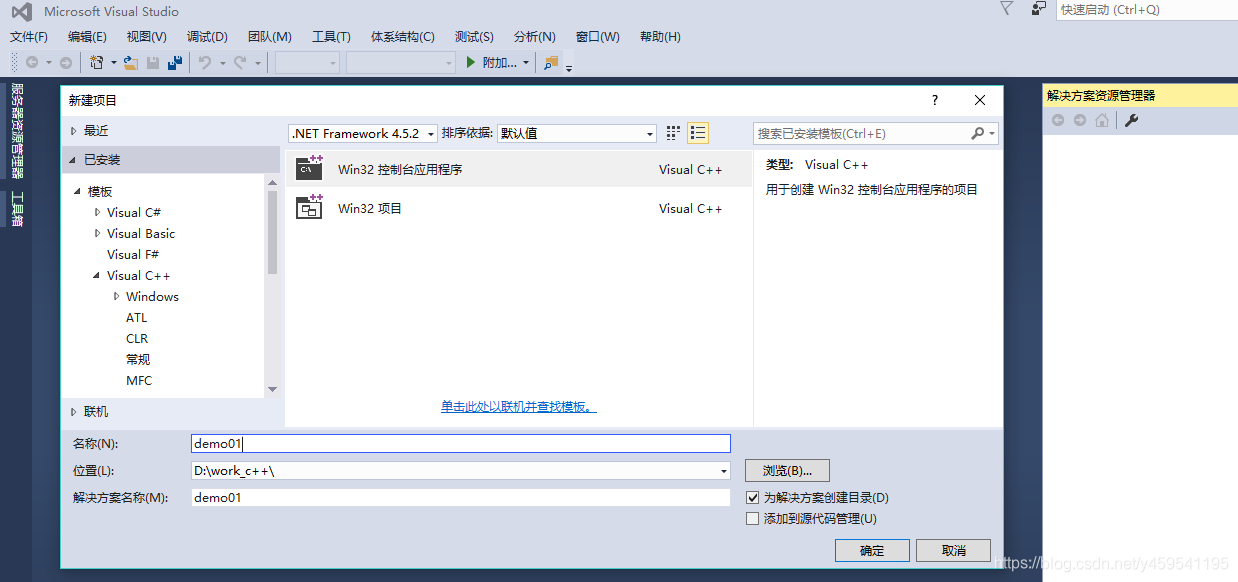
- vs2015里配置
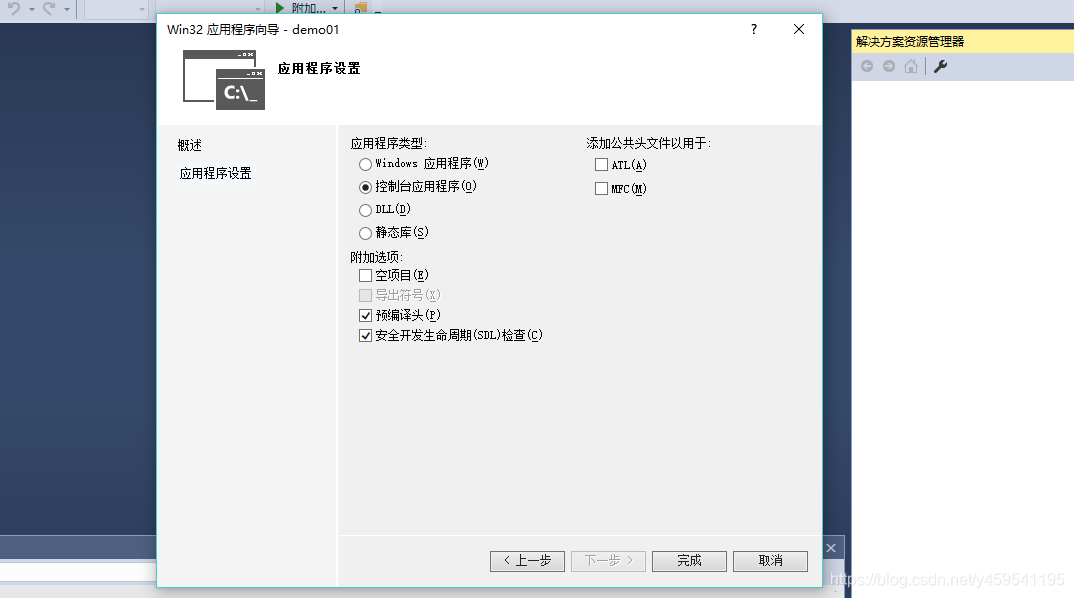
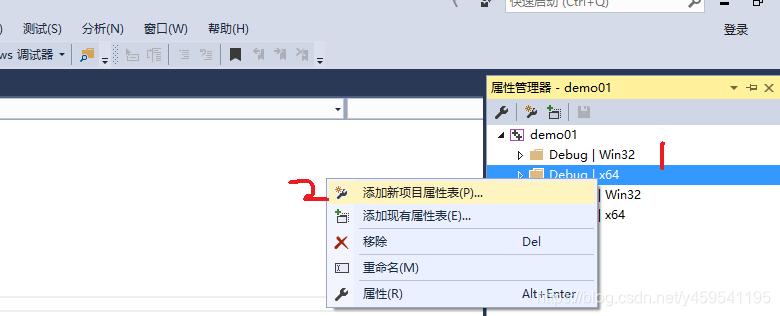
打开vs,新建一个项目
在视图下拉菜单的其他窗口,找到属性管理器,打开
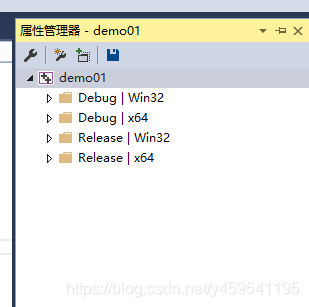
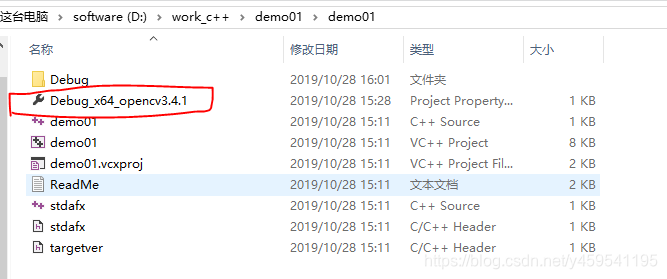
这里以Debug | x64模式配置为例,也可以直接配置Release模式,右击添加新项目属性:
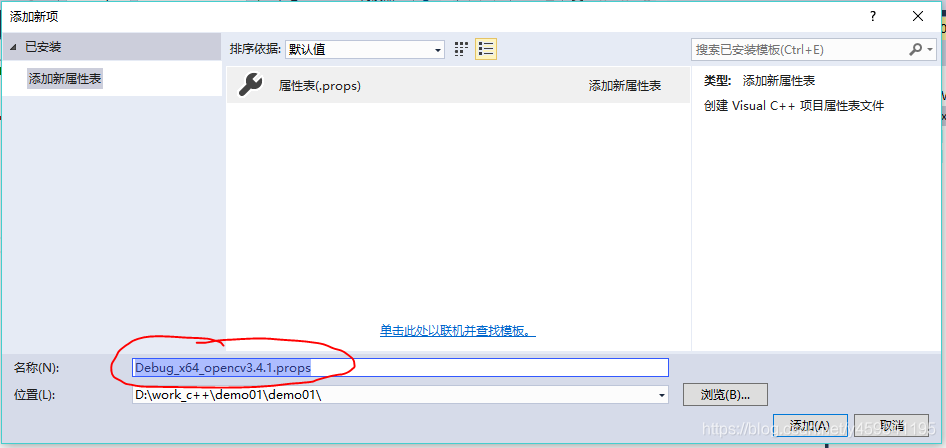
起个名字方便以后新建项目使用,这里是Debug_x64_opencv3.4.1
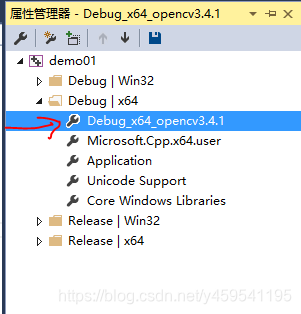
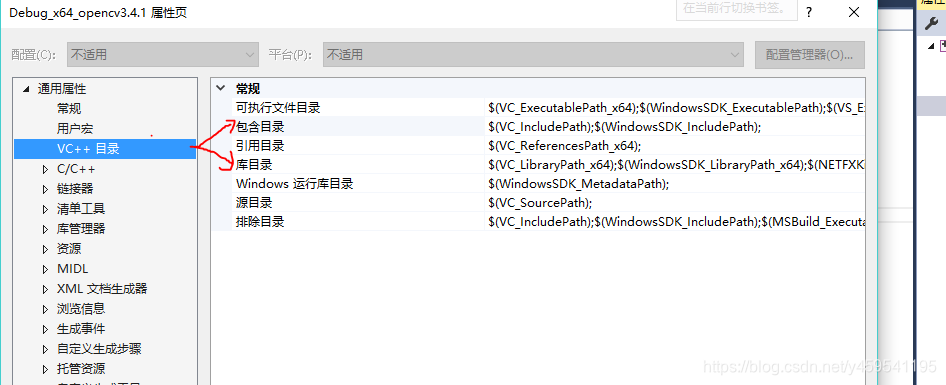
双击打开,修改C++目录:
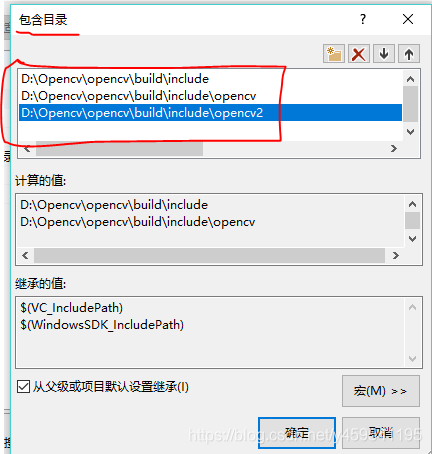
- 在包含目录里添加:
D:\Opencv\opencv\build\include
D:\Opencv\opencv\build\include\opencv
D:\Opencv\opencv\build\include\opencv2
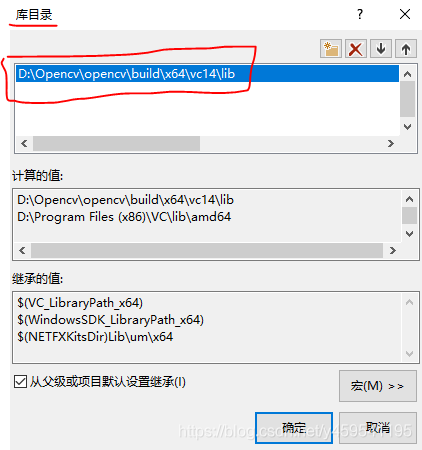
- 在库目录里添加:
D:\Opencv\opencv\build\x64\vc14\lib
注:这里的vc14对应VS2015版本
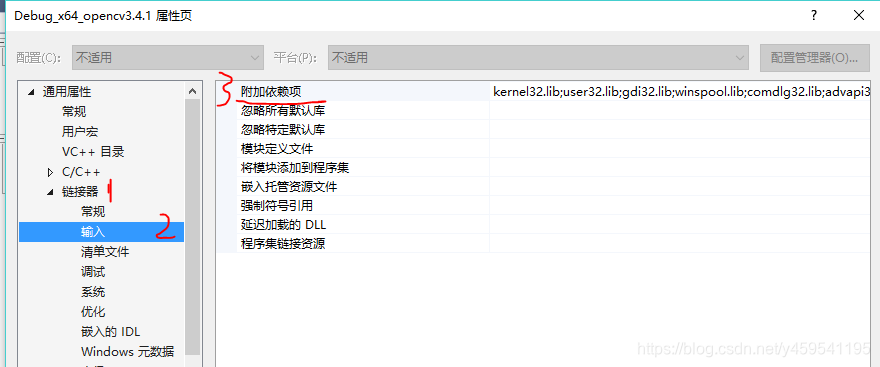
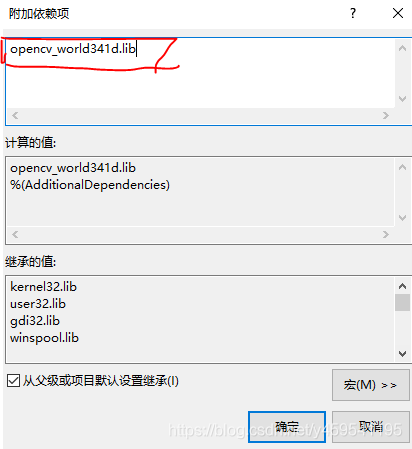
接着修改链接器:
输入–>附加依赖项
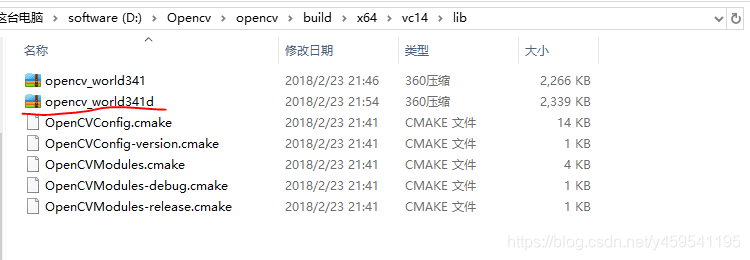
添加: opencv_world340d.lib
注:这个文件在刚添加的库目录D:\Opencv\opencv\build\x64\vc14\lib里面,带d是Debug版本,若配置release版添加opencv_world340.lib`
确定退出。
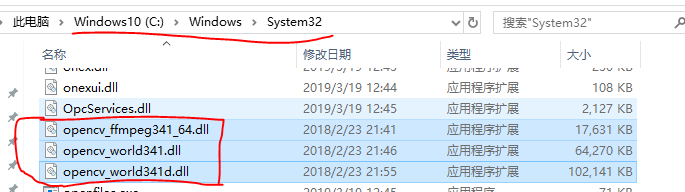
把D:\Opencv\opencv\build\x64\vc14\bin里三个dll文件复制到系统盘里(打开C盘,找到Windows–>System32文件夹)

这样就配置好OpenCV了。
另外如果配置了release版本属性文件注意切换模式:

属性配置文件可以拷到常用的目录里,下次新建项目,可以直接添加现有项,把属性配置文件加载到新的工程里,省去了重复配置
2.直线检测
先加载一下待处理图,看看OpenCV配置的有没有问题
#include "stdafx.h"
#include <opencv2/opencv.hpp>
#include <iostream>
#include <math.h>

using namespace cv;
using namespace std;

Mat src;
const char* input_title = "input image";
int main()
{
	//读取原图
	src = imread("D:\\work_c++\\444.jpg");
	//判断是否为空
	if (!src.data)
	{
		printf("load image fail...\n");
		return -1;
	}
	//char input[] ="input image";
	namedWindow(input_title, CV_WINDOW_AUTOSIZE);
	imshow(input_title, src);
	waitKey(0);
	return 0;
}

可以加载图像,说明OpenCV配置没有问题。
2.直线检测
这里尝试用三种方法来做,分别看看效果:
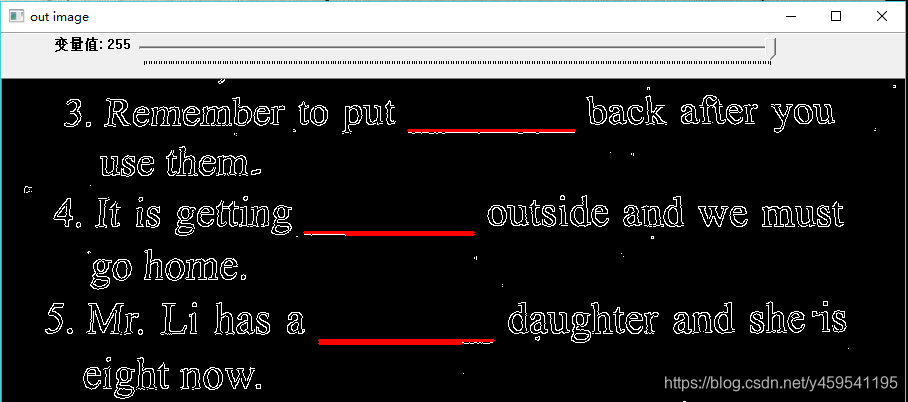
2.1 边缘检测Canny法
#include "stdafx.h"
#include <opencv2/opencv.hpp>
#include <iostream>
#include <math.h>

using namespace cv;
using namespace std;

Mat src, dst;
const char* input_title = "input image";
const char* out_lines = "out image";

int max_value = 255;
int threshold_value = 100;
void detect_lines(int, void*);
int main()
{
	//读取原图
	src = imread("D:\\work_c++\\444.jpg");

	//判断是否为空
	if (!src.data)
	{
		printf("load image fail ...\n");
		return -1;
	}
	//char input[] ="input image";
	namedWindow(input_title, CV_WINDOW_AUTOSIZE);
	imshow(input_title, src);

	namedWindow(out_lines, CV_WINDOW_AUTOSIZE);
	createTrackbar("变量值", out_lines, &threshold_value, max_value, detect_lines);
	detect_lines(0, 0);
	waitKey(0);
	return 0;
}

void detect_lines(int, void*)
{
	Canny(src, dst, threshold_value, 255, 3, false);
	vector<Vec4i> lines;
	HoughLinesP(dst, lines, 1, CV_PI / 180, 30, 40, 0);
	cvtColor(dst, dst, CV_GRAY2BGR);
	Mat srcImg = src.clone();
	for (size_t t = 0; t < lines.size(); t++)
	{
		Vec4i pl = lines[t];
		//line(dst, Point(pl[0], pl[1]), Point(pl[2], pl[3]), Scalar(0, 0, 255), 2, 8, 0);
		line(srcImg, Point(pl[0], pl[1]), Point(pl[2], pl[3]), Scalar(0, 0, 255), 2, 8, 0);
	}
	//imshow(out_lines, dst);
	imshow(out_lines, srcImg);
}
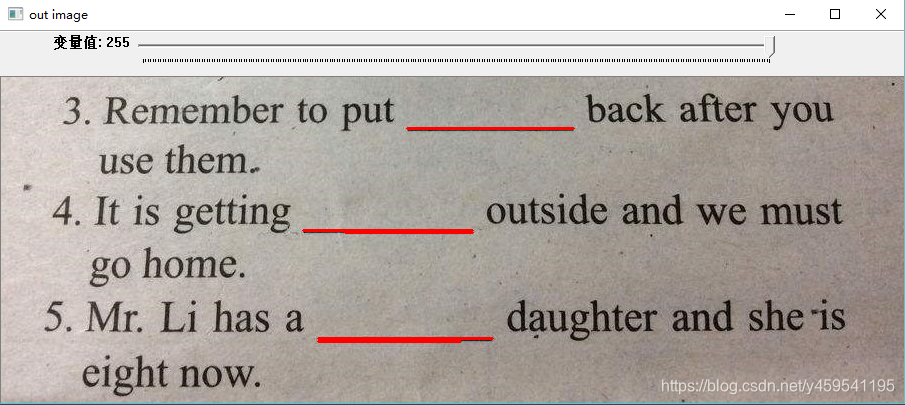
拖动滑块调一调找到合适阈值,效果如下:
2.2 阈值法
代码如下:
#include "stdafx.h"
#include <opencv2/opencv.hpp>
#include <iostream>
#include <math.h>

using namespace cv;
using namespace std;

Mat src, dst;
int max_value = 255;
int threshold_value = 106;
char output[] = "out image";
void detect_lines(int, void*);
int main()
{
	//读取原图
	src = imread("D:/work_c++/444.jpg");

	//判断是否为空
	if (src.empty())
	{
		printf("load image fail ...\n");
		return -1;
	}
	char input[] = "input image";
	namedWindow(input, CV_WINDOW_AUTOSIZE);
	imshow(input, src);


	namedWindow(output, CV_WINDOW_AUTOSIZE);
	createTrackbar("变量值", output, &threshold_value, max_value, detect_lines);
	detect_lines(0, 0);
	waitKey(0);
	return 0;
}

void detect_lines(int, void*)
{
	cvtColor(src, dst, CV_BGR2GRAY);
	threshold(dst, dst, threshold_value, 255, THRESH_BINARY_INV);
	vector<Vec4i> lines;
	HoughLinesP(dst, lines, 1, CV_PI / 180, 30, 80, 0);
	cvtColor(dst, dst, CV_GRAY2BGR);
	Mat srcImg = src.clone();
	for (size_t t = 0; t < lines.size(); t++)
	{
		Vec4i pl = lines[t];
		//line(dst, Point(pl[0], pl[1]), Point(pl[2], pl[3]), Scalar(0, 0, 255), 2, 8, 0);
		line(srcImg, Point(pl[0], pl[1]), Point(pl[2], pl[3]), Scalar(0, 0, 255), 2, 8, 0);
	}
	imshow(output, srcImg);
}
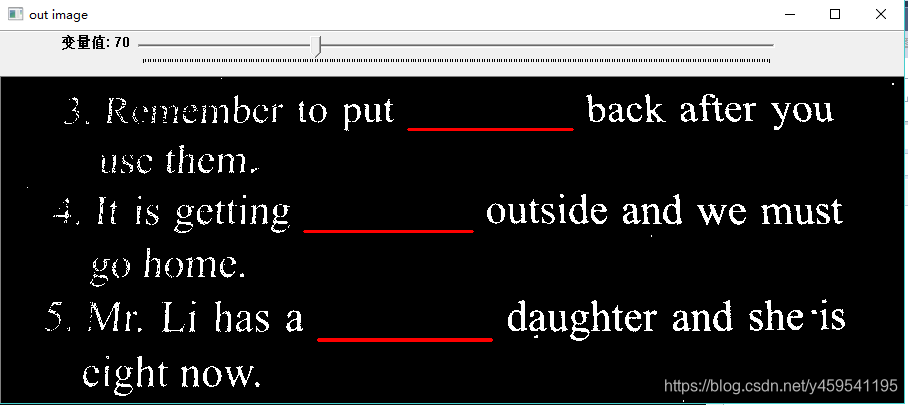
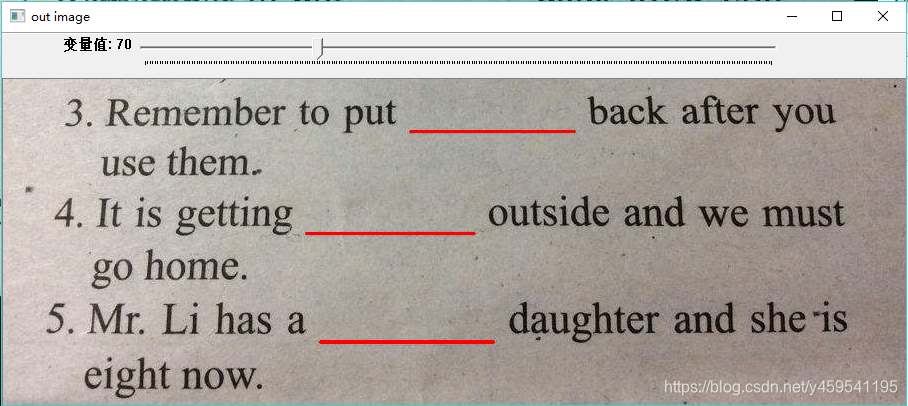
拖动滑块阈值为70时的效果:
2.3 形态学法
代码如下:
#include "stdafx.h"
#include <opencv2/opencv.hpp>
#include <iostream>
#include <math.h>

using namespace cv;
using namespace std;

Mat src;
char output[] = "out image";
void morhpologyLines(int, void*);
int main()
{
	//读取原图
	src = imread("D:/work_c++/444.jpg");

	//判断是否为空
	if (src.empty())
	{
		printf("load image fail ...\n");
		return -1;
	}
	char input[] ="input image";
	namedWindow(input, CV_WINDOW_AUTOSIZE);
	imshow(input, src);

	namedWindow(output, CV_WINDOW_AUTOSIZE);
	morhpologyLines(0, 0);

	waitKey(0);
	return 0;
}


void morhpologyLines(int, void*)
{
	//自动阈值
	Mat bImg, mImg,img;
	img = src.clone();
	cvtColor(img, bImg, CV_BGR2GRAY);
	threshold(bImg, bImg, 0, 255, THRESH_BINARY_INV|THRESH_OTSU);
	//imshow("binary", bImg);

	//开操作
	Mat kernel = getStructuringElement(MORPH_RECT, Size(21, 1), Point(-1, -1));
	morphologyEx(bImg, mImg, MORPH_OPEN, kernel, Point(-1, -1));
	//imshow("morp", mImg);


	//膨胀
	kernel = getStructuringElement(MORPH_RECT, Size(1, 1), Point(-1, -1));
	dilate(mImg, mImg, kernel);


	//霍夫直线
	vector<Vec4i> lines;
	HoughLinesP(mImg, lines, 1, CV_PI / 180, 30, 20, 0);
	Mat resImg = src.clone();
	for (size_t t = 0; t < lines.size(); t++)
	{
		Vec4i pl = lines[t];
		line(resImg, Point(pl[0], pl[1]), Point(pl[2], pl[3]), Scalar(0, 0, 255), 2, 8, 0);
	}
	imshow(output, resImg);
}
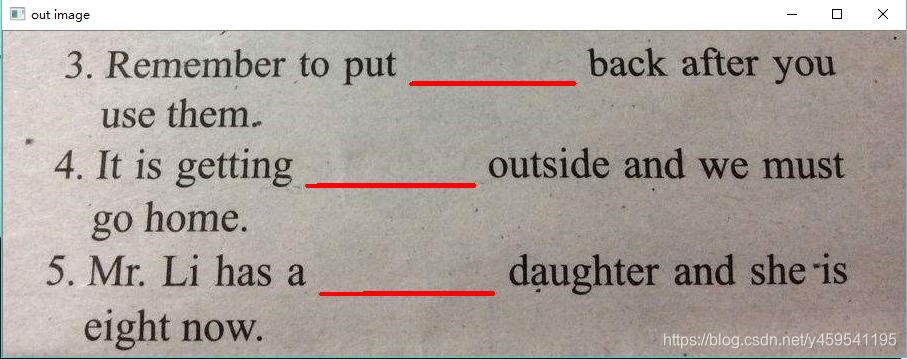
效果如下图所示:


 被折叠的 条评论
为什么被折叠?
被折叠的 条评论
为什么被折叠?
 到【灌水乐园】发言


