


访问和修改像素值
我们先加载一个彩色图像:
import cv2

img = cv2.imread('b.png')
print(img)

########### 打印结果 ###########
[[[243 243 243]
  [243 243 243]
  [243 243 243]
  ...
  [243 243 243]
  [243 243 243]
  [243 243 243]]

 [[243 243 243]
  [243 243 243]
  [243 243 243]
  ...
  [243 243 243]
  [243 243 243]
  [243 243 243]]]
如果imread()方法中,flags传递值为-1,那么将加载alpha通道,那么最里层的数组长度将会是3,打印结果如下:
[[[243 243 243 255]
  [243 243 243 255]
  [243 243 243 255]
  ...
  [243 243 243 255]
  [243 243 243 255]
  [243 243 243 255]]

 [[243 243 243 255]
  [243 243 243 255]
  [243 243 243 255]
  ...
  [243 243 243 255]
  [243 243 243 255]
  [243 243 243 255]]]
如果传递值为0,那么将加载灰色图像,打印结果将会是这样:
[[243 243 243 ... 243 243 243]
 [243 243 243 ... 243 243 243]
 [243 243 243 ... 243 243 243]
 ...
 [243 243 243 ... 243 243 243]
 [243 243 243 ... 243 243 243]
 [243 243 243 ... 243 243 243]]
我们以彩色图像为例,我们可以通过像素值的行和列坐标来访问它:
px = img[100, 100]
print(type(px), px)         # <class 'numpy.ndarray'> [255 255 255]

# 只访问蓝色像素
px = img[100, 100, 0]
print(type(px), px)         # <class 'numpy.uint8'> 255
我们还可以使用更加优雅的方式来修改它,如下:
# 访问红色像素
px = img.item(100, 100, 2)
print(type(px), px)         # <class 'int'> 255

#
img.itemset((100, 100, 2), 100)
px = img.item(100, 100, 2)
print(type(px), px)         # <class 'int'> 100
访问图像属性
图像属性包括行数、列数和通道数、图像数据类型、像素数等
shape = img.shape               # 加载彩色图片,返回一个包含行数、列数和通道数的元组
print(type(shape), shape)       # <class 'tuple'> (584, 870, 3)

shape = img.shape               # 加载灰色图片,返回一个包含行数、列数的元组
print(type(shape), shape)       # <class 'tuple'> (584, 870)

shape = img.shape               # 加载alpha通道,返回一个包含行数、列数和通道数的元组
print(type(shape), shape)       # <class 'tuple'> (584, 870, 4)
总像素数由img.size属性获取:
size = img.size
print(type(size), size)         # <class 'int'> 1524240
图像数据类型由img.dtype熟悉获取:
dtype = img.dtype
print(type(dtype), dtype)       # <class 'numpy.dtype[uint8]'> uint8
ROI
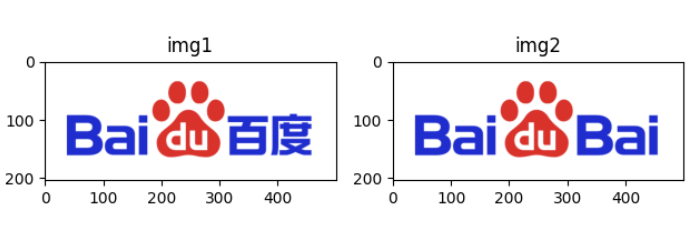
这里我们将Baidu的Logo进行修改一下,将"百度"二字,用"Bai"替换,如下:
import cv2
from copy import copy
from matplotlib import pyplot as plt

img1 = cv2.imread('tt.png', 1)
img2 = copy(img1)
img2[90:165, 313: 458] = img2[90:165, 35:180]
# 121, 1行2列第1个通道
plt.subplot(121),plt.imshow(img1, 'gray'),plt.title('img1')
# 122, 1行2列第2个通道
plt.subplot(122),plt.imshow(img2, 'gray'),plt.title('img2')
plt.show()
效果如下:
为图像创建边框
如果需要在图像周围创建边框,例如相框,可以使用cv2.copyMakeBorder()函数。copyMakeBorder(src, top, bottom, left, right, borderType, dst=None, value=None)常用参数解释如下:
- src: 输入图像
- top, bottom, left, right: 上下左右4个边框宽度,单位:px
- borderType: 边框类型
- cv2.BORDER_CONSTANT: 彩色边框
- cv2.BORDER_REFLECT: 边框元素的镜像
- cv2.BORDER_REFLECT_101或cv2.BORDER_DEFAULT
- cv2.BORDER_REPLICATE: 最后一个元素被复制
- cv2.BORDER_WRAP
- value: 如果边框类型为cv2.BORDER_CONSTANT的边框颜色
import cv2

img = cv2.imread('tt.png', 1)
# 设置边框颜色为蓝色
img = cv2.copyMakeBorder(img, 5, 5, 5, 5, cv2.BORDER_CONSTANT, value=[255, 0, 0])
cv2.imshow('image', img)
cv2.waitKey(0)
cv2.destroyAllWindows()
图像融合
这也是一种图像加法,但是给图像不同的权重,从而给人一种混合而透明的感觉,我们可以使用cv2.addWeighted()函数来实现。addWeighted(src1, alpha, src2, beta, gamma, dst=None, dtype=None)常用参数解释如下:
- src1: 输入图像1
- alpha: 输入图像1的权重
- src2: 输入图像2
- beta: 输入图像2的权重
- gamma: 标量,用于加到每个和上
- dst: 输出图像
- dtype
import cv2
from matplotlib import pyplot as plt

img1 = cv2.imread('img1')
img2 = cv2.imread('img2')
dst = cv2.addWeighted(img1, 0.7, img2, 0.3, 0)
# 131, 1行3列第1个通道
plt.subplot(131),plt.imshow(img1, 'gray'),plt.title('img1')
# 132, 1行3列第2个通道
plt.subplot(132),plt.imshow(img2, 'gray'),plt.title('img2')
# 133, 1行3列第3个通道
plt.subplot(133),plt.imshow(dst, 'gray'),plt.title('dst')
plt.show()
效果如下:
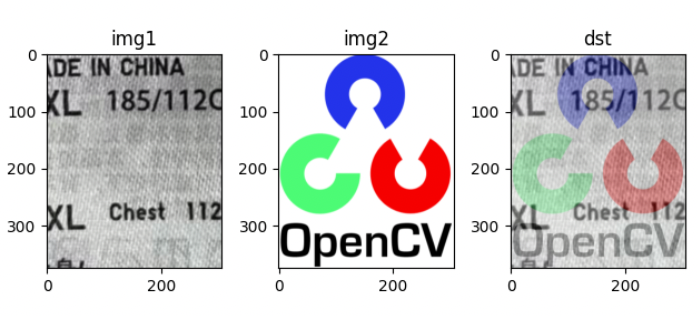
值得注意的是,img1与img2必须行数、列数和通道数一致!!!
为图片添加水印
我们想将opencv的logo放置在给定的背景图的右下方,如果我添加两个图像,它会改变颜色。如果我混合它,我会得到一个透明的效果。但我希望它是不透明的。如果它是一个矩形区域,我可以像上一章那样使用 ROI。但是 OpenCV 徽标不是矩形。所以你可以用按位运算来做到这一点,如下所示:
import cv2
from matplotlib import pyplot as plt

liushishi = cv2.imread('liushishi.png')
logo = cv2.imread('logo.png')
liushishi_height, liushishi_width = liushishi.shape[:2]
plt.subplot(331),plt.imshow(liushishi, 'gray'),plt.title('liushishi')
logo_height, logo_width = logo.shape[:2]
logo = cv2.resize(logo, (int(0.3 * logo_width), int(0.3 * logo_height)), interpolation=cv2.INTER_CUBIC)
logo_height, logo_width = logo.shape[:2]
roi = liushishi[liushishi_height - logo_height - 15:liushishi_height - 15, liushishi_width - logo_width - 15:liushishi_width - 15]
logo_gray = cv2.cvtColor(logo, cv2.COLOR_BGR2GRAY)
_, mask = cv2.threshold(logo_gray, 230, 255, cv2.THRESH_BINARY)
mask_inv = cv2.bitwise_not(mask)
liushishi_bg_1 = cv2.bitwise_and(roi, roi, mask=mask)
liushishi_bg_2 = cv2.bitwise_and(logo, logo, mask=mask_inv)
dst = cv2.add(liushishi_bg_1, liushishi_bg_2)
liushishi[liushishi_height - logo_height - 15:liushishi_height - 15, liushishi_width - logo_width - 15:liushishi_width - 15] = dst

plt.subplot(332),plt.imshow(logo, 'gray'),plt.title('logo')
plt.subplot(333),plt.imshow(logo_gray, 'gray'),plt.title('logo_gray')
plt.subplot(334),plt.imshow(mask, 'gray'),plt.title('mask')
plt.subplot(335),plt.imshow(mask_inv, 'gray'),plt.title('mask_inv')
plt.subplot(336),plt.imshow(liushishi_bg_1, 'gray'),plt.title('liushishi_bg_1')
plt.subplot(337),plt.imshow(liushishi_bg_2, 'gray'),plt.title('liushishi_bg_2')
plt.subplot(338),plt.imshow(dst, 'gray'),plt.title('dst')
plt.subplot(339),plt.imshow(liushishi, 'gray'),plt.title('liushishi')
plt.show()
效果如下:
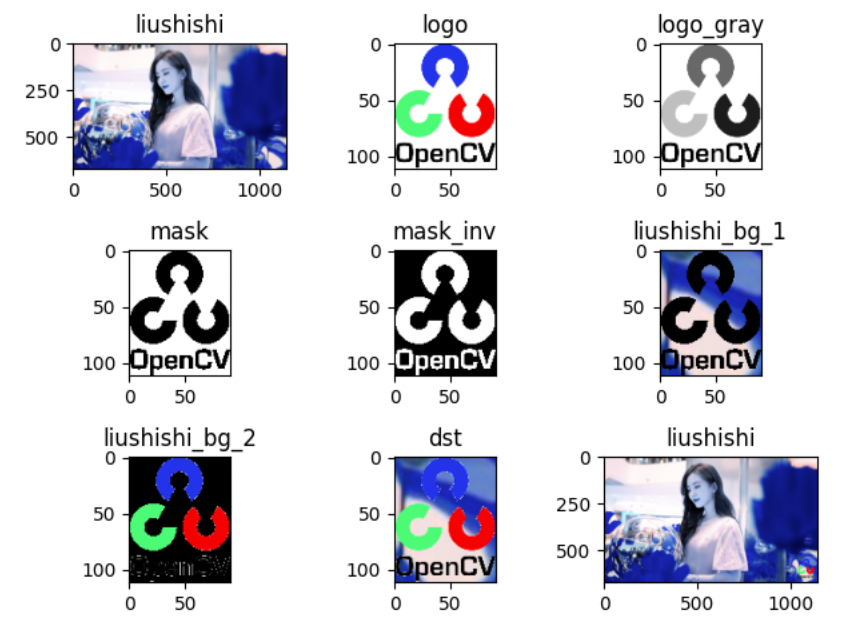
请看最后一张图,可以看到,我们的opencv的logo已经放置在图片的右下角了!这里为了方便演示各种操作之后的图片变化,所以将所有的图片都放置在一起展示,有一些色差,我们可以通过cv2.imshow()展示最后操作的背景图,就可以很直观的看到效果了!
这里,我们用到了好几个函数,现在我们来讲一下他们的用法:
resize
修改图片的尺寸。resize(src, dsize, dst=None, fx=None, fy=None, interpolation=None)参数详解如下:
- src: 输入图像
- dsize: 修改后的图片宽高
- dst: 输出图像
- fx: 比例因子(宽度),0.5表示宽度缩放成原来的一半
- fy: 比例因子(高度),0.5表示高度缩放成原来的一半
- interpolation: 插值法
cvtColor
该函数将输入图像从一个颜色空间转换为另一个颜色空间。cvtColor(src, code, dst=None, dstCn=None)参数详解如下:
- src: 输入图像
- code: 颜色空间转换码
- dst: 输出图像
- dstCn: 目标图像中的通道数
threshold
隔离图像上像素的边缘,上面代码中将大于230像素的值置为0,小于的置为255。threshold(src, thresh, maxval, type, dst=None)参数详解如下:
- src: 输入图像
- thresh: 阈值
- maxval: 使用#THRESH_BINARY和#THRESH_BINARY_INV阈值的最大值
- type: 阈值类型
- dst: 输出图像
bitwise_not
反转上面的图像创建掩码。bitwise_not(src, dst=None, mask=None)参数详解如下:
- src: 输入图像
- dst: 输出图像
- mask: 掩码
bitwise_and
使用位“与”运算来叠加。bitwise_and(src1, src2, dst=None, mask=None)参数详解如下:
- src1: 输入图像1
- src2: 输入图像2
- dst: 输出图像
- mask: 掩码
add
图像叠加。add(src1, src2, dst=None, mask=None, dtype=None)参数详解如下:
- src1: 输入图像1
- src2: 输入图像2
- dst: 输出图像
- mask: 掩码


 20万+
20万+


 被折叠的 条评论
为什么被折叠?
被折叠的 条评论
为什么被折叠?
 到【灌水乐园】发言


