


目标
重点介绍多视图应用的结构和切换内容视图的基本知识,并开发一个多视图应用。
内容
总体分析:
要创建三个视图:
1)根视图
2)Blue视图
3)Yellow视图
然后将这三个视图关联起来,创建转场。进一步优化,在转场时添加动画。
1.创建根视图器。
1.1改尺寸
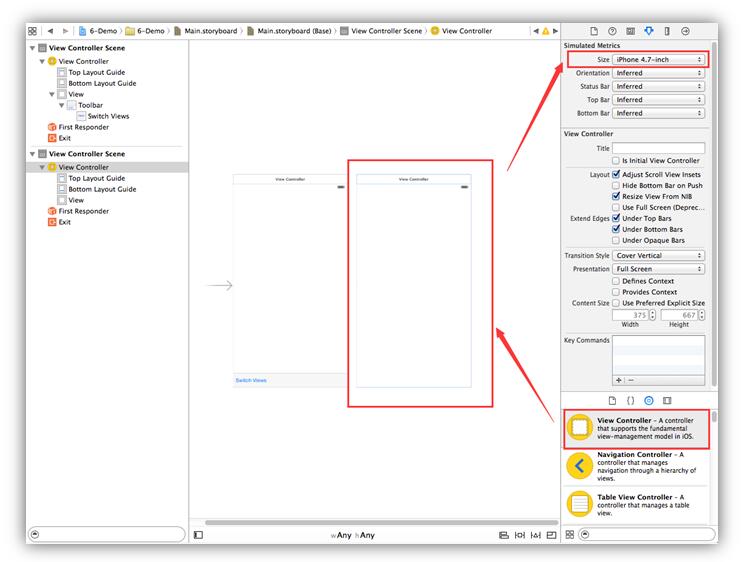
将视图改为4.7-inch
1.2增加工具条
在控件库中找到Toolbar添加到视图中,并改名为“Switch Views”。
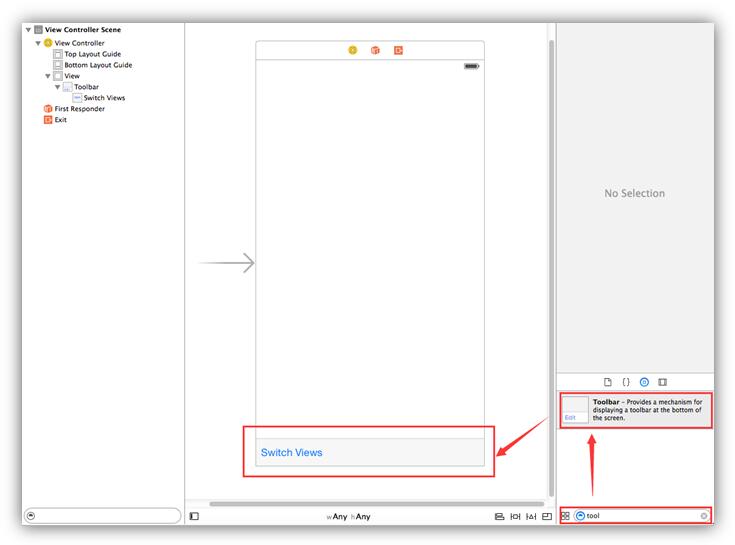
这样根视图就创建完成了。
2.创建Blue视图
创建Blue视图分两步:
1)设计Blue视图界面
2)创建Blue视图界面的控制器
2.1创建Blue视图
1)创建界面
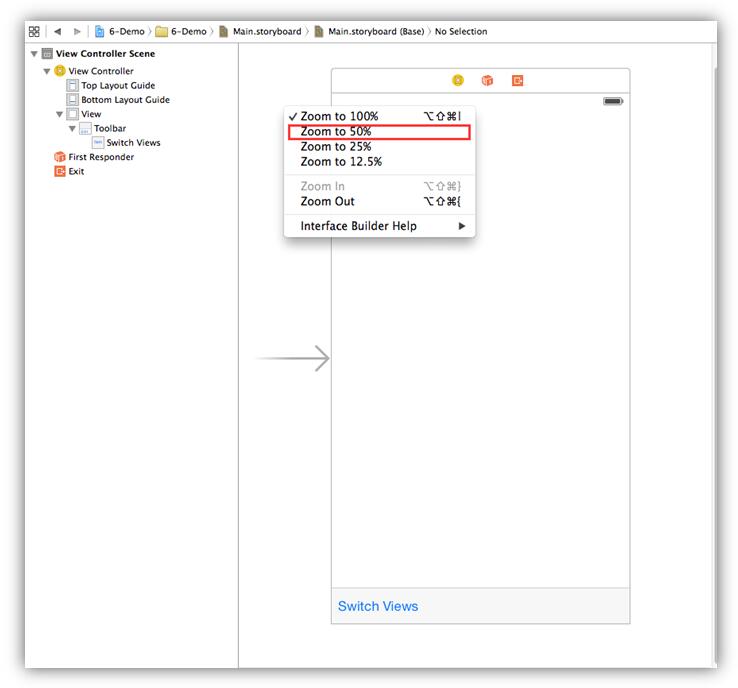
在Main.storyboard中右键点击缩小界面到50%(方便播放入新的View Controller视图),在控件库找到View Controller视图控件,拖放到storyboard中,并改尺寸为4.7-inch。
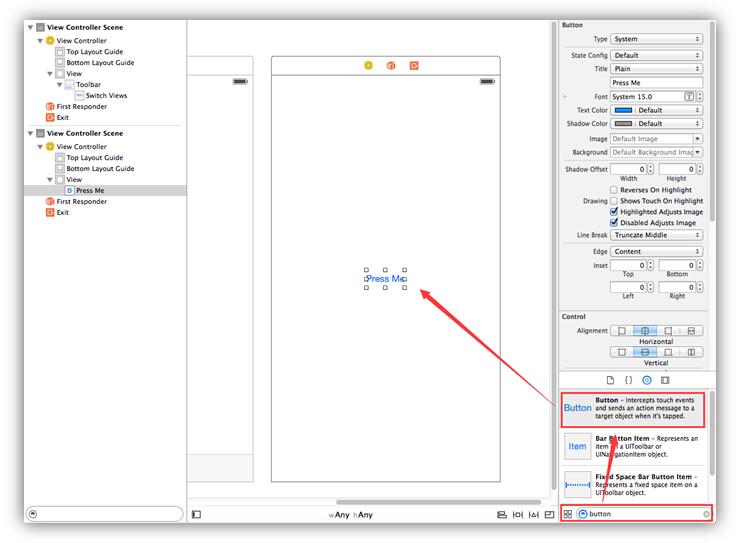
2)添加按钮
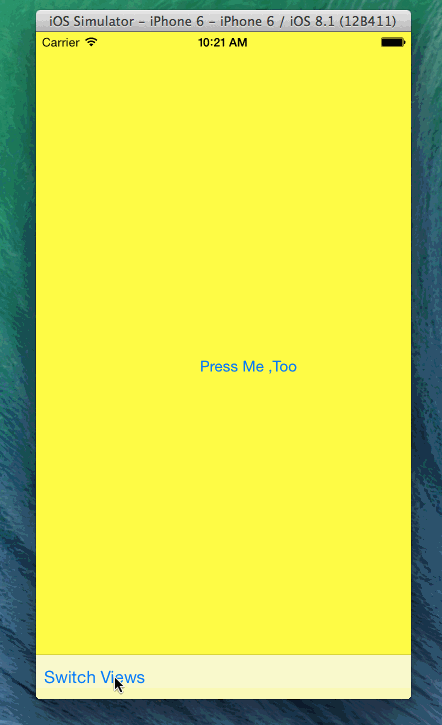
在控件库中拖放入button按钮控件,并改名为“Press Me”.
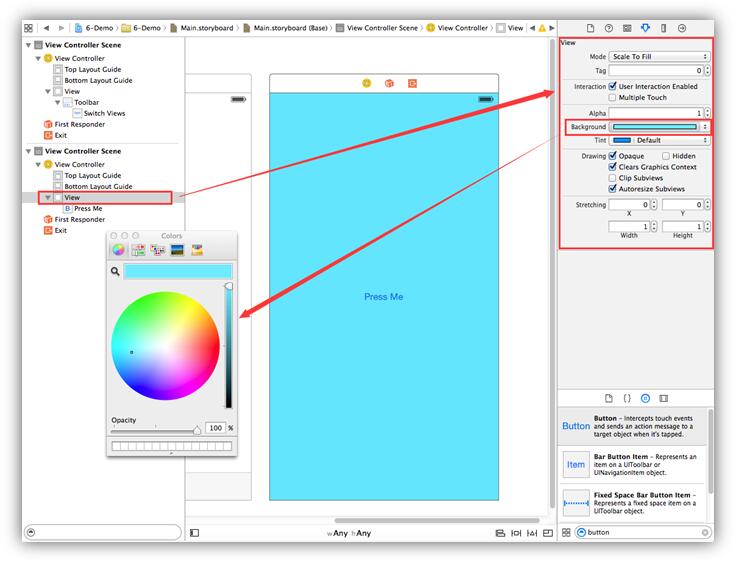
3)更改背景
选中View ,并打开属性检查器面板,找到background(背景)将其颜色改为蓝色。
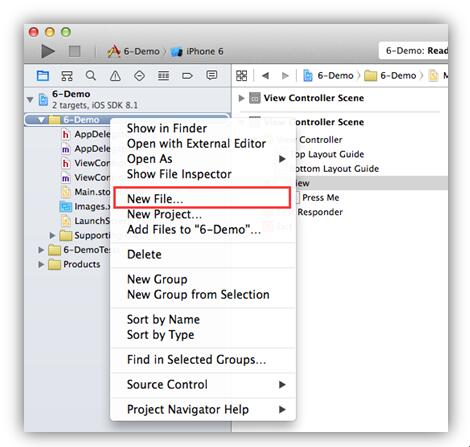
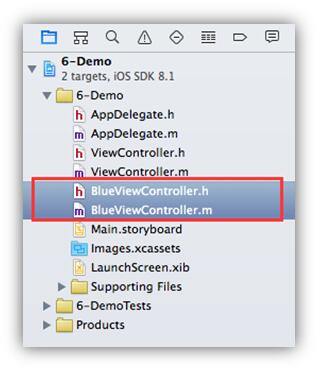
2.2创建BlueViewController
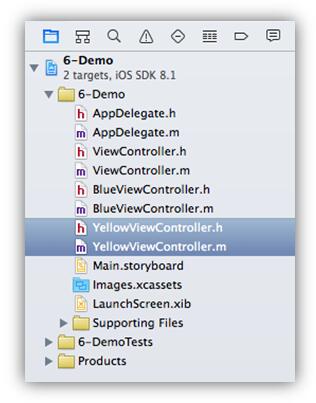
在项目导航栏中,选择项目文件夹,右键点击New File…
选择iOS中的Source>Cocoa Touch,点Next.
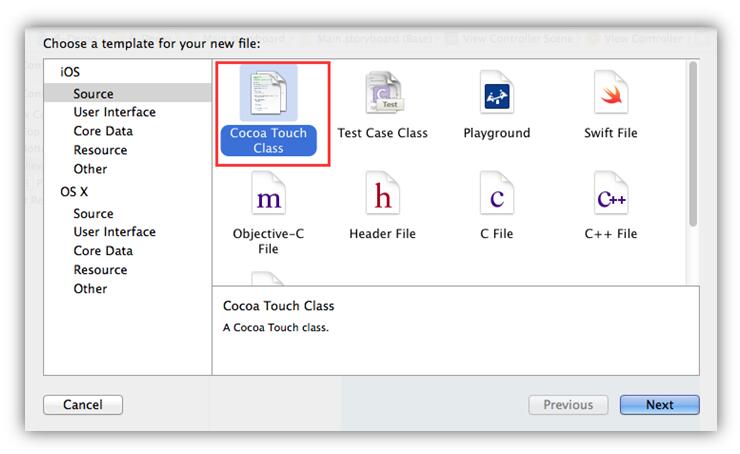
更改类名为BlueViewController.
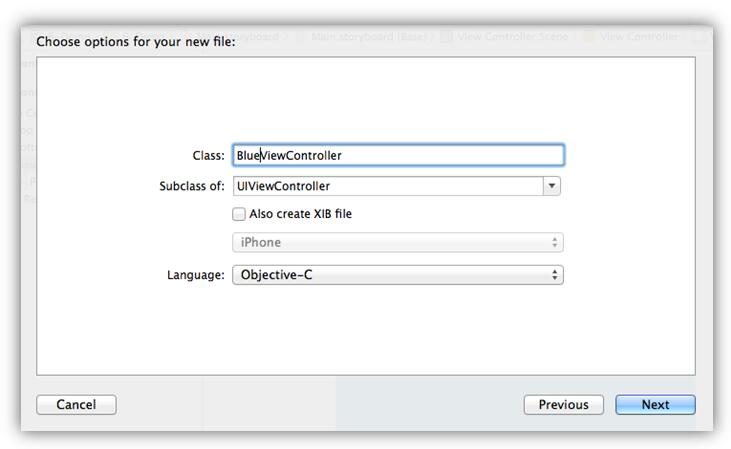
确认好保存位置,就创建好了Blue视图的控制器:
3.创建Yellow视图
和创建Blue视图一样,创建Yellow视图部分也是两步:
1)设计Yellow视图界面
2)创建Yellow视图界面的控制器
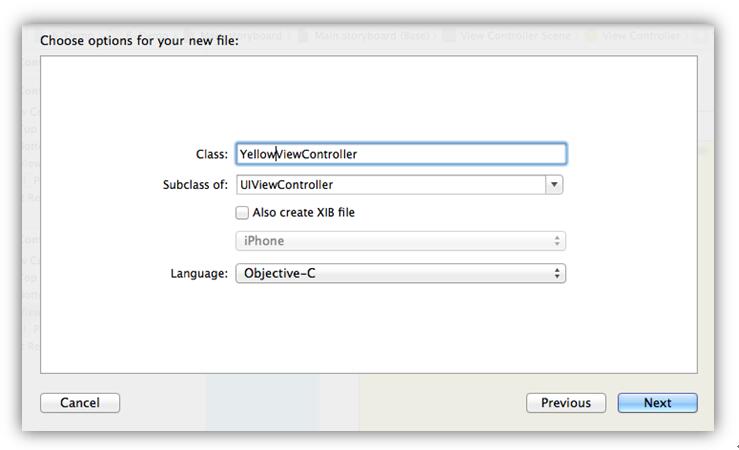
2.1创建Yellow视图
2.2创建YellowViewController
4.视图与控制器相关联
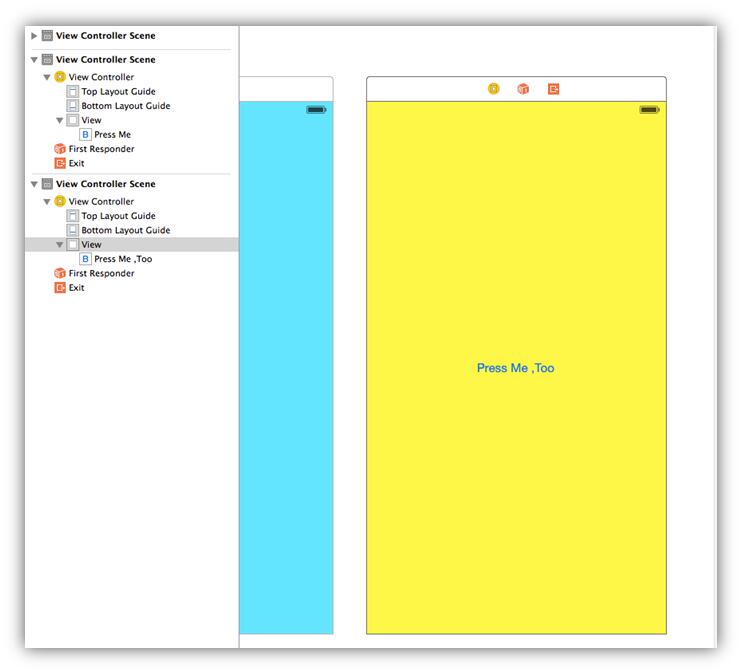
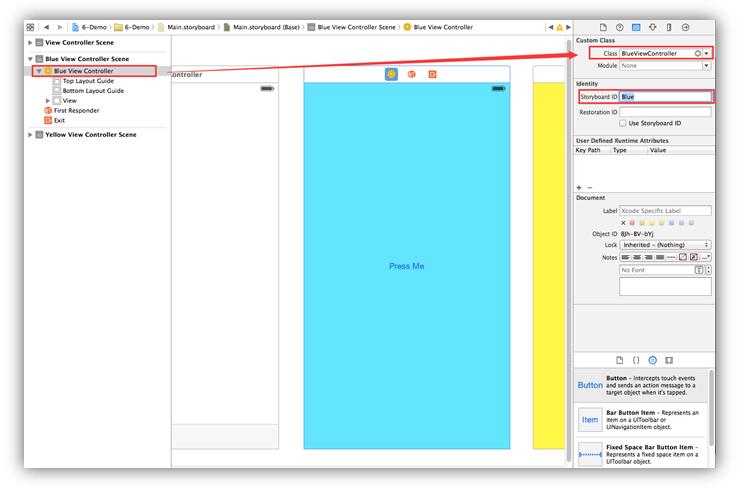
选中Blue视图的View Controller ,点击身份检查器,添加Class:BlueViewController。可以看到视图控制器名称也相应改变,这时就将视图与控制器相关联起来了。
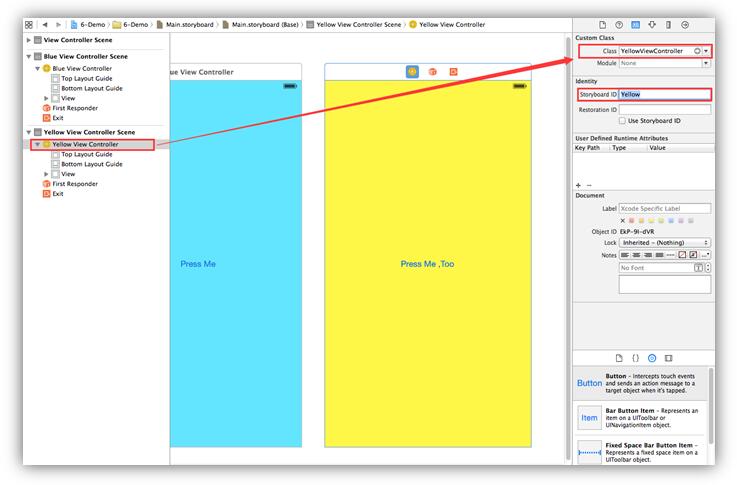
Yellow视图也是一样,选中Yellow视图的View Controller ,点击身份检查器,添加Class: YellowViewController。可以看到视图控制器名称也相应改变,这时就将视图与控制器相关联起来了。
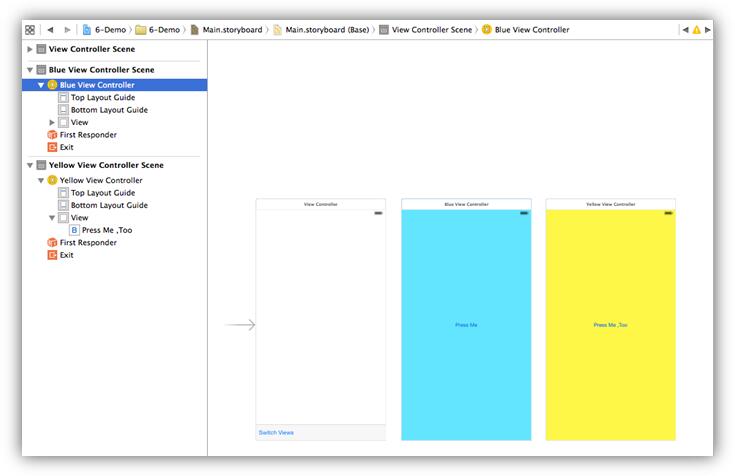
最后的效果,注意视图场景的名称改变:
5.创建转场
5.1修改根视图控制器
ViewController.h文件:
//
//  ViewController.h
//  6-Demo
//

#import <UIKit/UIKit.h>

#import "BlueViewController.h"
#import "YellowViewController.h"

@interface ViewController : UIViewController

@property (strong,nonatomic) BlueViewController     *blueViewController;
@property (strong,nonatomic) YellowViewController   *yellowViewController;

@end
ViewController.m文件:
//
// ViewController.m
// 6-Demo
//
#import "ViewController.h"
@interface ViewController ()
@end
@implementation ViewController
- (void)viewDidLoad {
[super viewDidLoad];
//加载完后执行其它操作
self.blueViewController = [self.storyboard instantiateViewControllerWithIdentifier:@"Blue"];
[self.view insertSubview:self.blueViewController.view atIndex:0];
}
- (void)didReceiveMemoryWarning
{
[super didReceiveMemoryWarning];
//手动释放视图内存
if (!self.blueViewController.view.superview) {
self.blueViewController = nil;
}else{
self.yellowViewController = nil;
}
}
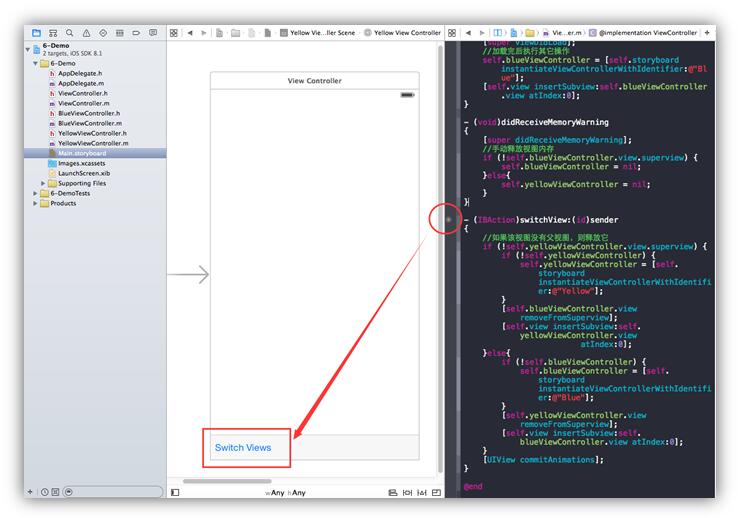
- (IBAction)switchView:(id)sender
{
//如果该视图没有父视图,则释放它
if (!self.yellowViewController.view.superview) {
if (!self.yellowViewController) {
self.yellowViewController = [self.storyboard instantiateViewControllerWithIdentifier:@"Yellow"];
}
[self.blueViewController.view removeFromSuperview];
[self.view insertSubview:self.yellowViewController.view
atIndex:0];
}else{
if (!self.blueViewController) {
self.blueViewController = [self.storyboard instantiateViewControllerWithIdentifier:@"Blue"];
}
[self.yellowViewController.view removeFromSuperview];
[self.view insertSubview:self.blueViewController.view atIndex:0];
}
[UIView commitAnimations];
}
@end
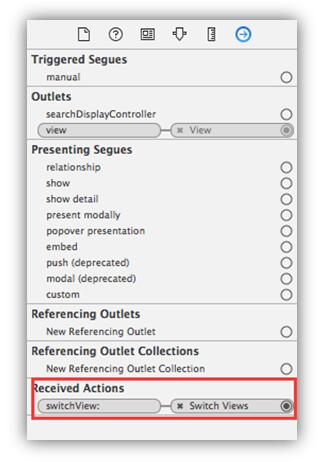
5.2为Toolbar上的按钮关联操作方法
关联后的结果可以在连接检查器中看到:
按command+R运行应用,可以看到:
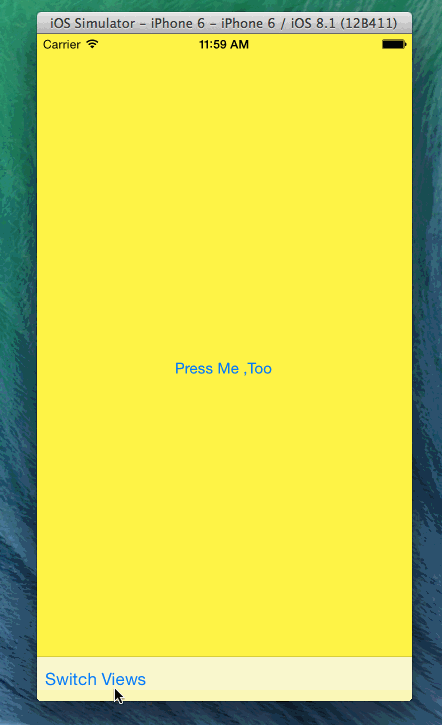
这时我们发现转场相当生硬,换个高大点的说法,用户体验太差。
怎么办呢?
下面我们就增加转场动画,来解决这个用户体验太差的问题。
6.增加转场的动画效果
- (IBAction)switchView:(id)sender
{
    [UIView beginAnimations:@"View Flip" context:NULL];
    [UIView setAnimationDuration:0.5];
    [UIView setAnimationCurve:UIViewAnimationCurveEaseInOut];

    if (!self.yellowViewController.view.superview) {
        if (!self.yellowViewController) {
            self.yellowViewController = [self.storyboard instantiateViewControllerWithIdentifier:@"Yellow"];
        }
        [UIView setAnimationTransition:UIViewAnimationTransitionFlipFromRight
                               forView:self.view
                                 cache:YES];
        [self.blueViewController.view removeFromSuperview];
        [self.view insertSubview:self.yellowViewController.view
                         atIndex:0];
    }else{
        if (!self.blueViewController) {
            self.blueViewController = [self.storyboard instantiateViewControllerWithIdentifier:@"Blue"];
        }
        [UIView setAnimationTransition:UIViewAnimationTransitionFlipFromLeft
                               forView:self.view
                                 cache:YES];
        [self.yellowViewController.view removeFromSuperview];
        [self.view insertSubview:self.blueViewController.view atIndex:0];
    }
    [UIView commitAnimations];
}
解释:
    [UIView beginAnimations:@"View Flip" context:NULL];
    [UIView setAnimationDuration:0.5];
    [UIView setAnimationCurve:UIViewAnimationCurveEaseInOut];
beginAnimations:context:接受两个参数,第一个是动画块标题。第二个参数是一个(void*)指针,指向关联到这个动画块的对象。这里使用NULL,因为没有必要指定对象。
setAnimationDuration:这是设定动画的持续时间。
setAnimationCurve:这是设定动画曲线(animation curve),这决定了动画运行的速度。速度为一条线性曲线,此处设置为(UIViewAnimationCurveEaseInOut)指定动画以:慢-快-慢 的播放速度来播放。
        [UIView setAnimationTransition:UIViewAnimationTransitionFlipFromRight
                               forView:self.view
                                 cache:YES];
这里是指定动画转换类型。有4种视图转换类型:
UIViewAnimationTransitionFlipFromLeft
UIViewAnimationTransitionFlipFromRight
UIViewAnimationTransitionCurlUp
UIViewAnimationTransitionCurlDown
根据显示的视图选择不同的效果,这里选择为左侧翻入,右侧翻入,给人感觉不断地向前翻和向后翻。
[UIView commitAnimations];设置和指定好了动画后,最后要调用commitAnimations方法来提交动画。
运行应用,可以看到想要的效果。
7.为按钮添加警告弹窗
我们当初在页面上添加的按钮“Press Me”和”Press ME,too”还没有任何效果。现在我们为这两个按钮分别加上警告弹窗。
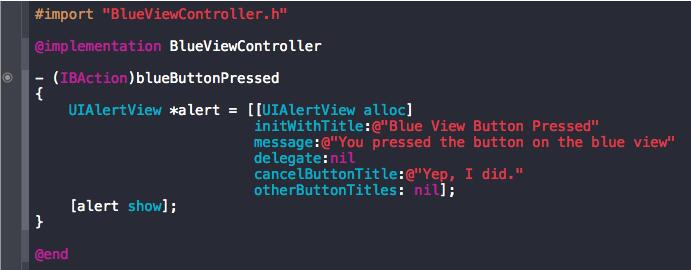
在BlueViewController.m文件中,添加如下代码,并与对应的按钮进行关联:
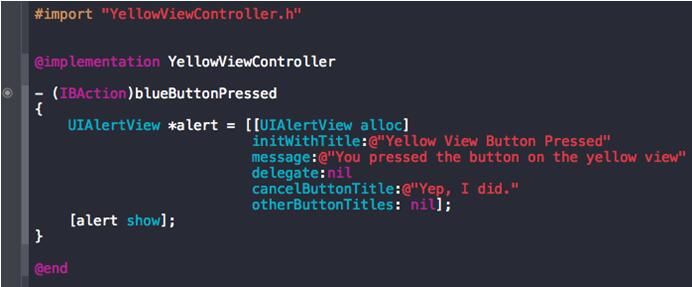
在YellowViewController.m文件中,添加如下代码,并与对应的按钮进行关联:
现在这个应用就写到这,有什么其它的玩法,可以自己尝试下。
小结
创建了多视图,学习了转场动画的添加。


 7742
7742

 被折叠的 条评论
为什么被折叠?
被折叠的 条评论
为什么被折叠?
 到【灌水乐园】发言


