


因业务需求,有多台云服务器包括移动云服务器、阿里云服务器、都是只能公网访问。
服务器1:3x.x.x.x2
服务器2:3x.x.x.xx7
服务器3:4x.x.x.x0
服务器4:4x.x.x.x5
微服务技术选型是zuul-gateway作为网关,nacos作为配置管理中心,redis作为缓存,mysql作为数据,fastdfs作为文件存储系统,nginx作为web服务器
一、服务器3
服务器3 搭建nacos服务、redis服务、zuul-gateway服务。
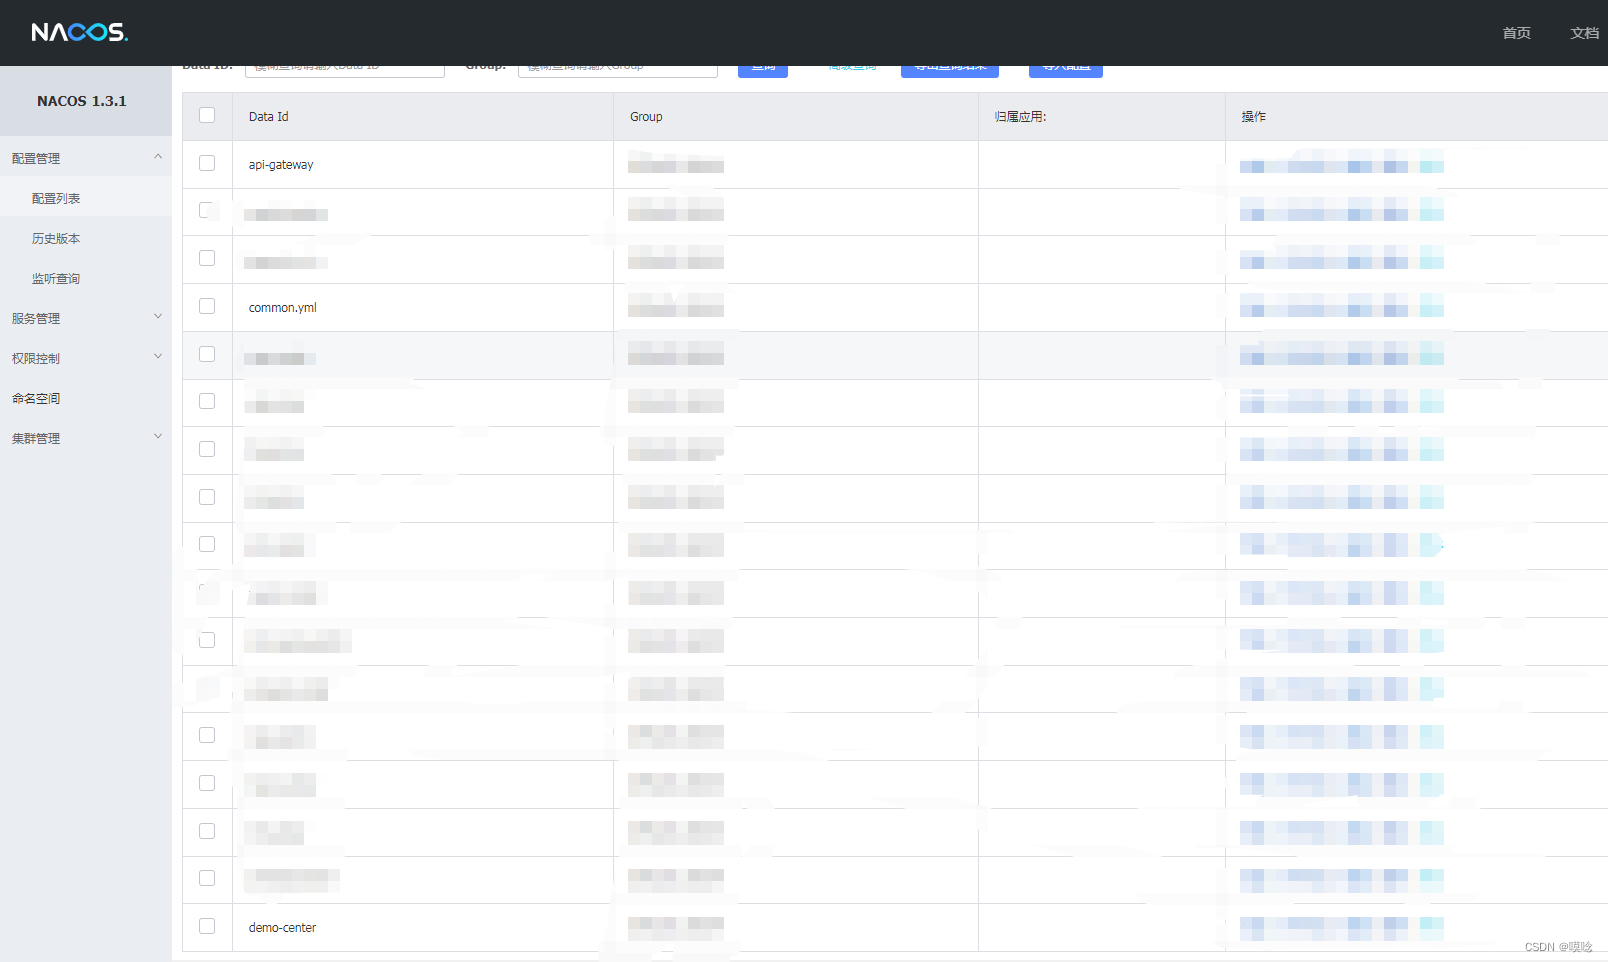
nacos 搭建配置 略
nacos配置中心截图预览
redis 搭建配置 略
zuul-gawate 配置分为三个,bootstrap.yml 和nacos配置的api-gateway配置和其他微服务共用common.yml配置
bootstrap.yml
server:
  port: 10001
  undertow:
    buffer-size: 1024
    direct-buffers: true

spring:
  application:
    name: api-gateway
  cloud:
    nacos:
      config:
        server-addr: ip:port #服务器3的ip和nacos启动的端口
        file-extension: yml
        namespace: xxxx #nacos的命名空间
        shared-configs:
          - data-id: common.yml
            group: DEFAULT_GROUP
            refresh: false
      discovery:
        namespace: xxxx #nacos的命名空间 跟上面的namespace一样
        server-addr: ip:port #服务器3的ip和nacos启动的端口 跟上面server-addr一样
        ip: ip #服务器3的IP
        port: 10001 #该服务使用的端口,跟上面的port一样
  servlet:
    multipart:
      enabled: true
      max-file-size: 512MB
      max-request-size: 512MB
      file-size-threshold: 0

  http:
    multipart:
      location:xxp #临时目录
# 添加ribbon的超时时间设置
ribbon:
  ReadTimeout: 600000
  ConnectTimeout: 600000
zuul:
  host:
    connect-timeout-millis: 600000
    socket-timeout-millis: 600000
hystrix:
  command:
    default:
      execution:
        isolation:
          thread:
            timeout-in-milliseconds: 600000
api-gateway配置
zlt:
  oauth2:
    token:
      store:
        type: redis
  security:
    ignore:
      # 忽略认证的地址
      httpUrls: >
        /api-demo/**,
        /api-demouser/**
    auth:
      urlPermission:
        #是否开启url级别权限
        enable: true
        #配置只进行登录认证,不进行url权限认证的api
        ignoreUrls: >
          /api-testuser/menus/tree
        #白名单
        includeClientIds:
          - test
      renew:
        #是否开启token自动续签(目前只有redis实现)
        enable: true
        #白名单
        includeClientIds:
          - test
  gateway:
    #网关动态路由
    dynamicRoute:
      enabled: true
zuul:
  ribbon-isolation-strategy: thread
  ribbon:
    eager-load:
      enabled: true
    threadPool:
      useSeparateThreadPools: true
      threadPoolKeyPrefix: api-gateway
  #关闭重试
  retryable: false
  ignored-headers: Access-Control-Allow-Credentials,Access-Control-Allow-Origin,Access-Control-Allow-Methods
  add-host-header: true
  routes:
    demo:
      path: /api-demo/**
      service-id: demo-center
      strip-prefix: true
      sensitive-headers: '*'
      custom-sensitive-headers: true
    demouser:
      path: /api-demouser/**
      service-id: demouser-center
      strip-prefix: true
      sensitive-headers: '*'
      custom-sensitive-headers: true
  ssl-hostname-validation-enabled: false
hystrix:
  threadpool:
    default:
      coreSize: 100
      maximumSize: 2000
      allowMaximumSizeToDivergeFromCoreSize: true
      maxQueueSize: -1
  command:
    default:
      execution:
        isolation:
          thread:
            timeoutInMilliseconds: 60000
swagger:
  butler:
    auto-generate-from-zuul-routes: true
    generate-routes: demo,demouser
    apiDocsPath: v2/api-docs
server:
  tomcat:
    max-swallow-size: -1
spring:
  http:
    multipart:
      location: /xx/xxx/xxp #临时目录
      max-file-size: 512MB
      max-request-size: 512MB
common.yml配置
#### nacos(注册中心和配置中心)地址
spring:
    cloud:
        nacos:
            server-addr: ip:port #nacos的ip和端口号
            username: nacos账号
            password: nacos密码
    ##### redis配置
# 连接池最大连接数(使用负值表示没有限制)
##### redis配置
    redis:
        host: redis的ip
        port: redis的端口
        password: redis的密码
        timeout: 5000
        lettuce:
            pool:
                max-active: 20
# 连接池最大阻塞等待时间(使用负值表示没有限制)
                max-wait: -1
# 连接池中的最大空闲连接
                max-idle: 10
# 连接池中的最小空闲连接
                min-idle: 0

    ##### druid配置
#连接池配置(通常来说,只需要修改initialSize、minIdle、maxActive
    datasource:
        druid:
            initial-size: 10
            max-active: 500
            min-idle: 10
# 配置获取连接等待超时的时间
            max-wait: 60000
#打开PSCache,并且指定每个连接上PSCache的大小
            pool-prepared-statements: true
            max-pool-prepared-statement-per-connection-size: 20
            validation-query: SELECT 'x'
            test-on-borrow: false
            test-on-return: false
            test-while-idle: true
#配置间隔多久才进行一次检测,检测需要关闭的空闲连接,单位是毫秒
            time-between-eviction-runs-millis: 60000
#配置一个连接在池中最小生存的时间,单位是毫秒
            min-evictable-idle-time-millis: 300000
            filters: stat,wall
# WebStatFilter配置,说明请参考Druid Wiki,配置_配置WebStatFilter
#是否启用StatFilter默认值true
            web-stat-filter:
                enabled: true
                url-pattern: /*
                exclusions: "*.js , *.gif ,*.jpg ,*.png ,*.css ,*.ico , /druid/*"
                session-stat-max-count: 1000
                profile-enable: true
                session-stat-enable: false
# StatViewServlet配置
#展示Druid的统计信息,StatViewServlet的用途包括:1.提供监控信息展示的html页面2.提供监控信息的JSON API
#是否启用StatViewServlet默认值true
            stat-view-servlet:
                enabled: true
#根据配置中的url-pattern来访问内置监控页面,如果是上面的配置,内置监控页面的首页是/druid/index.html例如:http://127.0.0.1:9000/druid/index.html
                url-pattern: /druid/*
#允许清空统计数据
                reset-enable: true
                login-username: Druid监控的账号
                login-password: Druid监控的密码

##### 允许bean覆盖
    main:
        allow-bean-definition-overriding: true

##### spring-boot-actuator配置
management:
    endpoints:
        web:
            exposure:
                include: "*"
    endpoint:
        health:
            show-details: always
########################## application级别通用配置 ##########################
##### ribbon配置
## 从注册中心刷新servelist的时间 默认30秒,单位ms
ribbon:
    ServerListRefreshInterval: 15000
## 请求连接的超时时间 默认1秒,单位ms
    ConnectTimeout: 30000
## 请求处理的超时时间 默认1秒,单位ms
    ReadTimeout: 30000
## 对所有操作请求都进行重试,不配置这个MaxAutoRetries不起作用 默认false
#ribbon.OkToRetryOnAllOperations=true
## 对当前实例的重试次数 默认0
#ribbon.MaxAutoRetries=1
## 切换实例的重试次数 默认1
    MaxAutoRetriesNextServer: 0

##### feign配置
feign:
    sentinel:
        enabled: true
    hystrix:
        enabled: false
    okhttp:
        enabled: true
    httpclient:
        enabled: false
        max-connections: 1000
        max-connections-per-route: 100
    client:
        config:
            feignName:
                connectTimeout: 30000
                readTimeout: 30000
##### mybatis-plus配置
#字段策略 IGNORED:"忽略判断",NOT_NULL:"非 NULL 判断"),NOT_EMPTY:"非空判断"
mybatis-plus:
    global-config:
        db-config:
            field-strategy: NOT_NULL
#逻辑删除配置
            logic-delete-value: 1
            logic-not-delete-value: 0
# 原生配置
    configuration:
        map-underscore-to-camel-case: true
        cache-enabled: false
        log-impl: org.apache.ibatis.logging.stdout.StdOutImpl
##### elasticsearch配置
zlt:
    elasticsearch:
        uris: ip:port #elasticsearch的IP和端口
        username: elasticsearch的账号
        password: elasticsearch的密码
##### fastDFS配置
    fdfs:
        web-url: ip:port #fdfs的web访问的ip和端口
        trackerList: ip:port #fdfs的tracker服务的ip和端口
##### 日志链路追踪
    trace:
        enable: true
##### 负载均衡隔离(version隔离,只适用于开发环境)
    ribbon:
        isolation:
            enabled: false
二、服务器1
服务器配置demo服务,配置包括bootstrap.yml 和nacos配置的demo-center配置和其他微服务共用common.yml配置
bootstrap.yml 配置
server:
  port: 10002
spring:
  application:
    name: demo-center
  main:
    allow-bean-definition-overriding: true
  cloud:
    nacos:
      config:
        server-addr: ip:port  #nacos的地址 服务器3的IP和nacos启用的端口
        file-extension: yml   #配置文件格式
        namespace: xxxx  #nacos命名空间 代指某个环境
        shared-configs:
          - data-id: common.yml
            group: DEFAULT_GROUP
            refresh: false
      discovery:
        namespace: xxxxx  #nacos命名空间 代指某个环境 跟上面namespace一致,同时跟gateway以及新增的服务一致
        server-addr: ip:port  #nacos的地址 服务器3的IP和nacos启用的端口
        ip: ip    #服务器1的IP
        port: 10002 #该服务使用的端口,跟上面的port一样
demo-center配置
spring:
  datasource:
    url: jdbc:mysql://ip:port/demo?useUnicode=true&characterEncoding=UTF-8&autoReconnect=true&useSSL=false&zeroDateTimeBehavior=convertToNull&serverTimezone=Asia/Shanghai
    #mysql 的ip和地址 服务器2(部署mysql服务)
    username: user      #mysql数据的账号
    password: password #mysql数据的密码
    driver-class-name: com.mysql.cj.jdbc.Driver
    #不使用common.yml的reids配置的话,可自行配置redis,如使用common.yml配置中的redis,注释即可
  redis:
    host: ip   #redis的ip
    port: port #redis的端口
    password: pwd #redis的密码

mybatis-plus:
  mapper-locations: classpath:/mapper/*Mapper.xml
  #实体扫描,多个package用逗号或者分号分隔
  typeAliasesPackage: com.xx.demo.model
  global-config:
    db-config:
      id-type: auto
      logic-delete-field: flag
      logic-delete-value: 1
      logic-not-delete-value: 0
zlt:
  swagger:
    enabled: true
    title: demo测试中心
    description: demo测试中心接口文档1
    version: 1.0
    base-package: com.xx.demo.controller
  cache-manager:
    configs:
      - key: menu
        second: 300
      - key: user
        second: 1800
  #多租户配置
  tenant:
    enable: true
    ignoreTables:
      - demo_user
      - demo
    ignoreSqls:
      # 用户关联角色时,显示所有角色
      - com.xx.demouser.mapper.xxMapper.findxx
      # 用户列表显示用户所关联的所有角色
      - com.xx.demouser.mapper.xxRoleMapper.findRolesxxx
  #审计日志
  audit-log:
    enabled: true
    log-type: db
    datasource:
      driver-class-name: com.mysql.cj.jdbc.Driver
      jdbc-url: jdbc:mysql://ip:port/alogs?useUnicode=true&characterEncoding=UTF-8&autoReconnect=true&useSSL=false&zeroDateTimeBehavior=convertToNull&serverTimezone=Asia/Shanghai
      #mysql 的ip和地址 服务器2(部署mysql服务)
    username: user      #mysql数据的账号
    password: password #mysql数据的密码
三、服务器2
服务器2部署mysql数据库服务
四、服务器4
服务器4部署demo-user服务、ngxin服务器、fastdfs服务、demo服务。
五、启动运行
启动redis服务、mysql服务、nacos服务、api-gewate服务、demo服务,可在nacos管理后台看到如下截图
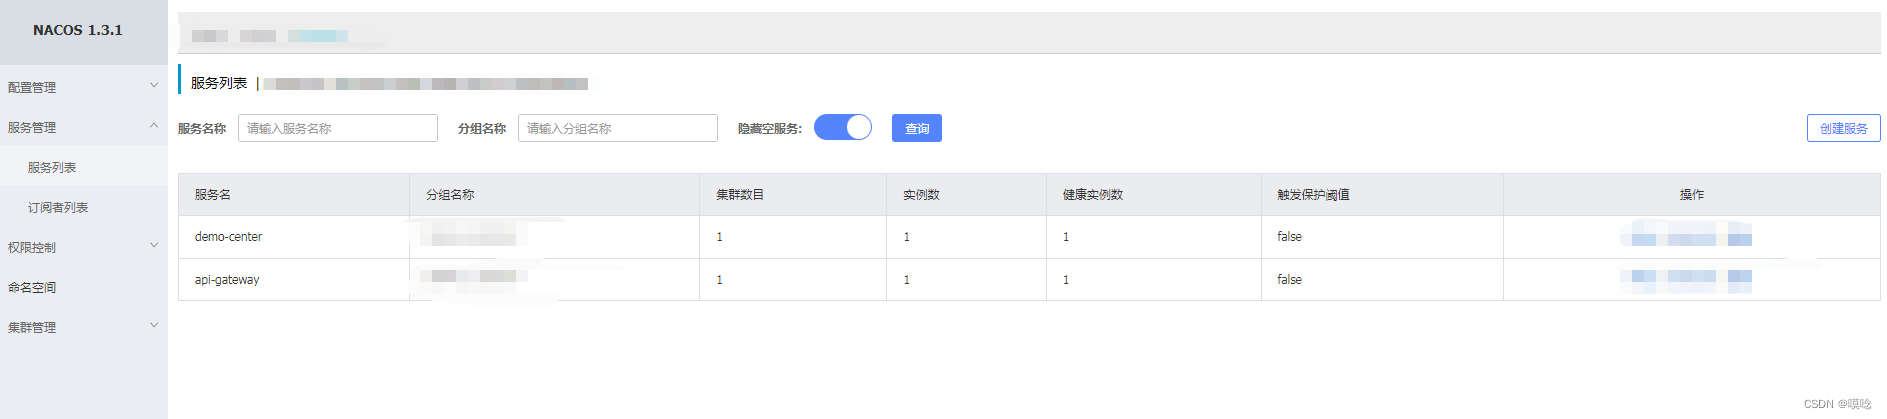
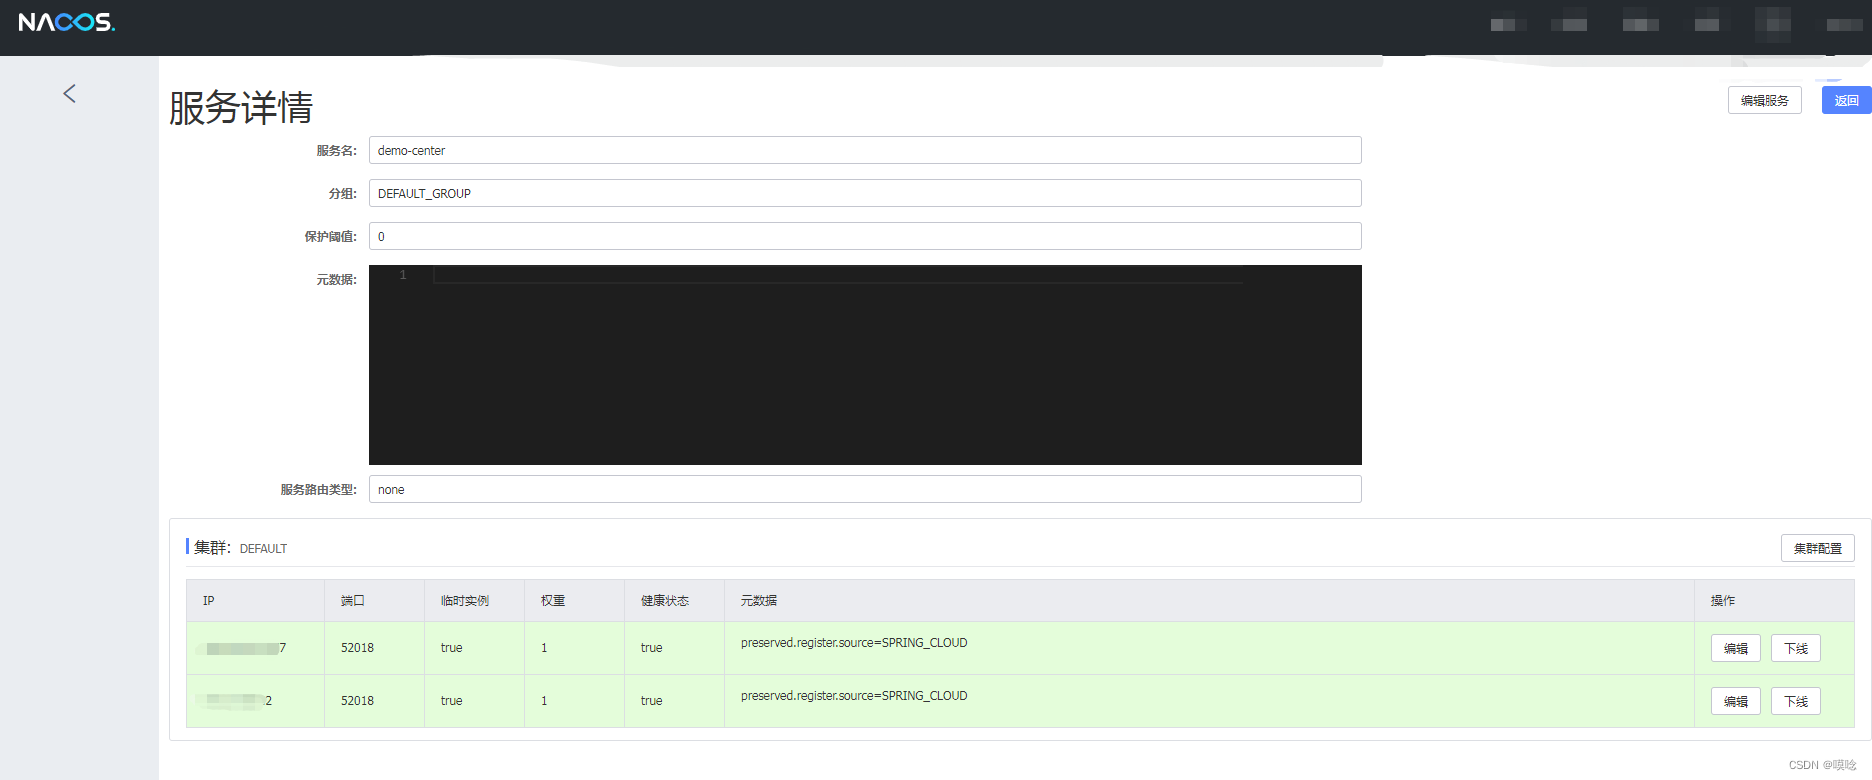
demo服务
服务1:ip为服务1的ip公网地址,端口则是配置bootstrap.yml配置文件中的端口
服务2:ip为服务4的ip公网地址,端口则是配置bootstrap.yml配置文件中的端口
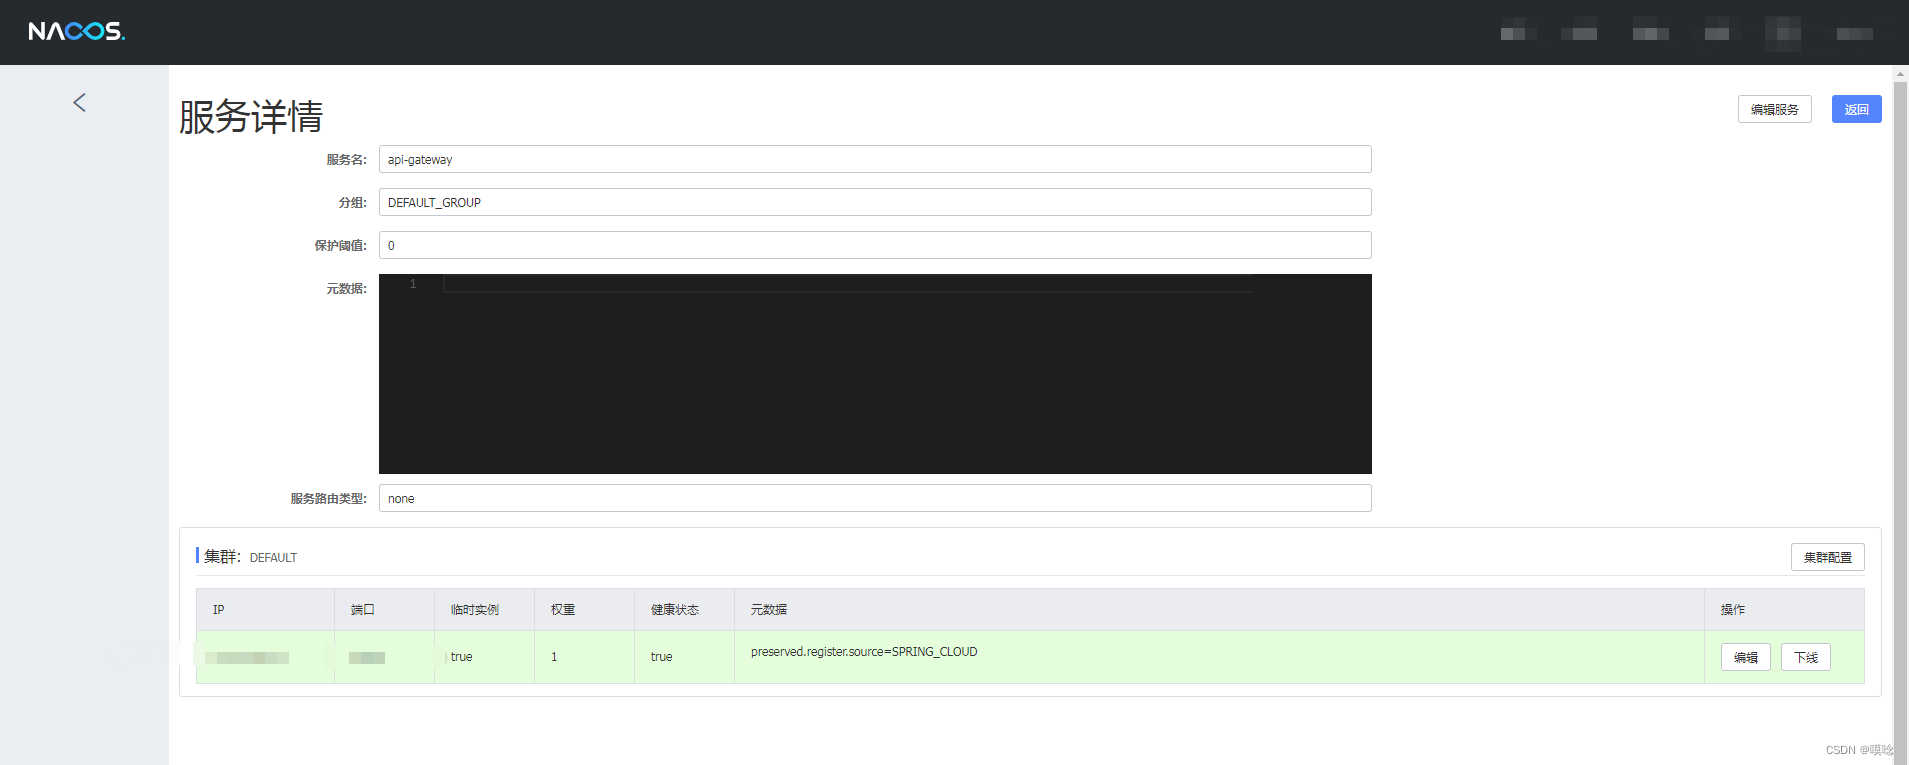
api-gateway服务
ip为服务3的ip公网地址,端口则是配置bootstrap.yml配置文件中的端口
六、验证服务是否正常访问
先访问demo服务器是否可被访问,例如demo写了一个url为demo/test,则通过浏览器或者postman访问
http(s)😕/ip:port/demo/test,是否正常。(ip和port为服务1的ip地址以及demo服务启动的端口)
在访问通过网关访问服务是否正常,例如:http(s)😕/ip:port/api-demo/demo/test,是否正常。(ip和port为服务3的ip地址以及api-gateway启动的端口)
确保demo服务两个服务均能访问后、可关闭其中一个服务,通过访问网关访问demo服务,正常
七、注意事项
确保启动的服务器服务启动的端口均能被其他服务器访问,可通过阿里云、移动云的控制台的云主机安全组来先限制端口访问权限,可保证端口暴露在外的安全隐患。
也可以通过服务器的防火墙限制ip访问端口
也可以通过虚拟专用通道构建局域网来限制端口访问。


 235
235


 被折叠的 条评论
为什么被折叠?
被折叠的 条评论
为什么被折叠?
 到【灌水乐园】发言


