


使用的服务器ip:
ansible:192.168.43.129 (装上ansible)
webserver:192.168.43.133
db:192.168.43.134
可以先去/etc/hosts做一个域名解析

然后在/etc/ansible/hosts文件里面定义一下主机清单
webserver    name=nginx   #定义webserver这台机子叫nginx(这个name是自己取的,与剧本里的when中名字对应即可),方便在剧本进行条件测试时进行区分
db     name=mysql   #定义db这台机子叫mysql
[web]
webserver
[db]
db
下面给被控的webserver和db做一个免密登录
[root@ansible ~]# ssh-keygen  #一路回车即可
[root@ansible ~]# ssh-copy-id root@192.168.43.133
[root@ansible ~]# ssh-copy-id root@192.168.43.134
测试一下主机连通性,两台都成功连通了
[root@ansible ~]# ansible all -m ping
[WARNING]: Found both group and host with same name: db
db | SUCCESS => {
    "ansible_facts": {
        "discovered_interpreter_python": "/usr/bin/python"
    },
    "changed": false,
    "ping": "pong"
}
webserver | SUCCESS => {
    "ansible_facts": {
        "discovered_interpreter_python": "/usr/bin/python"
    },
    "changed": false,
    "ping": "pong"
}
下面就是剧本啦,这是一个完整的剧本,根据条件分发到不同的机子进行执行
---
- hosts: db webserver
  remote_user: root
  vars:
    nginx_port: 89
    nginx_user: nginx

  tasks:
    - name: install_yum
      shell: curl -o /etc/yum.repos.d/CentOS-Base.repo https://mirrors.aliyun.com/repo/Centos-7.repo && curl -o /etc/yum.repos.d/epel.repo https://mirrors.aliyun.com/repo/epel-7.repo

    - name: install_nginx
      yum: name=nginx state=present
      when: name=="nginx"

    - name: copy_configure
      template: src=/root/nginx.conf.j2 dest=/etc/nginx/nginx.conf
      when: name=="nginx"

    - name: start_nginx
      service: name=nginx state=started
      when: name=="nginx"

    - name: restart_nginx
      service: name=nginx state=restarted
      when: name=="nginx"

    - name: install_php_rpm
      shell: yum install -y http://rpms.remirepo.net/enterprise/remi-release-7.rpm
      when: name=="nginx"

    - name: install_php_packages
      shell: yum install php80-php-xsl php80-php php80-php-cli php80-php-devel php80-php-gd php80-php-pdo php80-php-mysql php80-php-fpm -y
      when: name=="nginx"

    - name: start php
      service: name=php80-php-fpm state=started
      when: name=="nginx"

    - name: restart php
      service: name=php80-php-fpm state=restarted
      when: name=="nginx"

    - name: install_mysql
      shell: yum install -y mariadb-server mariadb
      when: name=="mysql"

    - name: start_mysql
      service: name=mariadb state=started
      when: name=="mysql"

    - name: create_db
      shell: mysql -e "create database wordpress;"
      when: name=="mysql"

    - name: grant_user
      shell: mysql -e "grant all on wordpress.* to 'wordpress'@'%' identified by 'Leyi@123456';"
      when: name=="mysql"

    - name: 传包
      unarchive: src=/root/wordpress-6.4.1-zh_CN.tar.gz dest=/usr/share/nginx/html/
      when: name=="nginx"
      tags: package
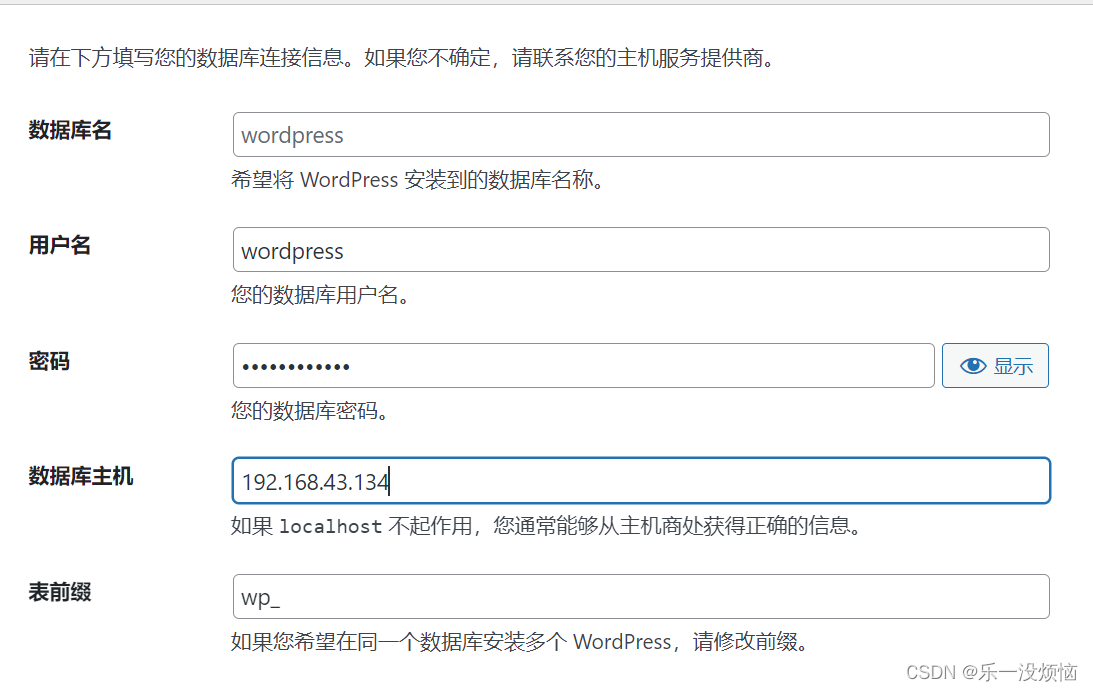
浏览器访问一下:http://192.168.43.133:89,出现以下界面

然后呢,按照指引进行填写
出现下边的界面也不要慌,我们去手动创建一个就好啦
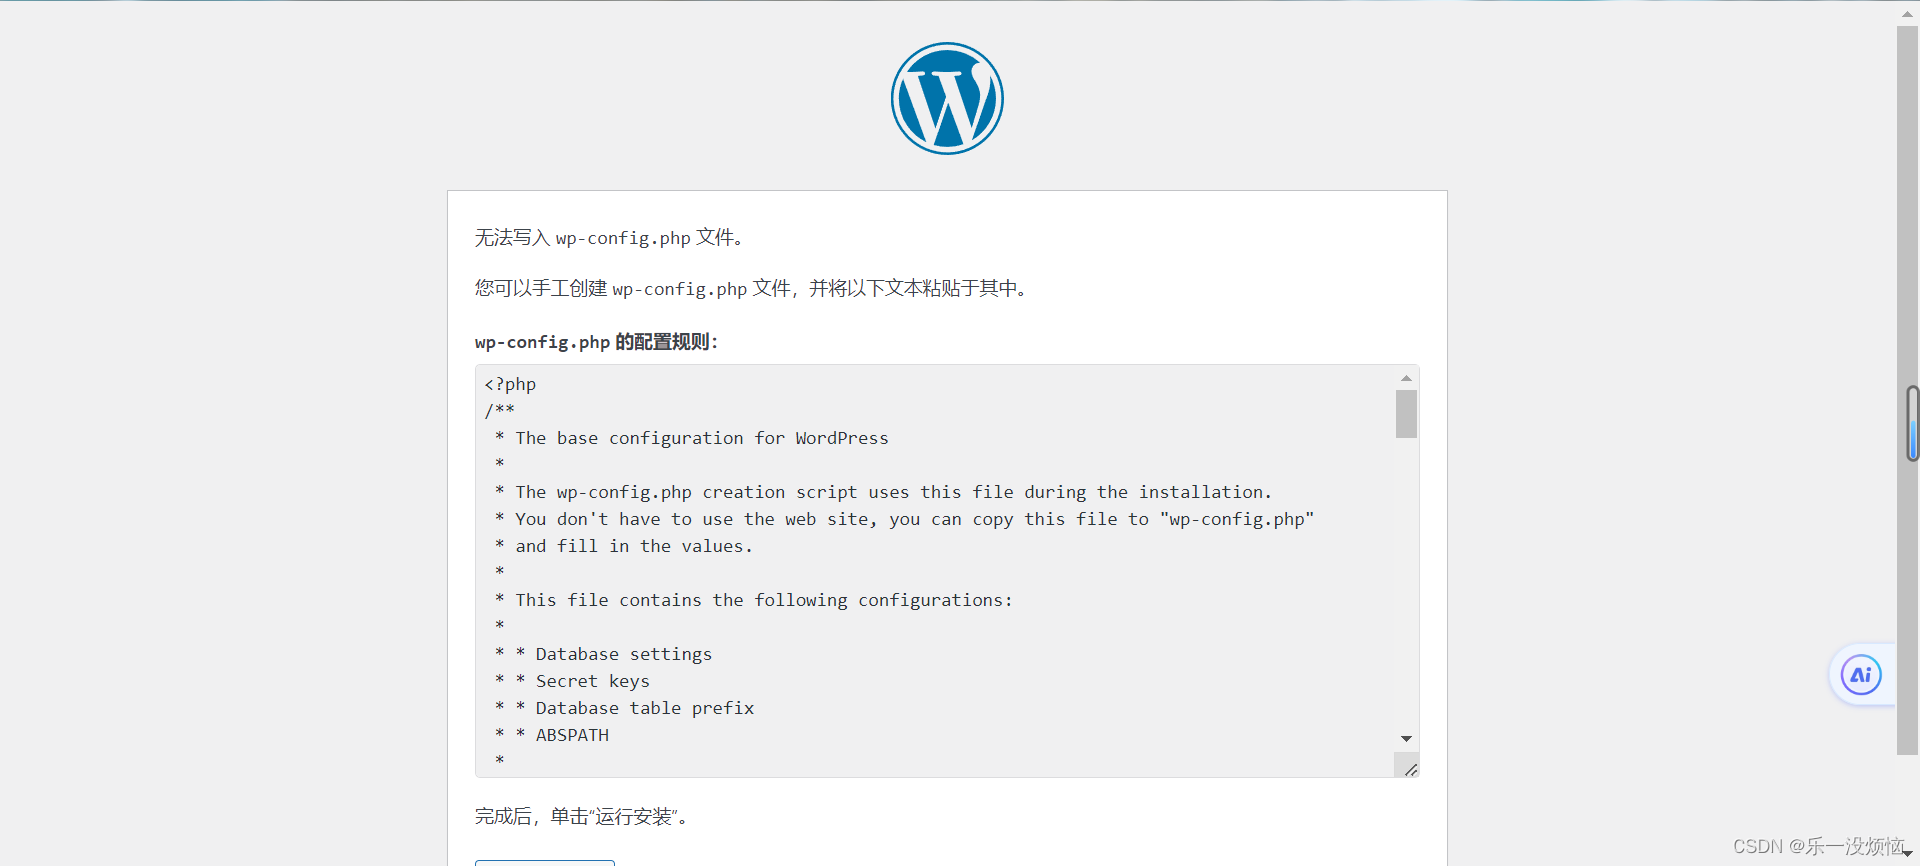
将内容复制下来,然后去写到webserver这台机子上/usr/share/nginx/html/wordpress/目录下,命名 wp-config.php。然后在浏览器刷新一下就好了
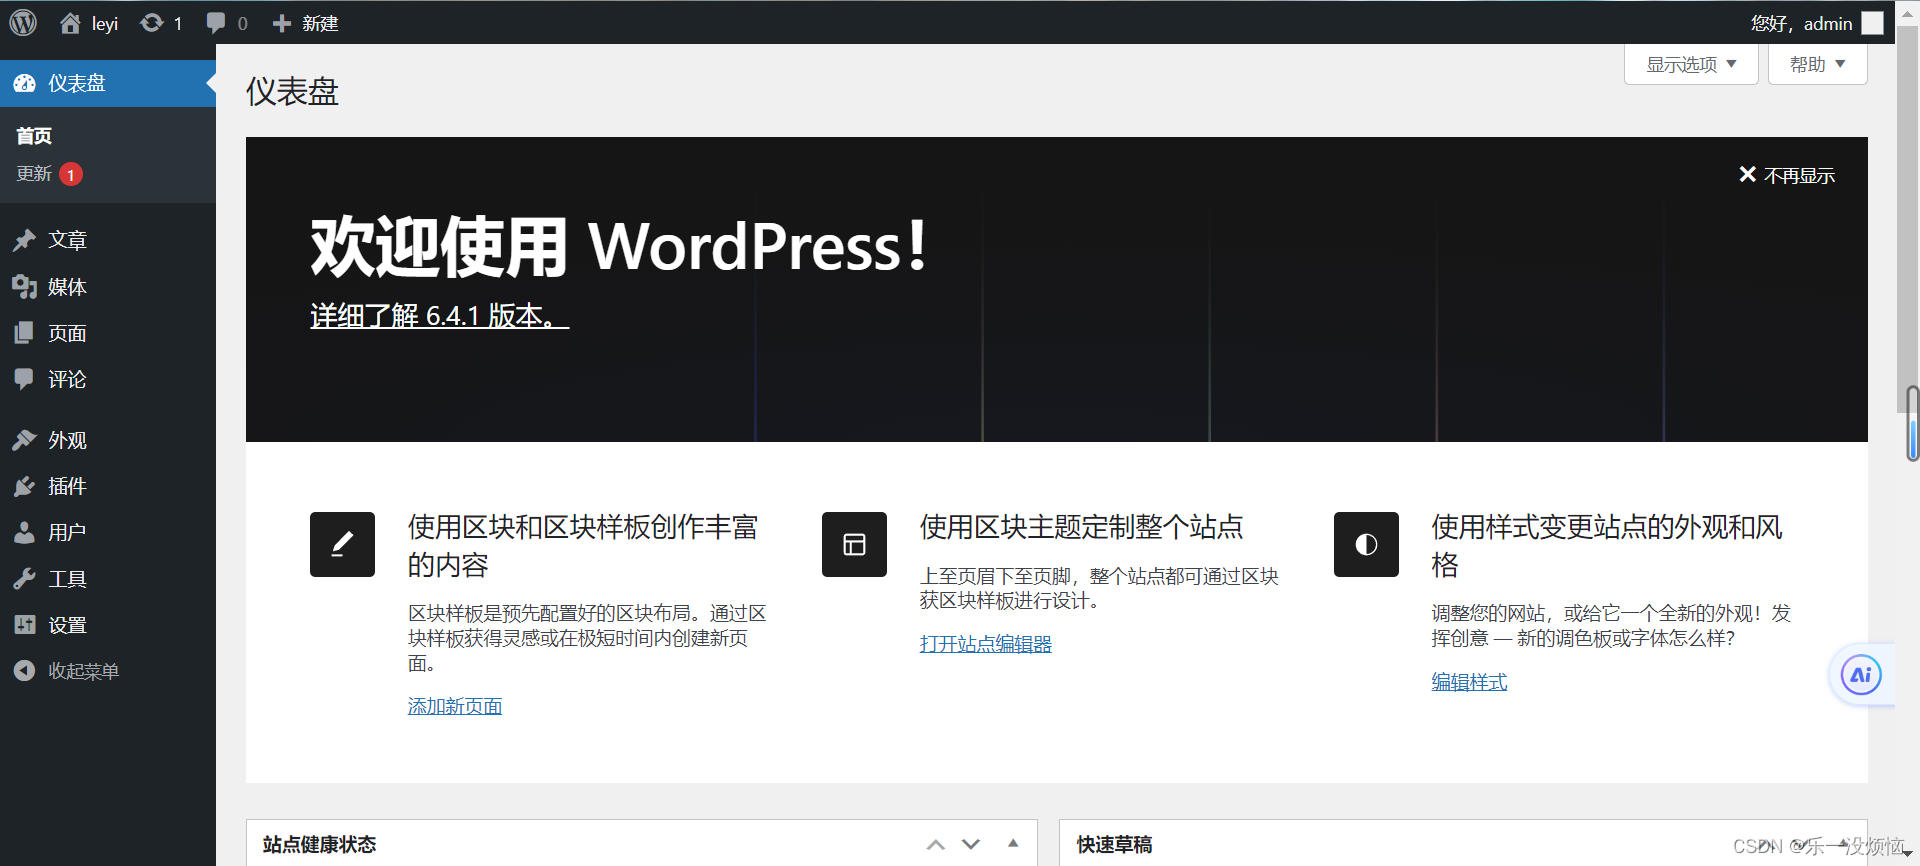
下面是部署完成后登录进入的界面。
如果不想手动去写入 wp-config.php文件的话,也可以在剧本里给/usr/share/nginx/html/wordpress/进行 授权
 - name: chown_wordpress
   shell: chown nginx.nginx /usr/shar/nginx/html/wordpress/
   when: name=="nginx"
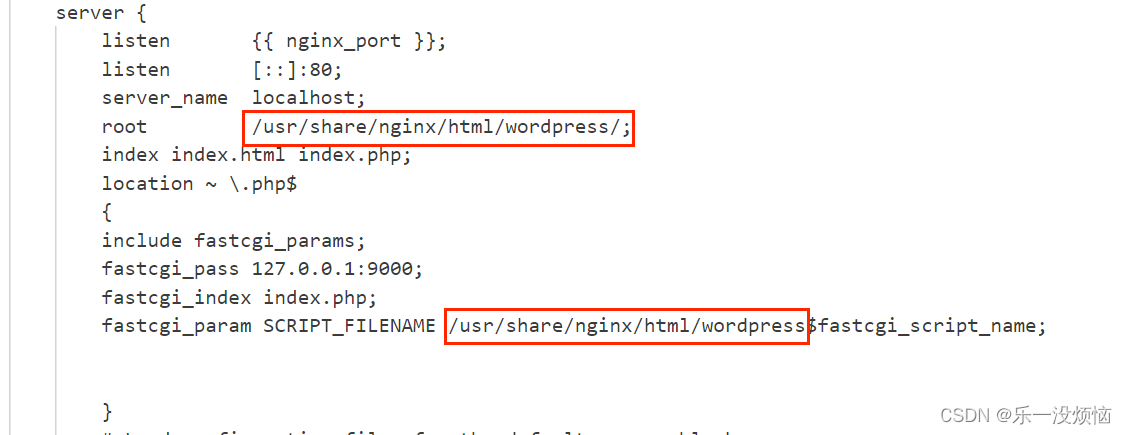
如果要部署其他项目,将nginx配置文件(nginx.conf.j2)里面的网站发布目录和“传包”里的安装包换一下就行了
下面附上nginx.conf.j2的内容
# For more information on configuration, see:
#   * Official English Documentation: http://nginx.org/en/docs/
#   * Official Russian Documentation: http://nginx.org/ru/docs/

user {{ nginx_user }};
worker_processes auto;
error_log /var/log/nginx/error.log;
pid /run/nginx.pid;

# Load dynamic modules. See /usr/share/doc/nginx/README.dynamic.
include /usr/share/nginx/modules/*.conf;

events {
    worker_connections 1024;
}

http {
    log_format  main  '$remote_addr - $remote_user [$time_local] "$request" '
                      '$status $body_bytes_sent "$http_referer" '
                      '"$http_user_agent" "$http_x_forwarded_for"';

    access_log  /var/log/nginx/access.log  main;

    sendfile            on;
    tcp_nopush          on;
    tcp_nodelay         on;
    keepalive_timeout   65;
    types_hash_max_size 4096;

    include             /etc/nginx/mime.types;
    default_type        application/octet-stream;

    # Load modular configuration files from the /etc/nginx/conf.d directory.
    # See http://nginx.org/en/docs/ngx_core_module.html#include
    # for more information.
    include /etc/nginx/conf.d/*.conf;

    server {
        listen       {{ nginx_port }};
        listen       [::]:80;
        server_name  localhost;
        root         /usr/share/nginx/html/wordpress/;
        index index.html index.php;
        location ~ \.php$
        {
		include fastcgi_params;
		fastcgi_pass 127.0.0.1:9000;
		fastcgi_index index.php;
		fastcgi_param SCRIPT_FILENAME /usr/share/nginx/html/wordpress$fastcgi_script_name;


        }
        # Load configuration files for the default server block.
        include /etc/nginx/default.d/*.conf;

        error_page 404 /404.html;
        location = /404.html {
        }

        error_page 500 502 503 504 /50x.html;
        location = /50x.html {
        }
    }

# Settings for a TLS enabled server.
#
#    server {
#        listen       443 ssl http2;
#        listen       [::]:443 ssl http2;
#        server_name  _;
#        root         /usr/share/nginx/html;
#
#        ssl_certificate "/etc/pki/nginx/server.crt";
#        ssl_certificate_key "/etc/pki/nginx/private/server.key";
#        ssl_session_cache shared:SSL:1m;
#        ssl_session_timeout  10m;
#        ssl_ciphers HIGH:!aNULL:!MD5;
#        ssl_prefer_server_ciphers on;
#
#        # Load configuration files for the default server block.
#        include /etc/nginx/default.d/*.conf;
#
#        error_page 404 /404.html;
#            location = /40x.html {
#        }
#
#        error_page 500 502 503 504 /50x.html;
#            location = /50x.html {
#        }
#    }

}
wordpress包获取路径:https://cn.wordpress.org/latest-zh_CN.tar.gz


 1029
1029


 被折叠的 条评论
为什么被折叠?
被折叠的 条评论
为什么被折叠?
 到【灌水乐园】发言


