


在上一篇中提到了路由网关spring-cloud-zuul,其主要介于外部服务调用者和微服务集群之间,提供了反向代理,负载均衡,拦截器等多种功能,适合于向外界提供微服务接口功能。就好比我们自己公司有多个微服务,这时有个其他公司需要调用我们的微服务接口,这时就可以使用zuul,而如果我们自己公司的这几个微服务之间需要互相调用服务接口的话,可以使用ribbon+restTemplate或feign来实现。
这里继续使用上一篇中的项目来扩展。用到的项目如下:
1.SpringCloudConfig
2.SpringCloudServiceCenter
3.SpringCloudServiceI
4.SpringCloudServiceII
5.SpringCloudServiceIII
一共一个配置中心,一个注册中心,3个微服务生产者(其中I和III的service id相同)
代码下载
一.ribbon+restTemplate
Ribbon是Netflix发布的负载均衡器,在与Eureka结合使用时,在配置完服务提供地址后,Ribbon就能根据配置的srevice id,到Eureka注册中心获取到该service id的所有实际地址,然后根据配置的负载均衡算法进行负载均衡。
新建SpringCloudCustomerI项目,作为服务消费者I
(1)pom.xml配置
	    <dependency>
			<groupId>org.springframework.cloud</groupId>
			<artifactId>spring-cloud-starter-netflix-eureka-client</artifactId>
		</dependency>
		<dependency>
			<groupId>org.springframework.cloud</groupId>
			<artifactId>spring-cloud-starter-netflix-ribbon</artifactId>
		</dependency>

		<dependency>
			<groupId>org.springframework.boot</groupId>
			<artifactId>spring-boot-starter-test</artifactId>
			<scope>test</scope>
		</dependency>

		<dependency>
			<groupId>org.springframework.boot</groupId>
			<artifactId>spring-boot-starter-web</artifactId>
		</dependency>
(2)application.properties配置
这里我就不在路径前加项目名了
#server.servlet.context-path=/myCustomerI
server.port=8770
spring.application.name=myCustomerI
eureka.client.service-url.defautZone=http://serviceCenter:8761/eureka/
(3)启动项SpringCloundCustomerIApplication.java
@LoadBalanced轮询方式。
package com.my.customerI;

import org.springframework.boot.SpringApplication;
import org.springframework.boot.autoconfigure.SpringBootApplication;
import org.springframework.cloud.client.loadbalancer.LoadBalanced;
import org.springframework.cloud.netflix.eureka.EnableEurekaClient;
import org.springframework.context.annotation.Bean;
import org.springframework.web.client.RestTemplate;

@SpringBootApplication
@EnableEurekaClient
public class SpringCloundCustomerIApplication {

	public static void main(String[] args) {
		SpringApplication.run(SpringCloundCustomerIApplication.class, args);
	}

	@Bean
	@LoadBalanced
	public RestTemplate restTemplate(){
		return new RestTemplate();
	}
}
(4)新建controller MyCustomerController。
package com.my.customerI.controller;

import org.springframework.beans.factory.annotation.Autowired;
import org.springframework.stereotype.Controller;
import org.springframework.web.bind.annotation.RequestMapping;
import org.springframework.web.bind.annotation.ResponseBody;
import org.springframework.web.client.RestTemplate;

@Controller
@RequestMapping(value="/CApi")
public class MyCustomerController {
	@Autowired
	private RestTemplate restTemplate;

	@ResponseBody
	@RequestMapping(value="CgetInfo")
	public String getCINfo() {
		return getServiceI()+"\n"+getServiceII();
	}

	private String getServiceI() {
        String info = restTemplate.getForObject("http://myServiceI/myServiceI/Api/getInfo", String.class);
        return info;
    }

	private String getServiceII() {
        String info = restTemplate.getForObject("http://myServiceII/myServiceII/Api/getInfo", String.class);
        return info;
    }
}
因为服务I和III的service id 都是myServiceI,路径都添加了前缀myServiceI,且都提供了/Api/getInfo接口(只是输出不同),所以当调用 getServiceI()方法时,将会按照轮询方式调用服务I和III。
启动注册中心,配置中心,服务I,II,III,和服务消费者I。
查看注册中心。

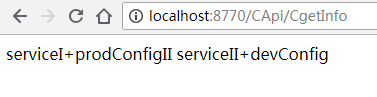
访问http://localhost:8770/CApi/CgetInfo,多访问几次,能发现两种输出一次轮询。

二.feign
事实上feign内包含了ribbon,并且feign是一个声明式的伪http客户端。可以通过注解来绑定接口,具有可插拔的特性。
其实我看到声明式的伪http客户端时是挺蒙蔽的,什么鬼,看起来好像很高大上啊。后面实际看了实现后,按我的理解来讲,就是如下:
@Component
@FeignClient("myServiceI")
public interface MyServiceIService {
	@ResponseBody
	@RequestMapping(value="/myServiceI/Api/getInfo")
	public String getInfo();
}
这里使用feign注解的方式将service id 为myServiceI的服务的/Api/getInfo接口绑定到了MyServiceIService 接口上。然后我们service id 为myServiceI的服务的/Api/getInfo接口在浏览器上直接访问的话路径是http://localhost:8762/myServiceI/Api/getInfo和
http://localhost:8764/myServiceI/Api/getInfo
而看下注解@FeignClient("myServiceI")这里可以理解为feign获取到了service id myServiceI,然后到Eureka注册中心中获取到对应的服务ip和端口。
然后@RequestMapping(value="/myServiceI/Api/getInfo"),/myServiceI是我添加的路径前缀,/Api/getInfo是服务接口地址,然后feign把ip端口服务接口地址合在一起,如果有多个地址,就使用负载均衡选一个,之后我们可以把feign看成是一个http客户端,它用这个路径去访问接口,得到结果后返回给我们。
新建SpringCloudCustomerII项目,作为服务消费者II
(1)pom.xml配置
		<dependency>
			<groupId>org.springframework.boot</groupId>
			<artifactId>spring-boot-starter-web</artifactId>
		</dependency>
		<dependency>
			<groupId>org.springframework.cloud</groupId>
			<artifactId>spring-cloud-starter-openfeign</artifactId>
		</dependency>
		<dependency>
		<groupId>org.springframework.cloud</groupId>
			<artifactId>spring-cloud-starter-netflix-eureka-client</artifactId>
		</dependency>
(2)application.properties配置
server.port=8771
spring.application.name=myCustomerII
eureka.client.service-url.defautZone=http://serviceCenter:8761/eureka/
(3)启动项SpringCloundCustomerIiApplication.java
package com.my.customerII;

import org.springframework.boot.SpringApplication;
import org.springframework.boot.autoconfigure.SpringBootApplication;
import org.springframework.cloud.netflix.eureka.EnableEurekaClient;
import org.springframework.cloud.openfeign.EnableFeignClients;

@SpringBootApplication
@EnableEurekaClient
@EnableFeignClients
public class SpringCloundCustomerIiApplication {

	public static void main(String[] args) {
		SpringApplication.run(SpringCloundCustomerIiApplication.class, args);
	}
}
(4)新建MyServiceIService.java用来访问service id为myServiceI的服务接口
package com.my.customerII.api;

import org.springframework.cloud.openfeign.FeignClient;
import org.springframework.stereotype.Component;
import org.springframework.web.bind.annotation.RequestMapping;
import org.springframework.web.bind.annotation.ResponseBody;

@Component
@FeignClient("myServiceI")
public interface MyServiceIService {
	@ResponseBody
	@RequestMapping(value="/myServiceI/Api/getInfo")
	public String getInfoOther();
}
(5)新建MyServiceIIService.java用来访问service id为myServiceII的服务接口
package com.my.customerII.api;

import org.springframework.cloud.openfeign.FeignClient;
import org.springframework.stereotype.Component;
import org.springframework.web.bind.annotation.RequestMapping;
import org.springframework.web.bind.annotation.ResponseBody;

@Component
@FeignClient("myServiceII")
public interface MyServiceIIService {
	@ResponseBody
	@RequestMapping(value="/myServiceII/Api/getInfo")
	public String getInfo();
}
(6)新建MyCustomerController.java
package com.my.customerII.controller;

import org.springframework.beans.factory.annotation.Autowired;
import org.springframework.stereotype.Controller;
import org.springframework.web.bind.annotation.RequestMapping;
import org.springframework.web.bind.annotation.RequestParam;
import org.springframework.web.bind.annotation.ResponseBody;

import com.my.customerII.api.MyServiceIIService;
import com.my.customerII.api.MyServiceIService;

@Controller
@RequestMapping(value="/CApi")
public class MyCustomerController {

	@Autowired
	private MyServiceIService myServiceIService;
	@Autowired
	private MyServiceIIService myServiceIIService;

	@ResponseBody
	@RequestMapping(value="/CgetInfo")
	public String getInfo(@RequestParam String name) {
		String result="";

		result+=name+" | "+myServiceIService.getInfoOther()+" | "+myServiceIIService.getInfo();

		return result;
	}
}
(7)启动注册中心,配置中心,服务I,服务II,服务III,服务消费者II
注册中心界面,可以看到服务消费者I没启动。

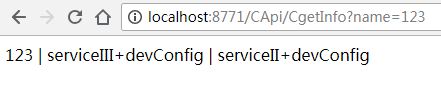
然后访问http://localhost:8771/CApi/CgetInfo?name=123
多次访问后可以看到会轮询如下两种输出。负载均衡运行正常。

还有一点就是想要绑定的接口方法名和我们接口中的方法名不需要一模一样,如下修改SpringCloudCustomerII中的MyServiceIService.java,而service id为myServiceI的服务I和III中对应/myServiceI/Api/getInfo的方法名为getInfo,这样也是可以的。
@Component
@FeignClient("myServiceI")
public interface MyServiceIService {
	@ResponseBody
	@RequestMapping(value="/myServiceI/Api/getInfo")
	public String getInfoOther();
}


 4044
4044


 被折叠的 条评论
为什么被折叠?
被折叠的 条评论
为什么被折叠?
 到【灌水乐园】发言


