


外面比较流行的一个UI库,这里介绍下简单的使用方法
引擎Git地址
https://github.com/ocornut/imgui
开发环境
Win10,Directx11 SDK,VS2015,Imgui版本为1.78 WIP
开发准备
工程目录下的examples带有DX11的使用例子,通过查看代码整理后的库文件如图:
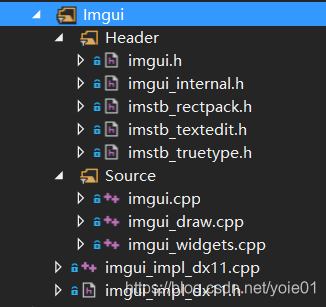
其中imgui_impl_dx11.h和imgui_impl_dx11.cpp被博主重新封装了,本文末尾提供打包库下载。
引用库
d3d11.lib,d3dcompiler.lib
代码添加
1、创建D3D设备后,初始化imgui引擎
IMGUI_CHECKVERSION();
ImGui::CreateContext();
//风格
ImGui::StyleColorsDark();
//设置字体,用于显示中文
ImFontConfig Config;
Config.MergeMode = true;
ImGuiIO& io = ImGui::GetIO();
io.Fonts->AddFontDefault();
io.Fonts->AddFontFromFileTTF("C:\\Windows\\Fonts\\simsun.ttc",
                             16.0f,
                             &Config,
                             io.Fonts->GetGlyphRangesChineseSimplifiedCommon());
//初始化imgui引擎 (当前窗口句柄,D3D设备,D3D设备上下文)
ImGui_ImplDX11_Init(m_Wnd, m_pd3dDevice, m_pd3dDeviceContext);
ImGui_ImplDX11_CreateDeviceObjects();
2、主绘制线程内调用(imgui 渲染过程)
ImGui_ImplDX11_NewFrame();
/*用户自定义区域开始*/
BeginDraw();
//绘制UI
DrawMenu();
//绘制图形
DrawOther();
EndDraw();
/*用户自定义区域结束*/
ImGui::Render();
m_pd3dDeviceContext->OMSetRenderTargets(1, &m_mainRenderTargetView, NULL);
ImGui_ImplDX11_RenderDrawLists(ImGui::GetDrawData());
这里给出用户自定义区域的代码,仅供参考
VOID BeginDraw()
{
	//UI窗体背景色
	ImGui::PushStyleColor(ImGuiCol_WindowBg, ImVec4(0.0F, 0.0F, 0.0F, 1.0F));
	//UI窗体创建
	ImGui::Begin(" ",
                 reinterpret_cast<bool*>(true),
                 ImGuiWindowFlags_NoTitleBar | ImGuiWindowFlags_NoInputs);
	//UI窗体位置,如果需要拖动不要设置
	ImGui::SetWindowPos(ImVec2(0, 0), ImGuiCond_Always);
	//UI窗体大小
	ImGui::SetWindowSize(ImVec2(ImGui::GetIO().DisplaySize.x,
                                ImGui::GetIO().DisplaySize.y),
                         ImGuiCond_Always);
	//UI窗体风格
	ImGuiStyle& style = ImGui::GetStyle();
	//窗体边框圆角
	style.WindowRounding = 0.0f;
}

VOID EndDraw()
{
	ImGuiWindow* window =  ImGui::GetCurrentWindow();
	window->DrawList->PushClipRectFullScreen();
	ImGui::End();
	ImGui::PopStyleColor();
}

void DrawMenu(){
	//UI窗体尺寸
	ImGui::SetNextWindowSize(ImVec2(200,500));
	ImGuiWindowFlags window_flags = 0;
	window_flags |= ImGuiWindowFlags_NoCollapse;
	window_flags |= ImGuiWindowFlags_NoResize;
	//临时用于保存控件值
	bool bTestCheckBox = false;
	if (ImGui::Begin("  ", reinterpret_cast<bool*>(true), window_flags)){
		if (ImGui::CollapsingHeader(u8"Root 根")) {
			if (ImGui::TreeNode(u8"分类>>")) {
				ImGui::Checkbox(u8"测试1", &bTestCheckBox); ImGui::SameLine();
				ImGui::Checkbox(u8"AAAA", &bTestCheckBox);
				ImGui::TreePop();
			}

			if (ImGui::TreeNode(u8"About2>>")) {
				ImGui::Checkbox(u8"BBBB", &bTestCheckBox); ImGui::SameLine();
				ImGui::Checkbox(u8"BBBB", &bTestCheckBox);
				ImGui::TreePop();
			}
		}
		ImGui::End();
	}
}

void DrawOther() {
    //颜色
	ImVec4 colf = ImVec4(1.0f, 1.0f, 0.4f, 1.0f);
	const ImU32 col = ImColor(colf);

	//绘制图形
	ImDrawList* draw_list = ImGui::GetWindowDrawList();
	//画线
	draw_list->AddLine(ImVec2(0, 20), ImVec2(500, 500), col, 3.0f);
	//画文字
	draw_list->AddText(ImVec2(30, 500), col, string_to_utf8("显示中文").c_str());
	//画矩形
	draw_list->AddRect(ImVec2(50, 100), ImVec2(150, 230), col, 0.0f, 0, 3.0f);
}
3、窗口消息回调内(用于响应UI控件)
if (ImGui_ImplWin32_WndProcHandler(hWnd, msg, wParam, lParam)) {
		return 0;
	}
4、释放代码
//释放引擎
ImGui_ImplDX11_Shutdown();
ImGui::DestroyContext();
以上为初步使用框架,后续深入使用另外再发博文了。
PS. 打包库 下载地址:


 5165
5165

 被折叠的 条评论
为什么被折叠?
被折叠的 条评论
为什么被折叠?
 到【灌水乐园】发言


