


前几篇搭建了Hadoop的集群环境,今天安装一下在集群环境下的开发工具——eclipse。
安装之前下载所需软件:
eclipse:http://www.eclipse.org/downloads/
jre下载:http://www.java.com/en/download/manual.jsp
Hadoop2.7.1插件下载:http://download.csdn.net/detail/young_kim1/9334233
本文安装的是Eclipse IDE for Java EE Developers 4.5.1版本,jre是1.7的。
安装Eclipse
1、安装jre
将jre拷贝到toolkits文件夹下(在家目录里新建了两个文件夹toolkits和labc,前者用于存放的软件安装包,后者放置实验所需的软件,详细内容见前几篇)
解压安装:rpm -ivh jre-7u51-linux-i586.rpm(默认安装到/usr/java目录下)
配置环境变量:
打开vi /etc/profile
输入export PATH=$PATH:/usr/java/[jre安装目录]
使环境变量生效source /etc/profile
2、安装Eclipse
将文件复制到toolkits文件夹下
解压缩安装:tar -zxvf eclipse-jee-mars-1-linux-gtk.tar.gz
移动文件到labc文件夹下:mv eclipse ../labc
进入安装目录,启动Eclipse:./eclipse
将程序放到桌面:
桌面上右键–>【创建启动器】,输入eclipse安装目录。

点击【确定】,下次可直接从桌面启动。
安装Hadoop2.7.1插件
1、将下载好的插件移动到eclipse安装目录下的plugins文件夹下。
2、重新启动eclispe,配置hadoop安装目录和hdfs端口。
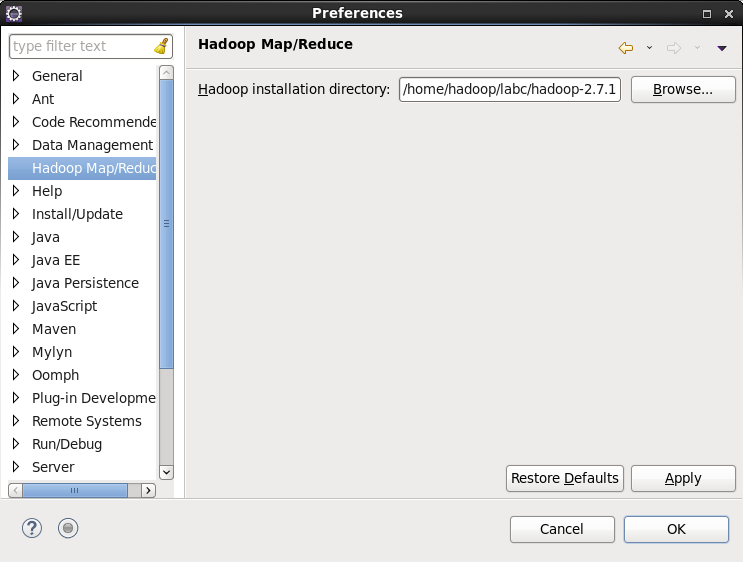
如果插件安装成功,打开【Windows】—>【Preferences】后,在窗口左侧会有Hadoop Map/Reduce选项,点击此选项,在窗口右侧设置hadoop安装路径,然后点击【OK】。
打开【Windows】–>【Perspective】–>【Open perspective】–>【Other】,选择【Map/Reduce】,点击【OK】。

点击【Map/Reduce Location】选项卡,点击右边小象图标,打开Hadoop Location配置窗口:
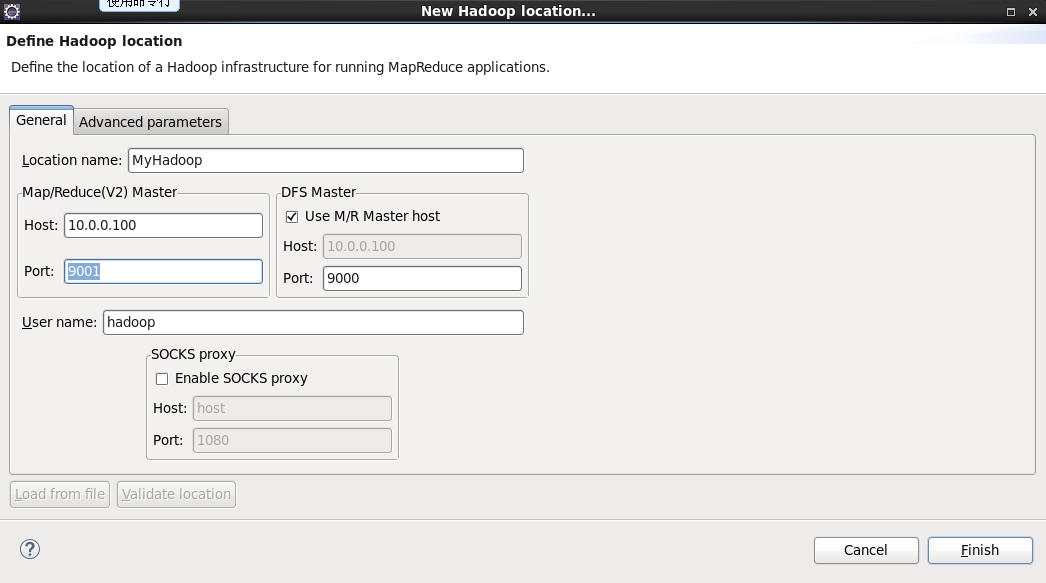
输入Location Name,任意名称即可。配置Map/Reduce Master和DFS Mastrer,Host和Port配置成与core-site.xml的设置一致即可,我这里直接输入的IP地址(貌似Map/Reduce Master 的端口设置任何数字都可以),点击【Finish】。
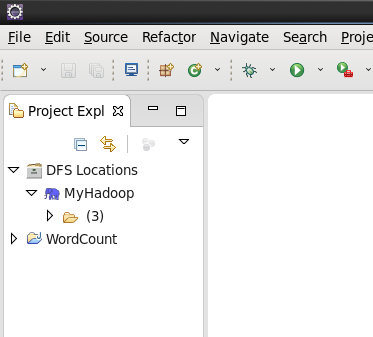
点击左侧的DFSLocations—>MyHadoop(上一步配置的location name),如果不报错,表示安装成功。
注意:这里和Hadoop1.x不一样,1.x版本这里会有user文件夹,2.x以后没有,如果你是新装的hadoop,这里显示的文件数为0,此时并不是报错。
新建WordCount项目
1、点击【File】—>【Project】,选择【Map/Reduce Project】,输入项目名称WordCount,一直回车。
在WordCount项目里新建class,名称为WordCount,代码如下:
import java.io.IOException;
import java.util.StringTokenizer;

import org.apache.hadoop.conf.Configuration;
import org.apache.hadoop.fs.Path;
import org.apache.hadoop.io.IntWritable;
import org.apache.hadoop.io.Text;
import org.apache.hadoop.mapreduce.Job;
import org.apache.hadoop.mapreduce.Mapper;
import org.apache.hadoop.mapreduce.Reducer;
import org.apache.hadoop.mapreduce.lib.input.FileInputFormat;
import org.apache.hadoop.mapreduce.lib.output.FileOutputFormat;
import org.apache.hadoop.util.GenericOptionsParser;

public class WordCount {

    public static class TokenizerMapper extends Mapper<Object, Text, Text, IntWritable> {
        private final static IntWritable one = new IntWritable(1);
        private Text word = new Text();

        public void map(Object key, Text value, Context context) throws IOException, InterruptedException {
            StringTokenizer itr = new StringTokenizer(value.toString());
            while (itr.hasMoreTokens()) {
                word.set(itr.nextToken());
                context.write(word, one);
            }
        }
    }

    public static class IntSumReducer extends Reducer<Text, IntWritable, Text, IntWritable> {
        private IntWritable result = new IntWritable();

        public void reduce(Text key, Iterable<IntWritable> values, Context context)
                throws IOException, InterruptedException {
            int sum = 0;
            for (IntWritable val : values) {
                sum += val.get();
            }
            result.set(sum);
            context.write(key, result);
        }
    }

    @SuppressWarnings("deprecation")
    public static void main(String[] args) throws Exception {
        Configuration conf = new Configuration();
        String[] otherArgs = new GenericOptionsParser(conf, args).getRemainingArgs();
        if (otherArgs.length != 2) {
            System.err.println("Usage: wordcount <in> <out>");
            System.exit(2);
        }
        Job job = new Job(conf, "word count");
        job.setJarByClass(WordCount.class);
        job.setMapperClass(TokenizerMapper.class);
        job.setCombinerClass(IntSumReducer.class);
        job.setReducerClass(IntSumReducer.class);
        job.setOutputKeyClass(Text.class);
        job.setOutputValueClass(IntWritable.class);
        FileInputFormat.addInputPath(job, new Path(otherArgs[0]));
        FileOutputFormat.setOutputPath(job, new Path(otherArgs[1]));
        System.exit(job.waitForCompletion(true) ? 0 : 1);
    }
}
2、在HDFS上创建目录input
hadoop fs -mkdir /input
3、拷贝本地README.txt到HDFS的input里
hadoop fs -copyFromLocal /home/hadoop/labc/hadoop/README.txt /input
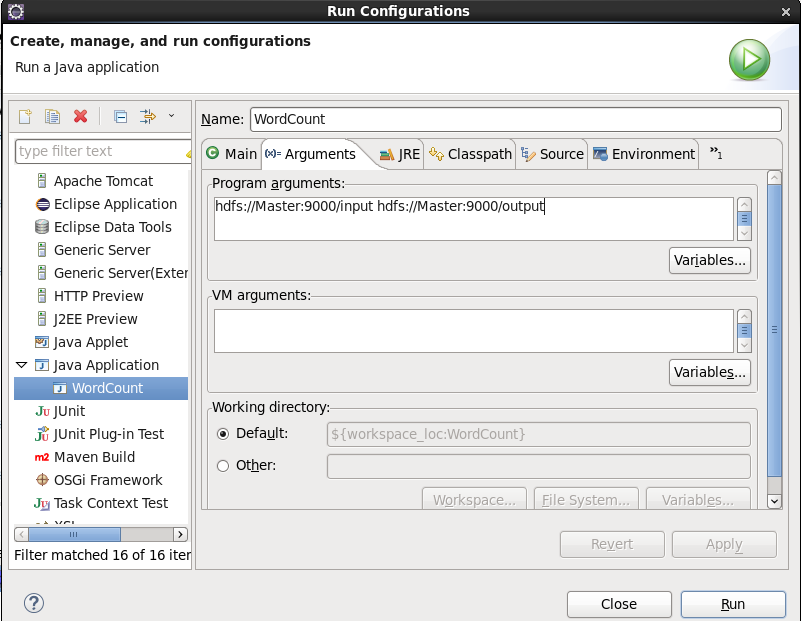
4、点击WordCount.java,右键,点击【Run As】—>【Run Configurations】,配置运行参数,即输入和输出文件夹
hdfs://Master:9000/input hdfs://Master:9000/output
5、点击【Run】,运行程序。
查看运行结果:
1> 在控制台输入:
hadoop fs -cat /output/part-r-00000
2>展开【DFS Locations】
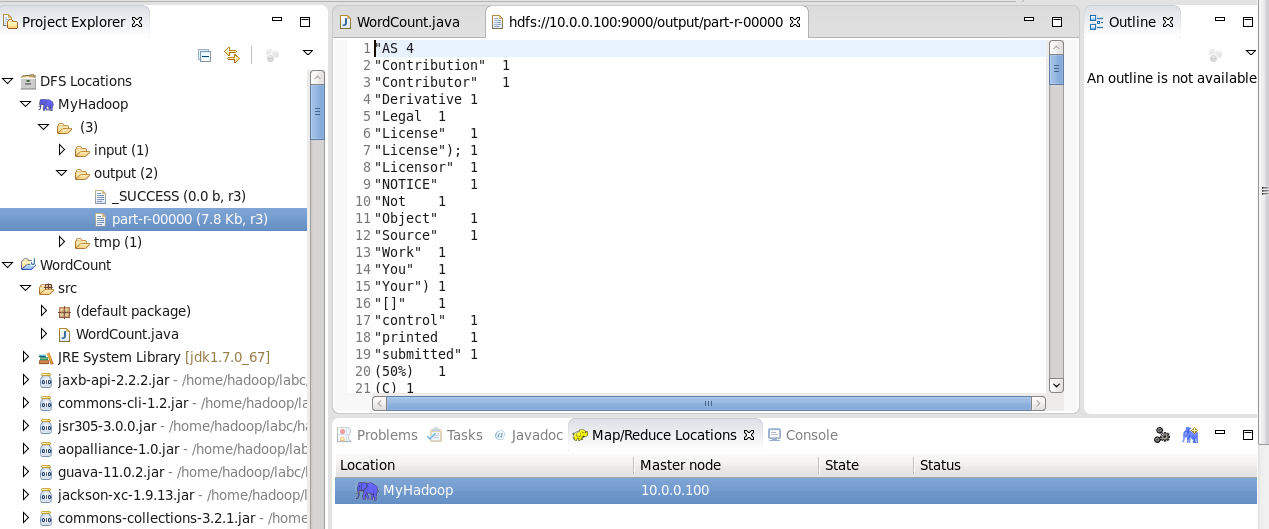
=============================================
环境的搭建告一段落,现在要好好学习hadoop的操作了。


 502
502

 被折叠的 条评论
为什么被折叠?
被折叠的 条评论
为什么被折叠?
 到【灌水乐园】发言


