


转载自:http://blog.csdn.net/weisubao/article/details/40075409
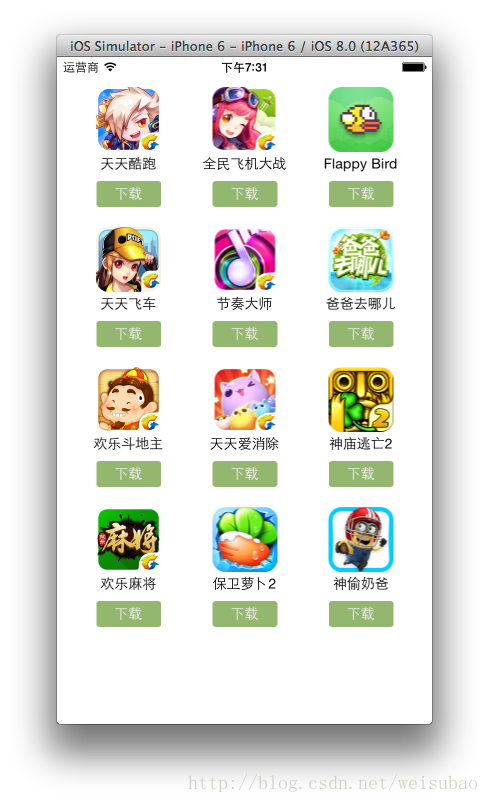
本次九宫格案例:
(1)导入app.plist和各种图片素材,方便后续开发。实际开发中,也是如此。
(2)把plist中数组导入进来。
——因为本案例中app.plist最终是一个数组,数组里面是字典。所以我们需要一个数组类型来接受这个plist文件。
——我们利用之前掌握的在变量的getter中进行延迟加载数据。
- #import "ViewController.h"
- @interface ViewController ()
- @property(nonatomic,strong) NSArray *arr1;
- @end
- @implementation ViewController
- - (void)viewDidLoad {
- self.arr1;
- [super viewDidLoad];
- }
- -(NSArray *)arr1{
- if (_arr1==nil) {
- NSString *path=[[NSBundle mainBundle]pathForResource:@"app.plist" ofType:nil];
- _arr1=[NSArray arrayWithContentsOfFile:path];
- NSLog(@"%@",_arr1);
- }
- return _arr1;
- }
- @end
- {
- icon = "icon_00";
- name = "\U5929\U5929\U9177\U8dd1";
- },
- {
- icon = "icon_01";
- name = "\U5168\U6c11\U98de\U673a\U5927\U6218";
- },
- ……
(3)九宫格计算
——关键在于利用 / 和 % 运算得到元素所在的行和列,注意%符号运算前后不能有CGFloat,都换成int类型较好。
——CGFloat其实就是float和double的集合。所有用float和double的地方几乎都可以用CGFloat。会根据当前系统自动解析,如果是32位系统,则用float,如果是64位系统,则解析成double。
- - (void)viewDidLoad {
- //定义总列数、每个九宫格的宽高
- int totalColumns=3;
- CGFloat appW=90;
- CGFloat appH=100;
- //定义水平和垂直方面的间距
- CGFloat marginX=(self.view.frame.size.width-totalColumns*appW)/(totalColumns+1);
- CGFloat marginY=20;
- //根据arr1中数据数量来初始化并加载一个一个的UIVIew
- for (int index=0; index<self.arr1.count; index++) {
- //计算这个app在几行几列
- int row=index/totalColumns;
- int col=index%totalColumns;
- //创建UIView
- UIView *appView=[[UIView alloc]init];
- //根据一些计算,确定不同UIView的位置
- appView.frame=CGRectMake(marginX+col*(marginX+appW), 30+row*(marginY+appH), appW, appH);
- appView.backgroundColor=[UIColor redColor];
- [self.view addSubview:appView];
- }
- [super viewDidLoad];
- // Do any additional setup after loading the view, typically from a nib.
- }
(4)往每个appView里面添加一个UIImageView、UIlabel和UIButton。直接在for循环中添加,即创建UIView *appView的时候顺便把它里面的东西也创建了。
——其中,UIImageView里的图片用到取得图片的名称,这个可以存放在plist里面,我们把_arr1里对应的字典取出来使用即可。
——重点是,UIButton的字体大小无法直接设置,而是用到UIbutton里的子视图titleLabel来设置。(因为UIButton里面其实封装了两个子视图控件,一个是装文字的UILabel *titleLabel,一个装图片的UIImageView *imageView)
- for (int index=0; index<self.arr1.count; index++) {
- //计算这个app在几行几列
- int row=index/totalColumns;
- int col=index%totalColumns;
- //创建UIView
- UIView *appView=[[UIView alloc]init];
- //根据一些计算,确定不同UIView的位置
- appView.frame=CGRectMake(marginX+col*(marginX+appW), 30+row*(marginY+appH), appW, appH);
- // appView.backgroundColor=[UIColor redColor];
- [self.view addSubview:appView];
- //根据索引拿到plist每个字典的数据
- NSDictionary *appDic=_arr1[index];
- //往appView里增加子控件icon
- //根据字典拿到里面的icon名称
- UIImageView *appIcon=[[UIImageView alloc]init];
- CGFloat iconW=65;
- CGFloat iconH=65;
- CGFloat iconX=(appW-iconW)/2;
- CGFloat iconY=0;
- appIcon.frame=CGRectMake(iconX, iconY, iconW, iconH);
- appIcon.image=[UIImage imageNamed:appDic[@"icon"]];
- [appView addSubview:appIcon];
- //往appView里增加子控件label
- UILabel *appLabel=[[UILabel alloc]init];
- CGFloat labelW=appW;
- CGFloat labelH=20;
- CGFloat labelX=(appW-labelW)/2;
- CGFloat labelY=iconY+iconH;
- appLabel.frame=CGRectMake(labelX, labelY, labelW, labelH);
- appLabel.text=appDic[@"name"];
- appLabel.textAlignment=NSTextAlignmentCenter;
- appLabel.font=[UIFont systemFontOfSize:14];
- [appView addSubview:appLabel];
- //往appView里增加子控件button
- UIButton *appBtn=[[UIButton alloc]init];
- CGFloat btnW=65;
- CGFloat btnH=26;
- CGFloat btnX=(appW-btnW)/2;
- CGFloat btnY=labelY+labelH;
- appBtn.frame=CGRectMake(btnX, btnY, btnW, btnH);
- [appBtn setTitle:@"下载" forState:UIControlStateNormal];
- appBtn.titleLabel.font=[UIFont systemFontOfSize:14];
- [appBtn setBackgroundImage:[UIImage imageNamed:@"buttongreen"] forState:UIControlStateNormal];
- [appBtn setBackgroundImage:[UIImage imageNamed:@"buttongreen_highlighted"] forState:UIControlStateNormal];
- [appView addSubview:appBtn];
- }
(5)最重要的:字典转模型
使用字典的坏处:需要用key值调取和设置数据,有时候会出错,虽然可以用宏变量改进,但是更要命的写错了key值,没有错误提示。
模型:严格叫做模型数据。核心就是我们把字典当成一个对象,字典里面的几个数据,我们分别转换成对象的几个属性,我们调用和设置数据的时候直接是“对象.属性”即可。
所以,我们需要创建一个类,这个专门用来存放数据,也就是常说的模型类。
本例中,创建一个JiuGongGe类,在.h中声明2个变量,和2种初始化方法(规范都是有2种初始化方法,其实核心是一种,第二种还是通过第一种来实现的)。
- #import <Foundation/Foundation.h>
- @interface JiuGongGe : NSObject
- @property(nonatomic,copy) NSString *name;
- @property(nonatomic,copy) NSString *icon;
- -(instancetype)initWithJiuGongGe:(NSDictionary *)dic;
- +(instancetype)jiuGongGeWith:(NSDictionary *)dic;
- @end
在JiuGongGe.m中实现(注意写法,记忆):
- #import "JiuGongGe.h"
- @implementation JiuGongGe
- -(instancetype)initWithJiuGongGe:(NSDictionary *)dic{
- if (self=[super init]) {
- self.name=dic[@"name"];
- self.icon=dic[@"icon"];
- }
- return self;
- }
- +(instancetype)jiuGongGeWith:(NSDictionary *)dic{
- return [[JiuGongGe alloc]initWithJiuGongGe:dic];
- }
- @end
其实,我们的小标题是“字典转模型”,也就是说只是把字典转换成模型(对象),原先字典存放在数组中的,然后通过数组[index]一个个调用字典,现在模型(对象)依然存放在数组中。所以我们需要对数组的那个getter方法进行改进:(注意:需要在ViewController.m中#import "JiuGongGe.h",因为要实例化对象)
- -(NSArray *)arr1{
- if (_arr1==nil) {
- NSString *path=[[NSBundle mainBundle]pathForResource:@"app.plist" ofType:nil];
- NSArray *tmpArr=[NSArray arrayWithContentsOfFile:path];
- NSMutableArray *muArr1=[[NSMutableArray alloc]init];
- for (NSDictionary *dict in tmpArr) {
- JiuGongGe *jiugognge=[JiuGongGe jiuGongGeWith:dict];
- [muArr1 addObject:jiugognge];
- }
- _arr1=muArr1;
- }
- return _arr1;
- }
在ViewDidLoad的那个for循环中,用到的地方都可以用对象.属性来调用数据了:
- //根据索引拿到每个对象,此处appDic名称未改,还是用之前取字典的那个变量,看的不太习惯
- JiuGongGe *appDic=_arr1[index];
- //往appView里增加子控件icon
- ……
- appIcon.image=[UIImage imageNamed:appDic.icon];
- //往appView里增加子控件label
- appLabel.text=appDic.name;
(6)jiuGongGeWith:(NSDictionary *)dic;初始化方法的改进
——里面用到的类名,可以替换成self。因为防止这个类有子类,如果子类调用jiuGongGeWith:(NSDictionary *)dic;时调用到父类的这个方法,里面写得名字还是父类的名字,初始化结果是一个父类的对象,而不是子类的对象。所以用self,谁调用就初始化谁的对象。
(7)id类型和instancetype的说明
——instancetype和id一样,都是万能指针。
——iOS建议我们使用instancetype代替id。尽管官方很多init方法的返回值也是id。
——使用id的好处就是,id是万能指针,我们不用担心它的返回值类型不匹配的问题。
——使用id的坏处:也正是因为它是万能指针,我们可以用任意指针接受这个返回值,比如NSString *str1=****,NSArray *arr1=****,这句代码写出来不会报错。但是有可能不是我们需要的返回值类型。
——使用instancetype的好处是,如果我们返回值是一个对象,那么你用上面两个任意指针接受这个返回值,它会有warning警告,我们用类对象JiuGongGe *jiugognge=***,就不会警告。
——instancetype只能用在返回值类型上,不能像id一样用在参数上。
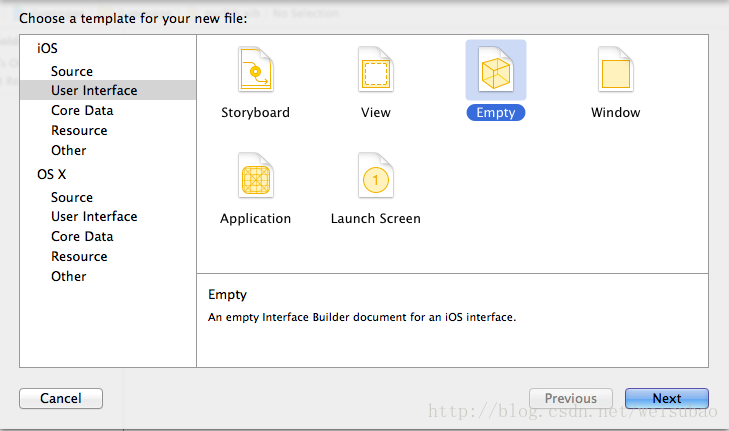
(8)利用xib图形化布局减少代码
xib和storyboard的区别在于,storyboard是描述整个程序界面的,而xib多用于局部重复界面的描述。
比如本例中有12个应用,每个应用的视图都是一样的,可以用xib来实现,然后再把xib加载进来即可。
xib的创建(用empty):
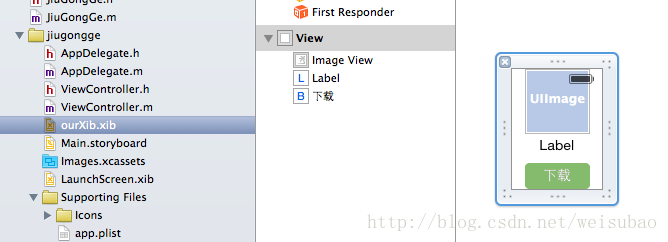
在ourXib中布局:
——给UIImageView和UILabel分别设置tag为10和20,方便调用。
——拖动控件到界面中,改变大小时候,UIImageView需要把size设置成Freeform才能调整大小。
ourXib设置好后,就可以调用:
——除了图片之外的资源,都需要用[NSBundle mainBundle]来调用。
——调用xib文件的方法是mainBundle的loadNibNamed方法。
- for (int index=0; index<self.arr1.count; index++) {
- //计算这个app在几行几列
- int row=index/totalColumns;
- int col=index%totalColumns;
- //根据索引拿到每个对象
- JiuGongGe *appDic=_arr1[index];
- NSArray *xibArr=[[NSBundle mainBundle]loadNibNamed:@"ourXib" owner:nil options:nil];
- UIView *xibView=[xibArr lastObject];
- xibView.frame=CGRectMake(marginX+col*(marginX+appW), 30+row*(marginY+appH), appW, appH);
- UIImageView *imgView2=(UIImageView *)[xibView viewWithTag:10];
- imgView2.image=[UIImage imageNamed:appDic.icon];
- UILabel *label2=(UILabel *)[xibView viewWithTag:20];
- label2.text=appDic.name;
- //添加到主view中
- [self.view addSubview:xibView];
- }
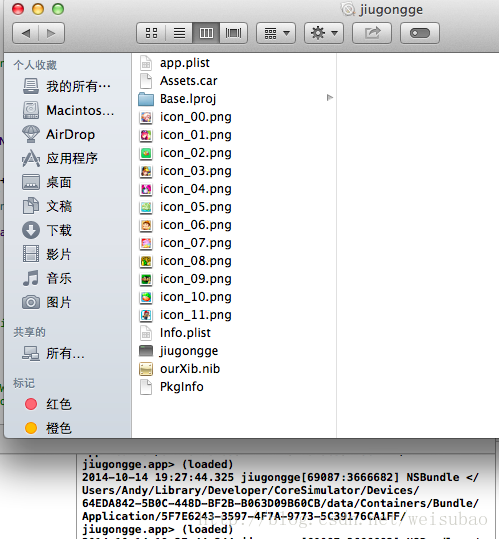
(9)xib文件和nib文件是什么关系?
——xib文件是我们开发者在开发的时候看到的东西;
——而运行在用户手机里时,xib文件会被转化为nib文件。
我们可以在iOS Simulator产生的沙盒中查看。
——找不到资源库路径,直接用NSLog(@"%@",[NSBundle mainBundle);把路径打印出来。
查找发现,这个资源库中确实有个ourXib.nib文件,xib文件确实转化成nib文件了。


 3312
3312

 被折叠的 条评论
为什么被折叠?
被折叠的 条评论
为什么被折叠?
 到【灌水乐园】发言


