


提示:Linux中OpenSSH_7.4p1升级到OpenSSH_9.3p1,不入坑,亲测没问题!!!
文章目录

前言
获取OpenSSH软件包 ,链接:https://pan.baidu.com/s/16W3LIRBnB1kPbi7aZc32Og?pwd=U6SD
提取码:U6SD
针对于漏洞修复,Linux中OpenSSH_7.4p1升级到OpenSSH_9.3p1,在升级之前必须要做以下三件事,不然的话升级后无法远程访问服务器,会出现以下报错:
登录服务器报错: "server unexpectedly closed network connection"
登录服务器报错: Connecting to 127.0.0.1:60700.. connection established. To escape to local shell, press 'ctrl+Alt+]'. warning: The host key of 127.0.0.1 (port: 60700) is not registered. The host key is saved automatically, for you have set the session properties [SSH - Save host key at first connection]. Password:**************** Password:
输入 ssh root@ip 后报错:Unable to negotiate with ip port 22: no matching host key type found. Their offer: ssh-rsa
1、修改vim /etc/ssh/sshd_config文件,
在末尾添加:
hostKeyAlgorithms ssh-rsa,ssh-dss
KexAlgorithms +diffie-hellman-group1-sha1
2、新建一个config文件,配置全局公钥
vim /$HOME/.ssh/config
添加内容:
Host *
HostkeyAlgorithms +ssh-rsa
PubkeyAcceptedKeyTypes +ssh-rsa
3、重启openssh服务使配置生效
systemctl restart sshd 或者 service sshd restart
一、前期准备工作
1、防止报错,提前配置文件
2、配置依赖环境
##卸载原有的openssh
rpm -e --nodeps `rpm -qa | grep openssh`

###安装相关依赖包
yum install vim gcc gcc-c++ glibc make autoconf openssl openssl-devel pcre-devel pam-devel zlib-devel tcp_wrappers-devel tcp_wrappers;

#安装wget
yum install -y wget

#安装tar
yum install -y tar
3、解压软件包
#使用xftp提取软件包到/usr/local

#解压软件包
tar -zxvf zlib-1.3.tar.gz -C /usr/local
tar -zxvf openssl-1.1.1t.tar.gz-C /usr/local
tar -zxvf openssh-9.3p1.tar.gz -C /etc/local
二、配置软件包
1、配置zlib文件
#进入zlib解压目录
cd /usr/local/zlib-1.3

#编译
./configure --prefix=/usr/local/zlib

#安装
make && make test && make install

#查看zlib文件
ll /usr/local/zlib

#查看版本
ldconfig -v
2、配置openssl文件
#安装依赖环境,要不然无法编译openssl文件,会报错:Can‘t locate IPC/Cmd.pm in @INC
yum -y install perl-IPC-Cmd

# 进入openssl目录
cd /usr/local/openssl-1.1.1t

# 编译安装openssl
./config shared --prefix=/usr/local/openssl
make -j 4
make install

#openssl做软连接
echo "/usr/local/openssl/lib/" >> /etc/ld.so.conf

# 加载配置文件
ldconfig
# 备份以前的openssl
mv /usr/bin/openssl /usr/bin/openssl.old

#注: 软连接,如果提示软连接已存在,记得备份软连接,然后在执行下面再次软连接,要不然会出问题,会导致root目录看不了,磁盘看不了,sftp连接不上;
ln -sv /usr/local/openssl/bin/openssl /usr/bin/openssl
ln -s /usr/local/openssl/lib/libssl.so.1.1 /usr/lib64/libssl.so.1.1
ln -s /usr/local/openssl/lib/libcrypto.so.1.1 /usr/lib64/libcrypto.so.1.1

#检查是否升级成功
openssl version -a
3、配置openssh文件
3.1备份openssh文件
# 查看当前安装包
[root@localhost ~]# rpm -qa | grep openssh

# 备份现有的SSH
[root@localhost ~]# mv /etc/ssh/ /etc/ssh.bak
[root@localhost ~]# mv /usr/bin/ssh /usr/bin/ssh.bak
[root@localhost ~]# mv /usr/sbin/sshd /usr/sbin/sshd.bak

# 备份文件
[root@localhost ~]# mv /etc/init.d/sshd /etc/init.d/sshd.bak

# 卸载现有OpenSSH
rpm -e --nodeps $(rpm -qa |grep openssh)

#确认是否卸载成功,无返回则卸载成功
rpm -qa | grep openssh
3.2配置openssh文件
# 进入openssh目录
cd openssh-9.3p1

# 编译
CCFLAGS="-I/usr/local/include" \
LDFLAGS="-L/usr/local/lib64" \
./configure \
--sysconfdir=/etc/ssh \
--with-zlib \
--with-ssl-dir=/usr/local/openssl

#安装
make -j 4
make install

#授权
chmod 600 /etc/ssh/*
#复制配置文件
cp -rf /usr/local/sbin/sshd /usr/sbin/sshd
cp -rf /usr/local/bin/ssh /usr/bin/ssh
cp -rf /usr/local/bin/ssh-keygen /usr/bin/ssh-keygen
cp -ar /usr/local/openssh-9.3p1/contrib/redhat/sshd.init /etc/init.d/sshd
cp -ar /usr/local/openssh-9.3p1/contrib/redhat/sshd.pam /etc/pam.d/sshd.pam

#配置/etc/ssh/sshd_config文件在末尾添加,其他的不用修改
PermitRootLogin yes
X11Forwarding yes
PasswordAuthentication yes
KexAlgorithms diffie-hellman-group1-sha1,diffie-hellman-group14-sha1,diffie-hellman-group-exchange-sha1,diffie-hellman-group-exchange-sha256,ecdh-sha2-nistp256,ecdh-sha2-nistp384,ecdh-sha2-nistp521,diffie-hellman-group1-sha1,curve25519-sha256@libssh.org

hostKeyAlgorithms ssh-rsa,ssh-dss
KexAlgorithms +diffie-hellman-group1-sha1
4、开启ssh服务
#开启sshd服务,并生成服务配置文件
systemctl enable sshd
# 重启服务
systemctl restart sshd
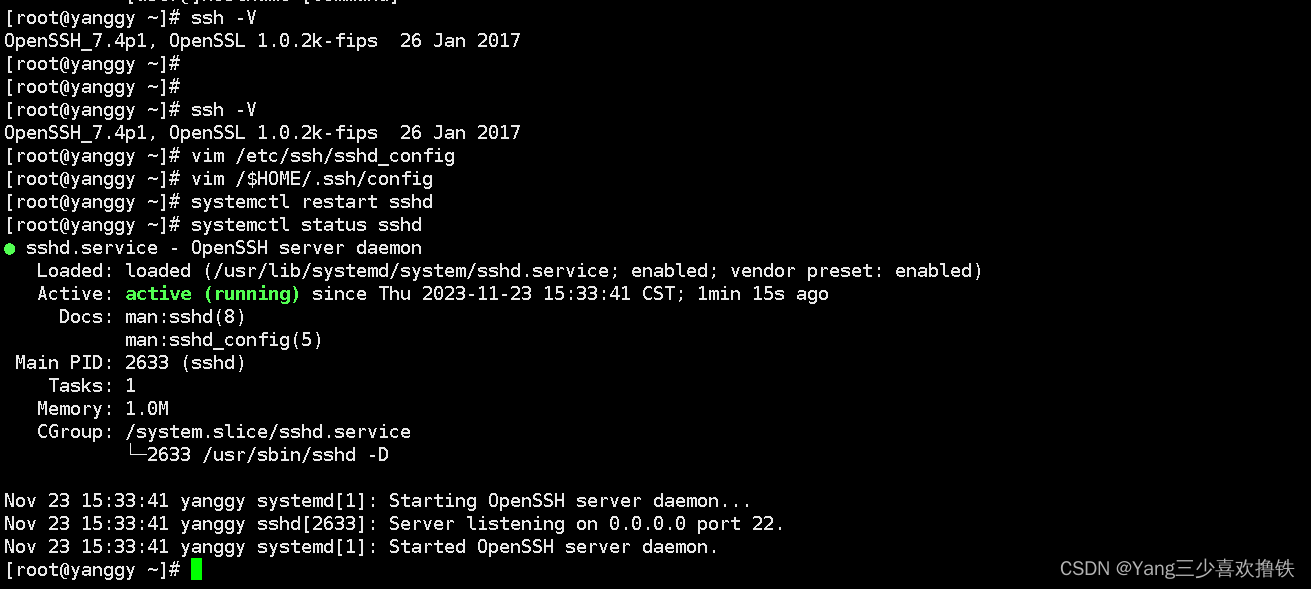
# 查看服务状态
systemctl status sshd
#查看openssh升级后版本
ssh -V

总结
期间踩了很多坑,特别是安装配置openssl文件的时候,一开始由于我当时版本太高了,导致很多错误,后面参考其他博客的相关文章,终于确认了openssl'的版本,并正常显示了openssl的版本,这篇文章亲测没有问题,特此记录一下,希望能帮忙到大家。


 218
218


 被折叠的 条评论
为什么被折叠?
被折叠的 条评论
为什么被折叠?
 到【灌水乐园】发言


